
When transitioning between character animation clips in the Sequencer Animation Track, you can use the Motion Blending tools to further increase the blend quality. Using Motion Blending tools, you can dynamically transition an animation clip's motion and world position between clips. This is especially useful when working with animations that contain world displacement data.
Here, a character transitions from a walk animation to a run animation. Without any blending, the transition is a hard cut. Using a simple blend, but without motion blending, the animation still resets the character's position to the animation's origin point, but the character's mesh is transitioned smoothly. By blending the animations with motion blending, the world position is preserved and the animation transitions smoothly.
| Description | Example |
|---|---|
| No Blending |  |
| Motion Blending with No Matching |  |
| Motion Blending with Matching |  (convert:false) (convert:false) |
Clip Matching references a bone from the character's skeleton and matches that bone's position and motion to the adjacent clip's bone that contains displacement data, such as a root or pelvis bone. By matching the selected bone with the adjacent clip's displacement, it automatically calculates and sets an offset to transition to the next animation while retaining the position of the character. The offset data will then be stored within the animation section in the Sequencer Asset.
Using Motion Blending
This section contains information about how to blend animations using Motion Blending in Sequencer.
Prerequisites
- Your project contains at least two Animation Sequences that contain a bone, such as a root or non-root bone, with world displacement data.
Motion Blending Set Up
To blend animations using Motion Blending in Sequencer, first add your animations to an animation track in the Sequencer Editor, ensuring they are playing sequentially or overlapping.
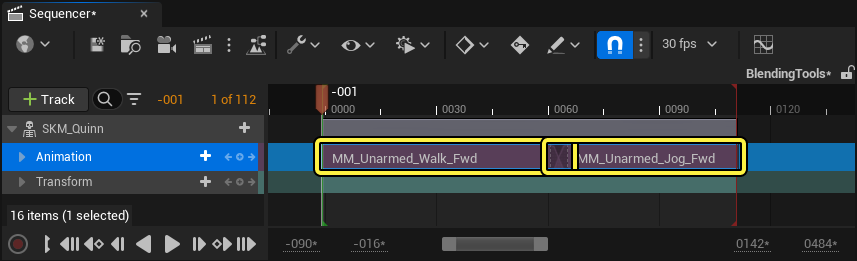
Navigate your playhead to the beginning of the second animation section to set the time for the animation offset to be calculated. Then, to blend the second animation from the final position of the first animation, right-click the second animation clip, navigate to Match With This Bone In Previous Clip and select a bone from the character's skeleton relevant to the animations you are transitioning. In this workflow example, the l_foot bone is used to blend the walk and run animations.
When played back, your Animation Clips will now blend the animation motion and the world displacement position.

Motion Blending Properties
Motion Blending has the following properties:
| Property | Description |
|---|---|
| Match With This Bone In Previous Clip | Select a bone to match the selected animation clip's motion and position with the previous clip, at the playhead's location in time. Using this property results in the animation's motion continuing from the previous clip's position.  |
| Match With This Bone In Next Clip | Select a bone to match the selected animation clip's motion and position with the following clip, at the playhead's location in time. Using this property results in the animation's motion playing centered around the origin point.  |
| Match X and Y Translation | When enabled, the selected bone will match X and Y axes translations. This is useful for ground motion in order to retain the character's movement direction.  |
| Match Z Height | When enabled, the selected bone will match the Z axis height of the animation. This is useful for animations that influence a character's height in world space.  |
| Match Yaw Rotation | When enabled, the selected bone will match the yaw (Z) rotation.  |
| Match Pitch Rotation | When enabled, the selected bone will match the pitch (Y) rotation.  |
| Match Roll Rotation | When enabled, the selected bone will match the roll (X) rotation.  |
| Show Root Motion Trail | To view a debug render of the entire animation track's root motion trail, right-click your animation track and enable the Show Root Motion Trail property. The root motion trail will be rendered as a black-and-white, striped line that traces every animation clip's root bone translation. 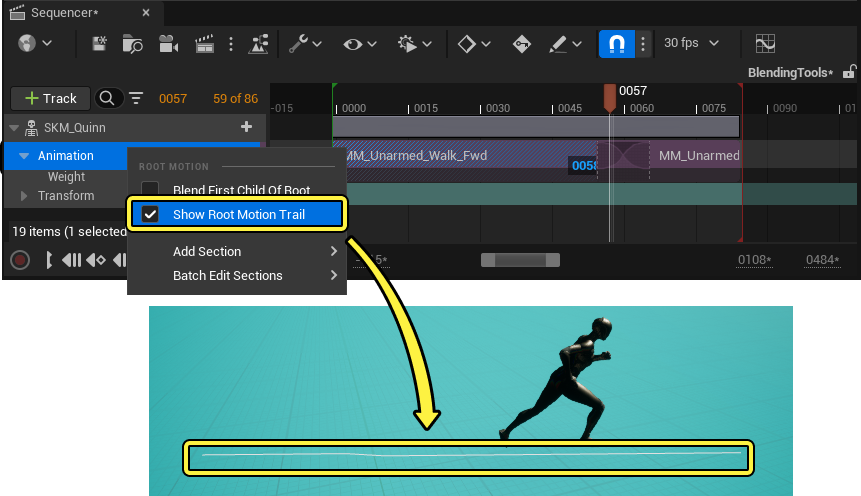 |
Root Motion Offset Settings
You can manually assign root motion offsets, such as translation and rotation, on each animation clip in your Level Sequence to influence the blending result. Adding root motion offsets only affects the clip, rather than the animation itself, and is applied in addition to any motion blending on a clip. Location and Rotation offsets also respect the start time of the animation clip and can be added to trimmed clips without issue.
To set a root motion offset for an animation clip, right-click the clip in the Sequencer Editor and navigate to Properties > Root Motions.
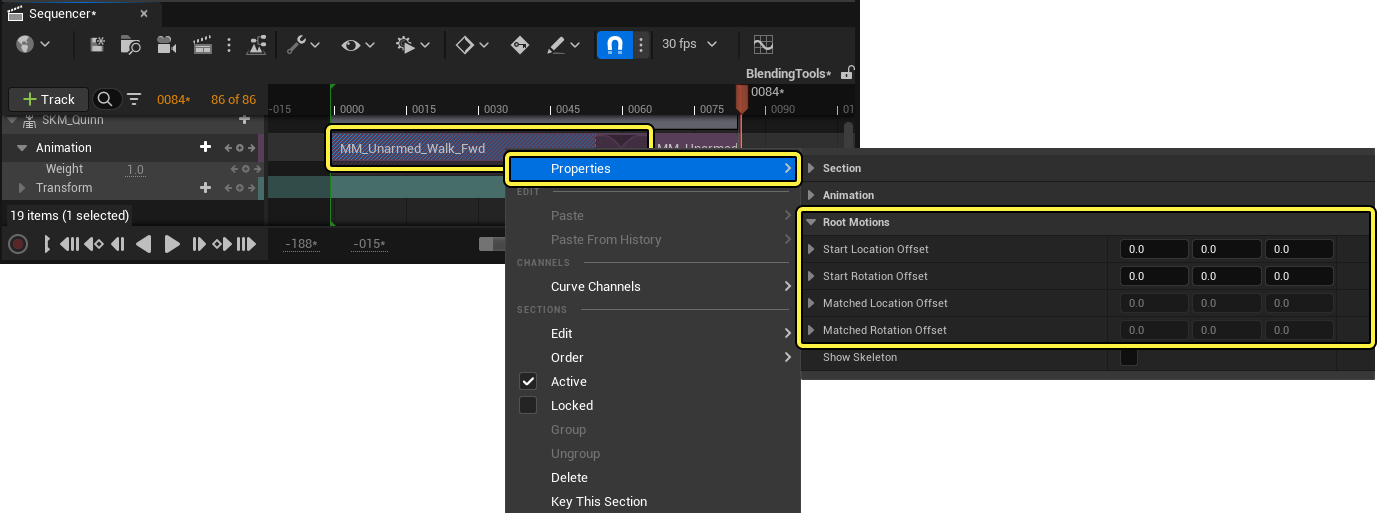
Root motion offset has the following properties:
| Property | Description |
|---|---|
| Start Location Offset | Set X, Y, and Z values to set the location (translation) offset applied to the root bone before the matched offset is applied. |
| Start Rotation Offset | Set roll (X), pitch (Y), and yaw (Z) values to set the rotation offset applied to the root bone before the matched offset is applied. |
| Matched Location Offset | Reference the X, Y, and Z values that set the location (translation) offset added to the root bone by the matched offset as a base value. |
| Matched Rotation Offset | Reference the roll (X), pitch (Y), and yaw (Z) values that set the rotation offset added to the root bone by the matched offset as a base value. |
You can also edit the Start Location Offset and Start Rotation Offset properties in the viewport by selecting a character's Transform Gizmo at the character's root bone location.

After selecting the gizmo, you can edit the offset's position and rotation using the transform tools.
Debug Settings
Use these debug tools to observe and debug motion blending behavior when creating cinematics in the Sequencer Editor:
| Property | Description |
|---|---|
| Show Skeleton | To view a debug drawing of an animation clip's skeleton and root motion displacement, right-click the animation clip and enable the Show Skeleton property from the context menu. Each animation clip will render the character's skeleton a different color to differentiate animations. Additionally, each animation's world displacement will be rendered as a red line between the animation's origin point and the bone that contains world displacement data. 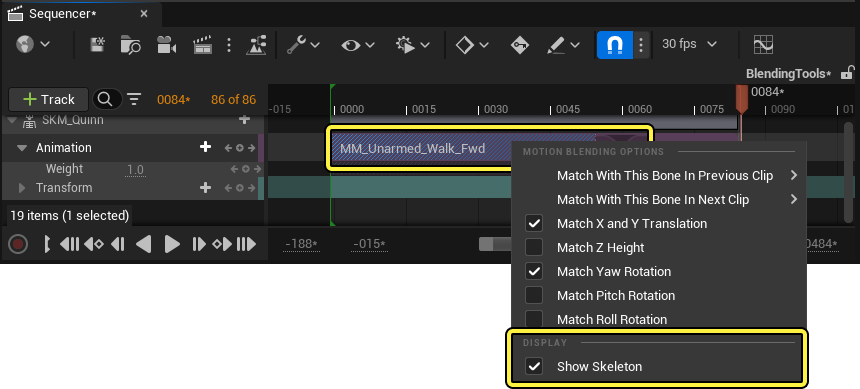 |
| Color Tint | You can manually set the color of each animation clip by right-clicking the clip in the Sequencer Editor, then navigating to Properties and setting a color value using the Color Tint property. 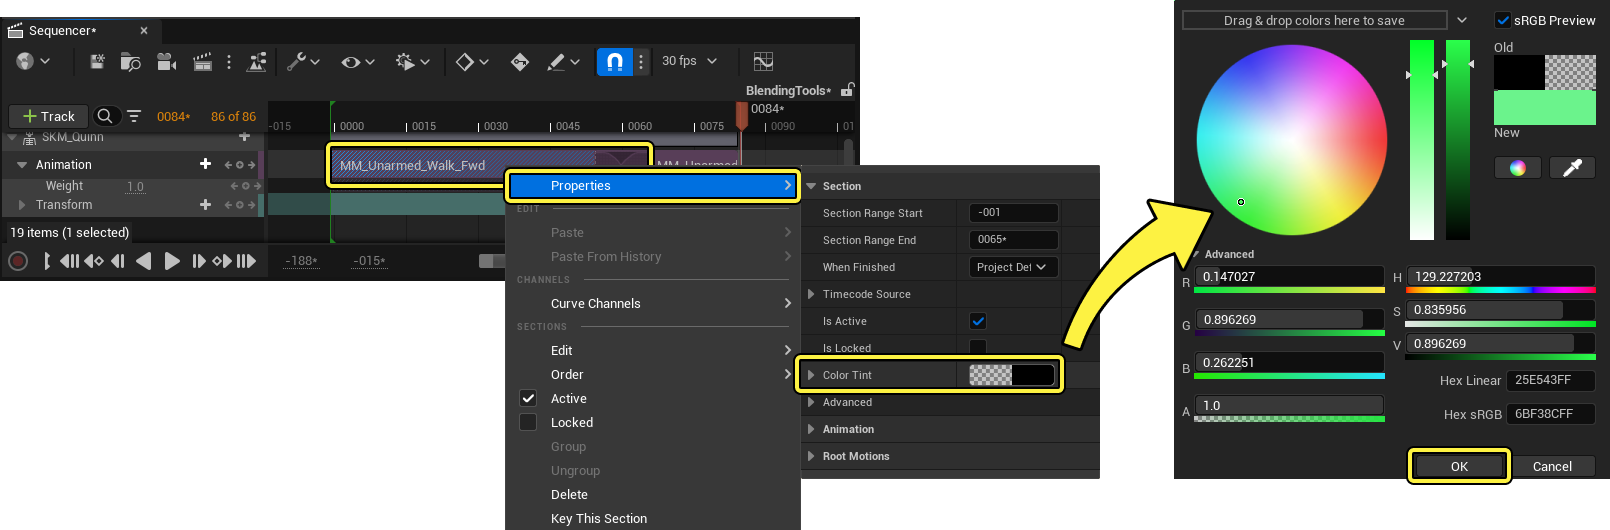
Color-tinted animation clips will be color coded in the Sequencer Editor and on skeleton render in the viewport. 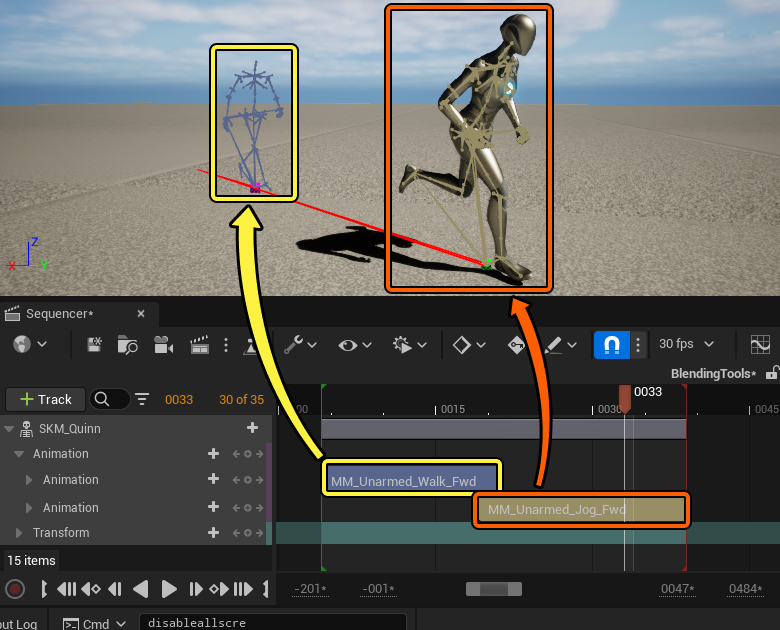 |
Blending Motion from Non-Root Bones
If your animations don't store character displacement on the root bone or your root bone is static, for example when using animations created using motion capture data, you can still blend an animation's world displacement position using the first child bone of the root, often labeled pelvis. After enabling motion blending on your animation clip, right-click your animation track and enable the Blend First Child of Root property.
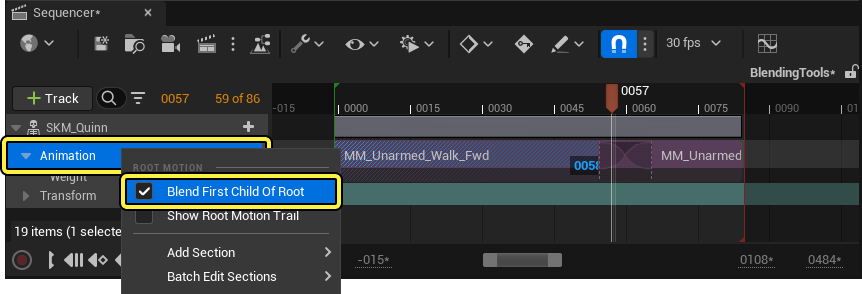
The Blend First Child of Root property ignores the root bone and insead blends the animation's motion using the first animated child bone in the character's skeleton.
| Without Blend First Child of Root | With Blend First Child of Root |
|---|---|
 |
 |
Blending between animation with root motion and animations with non-root motion may not have optimal results.
Control Rig Integration
To further edit the blending between animations in Sequencer, such as making minor edits and tweaks to a character's limbs, foot placement, or position, you can use an Additive FK Control Rig to manually key a character's animations, without overriding the effect of motion blending.
For more information about animating in Unreal Engine, see the following documentation: