ICVFX Editor: Introduction
In this course, you will discover the In-Camera VFX Editor, set it up in your projects, and explore some of the various features and settings within the panel.
What is the ICVFX Editor?
The In-Camera VFX Editor, also known as the ICVFX Editor, is a tool designed to make working with Unreal Engine easier for Stage Operators on Volume shoots. The primary goal of the In-Camera VFX Editor is to bring the most demanding tasks and often used tools into one interface that can be used as a companion to the main Editor window. Where 3D operations such as moving actors in the level are more intuitive in the Editor Viewport, the In-Camera VFX Editor offers specific stage-centric view styles that are tailored to the shape of the nDisplay Config Actor.
Launching the ICVFX Editor
Enabling the Plugin
The In-Camera VFX Editor is part of the nDisplay plugin. It will be available to you as long as this is enabled. The nDisplay plugin can be accessed through File > Plugins and restart the Editor when prompted.

Opening the ICVFX Editor Window
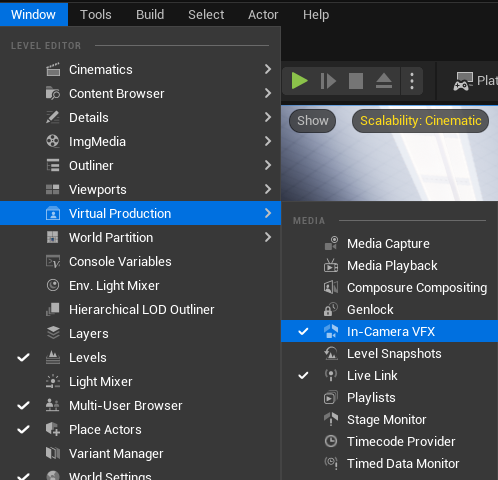
After your project has reopened, go to Window > Virtual Production > In-Camera VFX to open the In-Camera VFX Editor.
If you have a nDisplay Configuration Actor in your scene, the In-Camera VFX Editor will automatically load it.
Multiple nDisplay Config Actors
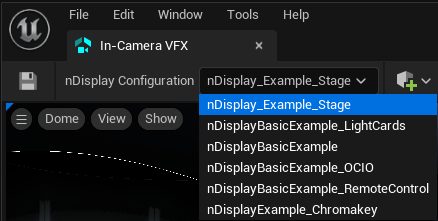
If you have multiple nDisplay configuration actors in your scene, you can select one from the dropdown in the top left of the window.
ICVFX Editor: Getting Started
Take a look at the different sections of the ICVFX Editor panel.
Using the ICVFX Editor
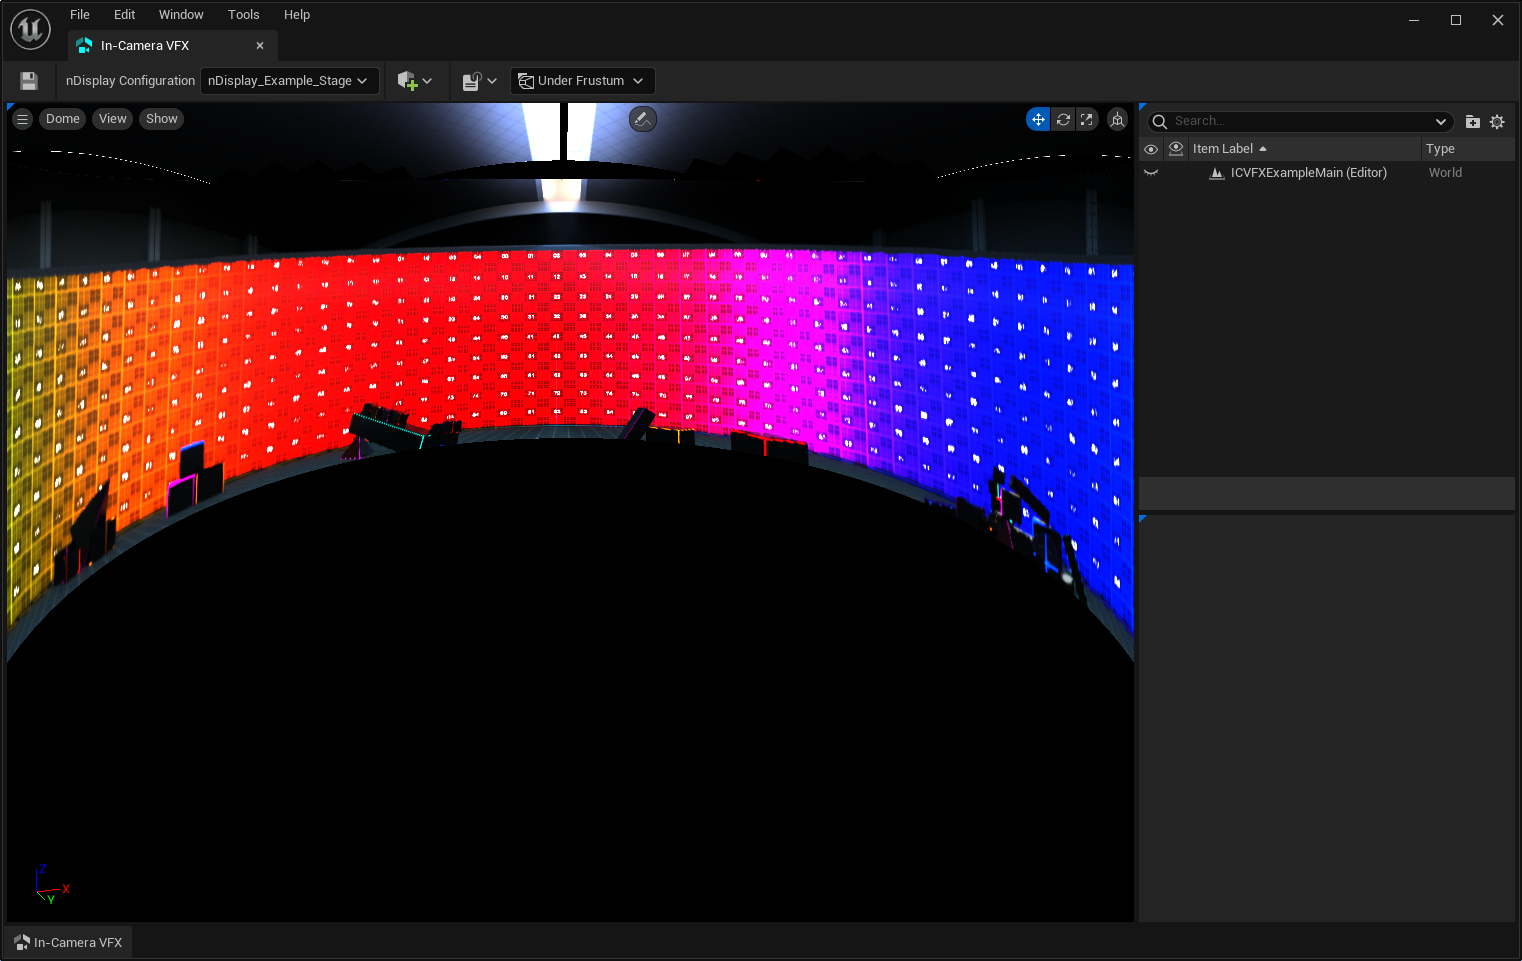
The In-Camera VFX Editor window is made of 4 main areas: the Viewport, the Outliner, the Details Panel, and the Drawer. These areas have been designed to work together to reduce the time spent finding stage-centric actors and maximize the time spent making creative decisions during a shoot.
The Viewport provides intuitive projection modes geared towards viewing the stage from within the volume.
The Outliner gives quick access to the actors most commonly used for stage content operations such as Light Cards, Flags, and Color Correction Windows.
The Details Panel gives streamlined property views of selected actors, allowing for quicker access to properties that are most often changed.
The Drawer is a dockable slide-out drawer and gives quick access to color grading operations for the nDisplay Cluster, ICVFX Camera, Post Process Volumes, and Color Correction Regions/Windows.
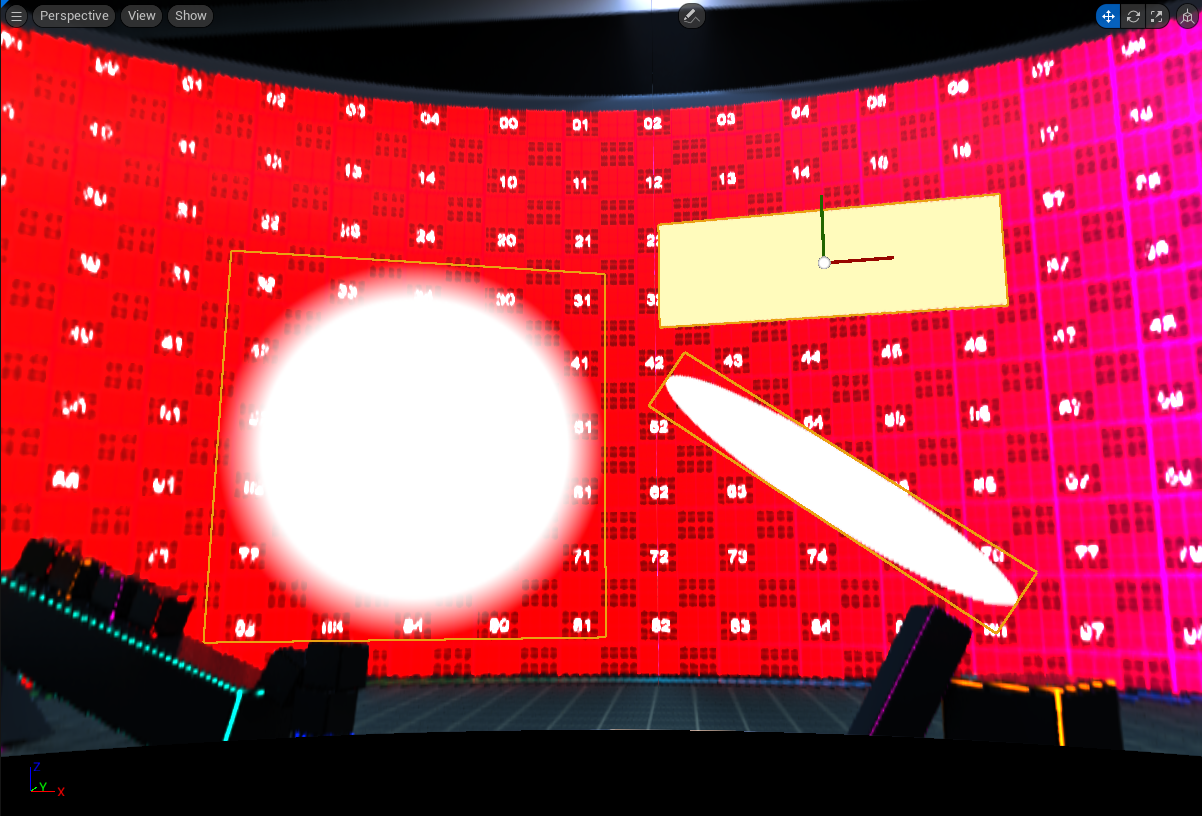
Viewport
The In-Camera VFX Editor uses nDisplay’s Editor Preview to show a view of the current stage position within the scene.

Viewing Modes
There are four different viewport projection modes:
Dome (default)
Best suited for hemispherical/cylinder shaped stages
Perspective
Best suited for non-hemispheric stage configurations and stages with multiple wild walls
Orthographic
Best suited for looking at flat surfaces of the volume, such as the ceiling, without any perspective
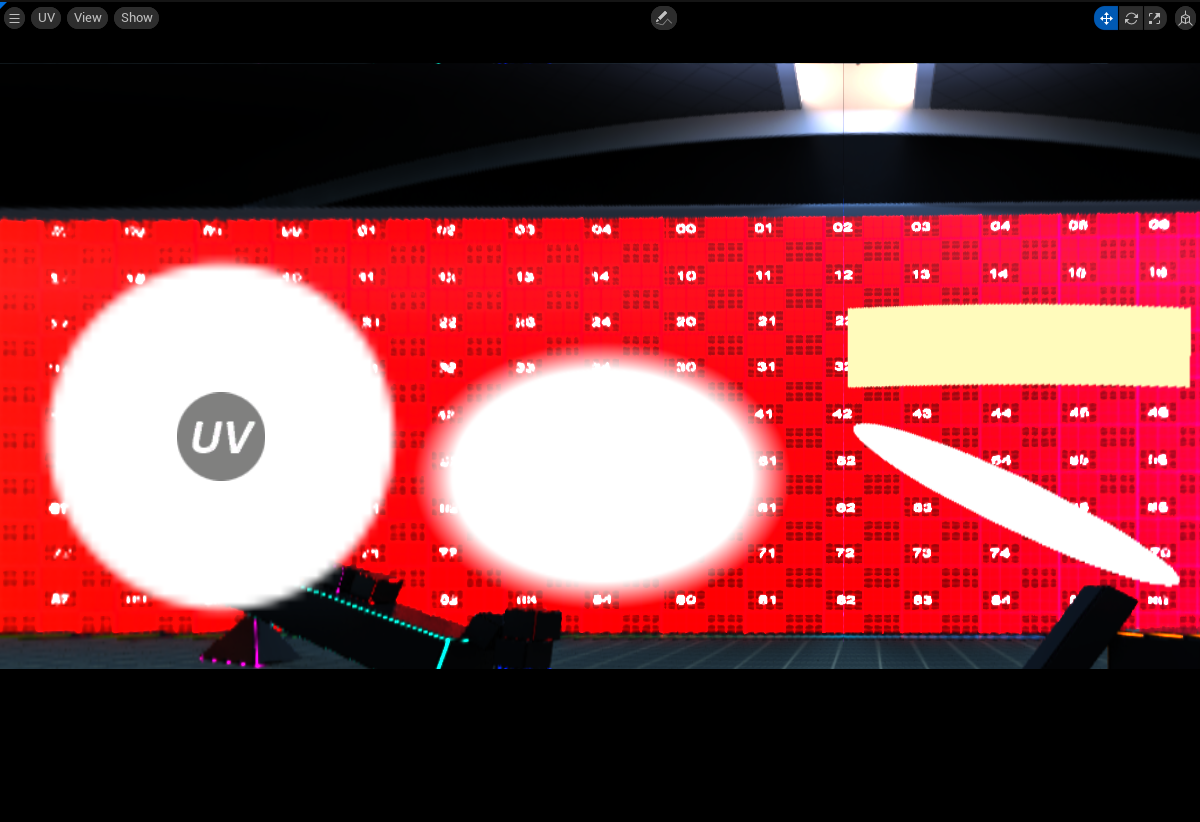
UV
This shows the layout of the nDisplay Configuration Actor meshes as they are laid out in UV channel 1. It allows for viewing a flattened version of the stage and interactions with UV Light Cards.
View Menu
The view menu in the top-left has preset viewing angles that only affect the view in the In-Camera VFX Editor window.
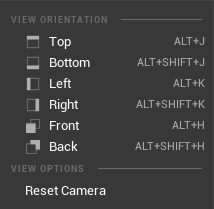
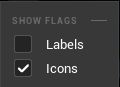
Show Menu
The show menu lets you toggle labels and icons for the In-Camera VFX Editor viewport.
ICVFX Editor: Content
The In-Camera VFX Editor was designed with a few specific actor types and their interactions in mind.
Viewport Actors
The Viewport view has the ability to easily drag-and-drop these actors to place them against the nDisplay mesh with surface-aligned transform controls. There are four types of actor that it can manage directly:
Light Cards
Light Cards are typically used as supplementary light sources outside of the camera's view. They are useful for shaping specular highlights and enhancing the light contribution from the wall.
Light Cards created in UV Mode will be handled separately in UV space, and can only be controlled while in UV mode. They can be identified by the UV icon in the viewport and their icon in the outliner.
3D Light Cards created outside of the UV view cannot be manipulated from within the UV view.
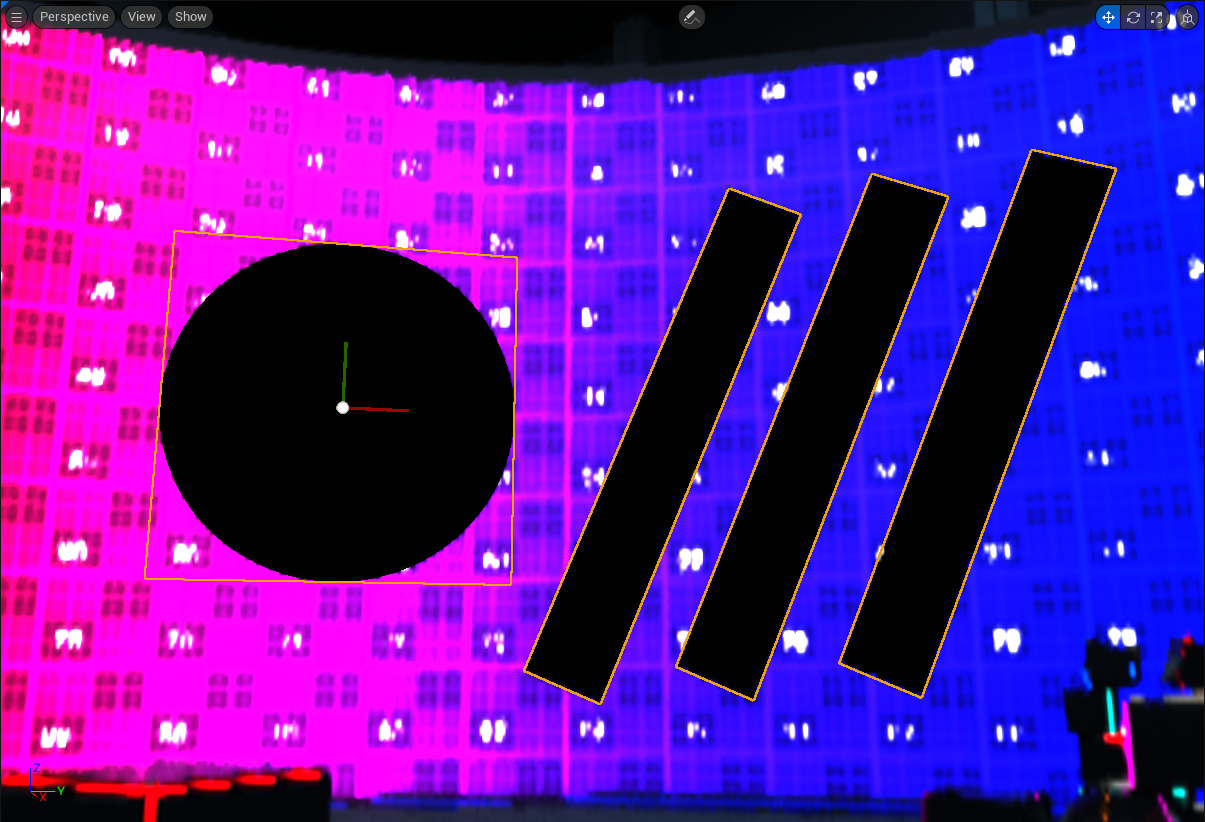
Custom Light Card Shapes
Custom light card shapes can be made using the Pen Tool in the top center of the viewport. These become 3D Light Cards or UV Light Cards depending on which view they were drawn in.
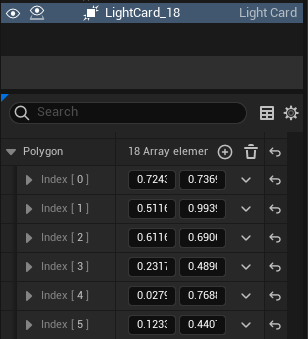
- Click to draw points on a line that will result in a polygonal-shaped light card
- Right-click to close the mask and end drawing mode
- The coordinate details of the mask are saved as an array element within the newly created custom light card
Flags
A Flag mimics the same purposes as physical flagging does in stage light-rigging. They provide negative fill to help control and shape the light within the volume. On curved stages they are helpful in reducing the impact of spill onto areas of the physical LED that are being impacted by real-world secondary contribution.
Flags have all the same controls as Light Cards, with a few preset properties.
When creating Flags in UV mode, those light cards are handled separately in UV space and can only be controlled in the UV mode. These can be distinguished by the ‘UV’ icon in the viewport and their icon () in the outliner. 3D Flags () made outside of the UV view cannot be manipulated from within the UV view.
Color Correction Window
Color Correction Windows are similar to ‘power windows’ that are often used in grading. Everything viewed in the scene behind the window is affected by the operations assigned to that window. Where Color Correction Regions are useful for 3D-centric changes such as affecting particular groups of actors; Color Correction Windows are powerful to use on the volume for operations such as modifying the exposure/intensity of the scene behind a window in order to modify out-of-view lighting. They are also intended to make blending the LED with the physical set more intuitive.
If a Color Correction Window is selected in the In-Camera VFX Editor or the main Editor Outliner, its color grading properties can be modified in the Drawer.
Chromakey Cards
Chromakey cards function in a similar way to light cards but include the ability to display tracking markers in a fixed position on the wall. As the Chromakey card is moved around the stage, tracking markers 'underneath' the content will reveal and hide as the Chromakey card passes over them.
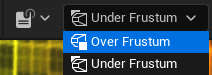
ICVFX Camera Component Frustum
Setting whether a Light Card is always rendered above or below the ICVFX Camera Component frustum can be done from the In-Camera VFX Editor toolbar while the respective actor is selected.
Created content will be automatically added to a layer that is treated as light card content by nDisplay. This does not work with World Partition due to the fact that the Layers system is incompatible with World Partition.
nDisplay does not currently support World Partition levels.
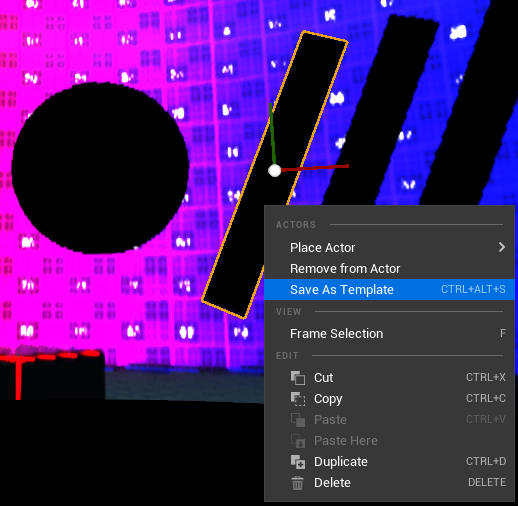
Templates
There are often requests for the ability to quickly create Light Cards and Flags with preset properties on a Volume shoot. Filmmakers will frequently have specific preferences for commonly-used content, such as a flag that covers half the ceiling or an off-camera light card for creating a warm fill. Templates allow you to quickly save these to be reused again across levels without needing to duplicate and migrate level actors. They will appear in the viewport as described by the template and can be quickly placed.
Create the content you want for the template, then right-click and select Save As Template. You will be prompted to name and save your Light Card/Flag template asset.
Templates can be accessed from the Place Actors button in the In-Camera VFX Editor toolbar.
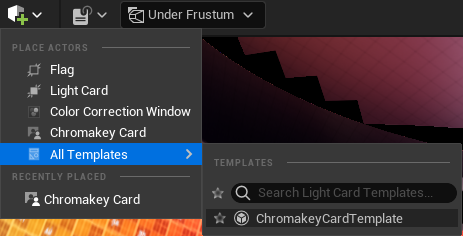
Click the star icon in the Templates list to favorite it for quick access from this menu.
In Project Settings > nDisplay - ICVFX Editor, the operator can also override the default light card and flag options in Place Actors and replace it with a template, as well as the default save path.
Labels
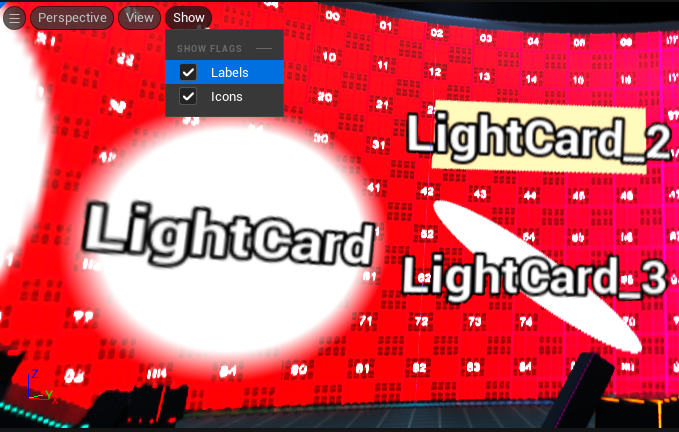
Labels will show the name of the actor in both the In-Camera VFX Editor viewport and on the LED walls running nDisplay. This can help calling out and identifying content to be manipulated by operators on a live stage.
ICVFX Editor: Navigation
Explore some of the different features within the ICVFX Editor Window and how to use them.
Outliner
The In-Camera VFX Editor has a condensed version of the Outliner that only reflects ICVFX content actor types (Light Card, Flag, Color Correction Windows, Chromakey Cards).
There is an Actor Hidden in Game column toggle to hide content from the nDisplay rendered session (the volume/wall) while keeping the actor visible to an operator’s editor viewport.
Post Process Volumes
All PostProcessVolume actors available in the current level will appear in the left-hand panel.
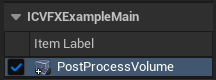
If there are unexpected color changes when grading the nDisplay Config Actor, check to see if there are any color grading modifications applied to the PostProcessVolumes (PPV). PPV grading is applied to the scene before viewport grading is.
Color Correction Regions
Color Correction Regions cannot currently be viewed in the In-Camera VFX Editor (as of 5.2) but their properties can be modified in the Drawer when selected.
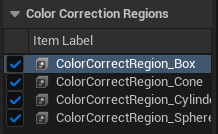
- All Color Correction Region actors available in the current level will appear in the left-hand panel
- Selecting one makes the color grading drawer show its properties for modification
Labels don’t currently show for Color Correction Regions.
In-Camera VFX Drawer
The In-Camera VFX Drawer is a centralized location for color and grading controls relating to the nDisplay Viewports, Post Process Volumes, Color Correction Regions, and Color Correction Windows.
Properties in these actors that would normally only be accessible in the Details Panel of the main Editor window are presented here without needing to scroll and expand sections of the Editor Details Panel. The properties displayed are based on what was found to be the most frequently accessed by our users. The actor focus of this panel is exclusive to the In-Camera VFX Editor window, and the selection is maintained if other actors are selected in the main Editor window.
Ctrl+Space will open the drawer for quick access, similar to the Content Drawer in the main Editor window. The drawer can be docked if desired.
Color Grading
The color grading section of the In-Camera VFX Drawer has been designed to bring all the grading controls from the Details Panel of the actors managed by the In-Camera VFX Editor to an easier-to-access location. The aim is to provide more intuitive interactions with these controls and enable creative requests to be responded to with greater ease.
The In-Camera VFX Drawer is aware of multiple types of actors for color grading purposes.
nDisplay
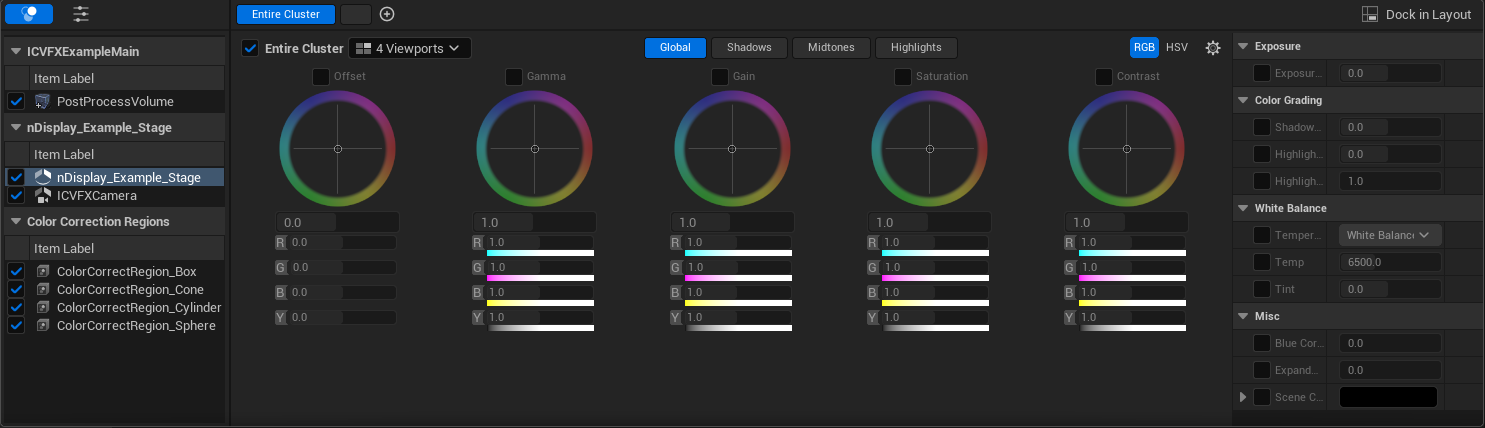
The nDisplay Panel
The color grading control surface area provides color grading controls for the nDisplay viewports and ICVFX camera(s). You can select in the left-hand panel which component you would like to make modifications to.

The properties available are the same as what is in the main Editor window.
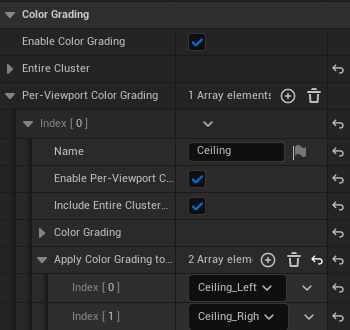
Per-viewport and per-node group selection is done at the top section of the Drawer. The groups can be set up from this location.
- Click the Add Group button
- Select from the dropdown which viewports you would like to control
- Double click the name to the left of the viewport selection to rename the group.
Viewport/Node group settings can be accessed and dialed more intuitively with these controls. The Details Panel of the main Editor window will reflect these changes.
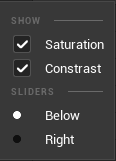
Saturation and Contrast can be hidden to free up space and customize the color grading control surface area. Click the cog icon in the top-right to access this menu.
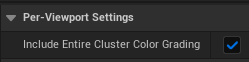
The Include Entire Cluster Grading toggle will stack the currently selected group’s color changes on top of what has been set in the Entire Cluster group when it is enabled. Disable this to control the group independently.
nDisplay ICVFX Settings
Toggle the button on the top left when selecting a nDisplay component to modify additional properties that are frequently modified on Volume shoots.
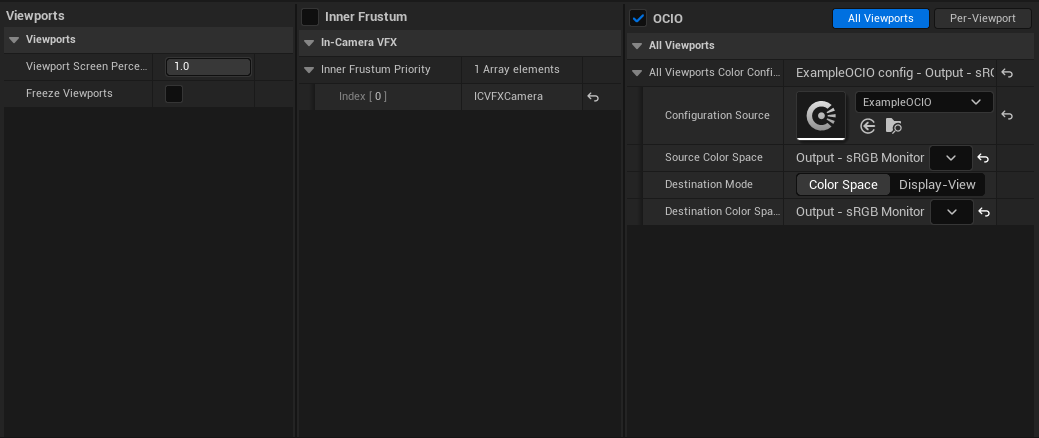
nDisplay Config Root Actor
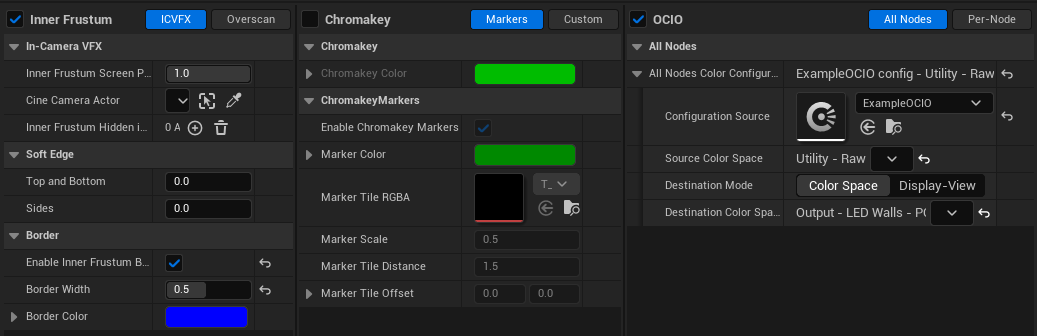
From the nDisplay Config Root Actor you can quickly change viewport screen percentage, toggle visibility of the ICVFX Camera inner frustum (as well as set priority on multi-frustum shoots) and configure OpenColorIO profiles for the cluster/viewports.
ICVFX Camera Component
From the ICVFX Camera Component you can modify Inner Frustum properties such as overscan, screen percentage and border visibility and style. Chroma Key fill and style for the inner frustum can be set from the central column with the option to use a custom made Chroma Key. OpenColorIO for the inner frustum can be set for all nodes or on a per node basis (useful if a node(s) displays on a different LED panel type to the rest of the cluster).
The ICVFX Depth of Field Compensation feature is located on the ICVFX Camera Component of the nDisplay Config actor.