
The Texture Graph Editor provides artists with a node-based interface to procedurally create and edit textures in Unreal Engine. With a node graph similar to the Material Editor, you arrange nodes in the editor to build a texture graph that represents an image. From the graph, you output textures. The network of nodes saves as a texture graph asset.
Using the Texture Graph
Textures are image assets and part of the core process for creating experiences in Unreal Engine. Textures are primarily used in materials and user interfaces (UI). You can apply textures directly as an input (like base color), use them as a mask, or use the RGBA values in other calculations. Textures can be unique to an asset or tiled.
Materials define the surface properties of meshes and may sample several textures for different purposes. For instance, a simple material may have a Base Color, Specular and Normal Map textures. In addition, there may be a map for Emissive and Roughness stored in the alpha channels of one or more of these same textures. The process of packing multiple values in a single texture makes them readily available while saving draw calls for performance and reducing disk space.
You can combine texture graphs with Blueprints, materials, and material functions for unique workflows only possible within Unreal Engine. The editor works with the Texture Asset Editor, which provides additional controls for managing the texture asset.
Loading the Plugin
The Texture Graph Editor is an experimental plugin that is not loaded by default when starting the engine.
To enable the plugin, follow these steps:
-
In the menu bar, select Edit > Plugins.
-
In the search bar, type "texture graph".
-
Enable the TextureGraph plugin, and select Yes in the dialog popup.
-
Restart the engine.
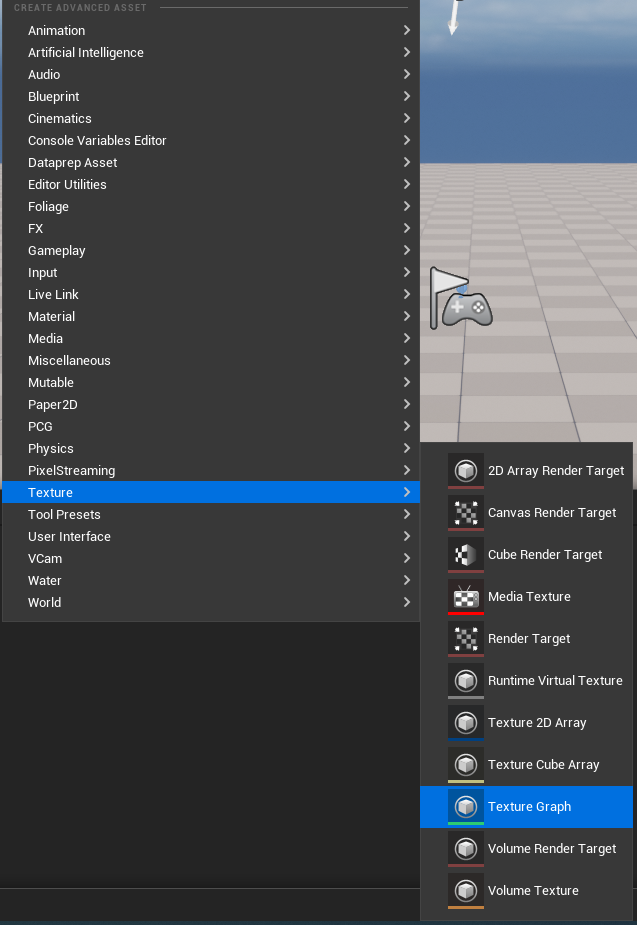
Creating a New Graph
To create a new texture graph, open the Content Drawer and do one of the following:
-
Click Add > Texture > Texture Graph.
-
Right-click an empty space in the content browser and select Texture > Texture Graph. This option creates a texture graph asset in the current folder.
Texture Graph UI

The Texture Graph UI
Main Menu - 1
The main menu bar contains quick access to important graph management items like save, and open. The tool bar also has several graph specific tools.

Texture Graph Main Menu Bar
| Action | Description |
|---|---|
| Save | Saves the current graph. |
| Open | Opens a graph from your content folder. |
| Export | Opens the export window which controls the graphs final texture export. This window provides control to which of the outputs in the graph get exported. You can choose to export just a single output or multiple textures if they exist. |
| Update | When Auto Update is not toggled on, the tool updates the graph thumbnails and output previews. This can be useful for complex graphs where the auto updating can be slow. |
| Auto Update | Turns the graph auto update on or off. Depending on the complexity of the graph you may decide to toggle this option off. |
| Palette | Displays the palette of nodes. |
| Node Histogram | Displays the node histogram, the histogram provides valuable information about the texture distribution of values. |
Node Palette - 2
The Node Palette contains all of the available nodes for use inside your texture graph. You can scroll through the library of nodes or use the search bar to find a specific node.
To add a node to the graph window, do one of the following:
-
Drag a node from the library to the main graph window.
-
Right-click in the graph window.
-
Drag a connection from an existing node's pins. This workflow has the advantage of creating the node connection once the node is placed. The node's connections are made from the initial pin to the first open input pin on the new node.

Node Palette
Main Graph - 3
The main graph window is the primary view for assembling your graph. You can position nodes anywhere on the graph. In general, input and creation nodes are placed on the left, and the flow of the graph proceeds to the right, ending with output nodes that control what textures get written.
You can have a single or multiple outputs from a graph.
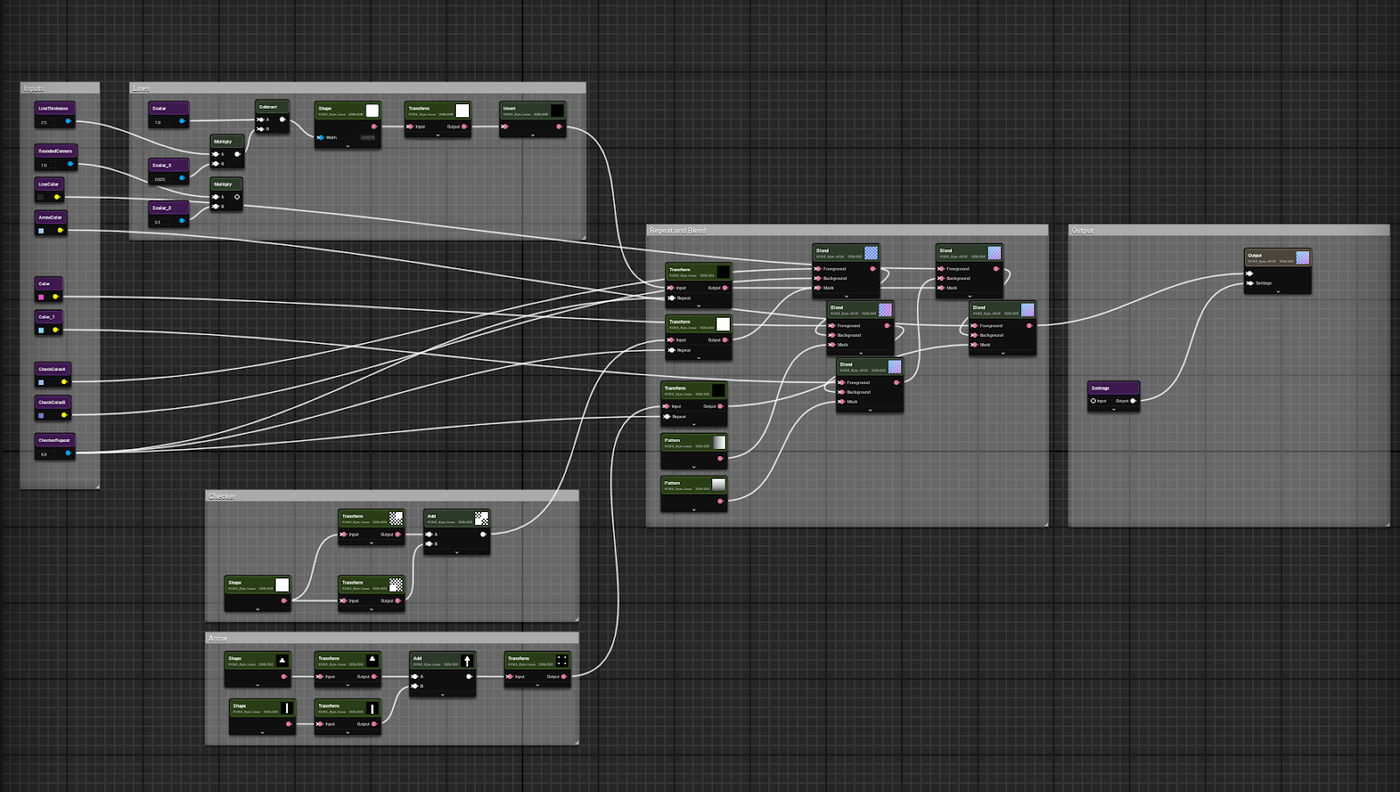
Primary Graph View
Node Preview - 4
The Node Preview displays the texture of the selected node. The preview has options for viewing specific channels and adjusting the zoom level of the texture.
You can lock the preview to view a specific node while other nodes are adjusted. For example, locking the view to the final output but adjusting a blend parameter earlier in the graph.

2D Preview

Image Histogram
Details Panel - 5
The Details panel contains the properties for the currently selected node.

Details Panel
3D Viewport - 6
The 3D Preview viewport displays the selected output map on a standard or user defined 3d mesh. You can define the mesh by dragging the asset directly into the view or by selecting the mesh and applying it with the custom mesh icon (teapot).
The visible map can be selected from the viewport Details panel.

D Viewport
Nodes
The node design for texture graph provides relevant information in a compact layout. With this layout artists can traverse the graph quickly and evaluate the flow of data easily. The node header shows the name or type of node. Nodes are colored based on type of operation. Below the name, is information about the image format of the node and the current resolution. The node header also contains a thumbnail preview.

Basic Node
When expanded, all of the attributes of a node are exposed. This may include node specific attributes or only output settings for the node. In general these values are automatically set based on the evaluation of the graph. In some cases you may want to define custom settings instead of the values.

Advanced Node
Materials

Material Node
Unreal Engine has a powerful material system. The texture graph can leverage the material system by evaluating materials to create textures that can be utilized in the graph. A material, such as the standard concrete material can be loaded into a material node. You can then define the rendered attribute.

Material Node Details
Material Functions
The Texture Graph Editor can use some material functions directly. The MaterialFunction node exposes the input pins and attributes available from the material function. This can be extremely useful, allowing for the development of a graph without the need to recreate complex functions that may already exist. With this functionality, the texture graph leverages the robust material function library and toolset.
For example, the texture bombing material function can quickly be integrated to give more random repeating of a texture when compared to a simple repeat available in transform.

Material Function Node

Material Function Details
Texture Graph Subgraphs
You can reuse texture graphs as a subgraph through the TextureGraph node. This is useful for custom repeated operations. For example, adding some noise to a mask.
The subgraph can contain a series of nodes to create a complex noise pattern with some specific variables controllable through scalar values.

Texture Graph Subgraph
When you use a TextureGraph node, the specified inputs are exposed along with any outputs defined in the subgraph. This provides the means for development and reuse of common operations.

Texture Graph Node
Texture Graph and Blueprints
You can combine a texture graph with Blueprints for a wide range of pipeline related functions to streamline common tasks.
When you load the Texture Graph plugin, you get additional functions in the [palette] of the Blueprint Editor. To learn more about Blueprints, see Blueprints Visual Scripting and Blueprint Editor Palette.
With these functions an existing graph can be controlled easily. For example, you can have a basic texture graph that creates a common UV checker pattern.

Blueprint Functions for Texture Graph
For a full list of functions and descriptions, see the Blueprint API.
Next Steps
With the fundamentals of texture graph, use the following resources to learn more about the nodes and to get started creating textures.