
Overview
The Unreal Engine includes a sample Virtual Camera Actor that can be used as a starting point for your project. This actor is built using the Virtual Camera Component referenced in the Virtual Camera Component Quick Start.
Goals
In this guide, you will learn how you can use the Virtual Camera Actor in your scene.
Objectives
- Place the Virtual Camera Actor in the scene
- Connect your iOS device via Live Link
- Use the Virtual Camera Actor’s built-in interface to change the camera’s parameters
- (Optional) You will learn how you can use a Gamevice peripheral to control the camera in the scene
1 - Required Setup
Editor Setup
Before you start, you need to enable the appropriate plugins inside your project.
-
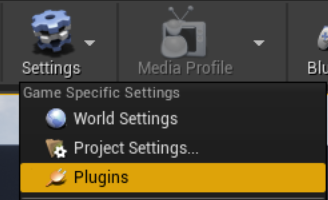
Click on Settings > Plugins to open the Plugins menu.
-
Search for the VirtualCamera, Live Link, and Remote Session plugins and enable them.


-
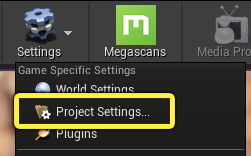
Open your Project Settings.
-
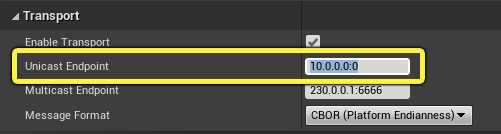
Go to the UDP Message section and set your Unicast Endpoint to your computer’s IP address with :0 at the end of the IP to indicate your port number.
-
If you have issues connecting your device, add your device’s IP Address with :6666 at the end to the Static Endpoints list.

-
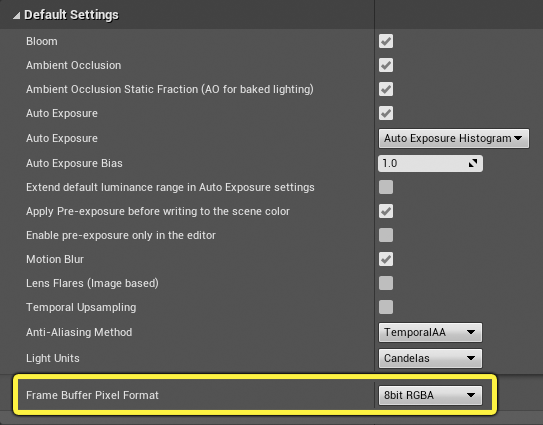
Go to the Rendering section and under Default Settings, set your Frame Buffer Pixel Format to 8bit RGBA.
-
Restart the editor.
iOS Device Setup
-
Download the Live Link VCAM app from the App Store to your ARKit enabled iOS device and launch the app.

-
Enter the IP address of your computer and tap the Connect button to try and establish a connection.
Section Results
You are now ready to start using the virtual camera actor.
2 - Adding a Virtual Camera Actor
Placing the Camera in your Scene
-
On the Place Actors panel, select the Virtual Production category and click and drag the VirtualCamera2 Actor to your scene.
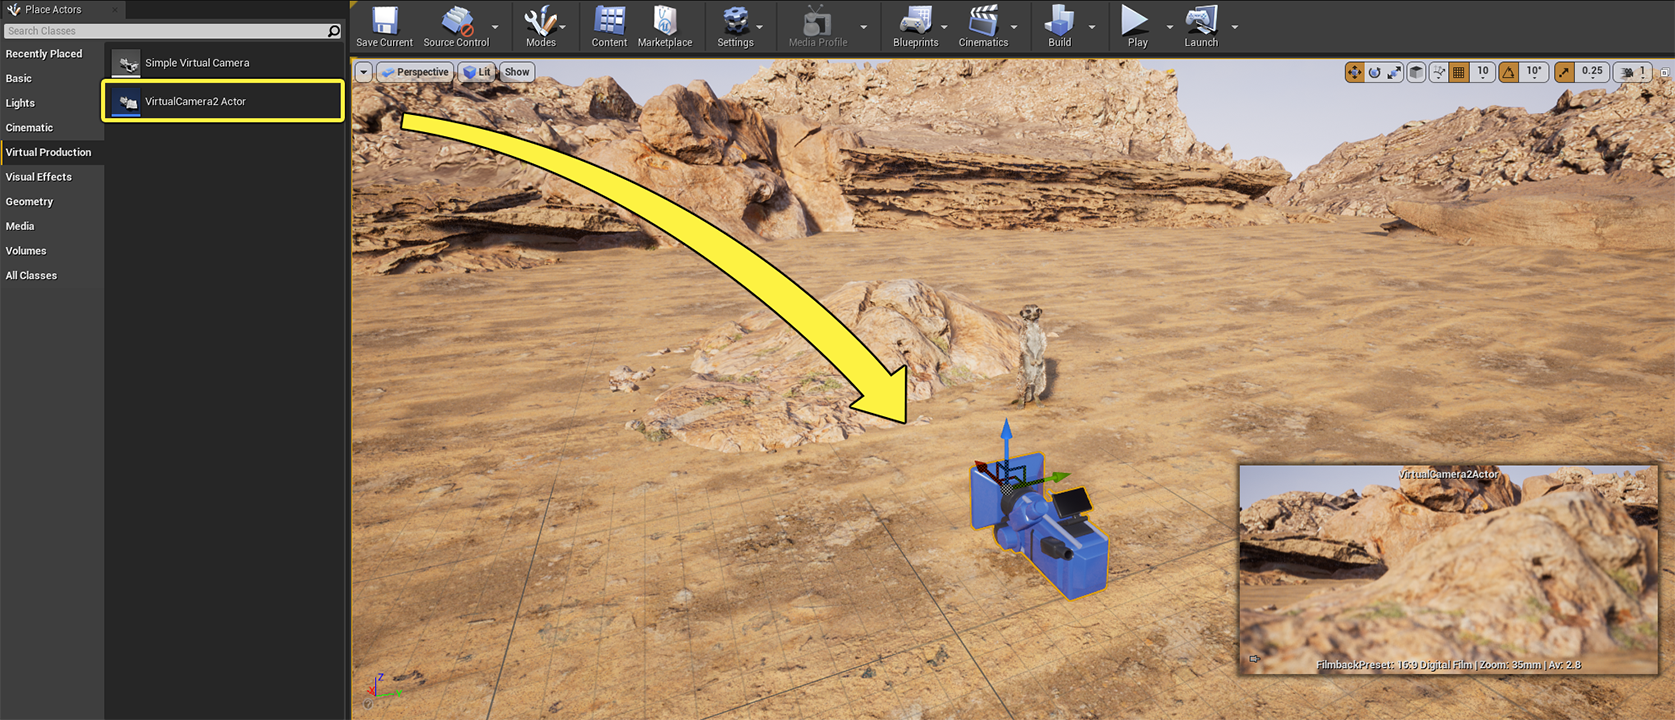
-
Adjust your actor as desired in the scene.
You can learn more about adjusting the camera settings by going to the CineCamera Actors page.
Connecting your Device
-
Tap the Connect button on the Unreal Remote 2 App.
-
Click on Window > Live Link to open the Live Link window.
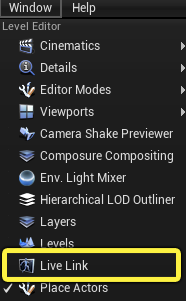
-
Click on the Source button and select Message Bus Source. You should see the iOS device listed as Remote Session.
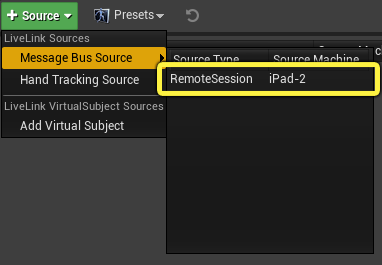
-
Select the VCam component on your virtual camera actor.
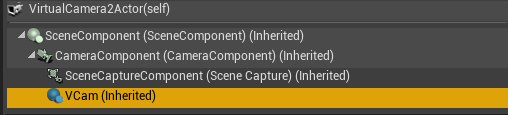
-
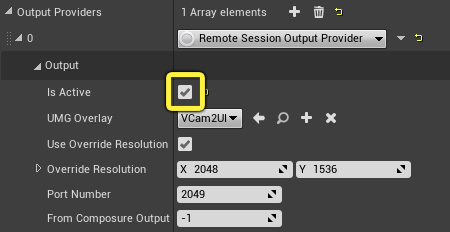
Expand the Output Providers and check Is Active as shown below.
-
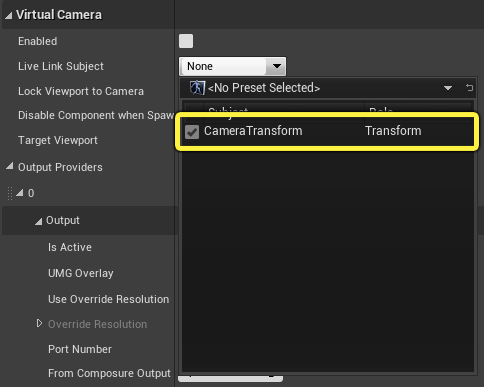
Click on the Live Link Subject dropdown to select the CameraTransform.
-
Finally, click on the Enabled checkbox to activate the virtual camera.

Section Results
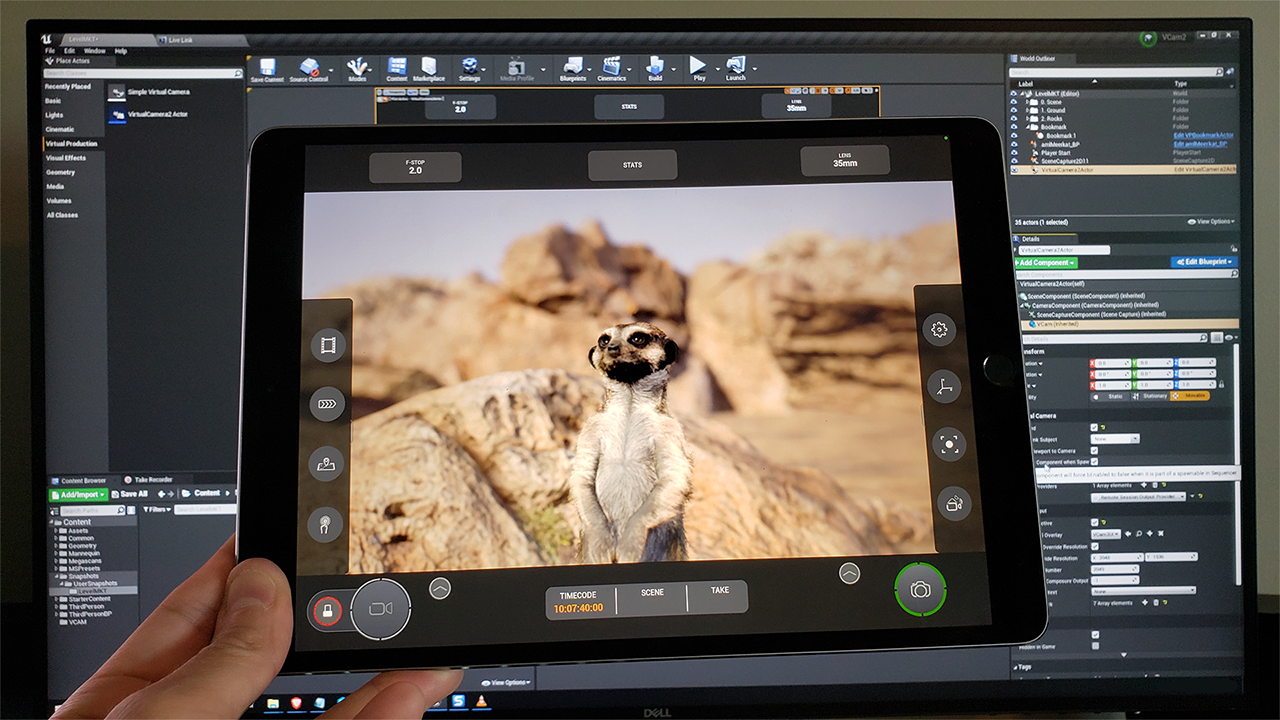
You should now see your iOS device act as a camera within the scene. As you move the iOS device around, you will see the editor view change to reflect your movements.
You will also see the pre-built interface which contains many useful controls for managing your camera in the scene.
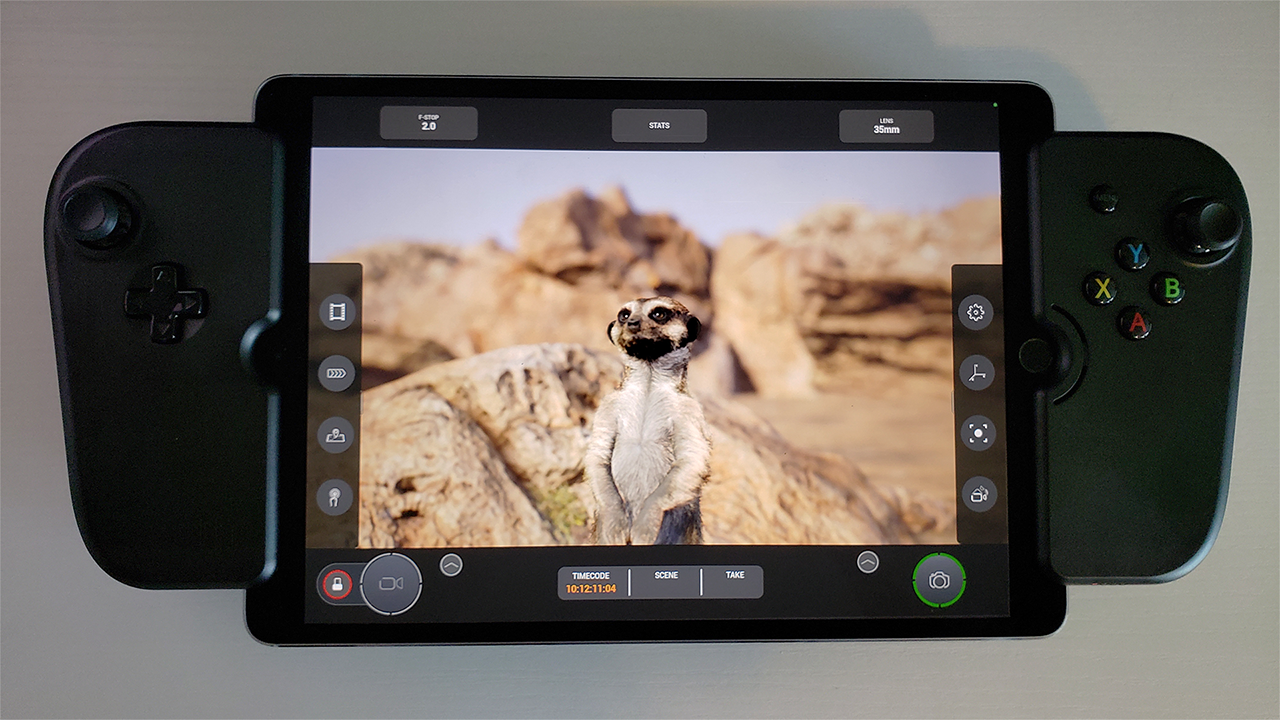
If you have a Gamevice peripheral, you can connect it to gain additional controls while operating your virtual camera.
3 - Exploring the Virtual Camera Controls
Let’s take a look at the many useful features that come with the Virtual Camera Actor interface.
The Interface at a Glance

The interface comes with a variety of controls that you can access via the touch screen. If you have a Gamevice, you can use the buttons and joysticks to access the interface controls.
Your iOS device’s position and rotation will dictate the on screen camera’s position and rotation. However, if you use a Gamevice, the camera’s position and rotation will be controlled directly via the joysticks, instead of the device’s movement.
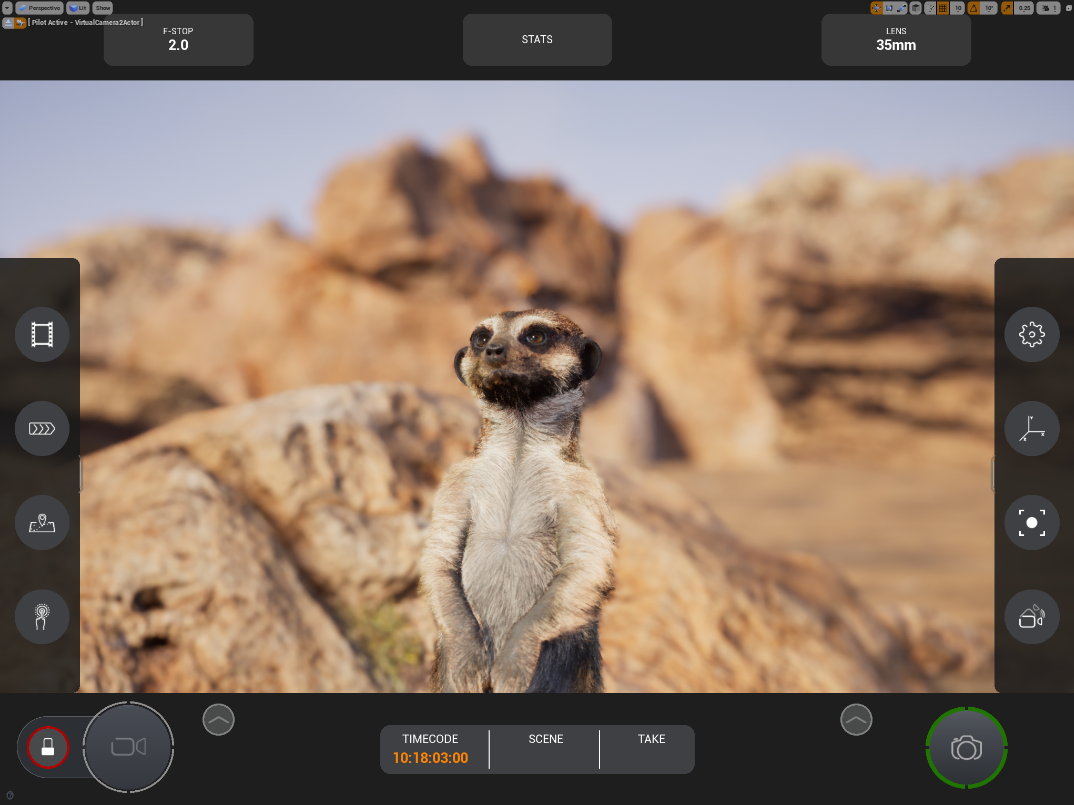
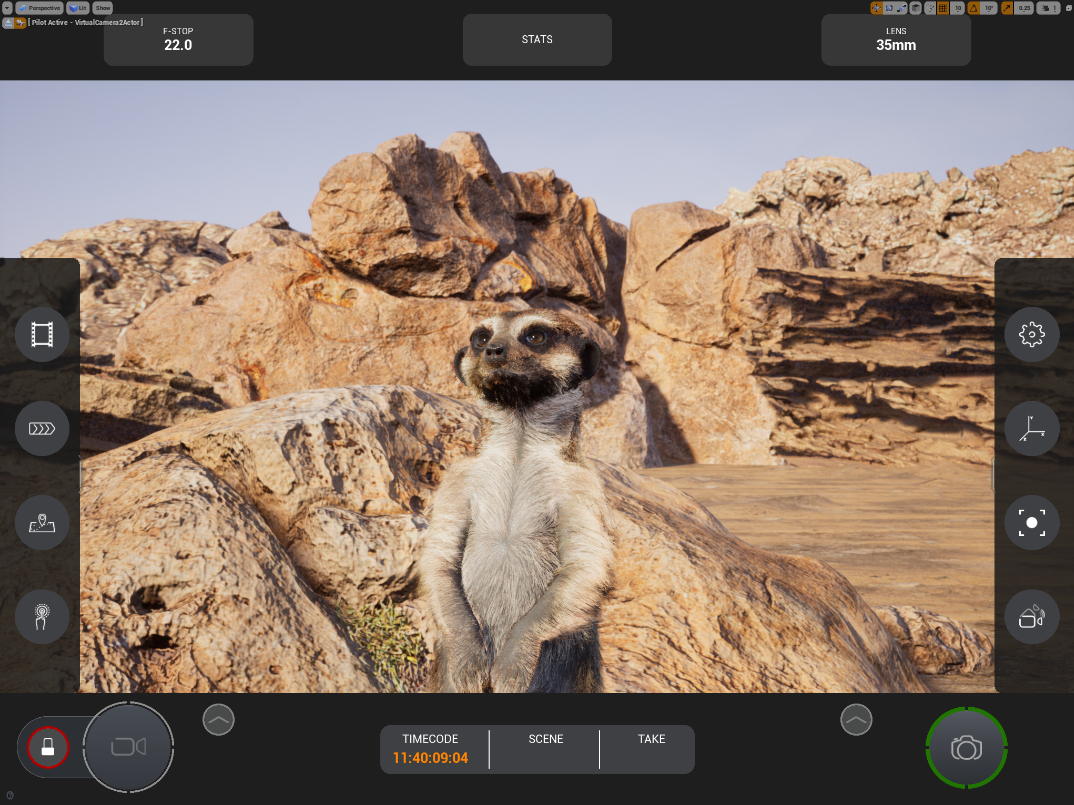
Adjusting the F-Stop
In Unreal Engine’s Virtual Camera setup, adjusting the F-Stop will only affect the camera’s depth of field; it will not affect the exposure of the image.
-
Tap on the F-Stop button on the interface to bring up the F-Stop slider on the screen.
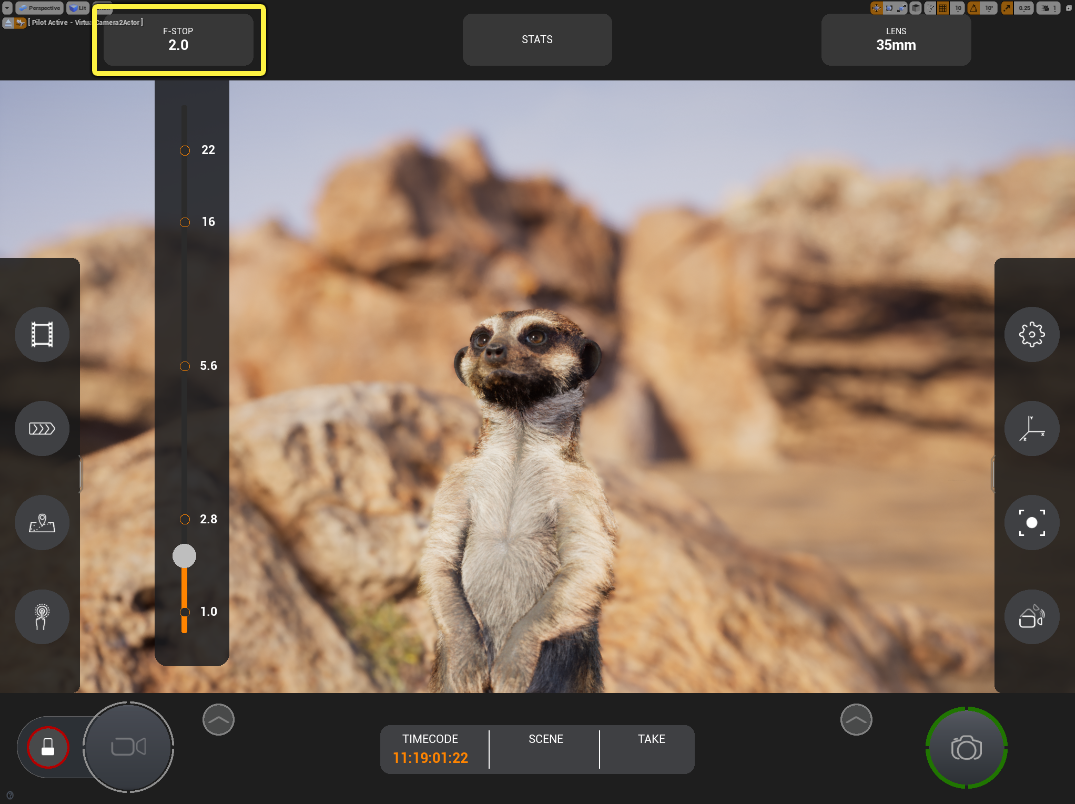
-
Slide your finger along the slider to adjust the F-Stop in real time.
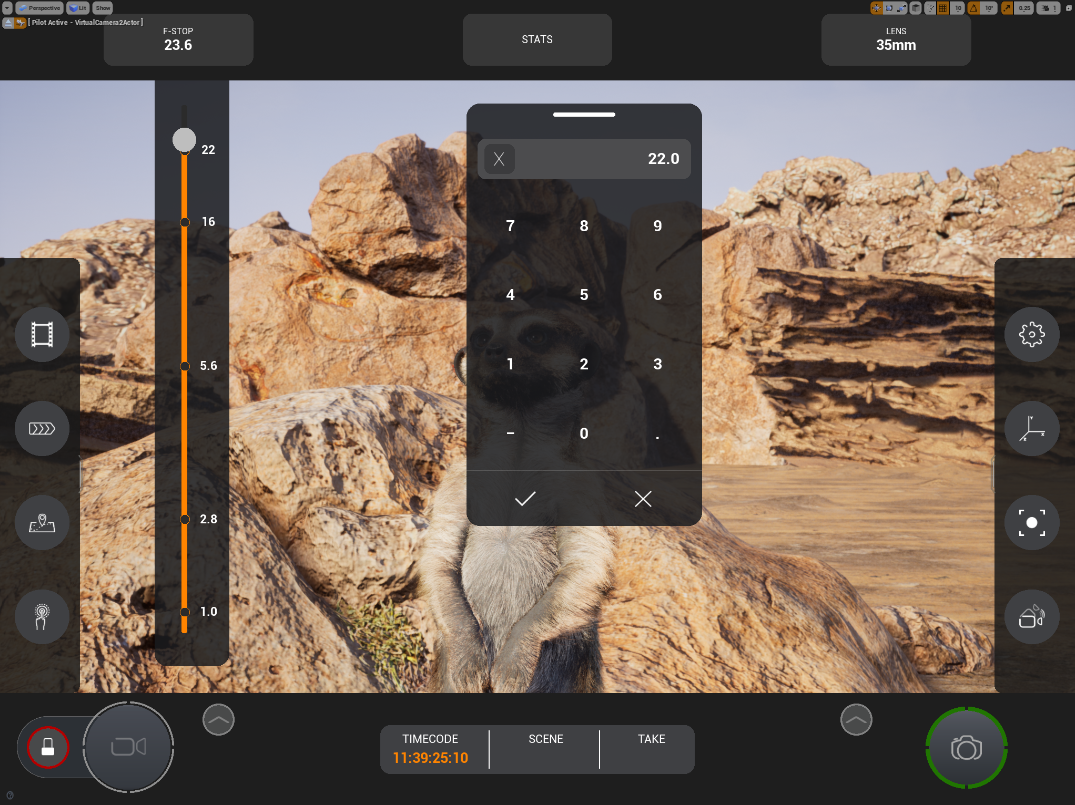
-
Tap on the traveling F-Stop indicator to bring up a number pad that you can use to enter the exact F-Stop number.
Gamevice Controls
| Control | Description |
|---|---|
| Left Trigger (L2) | Opens the F-Stop slider |
| Left Joystick | Manipulates the F-stop slider by going up and down |
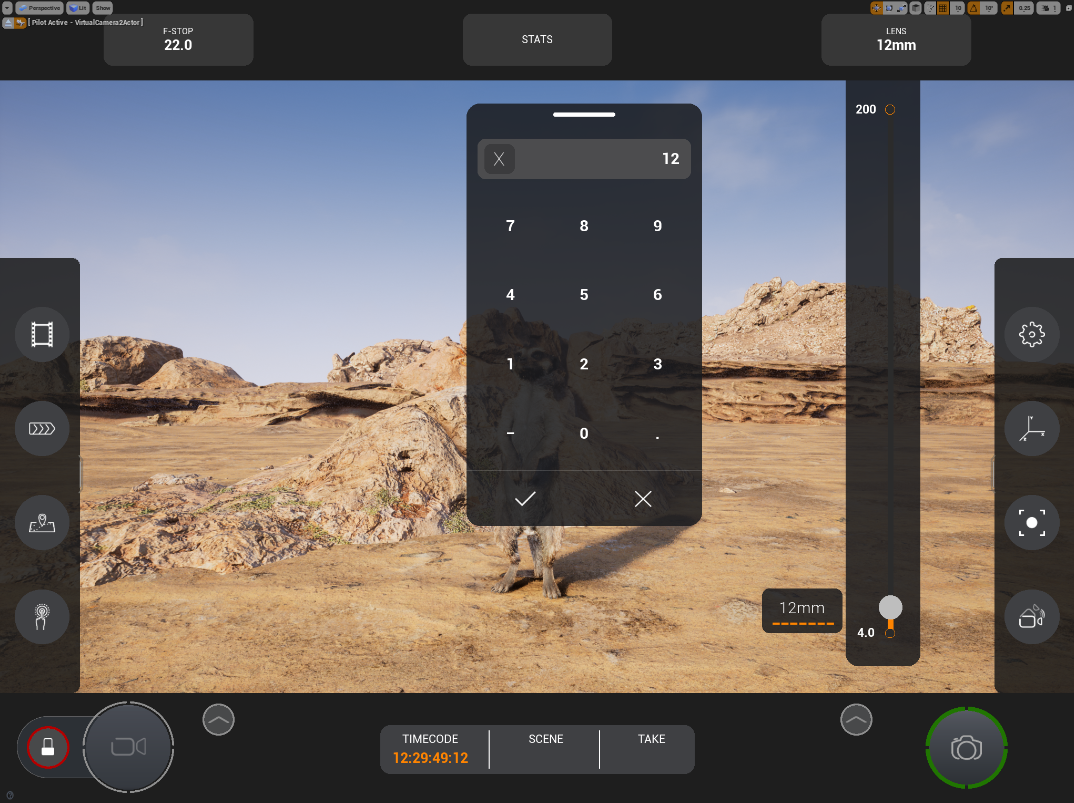
Adjusting the Lens
-
Tap on the Lens button on the interface to bring up the Lens slider to the screen.

-
Slide your finger along the slider to adjust the Lens in real time.
-
Tap on the traveling Lens indicator to bring up a number pad that you can use to enter the exact Lens number.
Gamevice Controls
| Control | Description |
|---|---|
| Right Trigger (R2) | Opens the Lens slider. |
| Right Joystick | Manipulates the Lens slider by going up and down. |
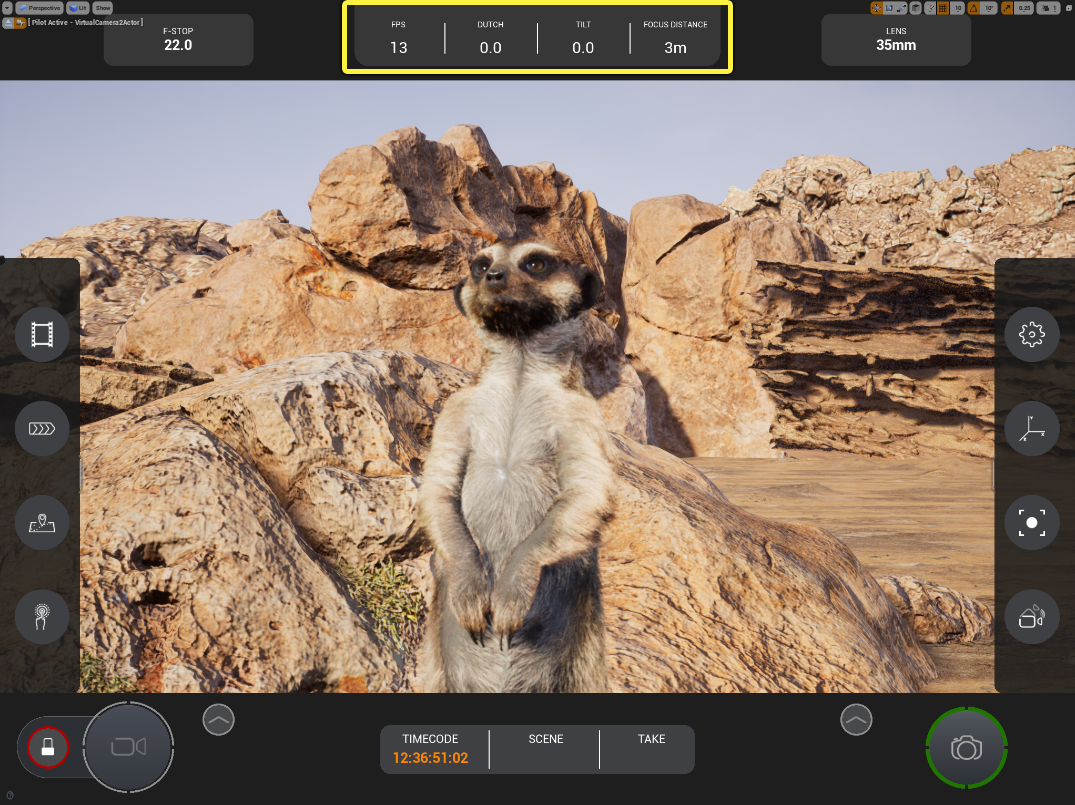
Viewing the Stats
-
Tap on the Stats button on the interface to bring up the Stats to the screen.

-
You can now see the Frames Per Second (FPS), as well as the Dutch, Tilt, and Focus Distance of the camera.
Adjusting the Settings
-
Tap on the Settings icon to reveal the Camera Settings.
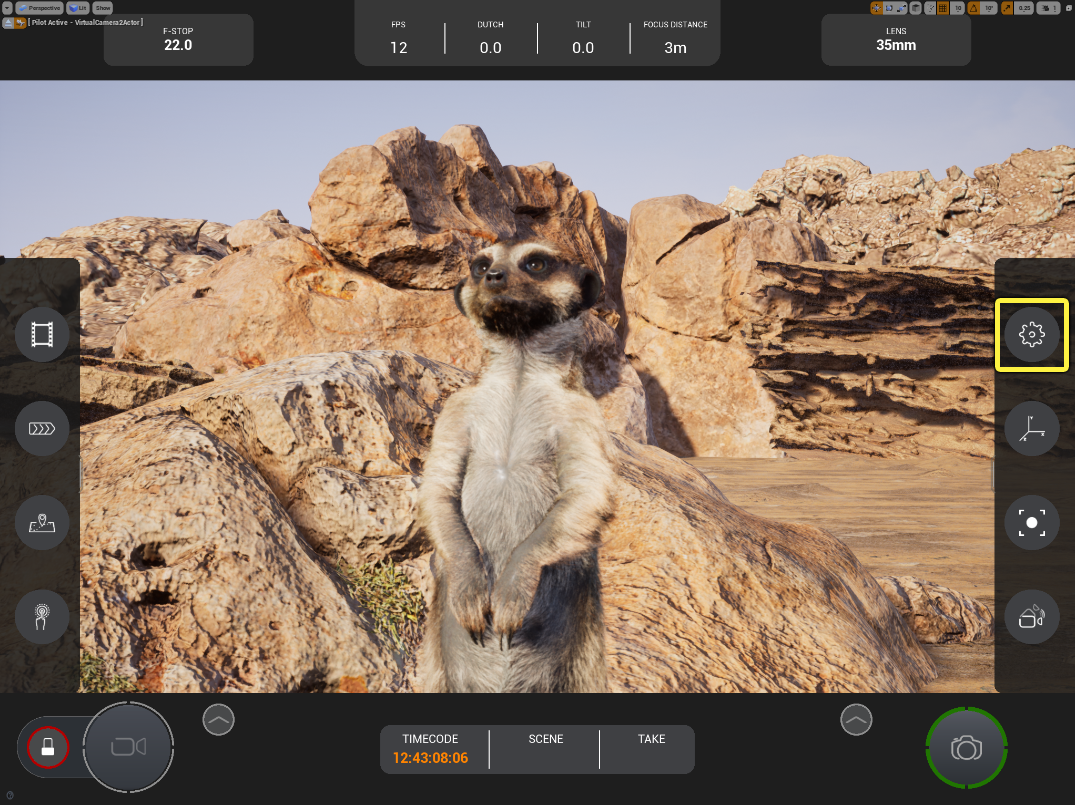
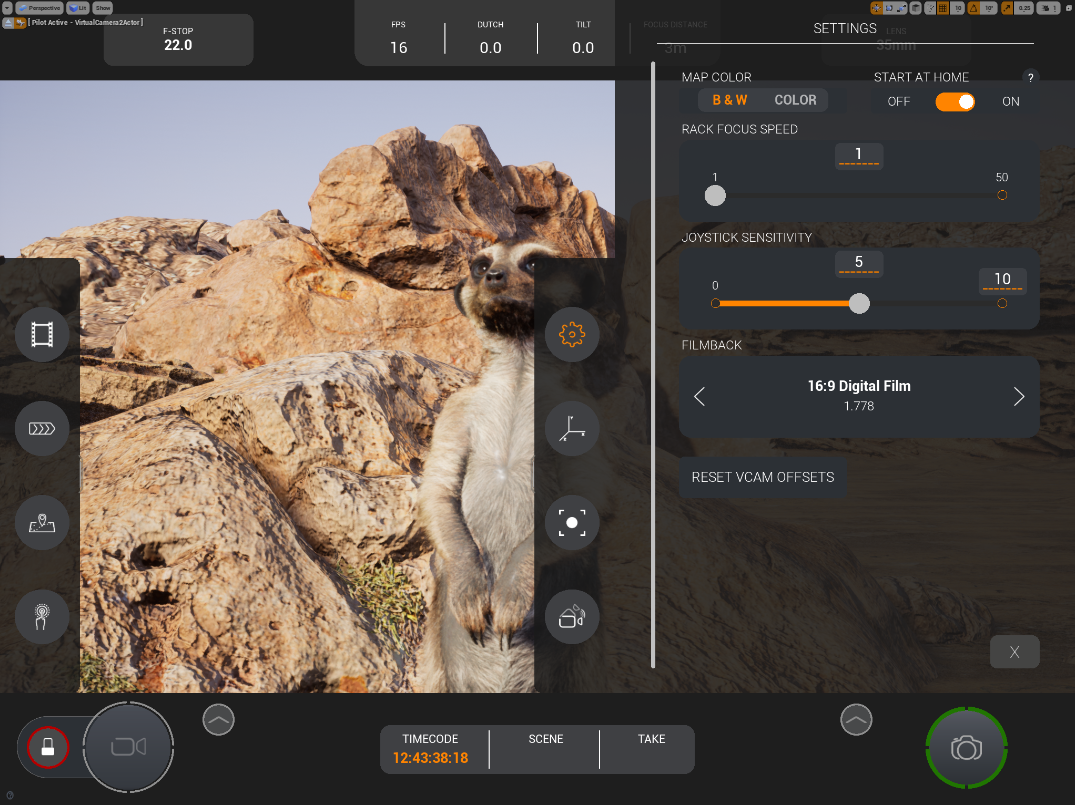
-
You can now adjust the following settings:
| Setting | Description |
|---|---|
| Map Color | Sets the map render to black and white, or full color. |
| Start at Home | Starts the Virtual Camera where the actor is located within the scene and creates a home icon on the map. |
| Rack Focus Speed | Adjusts how fast the camera changes focus between presets. |
| Joystick Sensitivity | Adjusts the sensitivity of the virtual joystick used to move around the scene. |
| Filmback | Cycles through the different film back options available to the camera. |
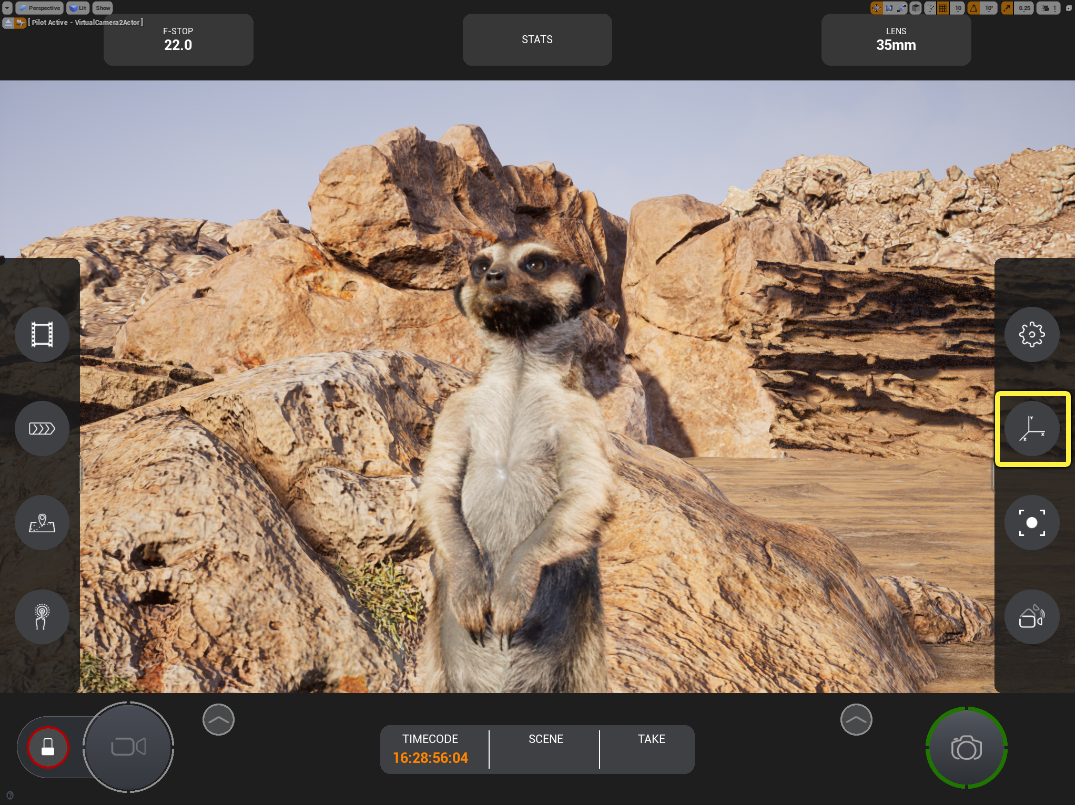
Adjusting the Motion Parameters
-
Tap on the Motion Adjustments icon to reveal the Motion Adjustment Settings.
-
You can adjust the translation of the camera by adjusting the Dolly, Truck, and Boom speed multipliers individually. You can also lock any movement axis by clicking on the lock icon for additional control.
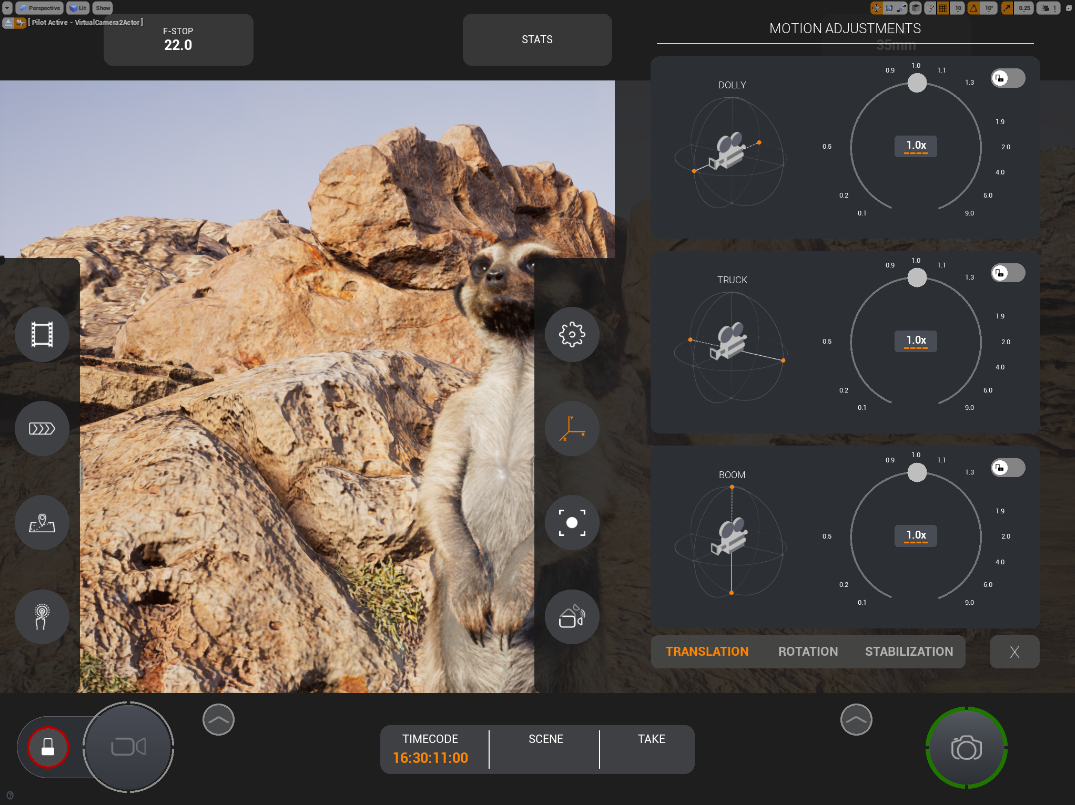
-
Tap on Rotation to switch to the rotation parameters.

-
You can now tap on each lock icon to lock the rotation of the Tilt, Pan, or Dutch individually. If the Dutch axis is locked, you will get the option to Reset Dutch, which will reset it to 0.
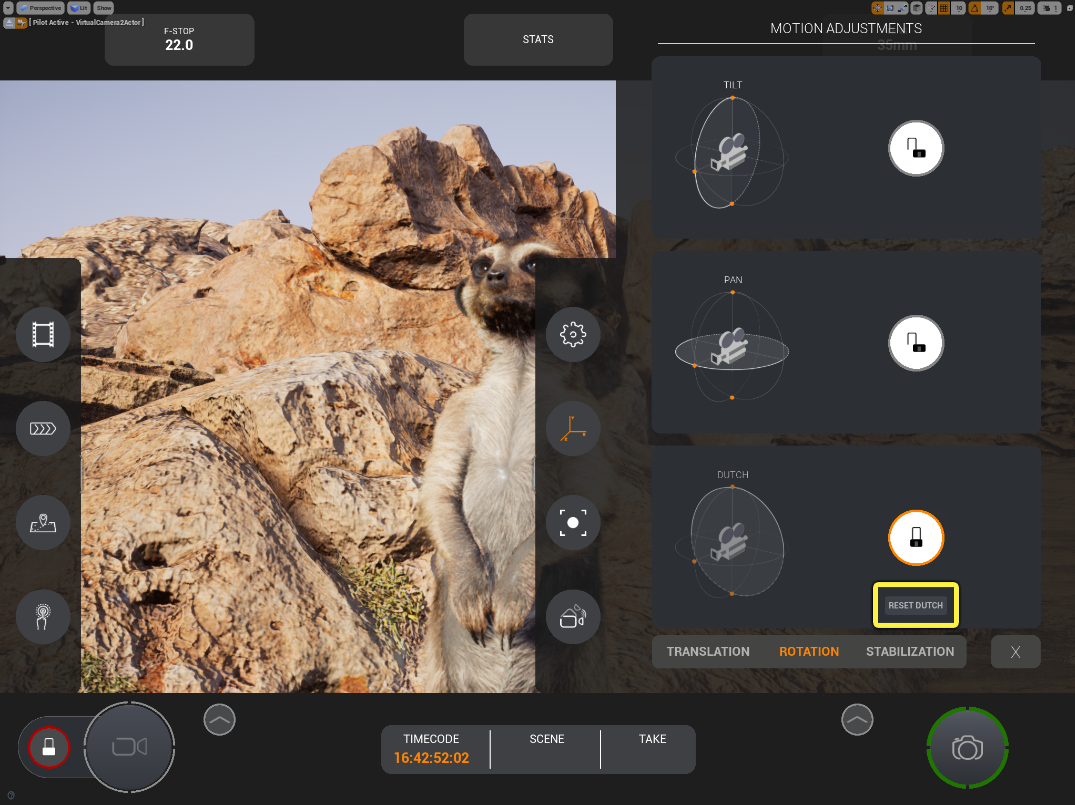
-
Tap on Stabilization to switch to the stabilization parameters.
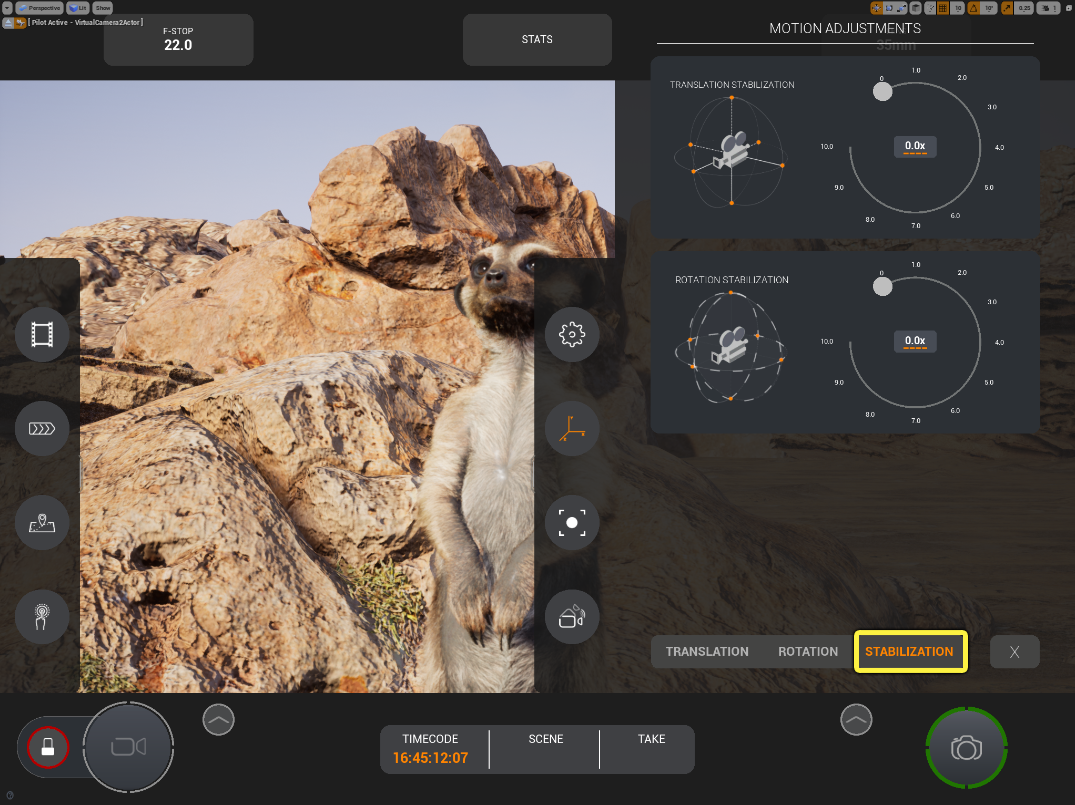
-
You can now adjust the amount of stabilization that will be added to the camera's translation and rotation. Rotate the slider to add more stabilization as needed.
Gamevice Controls
| Control | Description |
|---|---|
| Left (L1) and Right (R1) Shoulder Buttons | Cycle through Translation, Rotation and Stabilization. |
| Left and Right Joysticks | Move the radial sliders. |
| D-Pad | Cycle through the options in each category. |
| Face Top (Y) Button | Toggle the locks for each property. |
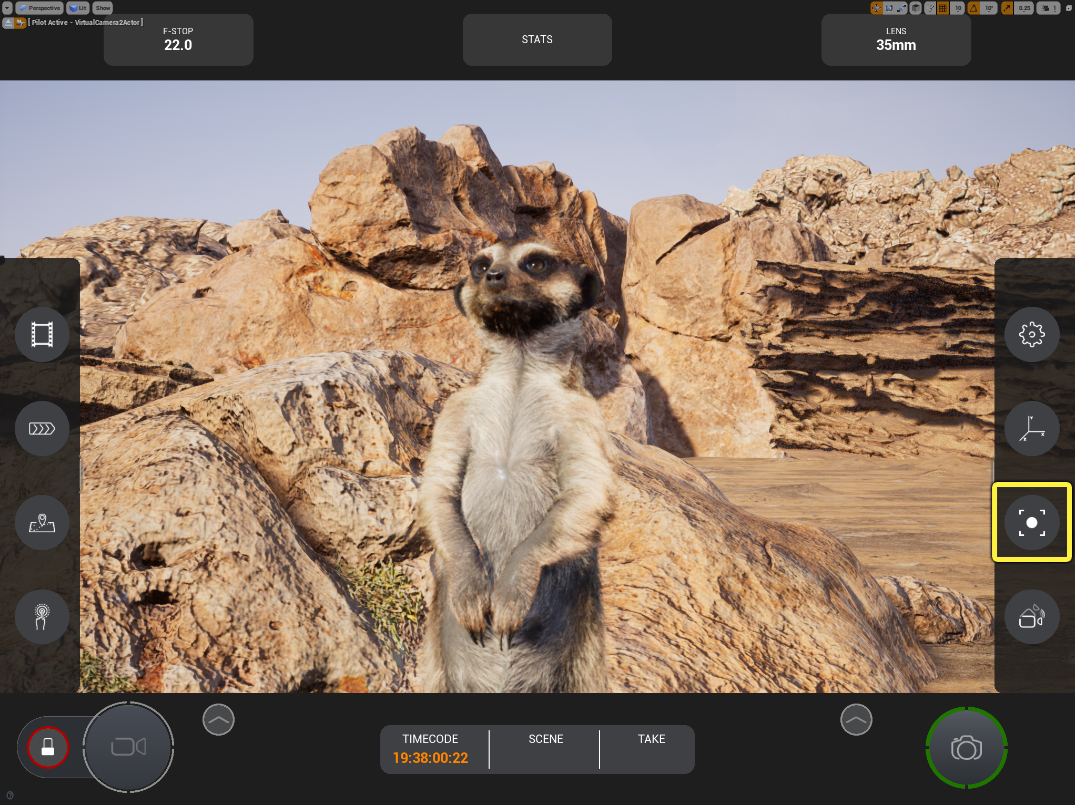
Adjusting Focus
-
Tap on the Focus Adjustments icon to reveal the Focus Adjustment Settings.
-
You can adjust the manual focus by sliding your finger along the slider.
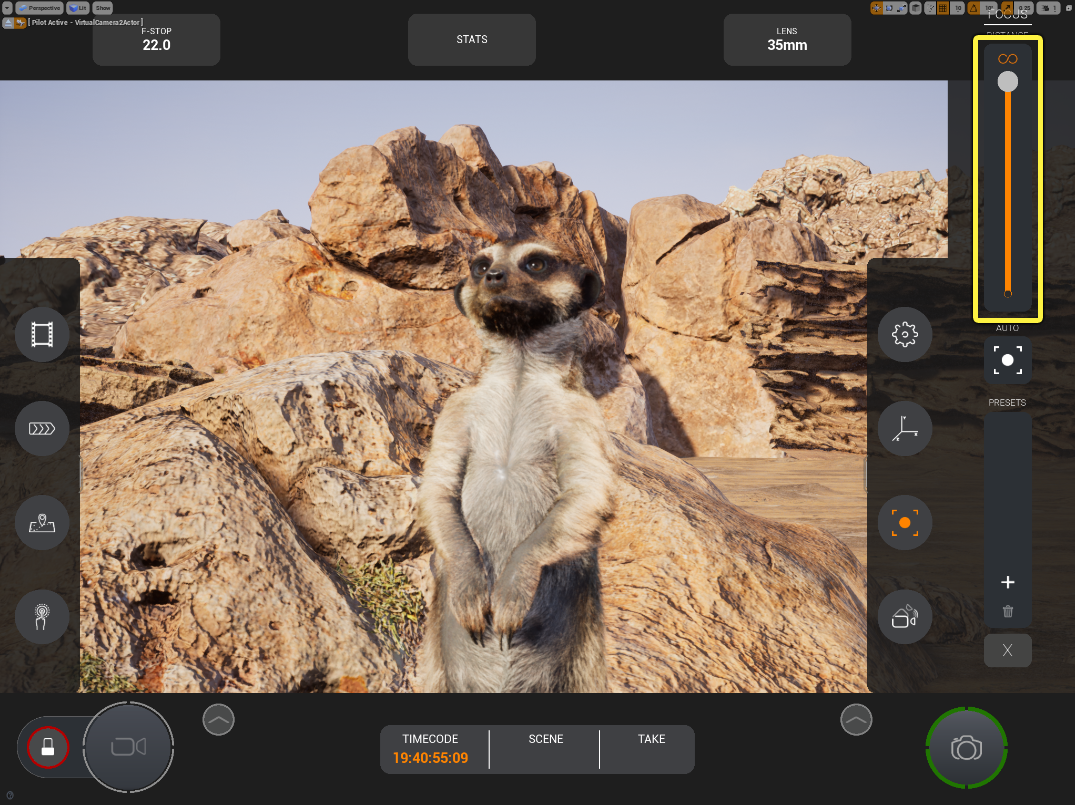
-
You can activate auto focus by tapping an object on the screen. The camera will lock focus on that object no matter the camera’s position or rotation.

-
You can activate reticle focus by tapping the Reticle Icon on the menu. This will reveal a reticle on the screen that can be moved around to shift focus. The camera will maintain focus on whichever object is under the reticle.
-
You can save focus Presets by tapping on the plus sign. You can save up to five presets at a time and can switch between presets by tapping on the preset number.
Gamevice Controls
| Control | Description |
|---|---|
| Face Top (Y) Button | Toggle between manual and auto focus. |
| Right Joystick | Adjust manual focus. |
| Face Bottom (A) Button | Add a focus Preset. |
| D-Pad | Select different focus Presets. |
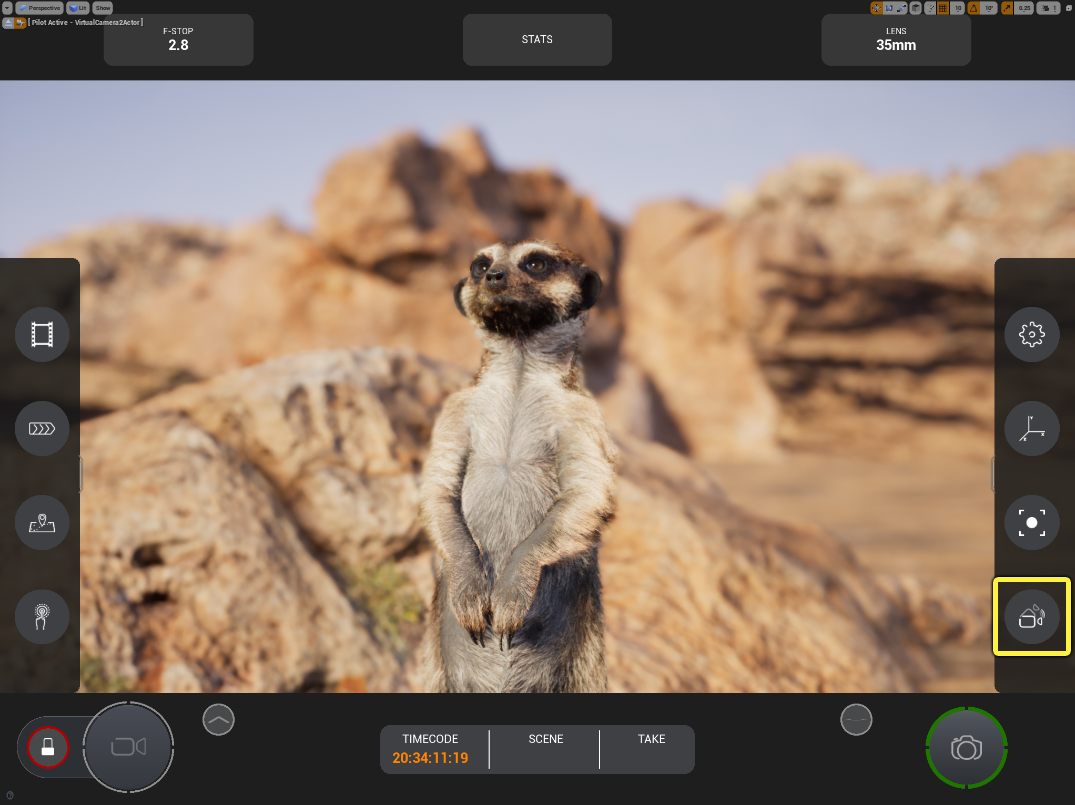
Repositioning your Camera
-
You can tap the Reposition icon to freeze the camera’s location and rotation in place. This allows the camera operator to move to a new position without losing the camera’s current transformation. You can unfreeze the camera by tapping the icon again.
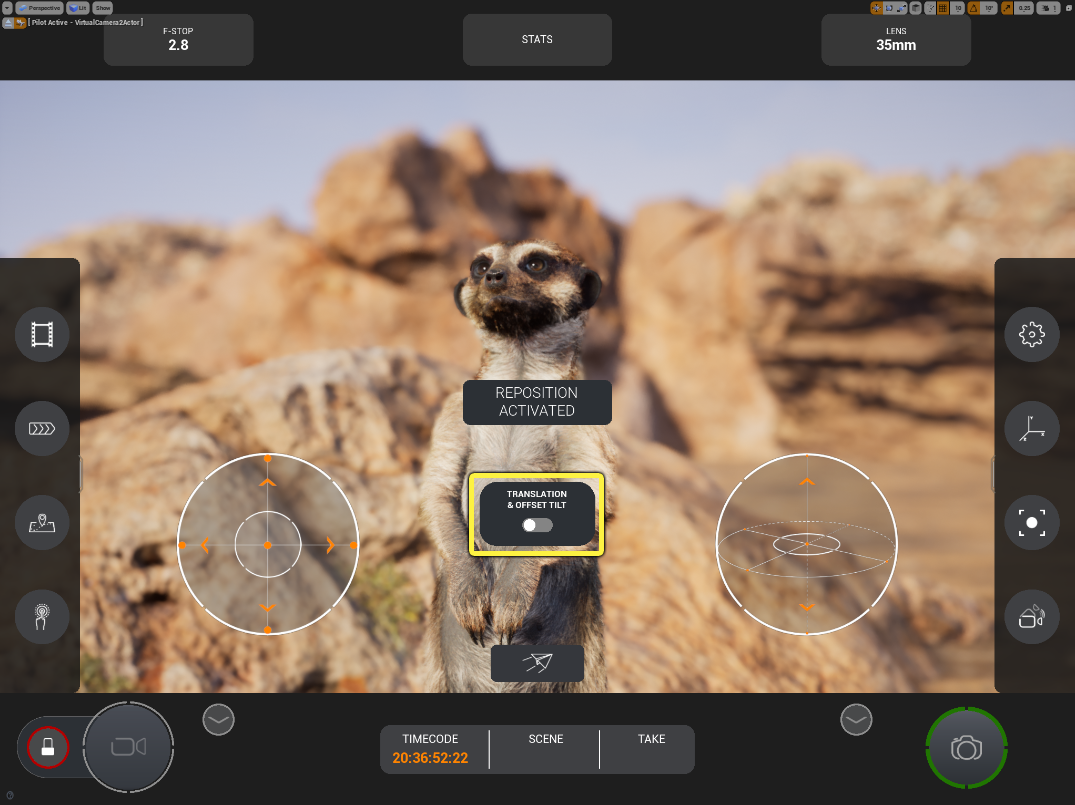
-
While Reposition is active, you can tap the Translation & Offset Tilt toggle to apply the camera’s translation and tilt as an offset. This is useful for shots that may require uncomfortable physical positioning by the camera operator.
Gamevice Controls
| Control | Description |
|---|---|
| Face Left (X) Button | Toggle the Translation & Offset Tilt. |
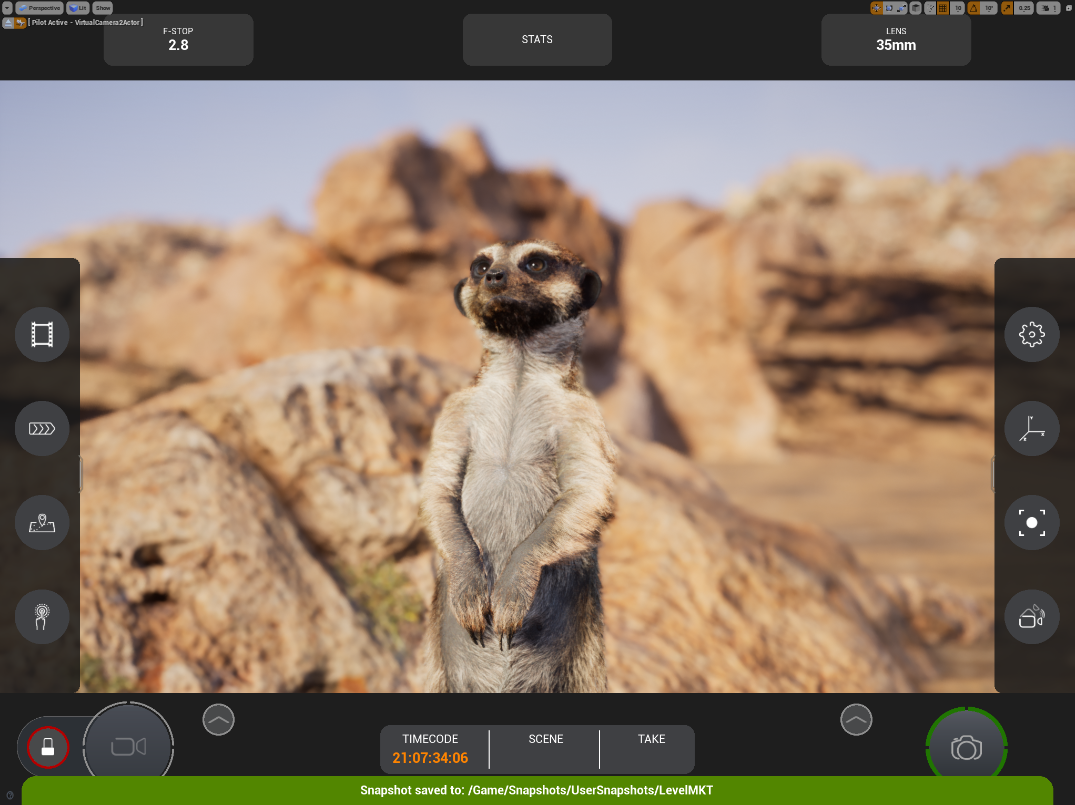
Taking Snapshots
-
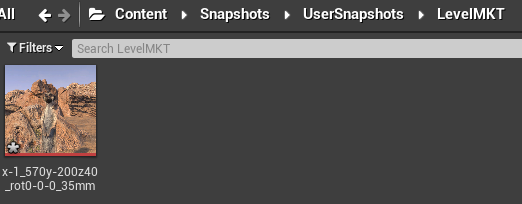
Tap on the Snapshot icon to take a snapshot of the scene. This snapshot will be automatically saved as a texture under the Game > Snapshots > UserSnapshots > LevelName directory.

-
Once a snapshot is taken, you will see a notification at the bottom of the screen. You will also see the new snapshot file created inside the Content Browser.
Using the Virtual Joysticks
-
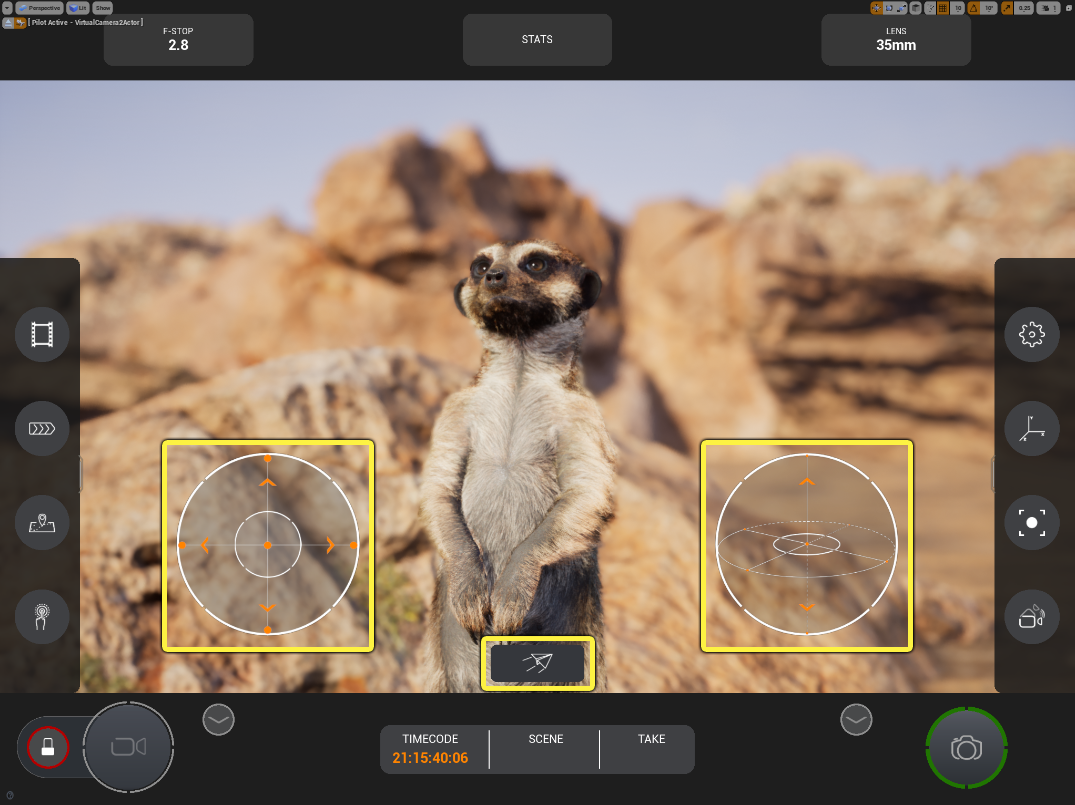
You can view the virtual joysticks by tapping on one of the Arrow icons on the screen

-
The left joystick moves the camera in the X and Y axis, while the right joystick moves the camera along the Z axis (Boom) and rotates the camera in place.
-
Tapping the Airplane icon enables Fly Mode. This mode allows the camera to move in the direction of the lens, instead of the scene’s X and Y axis.
Gamevice Controls
| Control | Description |
|---|---|
| Left and Right Joysticks | Move the camera in the scene. |
| Face Top (Y) Button | Toggle Fly Mode. |
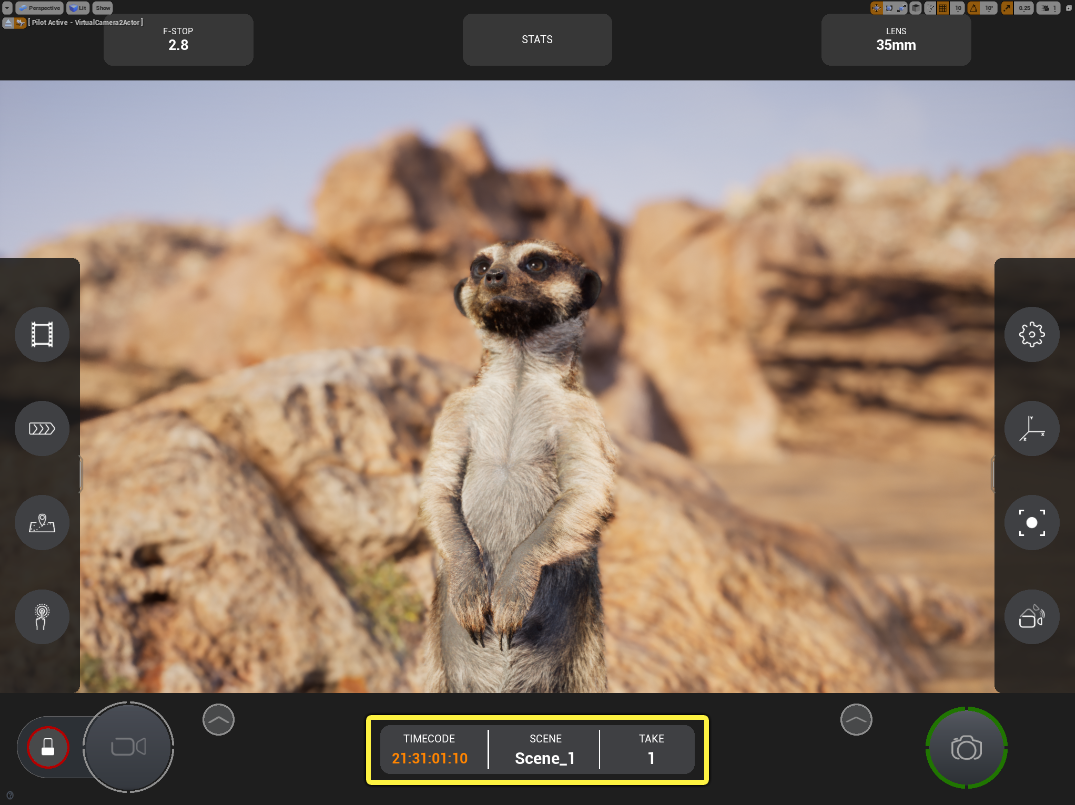
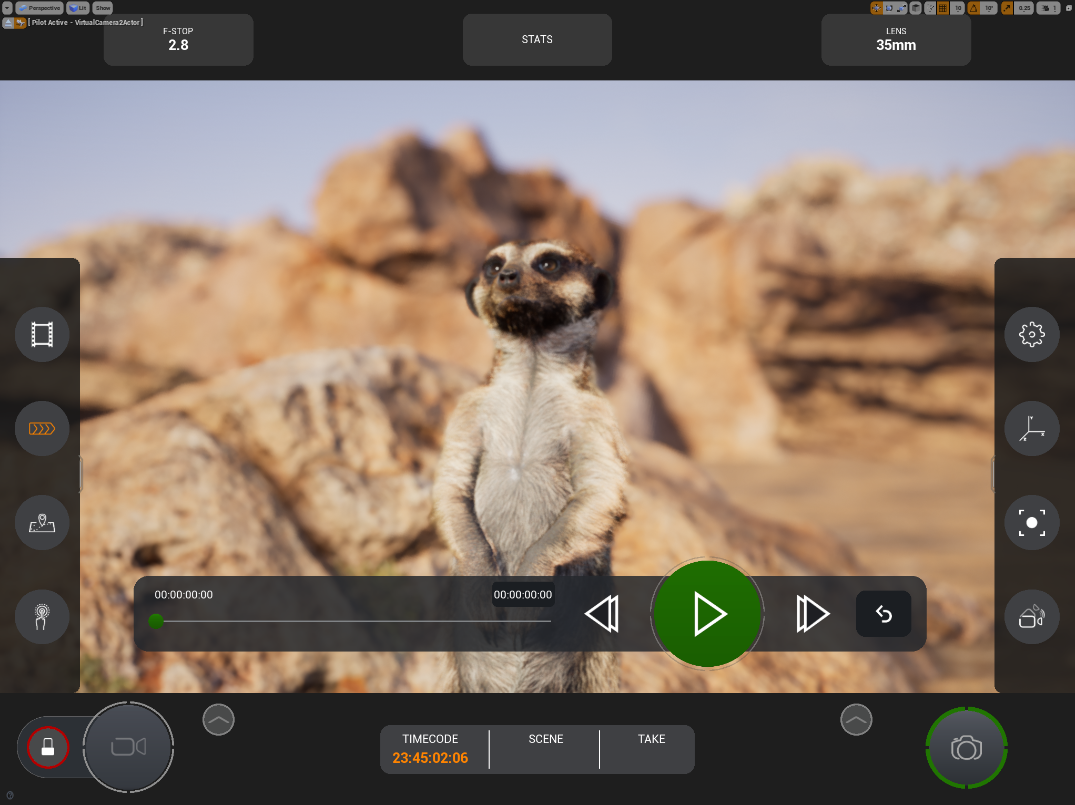
Viewing the Recording Information
When the virtual camera is active, it can display the current Time Code, the current Scene, and the current Take. This information is automatically derived from Unreal Engine’s Take Recorder.
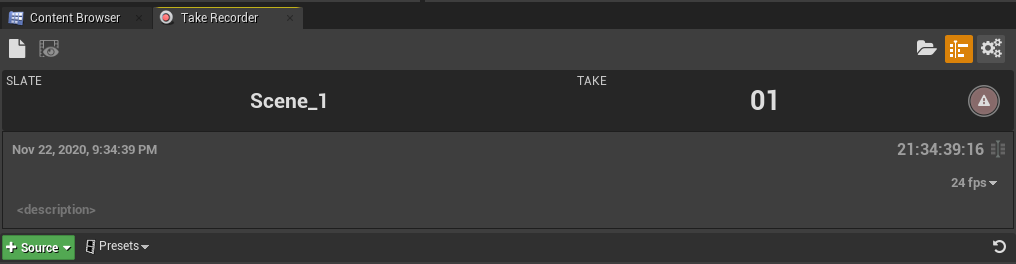
You can learn more about the Take Recorder by following the Using the Take Recorder guide.
Recording a Video Clip
-
To record a video clip, tap on the Lock icon to unlock the safety lock. Tap on the Recording icon to start the recording, and tap it again to end the recording.
Starting the recording will automatically initiate the animation playing on the active Level Sequence.
Gamevice Controls
| Control | Description |
|---|---|
| Left Shoulder (L1) Button | Unlock the safety lock. |
| Left Trigger (L2) Button | Start and stop recording. |
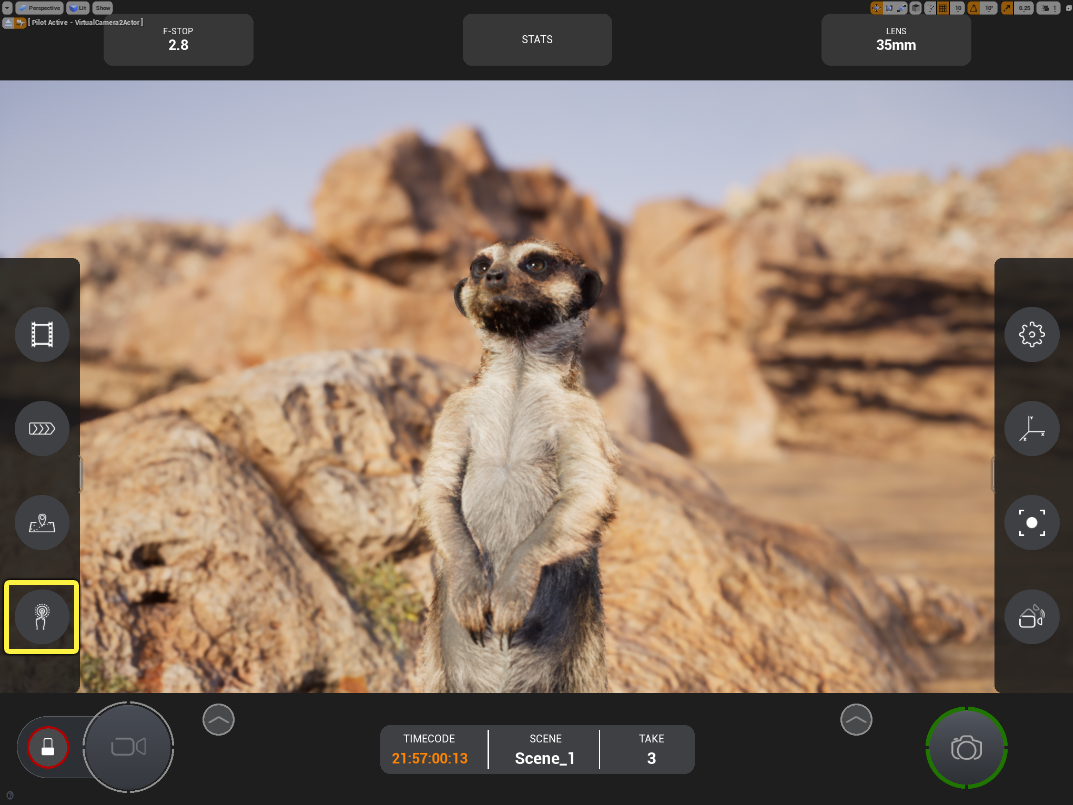
Interacting with Objects in your Scene
-
Tap the Interact icon to go into Interaction Mode.
-
Tap an object in your scene to view its Translation, Rotation, and Scale properties. You can now change the object’s properties to manipulate it in the scene. Slide your fingers to change the values or tap on the property to bring up the number pad.
-
You can also Undo or Redo your actions by tapping on the appropriate icons. You can also toggle the properties from global to local world space by tapping the Globe icon.
Gamevice Controls
| Control | Description |
|---|---|
| D-Pad | Navigate to the different properties. |
| Face Top (Y) Button | Toggle between global and local world space. |
| Face Bottom (A) Button | Open the number pad. |
| Left (L1) and Right (R1) Shoulder Buttons | Undo and Redo your actions, respectively. |
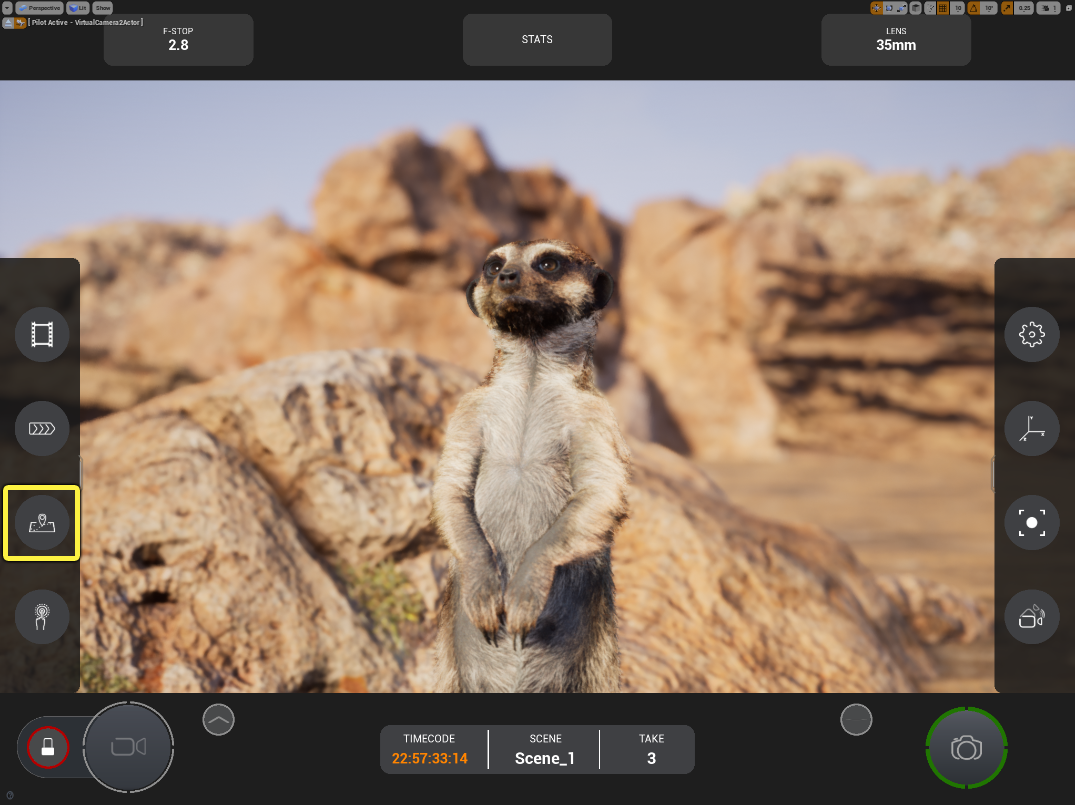
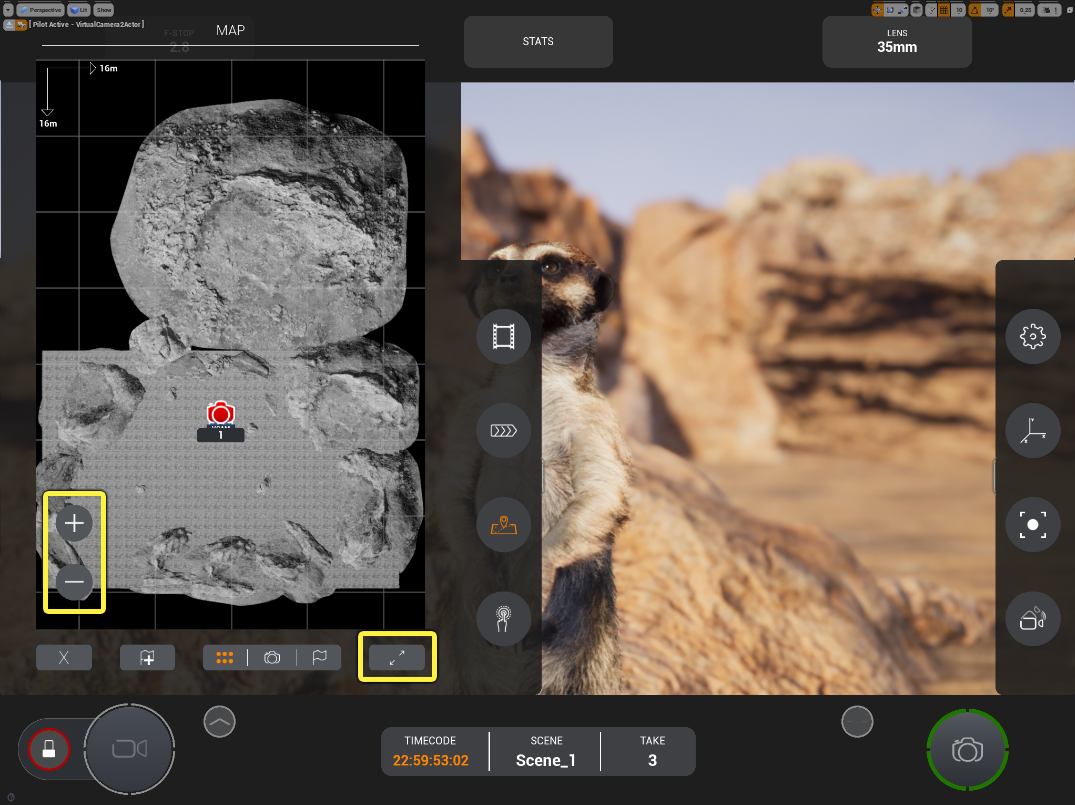
Using the Map Tool
The Virtual Camera comes with a Map Tool to help the camera operator navigate around the scene and place Flags (markers) to easily teleport to specific locations.
-
Tap the Map icon to open the Map Tool.
-
A top-down view of the scene will appear on the left side of the screen. You can toggle between overlay and full screen mode by tapping the Expand icon. You can zoom in and out of the map by using the Plus and Minus icons or by using the pinching gesture on the touchscreen.
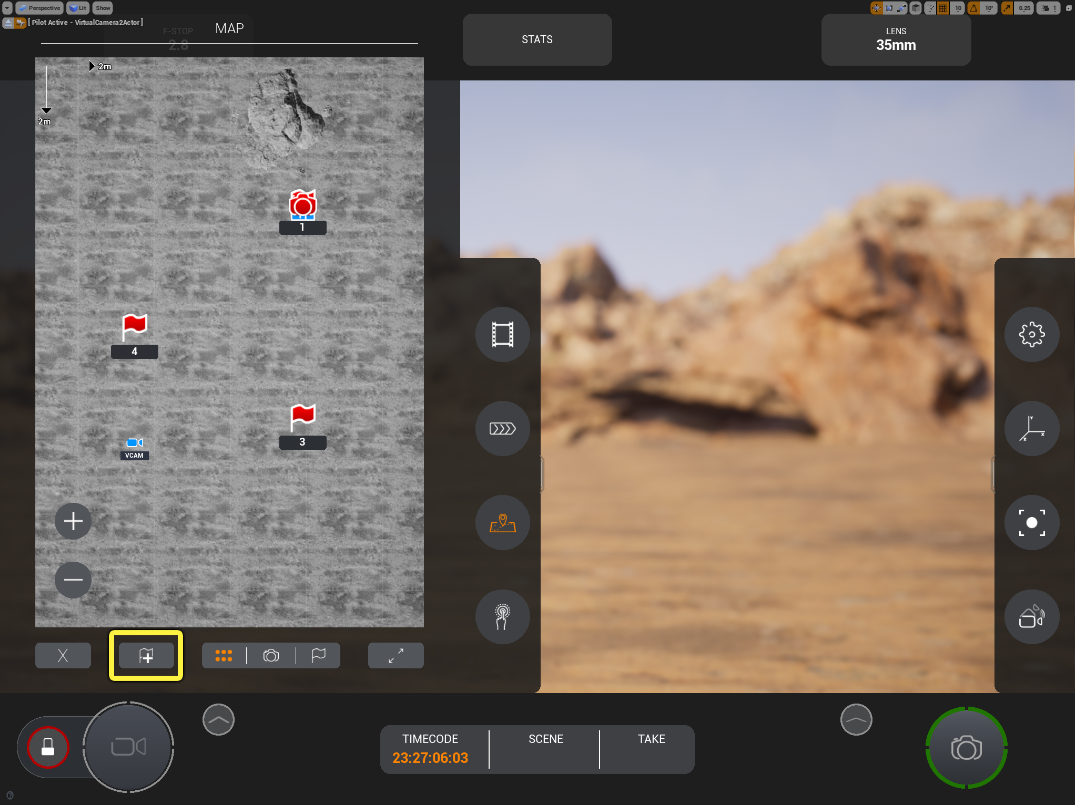
-
You can add flags on the map by tapping on the Add Flag icon on the screen. A flag will be created on the camera’s current location. You can teleport between flags by tapping on each flag on the screen.
-
You can remove flags by long-pressing a flag on the map.
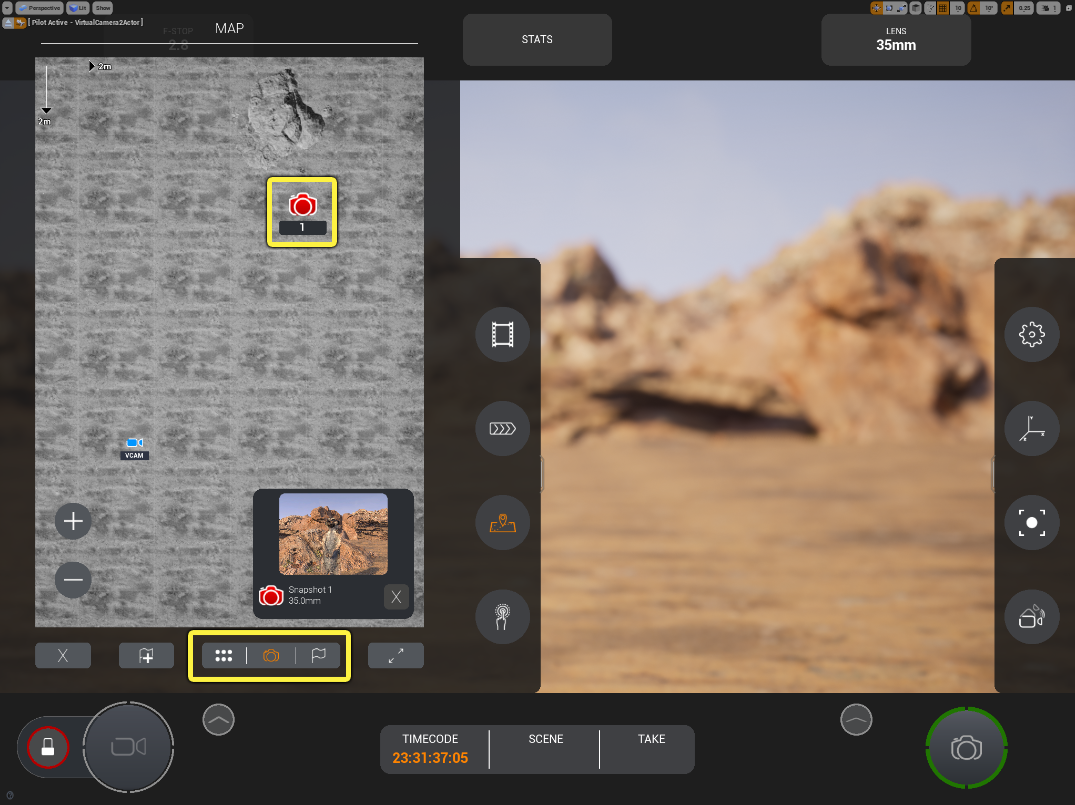
-
You can also view saved snapshots by tapping on the Snapshot icon inside the map. Once selected, you can delete a snapshot by tapping the X.
-
For ease of use, you can filter between viewing Flags, Snapshots, or Both by tapping on the filter bar, as indicated below.
Gamevice Controls
| Control | Description |
|---|---|
| Face Top (Y) Button | Toggle between overlay and full screen modes. |
| Left Joystick | Pan the map. |
| Right Joystick | Zoom in and out of the map. |
| D-Pad | Cycle through the filters. |
Previewing Animations
-
Tap on the Animation Preview icon to open the Animation Timeline controls.
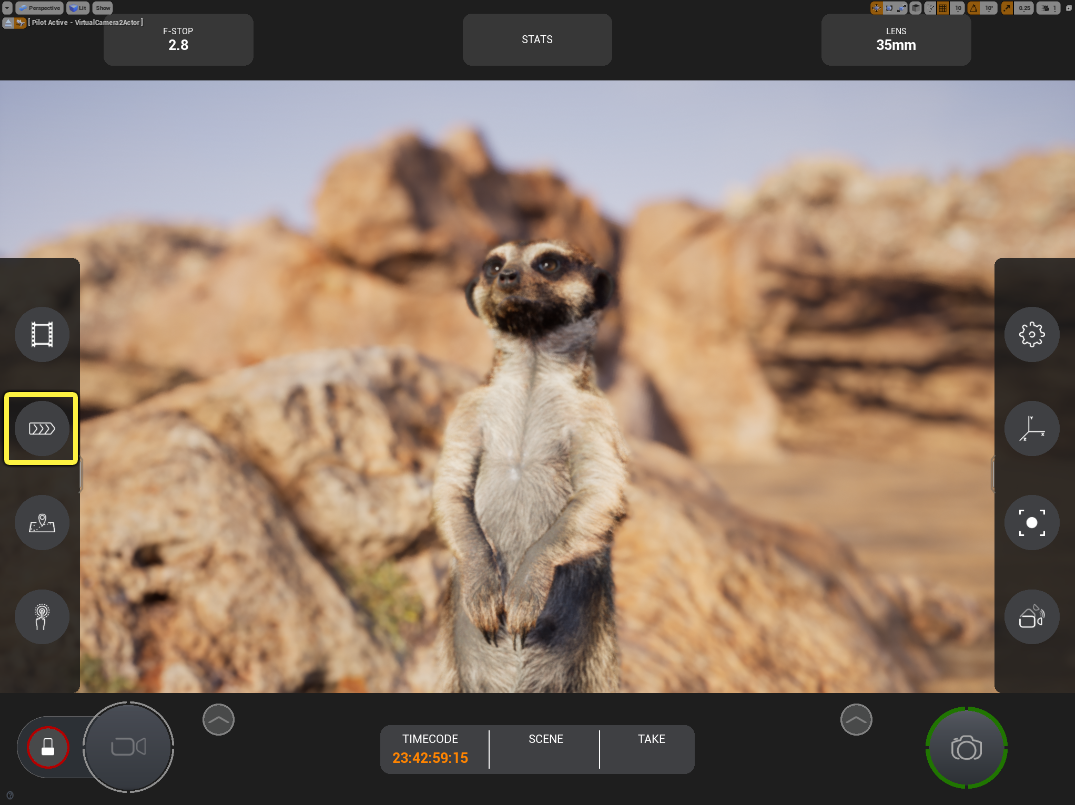
-
These controls allow the user to preview the animation contained within the current Level Sequence in the editor. Play / Pause and scrub controls work similarly to Sequencer. In addition, you can see the time code and elapsed time of the animation being played.
Gamevice Controls
| Control | Description |
|---|---|
| Right Shoulder (R1) Button | Play or Pause the animation. |
| Right Joystick | Scrub the timeline. |
| Left (L1) and Right (L2) Trigger Buttons | Scrub the timeline per frame. |
Review your Recordings
-
Tap the Clip icon to go into the Clip Review Mode.
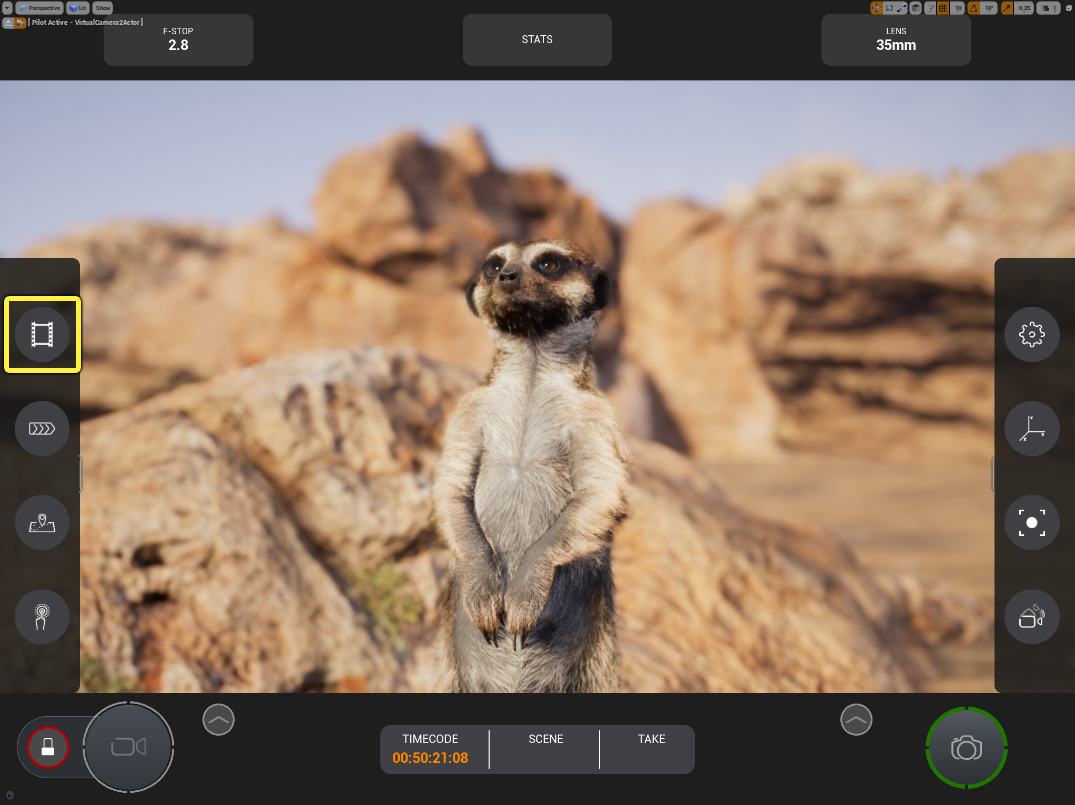
-
In this mode you have access to all the clips recorded by the virtual camera. You can scroll through the clips on the left by sliding your fingers up and down. Once you select a clip, you can use the controls at the bottom to Play / Pause and scrub through the clip.
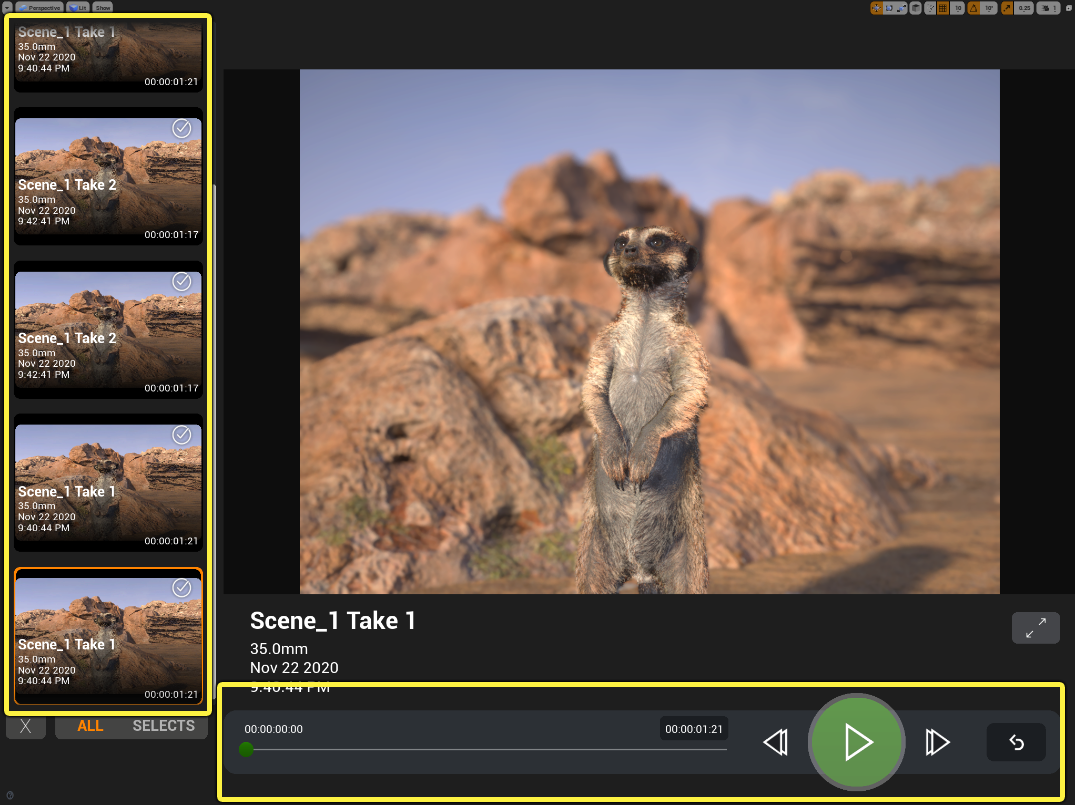
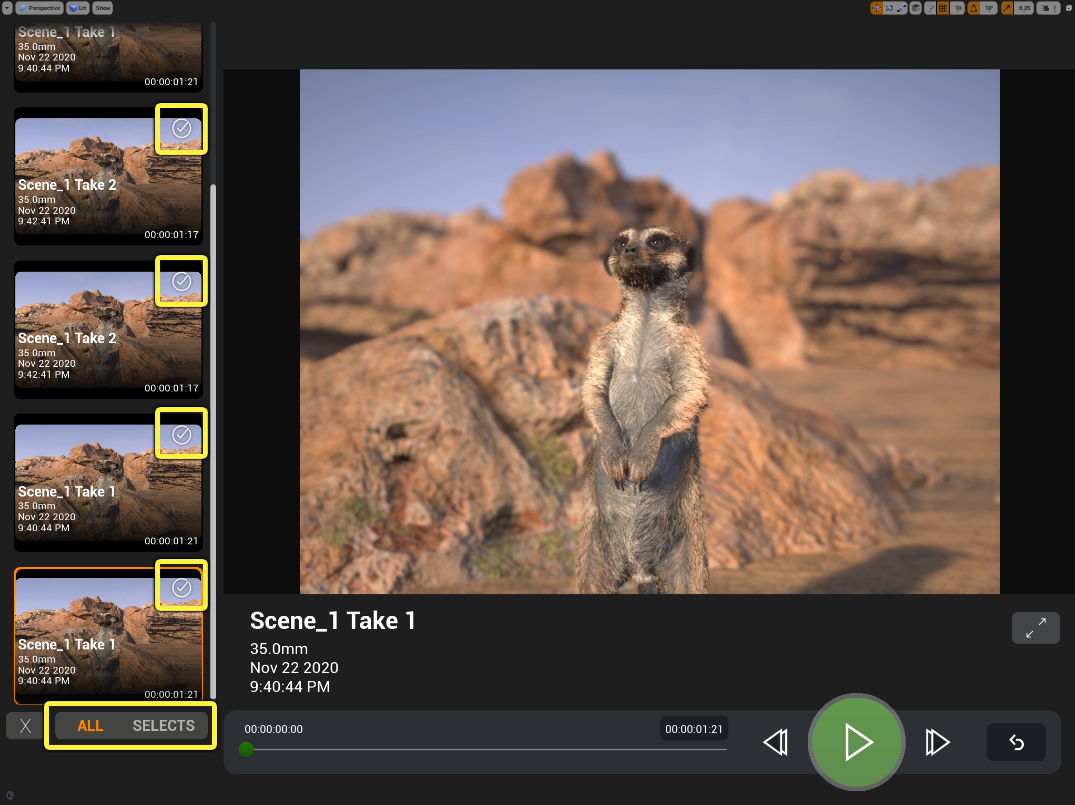
-
You can also mark clips by tapping on the check box to mark them as part of the Selects list. You can quickly filter through the best clips on the list by toggling between All and Selects.
Gamevice Controls
| Control | Description |
|---|---|
| Left Joystick | Scroll through the clips on the left. |
| Face Bottom (A) Button | Select the clip and load it into the viewport. It also resets the clips if it is currently playing. |
| Right Shoulder (R1) Button | Play and Pause the clip. |
| Right Joystick | Scrub the timeline. |
| Left (L1) and Right (L2) Trigger Buttons | Scrub the timeline per frame. |
| Face Top (Y) Button | Enable and disable fullscreen mode. |
Section Results
In this section you reviewed all the major interface options for the Virtual Camera Actor. You learned how to manipulate various camera settings, such as F-Stop, Lens type, and Focus to adjust the final image.
You also learned about the available settings and motion parameters you can use to adjust the camera’s movement and operation. In addition, you learned how you can take snapshots and video clips with the camera and how to navigate your scene with the Map Tool.
Finally, you learned how to review your clips and animations within the viewport to quickly select the best takes for your project.
Next Steps
Now that you know how to use the built-in Virtual Camera Actor, you can learn how to build your own by following the Virtual Camera Component Quick Start.