Overview
When building advanced visual effects in Unreal Engine, Niagara systems can become very complex. Each emitter may contain dozens, or even hundreds of parameters that control the final output. This is beneficial for visual effect artists and advanced users. However, it can become overwhelming to beginners or non-VFX artists.
Users can create a subset of parameters of an emitter by using the Summary View. This view is fully customizable and contains only the parameters selected by the user. This can help highlight key parameters that affect the simulation or expose certain parameters to non-technical users for ease of use.
You can create a Summary View per emitter in any Niagara system. For this example, you will use a fluid system that comes with an emitter that has a Summary View set up by default. Then, you will create one from scratch.
Create a Niagara System
In this section you will create a new Niagara system and see its default Summary View.
-
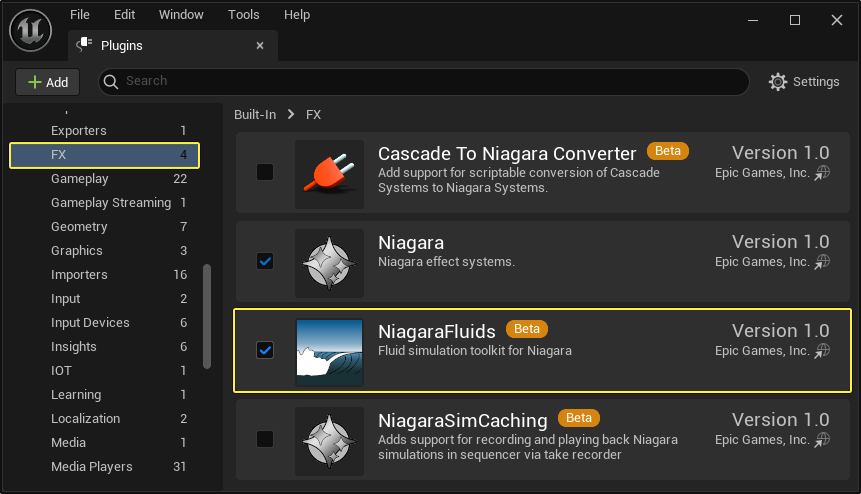
To open the Plugins window click Settings > Plugins. Go to the FX category and enable the NiagaraFluids plugin. Restart the Unreal Engine editor, if needed.
-
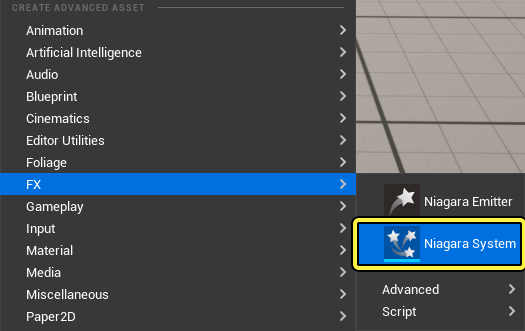
In the Content Browser, right click and select FX > Niagara System.
-
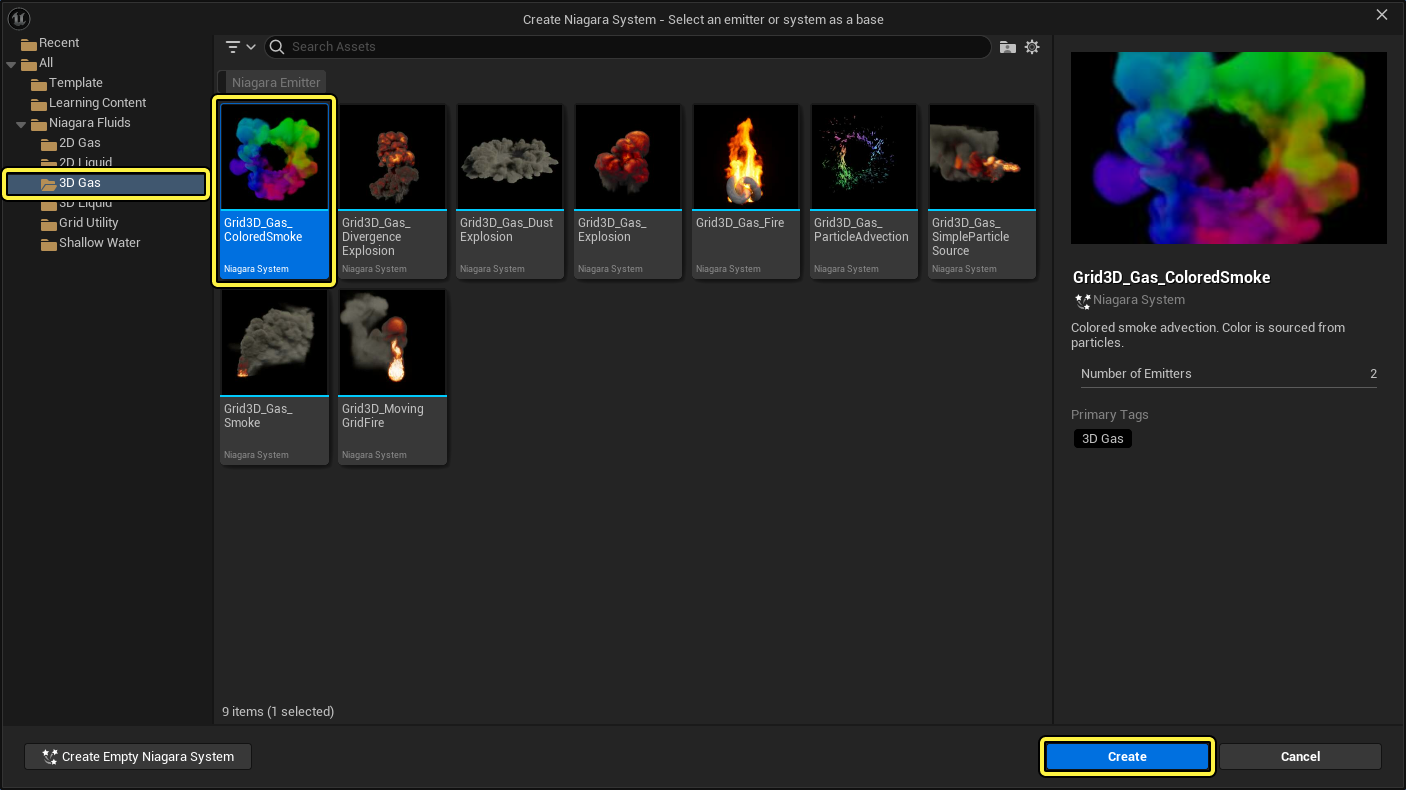
Expand the Niagara Fluids category on the left and click 3D Gas. Then select Grid3D_Gas_ColoredSmoke and click Create.
-
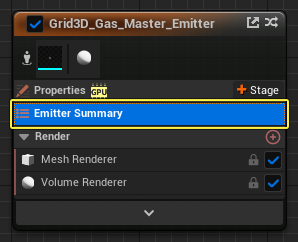
Double click NS_ColoredSmoke to open it. Select the Grid3D_Gas_Master_Emitter and click Emitter Summary.
-
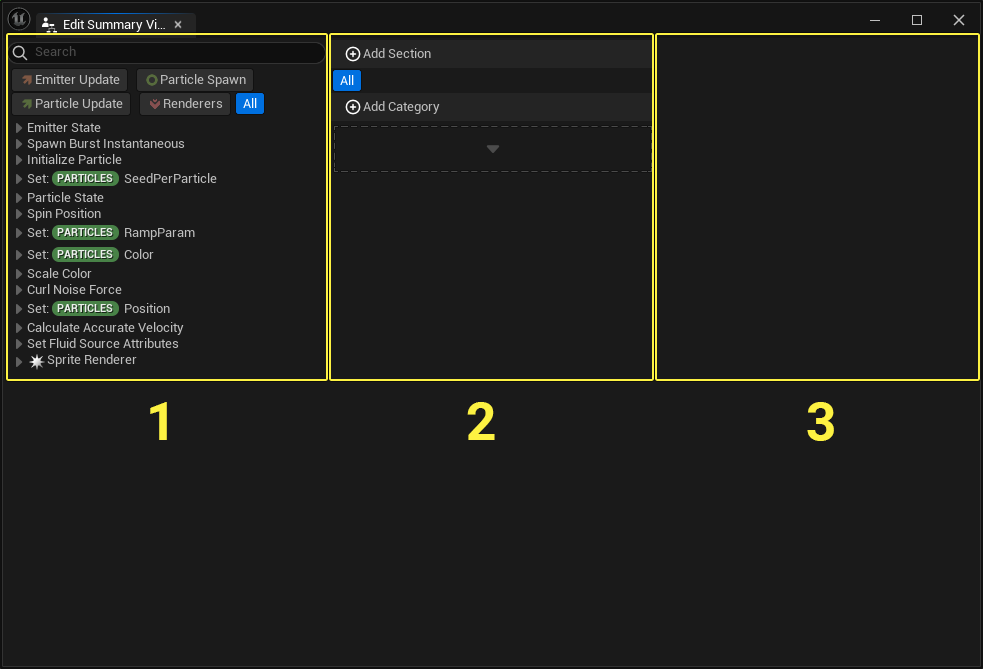
Go to the Details panel to see the Summary View of this emitter.
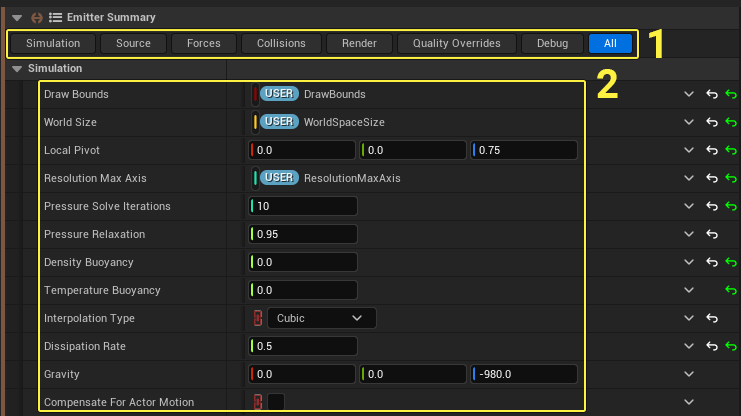
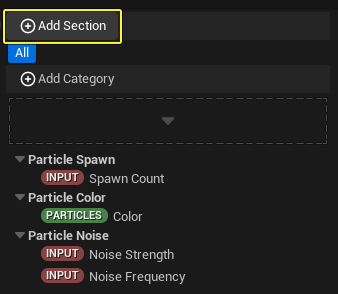
The Summary View consists of Sections (1) and individual Parameters (2). The Sections act as filters for the parameters being displayed. The parameters can be individual variables, entire modules, or even renderers with their properties. In addition, you can create Categories (not pictured) to further group parameters under specific Sections.
Create your First Summary View
In this section you will create a Summary View for one the emitters. You will also learn how to search for and add parameters.
-
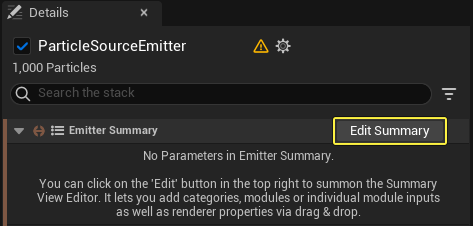
In NS_ColoredSmoke select the ParticleSourceEmitter and click on Emitter Summary.
-
Go to the Details panel and notice the Summary View is empty. Click on Edit Summary to open the Edit Summary View window.
- The Edit Summary View window consists of the following areas:
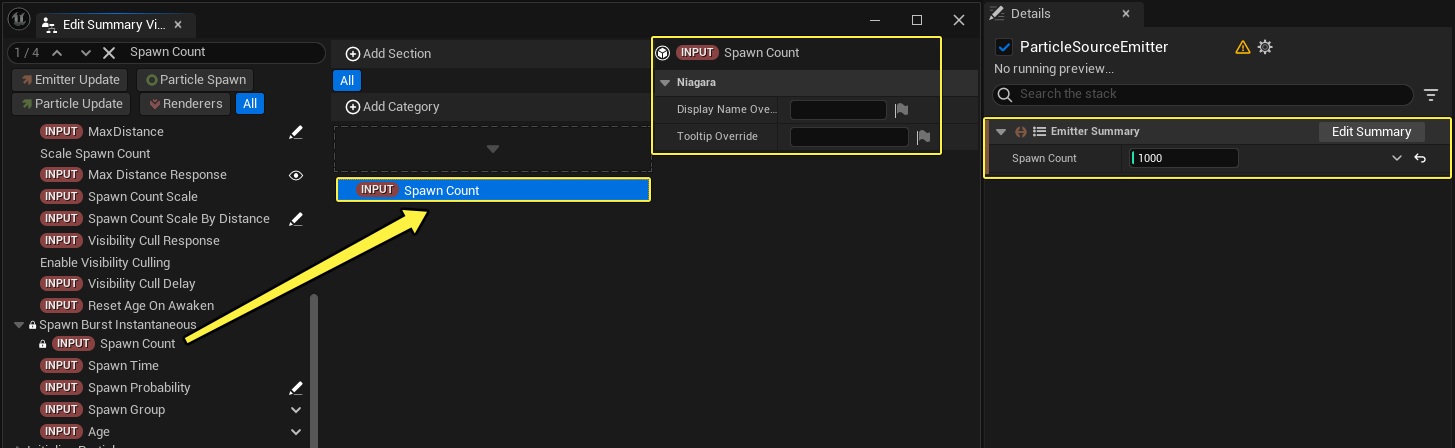
- (1) The Source List area, where you can search for any source of information, including individual parameters, modules, renderers, and more. You select the source and drag it to a Category (2) to include it in your Summary View.
- (2) The Section and Category area. This is where you organize your parameters under Categories and Sections.
- (3) The Details area. This area will show the details of any selected element.
-
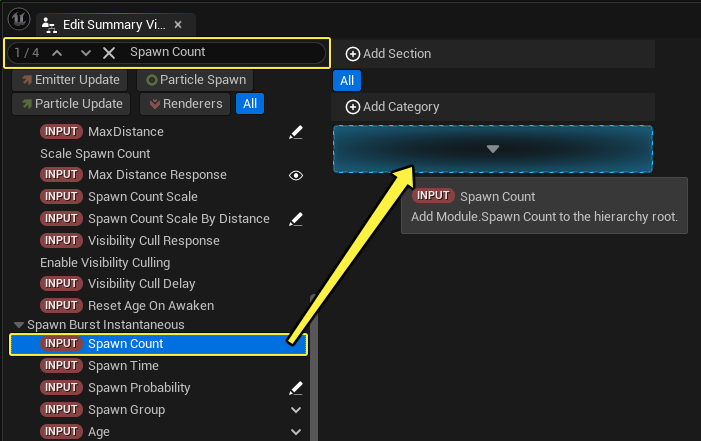
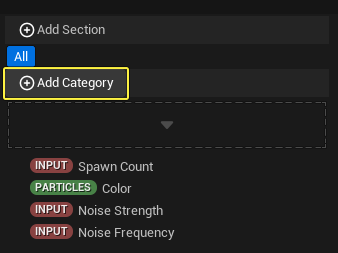
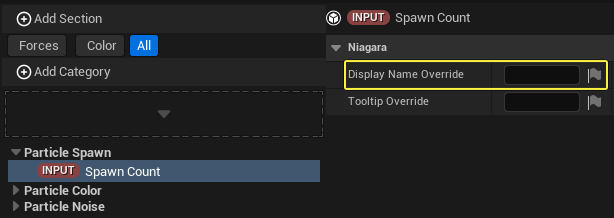
Click in the Search bar and type "Spawn Count." Then click and drag Spawn Count into the area below the Add Category button.
Select the parameter to see the available information in the Details area. In this case, you can enter a display name override and a tooltip override. Also notice how the Summary View of the emitter is immediately updated and shows the Spawn Count parameter.
-
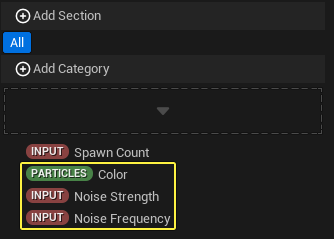
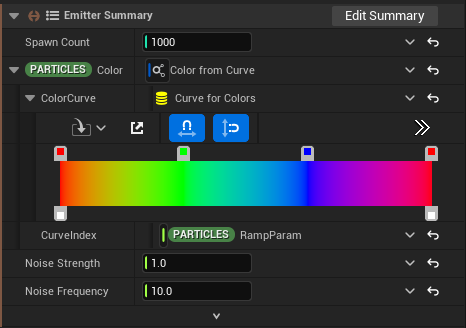
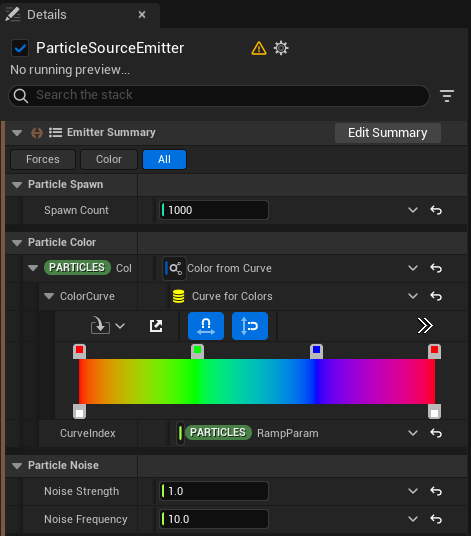
Following the steps above, add the following parameters to your summary: Color, Noise Strength, Noise Frequency, as seen below.
-
Your Summary View should now look like the image below.
Organize your Summary View
In this section you will create categories and sections for your Summary View. You will also use the Display Name Override for one of your parameters.
-
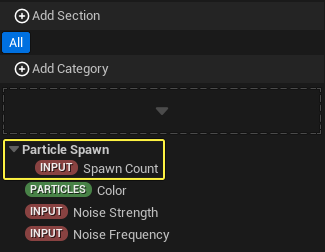
In the Edit Summary View window, click Add Category and name your category Particle Spawn.
-
Click and drag the Spawn Count parameter to the Particle Spawn category, nesting the parameter to the category.
-
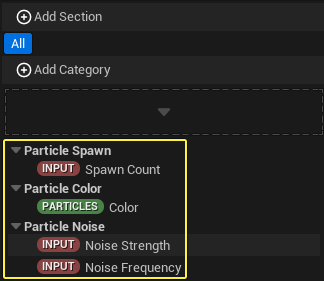
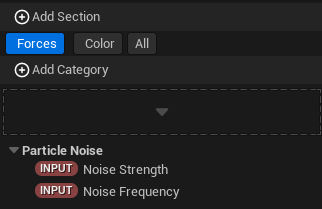
Add the category Particle Color, then add the Color parameter to it. Add the category Particle Noise, then add the parameters Noise Strength and Noise Frequency.
-
Click Add Section and name your new section Color. Your new section is selected by default. Notice no parameters or categories are part of this new section.
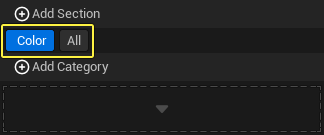
-
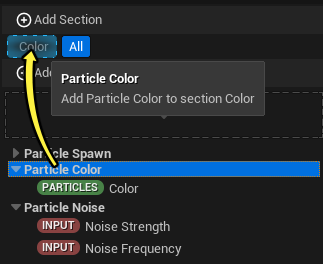
Click the All section. Select and drag the Particle Color category into the Color section.
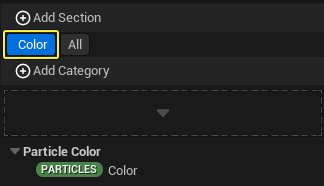
Click the Color section to see the Particle Color category, along with the parameters associated with that category.
-
Go back to the All section and create a new section named Forces. Then select and drag the Particle Noise category to that section.
-
Go back to the All section and select the Spawn Count parameter. In the Details area, click the Display Name Override input box and enter Particle Count.
-
Your Summary View should now reflect all your sections and categories.
Add Parameters from the Emitter
In addition to using the Edit Summary View window, you can add parameters directly to Summary View while working inside your emitter. This makes it easier to build your Summary View as you work on your emitter.
To add parameters from your emitter, follow these steps:
-
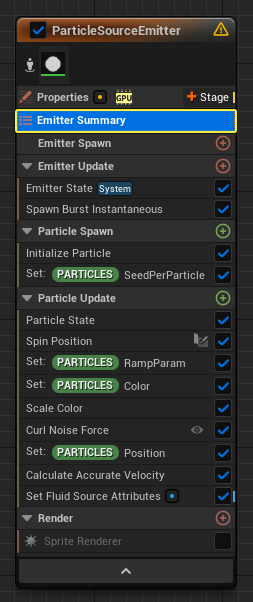
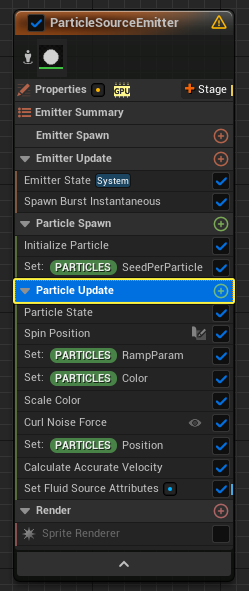
Exit the Edit Summary View window and click Particle Update in the emitter.
-
Go to the Details panel and scroll down to the Curl Noise Force module. Right-click the Noise Quality / Cost parameter and select Add to Emitter Summary.

-
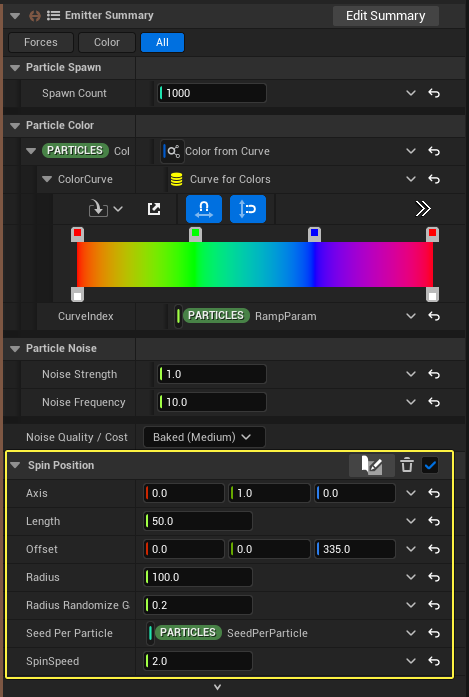
Scroll up to the Spin Position module. Right-click the module name and select Add to Emitter Summary. You can add individual parameters, entire modules, and more, to the Summary View.

-
Click Summary View in the emitter to confirm you added your parameters.