A struct is a collection of different types of data that are related and held together for easy access. You've probably used simple structs in Blueprints already, as Vectors, Rotators, and Transforms are all struct variables. For example, a Vector struct holds an X float, a Y float, and a Z float variable that are related to each other.
Structs can also nest their data. A Transform struct holds Location (a Vector struct), Rotation (a Rotator struct), and Scale (a Vector struct) data about an Actor.
Creating Structs
You add a struct variable to your Blueprint in the same way you add any other Blueprint variable. Simple structs, like Vectors, Rotators, and Transforms, are listed in the top section of the variable type dropdown menu.
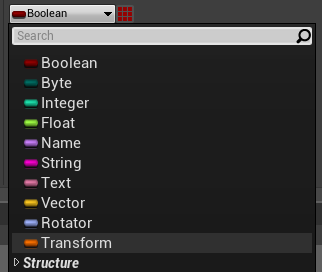
There is also a Structure section of the dropdown menu, where you can find all struct variables currently available to your Blueprint.
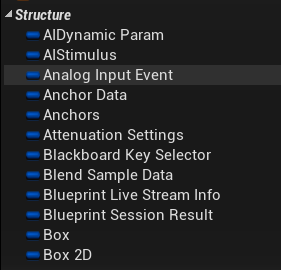
Accessing Struct Information
Because structs work by bundling data together, you also need to work on accessing those smaller chunks of information. You can do that through a few different methods:
Splitting Struct Pins
If you want to be able to access the individual variables in a struct on a single node, splitting struct pins can be a helpful tool.
To split a struct pin, right-click on the pin and select Split Struct Pin.
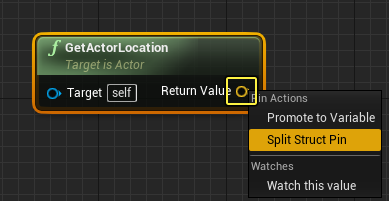
This exposes all of the variables contained within the struct as individual pins on the node, allowing you to enter values or manipulate them independently.
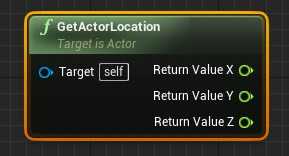
To undo a Split Struct Pin, right-click on any of the new pins and select Recombine Struct Pin.
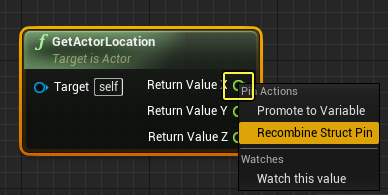
You can split and recombine both input and output struct pins.
Breaking Structs
Often, taking apart a struct into its individual parts will be gameplay logic you repeat in a function or macro. Using a Break Struct node allows you to replicate that behavior throughout your Blueprint graph easily. To create a Break Struct node, drag off of a struct output pin and select Break [Struct Name] from the context menu.
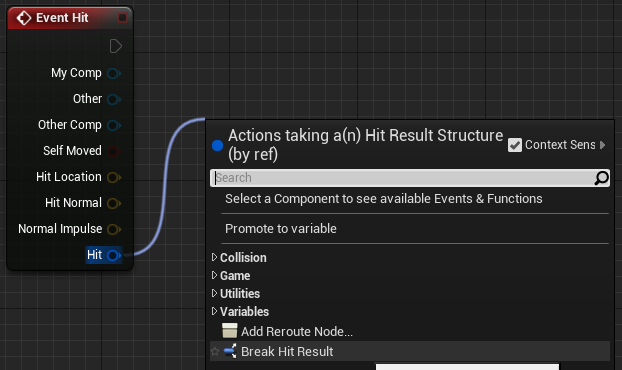
The Break Struct node will have a different name and different output pins depending on the struct you use, but overall will break the struct into its individual parts.
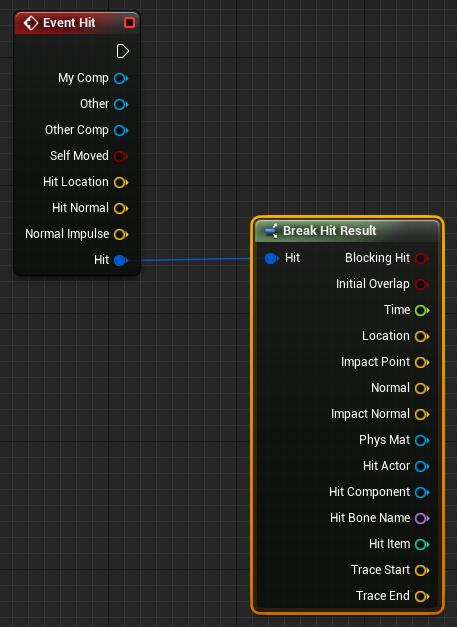
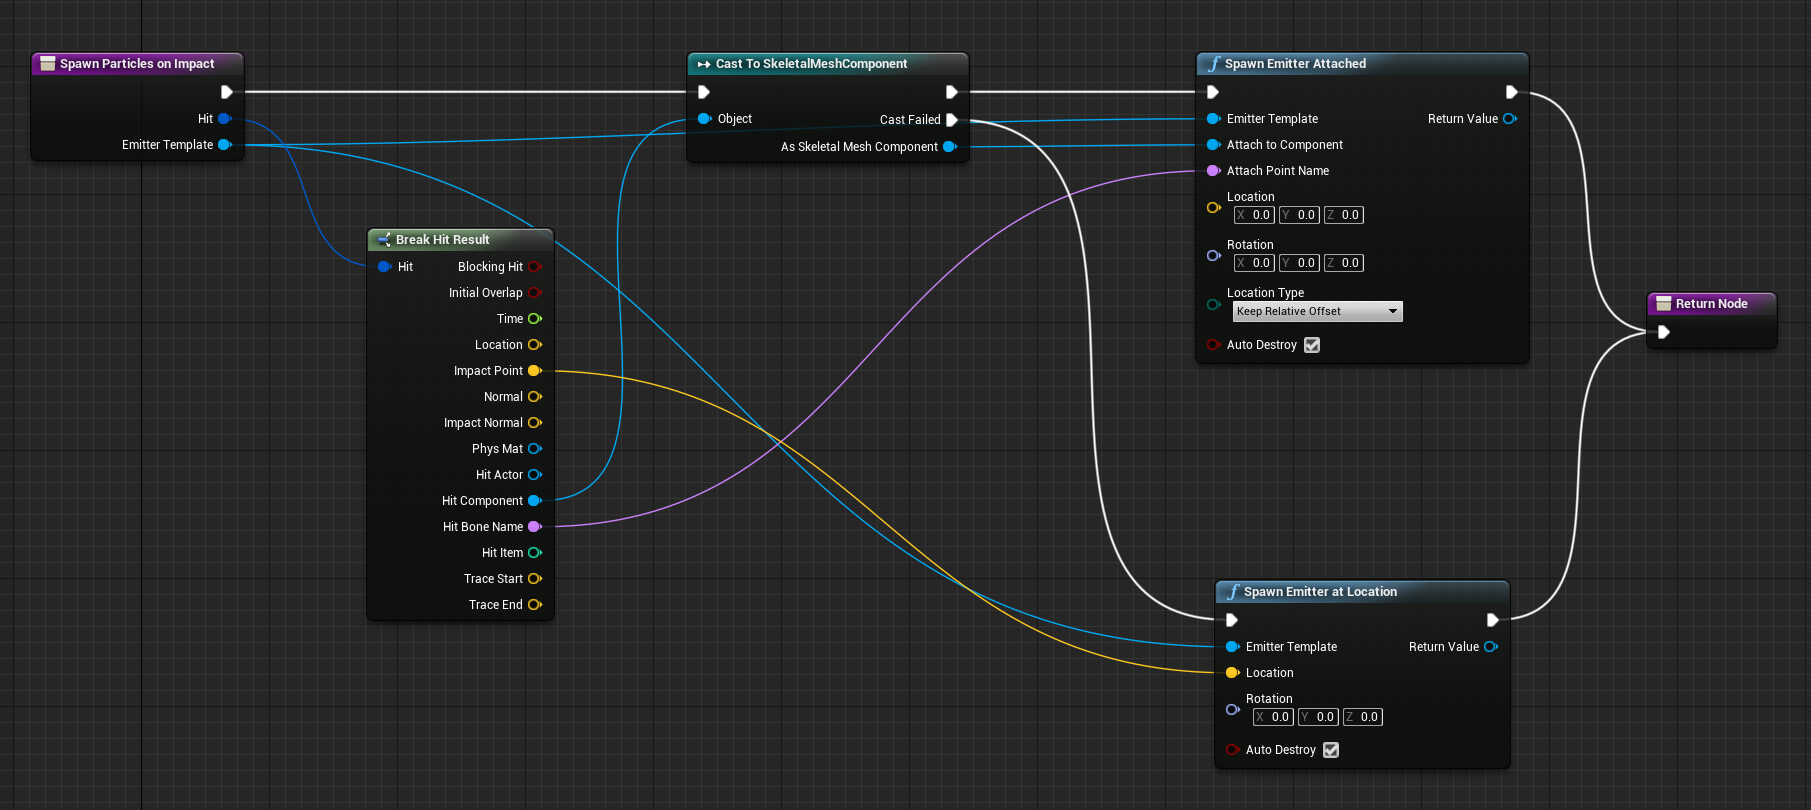
For example, if you always want to work with the Impact Point, Hit Component, and Hit Bone Name of a Hit Result, you can have a Break Hit Result node inside a function that means that you can just input Hit Result as a function input, and always have those three data pieces separated out inside the function.
Making Structs
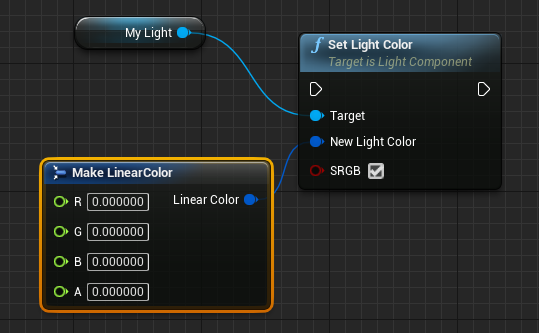
Much like you can break a struct into its individual pieces of data, you can make a struct out of the right data as well.
To create a Make Struct node, drag off of a struct input pin and select Make [Struct Name] from the context menu.
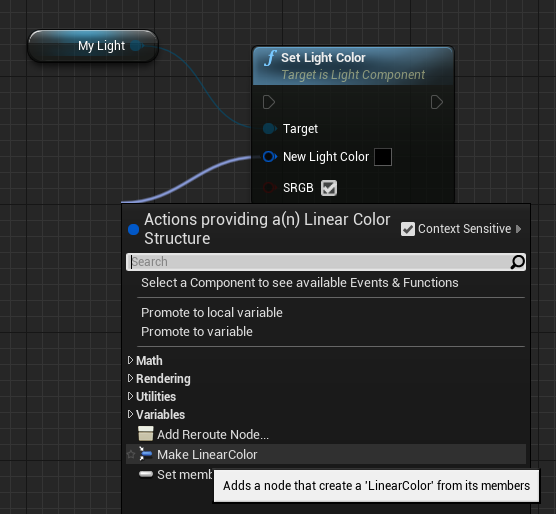
The Make Struct node will have a different name and different input pins depending on the struct you use, but overall will enable you to build a struct out of all the data it contains.
Setting Members in Structs
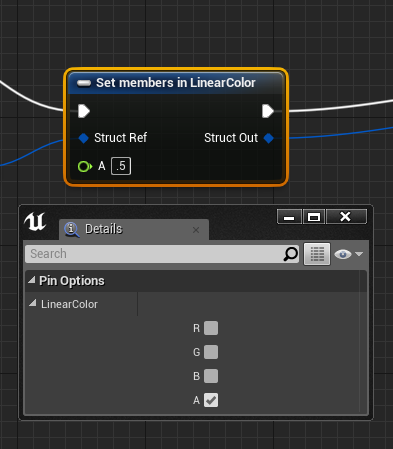
Sometimes, structs can contain a lot of data, and you only want to change a few elements out of that set. Setting members in a struct enables you to be very specific about what data you change, without having to wire up all the data pins that are remaining constant.

To change which members are available through the Set Members in Struct node, select the node. In the Details panel, there are checkboxes for each possible member to expose as a pin on the node. Member variables that are not exposed will not be changed by the Set Members in Struct node.
Using Custom Structs
In addition to using the structs supplied within the Engine, you can create your own custom structs with your own variables and values.�
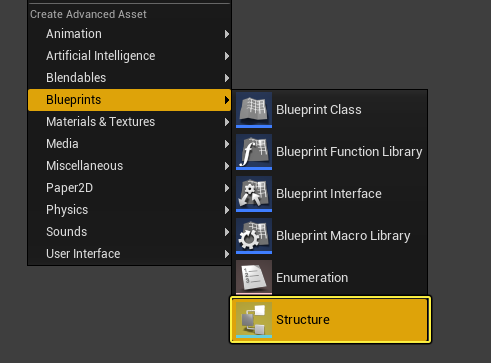
To create a custom struct, right-click in the�Content Browser�then under�Create Advanced Asset�and�Blueprints,�select�Structure.�
Once you define the name of the struct and open it, inside the Structure Window�you can add variables and their default values.�
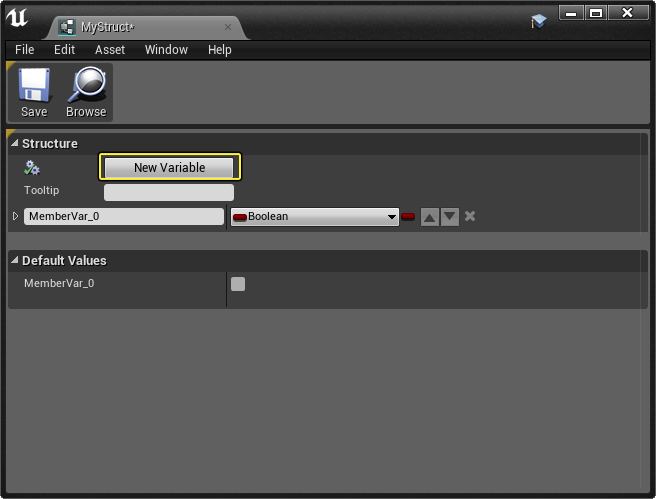
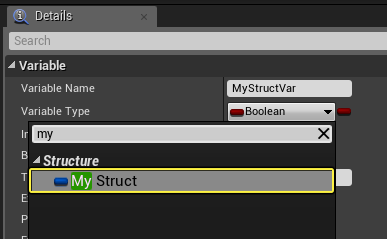
You can then add this struct as a variable inside any other Blueprint by creating a variable and assigning the�Variable Type�to the name of your struct.��
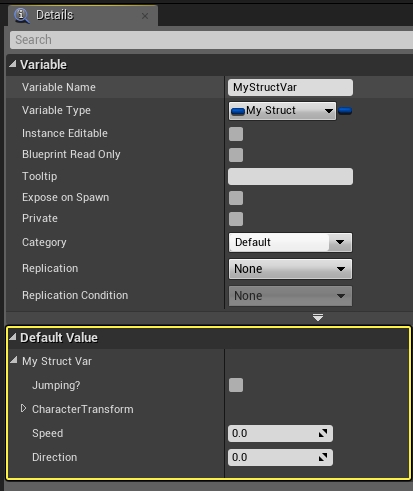
After compiling, you will see all the variables you've added to the struct that can be defined.
Breaking Custom Structs
When you add a custom struct to a graph, you can drag off it and break it a part in order to access the variables within it.�
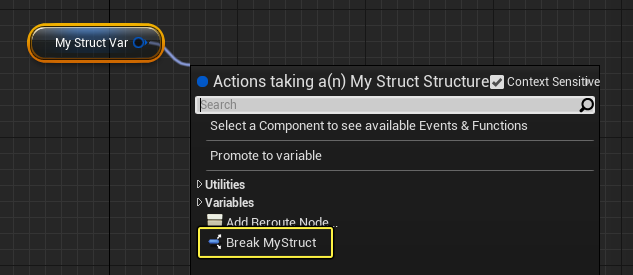
You can then connect individual variables from the struct to other Blueprint nodes. Optionally, from the�Details�panel, you can click the�Hide Unconnected Pins�button to hide any pins that are not connected to other Blueprint nodes.�
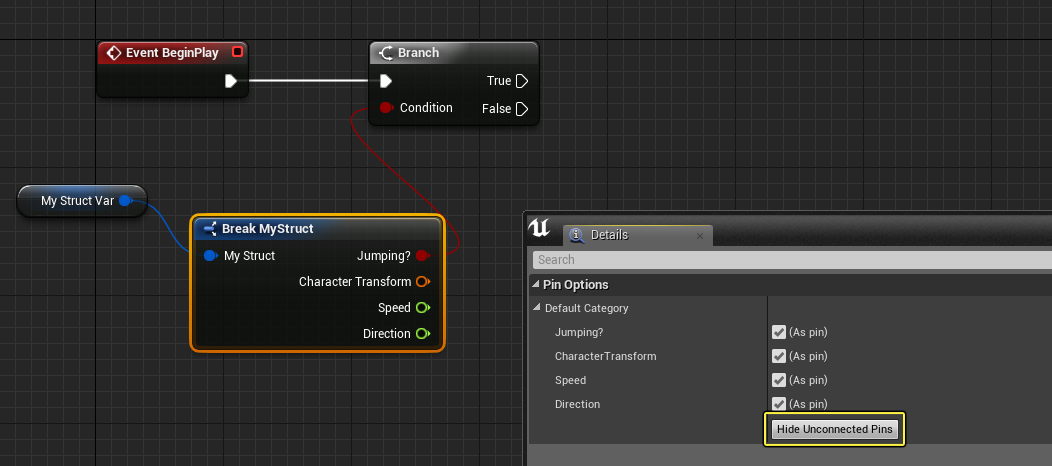
Any pins that are not connected will be hidden on the Break Struct node.�
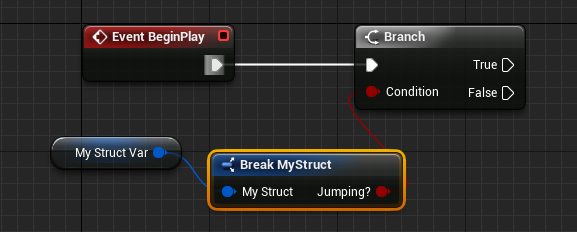
You can re-enable the showing of the pins from the�Details�panel by enabling the (As pin) property next to your desired variable.