You can use Pending Takes for recording gameplay, simulations, and PIE events, then use them to add to or overwrite existing sequences with the newly-recorded data.
Adding New Sequence Data
To add new data to an existing sequence, follow these steps:
- Set up a new project and animate a cube by following the steps from the Creating Camera Cuts Using Sequencer tutorial for setting up a 3rd person project and animating a cube.
- Open the Take Recorder panel: Window > Cinematics > Take Recorder.
-
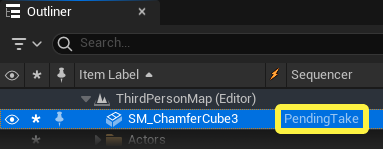
Right-click on the cube sequence in the Content Browser and select Open in Take Recorder. The sequence you selected does not appear as a source in the Source panel. However, in the Outliner, Sequencer displays 'Pending Take' as its sequence, which informs you the take is active with Take Recorder.
- Add the Player actor to Take Recorder and record your player interaction with the cube.
- Click + Source and select Player.
- Start PIE.
- In the Take Recorder, click Record. The sequence starts playing the moment you start recording. If your cube animation isn't longer than three seconds, you need to adjust the Countdown value in User Settings as it defaults to a three second delay at the start of recording.
- Move your player around the animated cube.
- When finished, click the Stop button or press the Esc key.
- Click Review last recording to review your take.
Your take can go beyond the duration of the added sequence. Opening a sequence in Take Recorder is different from sourcing a sequence.
Overriding Sequence Data
Overriding a sequence only records the duration of the selected sequence.
Using Record with Take Recorder provides you with a way to re-record a take and overwrite the existing sequence data. This is a destructive process! Record with Take Recorder adds all sourced actors tracks to the select sequence and overrides the data for any actors in the sequence. The length of the take is determined by the duration of the selected sequence.
- Set up a new project and animate a cube by following the steps from the Creating Camera Cuts Using Sequencer tutorial for setting up a 3rd person project and animating a cube.
- Open the Take Recorder panel: Window > Cinematics > Take Recorder.
- Right-click on the cube sequence in the Content Browser and select Record with Take Recorder. The selected sequence does not appear as a source in the Source panel. However, the Slate title has the name of the sequence you added.
- Add the Player actor to Take Recorder and record your player interaction with the cube.
- Click + Source and select Player.
- Start PIE.
- In the Take Recorder, click Record. The sequence starts playing the moment you start recording. If you want to end the take earlier, click the Stop button or press Esc key.
- Move your player to interact with the moving cube and let the duration of the sequence end the recording.
- In Sequencer, play the revised sequence and note the changes.