
This Tutorial series covers working with and placing Cameras in Unreal Engine. A Camera can be used by itself and placed directly into a level or it can be a part of a Blueprint (for instance, to provide a perspective for the player when flying a plane, driving a car, or controlling a character).
Creating and Placing a Camera Actor
-
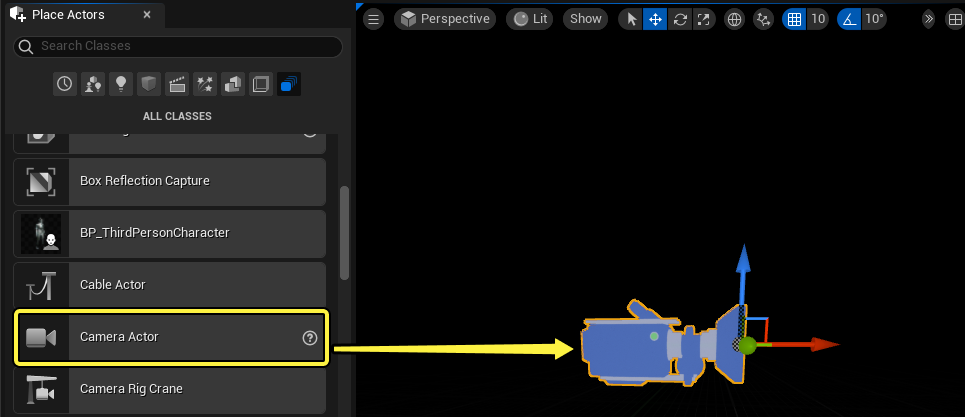
In the Editor, navigate to Window > Place Actors > All Classes, then place a Camera by dragging a Camera Actor into your level.
-
You can use the Search Bar to find the Camera Actor directly, or You can right-click in the Level Viewport and use the context menu by selecting Place Actor then selecting the Camera Actor.

-
When you select your Camera in the Level, in the Viewport, a picture-in-picture window appears, representing the viewing angle of the Camera. The upper-middle portion of the picture-in-picture window displays the Camera name. In its lower-left corner, there is a pin icon, which provides the option to "pin" the window (keep it on screen when clicking off the Camera) is represented by a pin icon in the lower left corner of the window.

-
Select a Camera to populate the Details panel with settings that pertain to the Camera.

This Tutorial series covers working with and placing Cameras (ACameraActor) with C++ in Unreal Engine. A Camera can be used by itself and placed directly into a Level or it can be a part of a Blueprint (for instance, to provide a perspective for the player when flying a plane, driving a car, or controlling a character).
Creating And Placing a Camera Actor
-
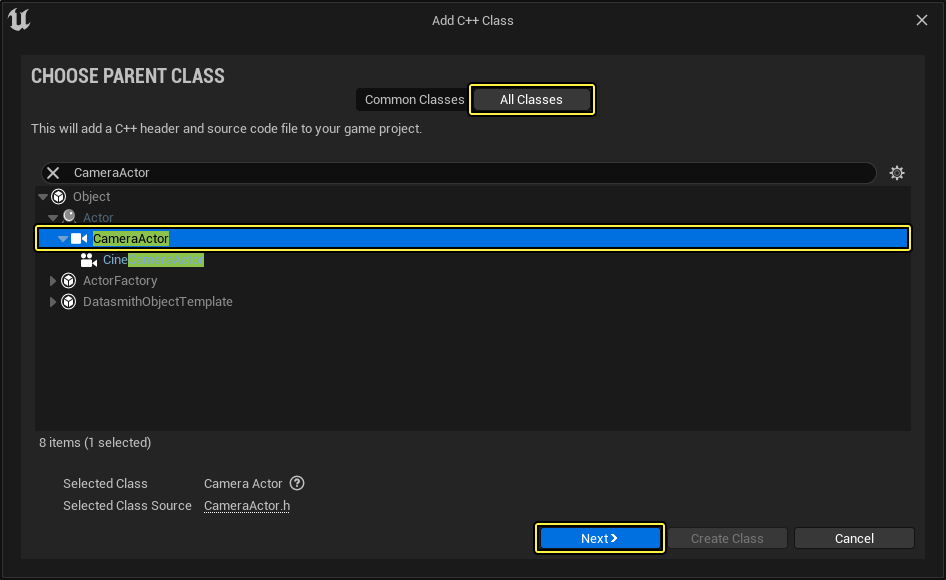
Create a Camera with the C++ Class Wizard. Launch the wizard, enable the box to Show All Classes, and, in the Search bar, type CameraActor to select and create your new Camera Actor class.
-
In the Sources panel, navigate back to your C++ classes folder and create a Blueprint class of your Camera Actor.

-
When you select your Camera in the Level, in the Viewport, a picture-in-picture window appears, representing the viewing angle of the Camera. The upper-middle portion of the picture-in-picture window displays the Camera name. In its lower-left corner, there is a pin icon, which provides the option to "pin" the window(keep it on screen when clicking off the Camera) is represented by a pin icon in the lower-left corner of the window.

-
Select a Camera to populate the Details panel with settings that pertain to the Camera.

Camera Actor Details Panel Overview
The following table is an overview of each section in the Details panel for a Camera Actor.
| Property | Description |
|---|---|
| Transform | This category represents the location of the Camera in the world. |
| Camera Settings | This category you to modify the type of projection used by the Camera, field of view, aspect ratio, and post process blending. |
| Auto Player Activation | Specifies which Player Controller, if any, should automatically use this Camera when the controller is active. |
| Film | In this category, you can apply film effects such as Tint, Saturation, or Contrast. See also Film. |
| Scene Color | Used to apply effects to the Camera. See also Scene Color. |
| Bloom | Simulates the effects the eye perceives when viewing bright objects. See also Bloom. |
| Light Propagation Volume | Used to achieve Global Illumination (GI) in real-time. See also Light Propogation Volumes. |
| Ambient Cubemap | Lights the scene from a provided image. See also Ambient Cubemap. |
| Auto Exposure | This simulates the human eye adjusting to bright/dark areas. See also Auto Exposure. |
| Lens Flares | Simulates the scattering of light when viewing bright objects through imperfections found in camera lenses. See also Lens Flares. |
| Ambient Occlusion | Approximates the attenuation of light due to occlusion. See also Ambient Occlusion. |
| Global Illumination | Affects the indirect lighting contribution coming from Lightmass in order to alter a scene's brightness, color, or tint. See also Global Illumination. |
| Depth Of Field | Applies a blur effect to a scene based on distance in front or behind a focal point. See also Depth Of Field. |
| Motion Blur | Generates a Motion Blur effect that blurs objects based on its motion. See also Motion Blur. |
| Misc | Applies Blendables (screen overlays), sets Anti-Aliasing methods or Screen Percentage options for the Camera. See also Blendables, Screen Percentage, or Anti-Aliasing and Upscaling. |
| Screen Space Reflections | Alters the appearance of objects on the surface of Materials. Enabled by default. See also Screen Space Reflection. |
| Activation | Determines whether or not the Camera is automatically enabled. |
| Tags | Provides you with Tags to place on the Actor. |
| Actor | Displays information pertaining to the Camera Actor itself. |
| Blueprint | Allows you to turn the Actor into a Blueprint or add Events to the Level Blueprint for the Actor. |
For information on using Cameras for cinematic purposes, refer to Cinematics and Sequencer overview page. Additionally, the In-Camera VFX Production Test provides an excellent resource for a sample cutscene and how it was constructed.
Now that you have an understanding of how to place a Camera Actor in your level, the examples below provide some ways in which you can use the Camera, including how to use a Camera as a viewpoint for a player, how to use a Camera Component as part of an Actor class, how to use a Spring Arm Component with a Camera Component (typically used for creating Third Person perspectives), and how to switch between Cameras during gameplay.