
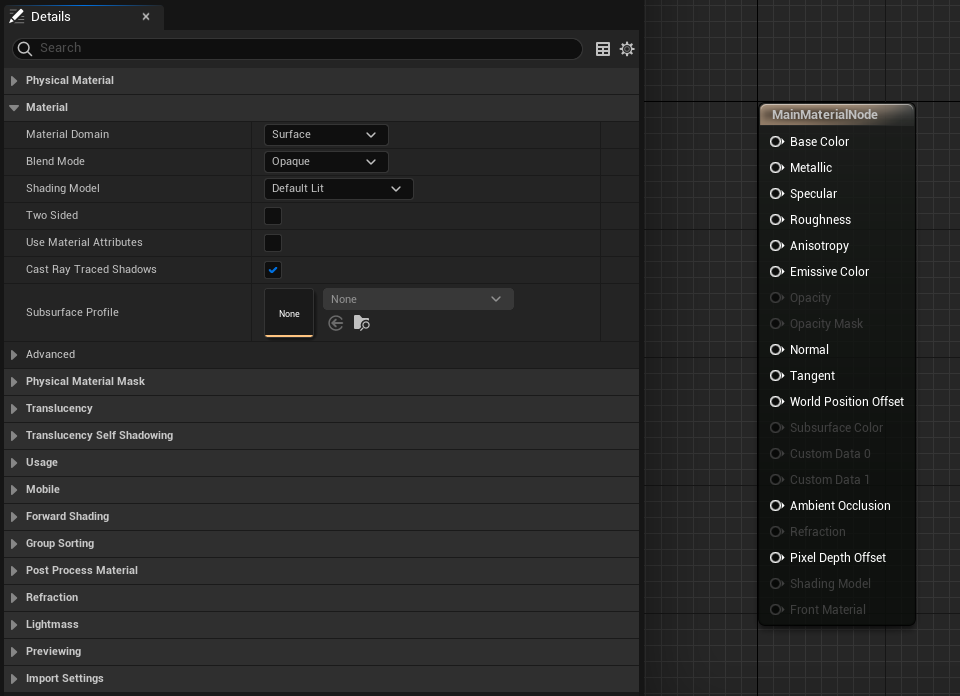
This document breaks down the properties available on a Material. These properties are displayed in the Details panel of the Material Editor when the Main Material Node is selected.
Material properties include:
- Physical Material
- Material Properties
- Physical Material Mask
- Translucency and Translucency Self Shadowing
- Usage Flags
- Mobile
- Forward Shading
- Group Sorting
- Post Process Material
- Refraction
- Lightmass Settings
- Previewing
- Import Settings
The properties listed above determine how what a Material can and cannot do, how it interacts with light and blends with the pixels behind it.. These properties are described below, presented in the order in which they appear in the Details panel.
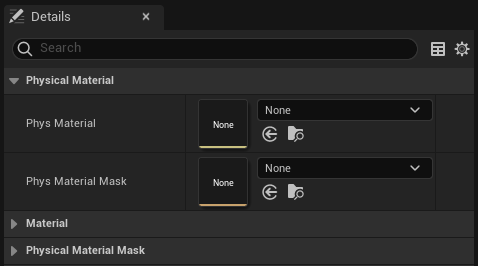
Physical Material
| Property | Description |
|---|---|
| Phys Material | The Physical Material associated with this Material. Physical Materials provide a definition of physics properties, such as how much energy is retained on collision (bounciness) and other physics-based aspects. A Physics Material has no influence over how a Material appears visually. |
| Phys Material Mask | A physical Material mask used for this graphics Material. Used for sounds, effects, and more. |
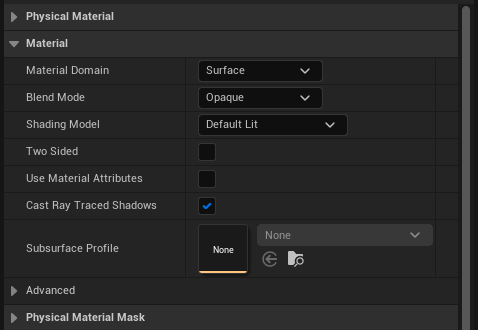
Material
| Property | Description |
|---|---|
| Material Domain | Material Domain allows you to define how you will use the Material. Certain Material uses (such as decals) require additional instructions for the render engine to consider. Because of this, it is important to set the Material Domain accurately, particularly when the Material is intended for something other than a surface. Material Domain includes the following options:
|
| Blend Mode | Blend Modes describe how the output of the current Material will blend over what is already being drawn in the background. Put more technically, it allows you to control how the engine will combine this Material (Source color) with what is already in the frame buffer (Destination color) when rendered. The available blending modes are:
For more information on these Blend Modes, read the Blend Modes documentation. |
| Shading Model | Shading Models determine how Material inputs (e.g. Emissive, Diffuse, Specular, Normal) are combined to make the final color.
For more information on these Shading Models, read the Shading Model documentation. |
| Two Sided | When Two Sided is enabled, the normal is flipped on back faces, which means lighting is calculated for both the front faces and the back faces. This is commonly used on foliage to keep from having to double up the number of polygons. Two Sided does not work correctly with static lighting, since the mesh still uses only a single UV set for light mapping. As a result, two sided Materials with static lighting are shaded the same on both sides. |
| Use Material Attributes | This checkbox causes the Material's primary node to be condensed down to a single input labeled "Material Attributes." This is useful when you need to blend multiple Materials using Layered Materials, or when defining multiple Material types using a Make Material Attributes expression node. See the Layered Materials documentation for more information. |
| Cast Ray Traced Shadows | This checkbox enables this Material to cast ray traced shadows when Ray Tracing features are enabled in the Project Settings. |
| Subsurface Profile | This allows you to change what Subsurface Profile is used in the Material. |
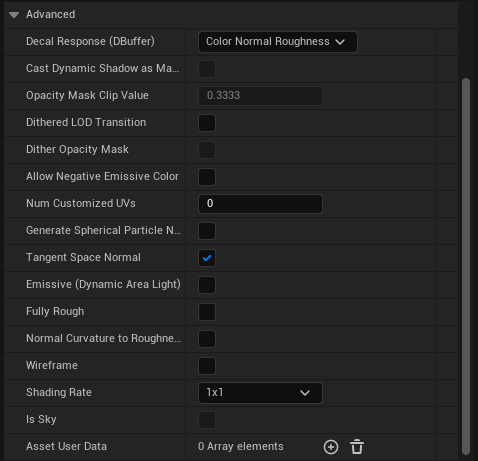
Advanced Material Properties
| Property | Description |
|---|---|
| Decal Response (DBuffer) | This defines how the Material reacts on DBuffer decals(Affects look, performance, and texture/sample usage). Non DBuffer Decals can be disabled on the primitive(e.g. static mesh) |
| Cast Dynamic Shadow as Masked | Whether the Material should cast shadows as masked even though it has a translucent blend mode set. |
| Opacity Mask Clip Value | This is the reference value which the OpacityMask input of masked Materials will clip against per-pixel. Any value higher than OpacityMaskClipValue will pass and the pixel will be drawn (opaque), any value lower will fail and the pixel will be discarded (transparent). |
| Dithered LOD Transition | Whether meshes rendered with this material should support dithered LOD transitions. |
| Dither Opacity Mask | When combined with Temporal Anti-Aliasing, this can provide a form of limited translucency which supports all lighting features. |
| Allow Negative Emissive Color | Whether the Material should allow outputting negative emissive color values. This is only allowed on Unlit Materials. |
| Num Customized UVs | This sets the number of Customized UV inputs to display. Unconnected customized UV inputs will pass through the vertex UVs. |
| Generate Spherical Particle Normals | This produces surface normals that remain spherical as you rotate around a Particle System that uses this Material. This is useful for volumetric Particle Systems, since the sprites always rotate to face the camera. With this option, they will have a more spherical volume appearance. |
| Tangent Space Normal | Tangent space normals are calculated from the surface of the object, with the Z-Axis (blue) always pointing directly away from the surface. World space normals use the world coordinate system to calculate pixel angle, ignoring the surface's original orientation. Tangent space calculations are slightly more costly in terms of performance, but are generally more convenient, as these are usually the types of normal maps you can create in 2D applications such as Photoshop. Visually, tangent-space normal maps tend to look primarily blue-ish, while world-space maps are more vividly rainbow-colored. |
| Emissive (Dynamic Area Light) | If enabled, the Material's Emissive color is injected into the Light Propagation Volume. |
| Fully Rough | Forces the material to be completely rough. This saves a number of material instructions and one sampler. |
| Normal Curvature to Roughness | Reduces the roughness based on screen space normal changes. |
| Wire Frame | Enables a wire frame view of the mesh the Material is applied to. |
| Shading Rate | Select what shading rate to apply for platforms that have variable rate shading. |
| Is Sky | Unlit and Opaque blend modes used in materials can be used as a Sky Material on a sky dome mesh. When enabled, these meshes will not recieve any contribution from the aerial perspective. Height and Volumetric Fog effects are still applied. |
| Asset User Data | An array of user data stored with the asset. |
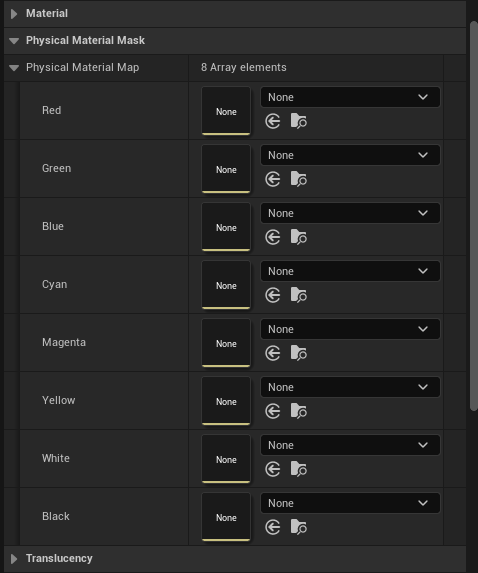
Physical Material Mask
| Property | Description |
|---|---|
| Physical Material Map | An array of Physical Material Maps for use with this Material. The mask slots are used to apply sounds, effects, or some other type of Physical Material to a desired color channel. |
Nanite
| Property | Description |
|---|---|
| Nanite Override Material | An override material which will be used when rendering with Nanite. |
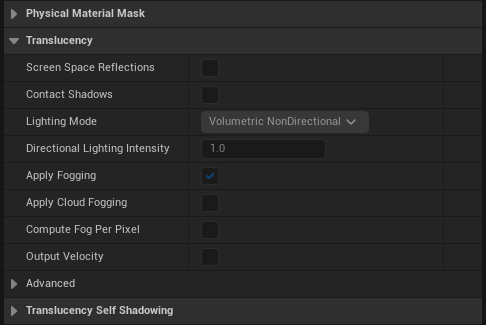
Translucency
| Property | Description |
|---|---|
| Screen Space Reflections | Enabling this supports screen space reflections (SSR) on translucent Materials. |
| Contact Shadows | Enabling this supports contact shadows on translucent Materials. |
| Lighting Mode | This allows for control over the lighting mode used by Translucency within this Material. This is especially useful for Particle Systems that are making use of Translucency, such as self-shadowing smoke or steam.
See Lit Translucency for more information on translucency usage in your Materials. |
| Directional Light Intensity | Useful for artificially increasing the influence of the normal on the lighting result for translucency. A value lareger than 1 increases the influence of the normal, a value smaller than 1 makes the light more ambient. |
| Apply Fogging | When enabled, translucent Materials are fogged. |
| Compute Fog Per Pixel | When enabled, translucent Materials have fog computed for every pixel, which costs more but fixes artifacts due to low tessellation. |
| Output Velocity | When enabled, translucent Materials will output motion vectors in the velocity pass. |
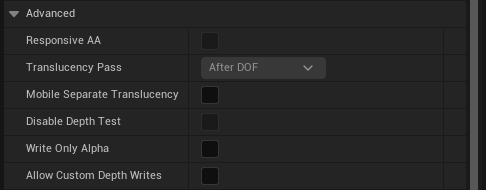
Advanced Translucency Properties
| Property | Description |
|---|---|
| Responsive AA (anti-aliasing) | Small moving objects, especially particles, can sometimes get obliterated by anti-aliasing. By setting this property to true, a different AA algorithm is used which provides more definition. Put another way, if you create a blizzard or similar particle system but cannot clearly see the snowflakes, this option should improve clarity. You should only use this option on small moving objects, because it creates aliasing artifacts on the background. |
| Translucency Pass | Indicates that the Material should be rendered in the Separate Translucency Pass (not affected by DOF, and requires "AllowSeparateTranslucency" to be set in the .ini file). |
| Mobile Separate Translucency | Enable this option to render the Material in the Separate Translucency Pass. This means that the Material is not affected by DOF and also requires you to set bAllowSeparateTranslucency in the .INI files). |
| Disable Depth Test | Allows the Material to disable depth tests, which is only meaningful with translucent blend modes. Disabling depth tests will make rendering significantly slower since no occluded pixels can get Z-culled. |
| Write Only Alpha | Whether the translucency pass should write its alpha, and only the alpha, into the framebuffer. |
| Allow Custom Depth Writes | Allows you to use a translucent Material with custom depth writing by compiling additional shaders. |
| Allow Front Layer Translucency | Allows a translucent material to be used with Front Layer Translucency by compiling additional shaders. Useful for controlling what should be included in Front Layer Translucency. |
Translucency Self Shadowing
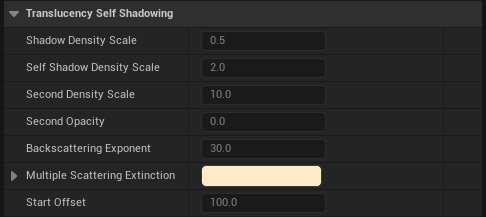
Translucent self shadowing is a nice way to create a volumetrically lit translucent object, such as a pillar of smoke or steam. The self shadowing is broken into two primary parts: Self Shadow Density and Second Self Shadow Density. The two parts exist to allow for variations. You can define the density of each independently and use the difference between the two to get interesting patterns throughout the self shadow.
| Property | Description |
|---|---|
| Shadow Density Scale | Sets the density of the shadow cast onto other surfaces by this translucent Material. This acts a bit like a master scale for shadowing; if set to 0, there is no shadowing whatsoever. As you increase the value to 1 and beyond, both the cast shadow and the self shadow will get darker. |
| Self Shadow Density Scale | Sets the density of the shadow this Material casts on itself. Consider shadows within a pillar of smoke. |
| Second Density Scale | This is a second self shadow density that can be set for variation. An internal gradient is created between this value and the Translucent Self Shadow Density Scale. |
| Second Opacity | This sets the opacity value for secondary self shadowing., serving as a way to scale the gradient effect between self shadow and second self shadow. |
| Backscattering Exponent | This controls the backscattering that is used when employing the Subsurface shading model along with Translucency. Larger values give a smaller, brighter backscattering highlight. This value is only used within volumetric translucent shadows formed from a directional light. |
| Multiple Scattering Extinction | This gives a colored extinction value for objects that have a volumetric translucent shadow, such as smoke or steam. This amounts to a tinited or colored shadow. |
| Start Offset | This is a world-space offset for the self shadow created within a translucent volume. The higher the number, the farther the shadow moves away from the lighting source. |
Usage
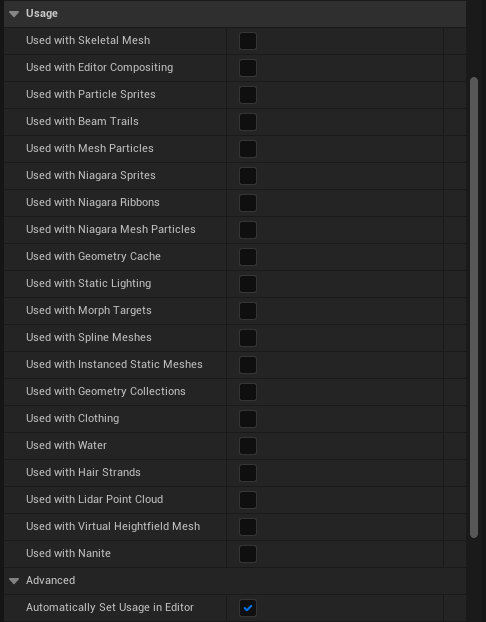
The Usage flags tell the Engine what sort of surface you intend to apply the Material on. These settings allow the Engine to compile special versions for each application. These are only valid when using the Surface Material Domain setting.
In the editor, these flags are set automatically for any objects that already exist within your maps. For instance, if you have a Particle System that uses your Material placed somewhere in a level, when you load that map in the editor, it will automatically set the Used with Particle System flag. You must save the Material asset to allow the game to use the Material on that specific mesh.
If you do not have the appropriate usage flag set, the default world grid material will be used in-game instead. This will have an appropriate message in the log of the game client.
| Property | Description |
|---|---|
| Used with Skeletal Mesh | Set this if the Material will be placed on a Skeletal Mesh. |
| Used with Editor Compositing | Set if the Material will be used with the Editor UI. |
| Used with Particle Sprites | Used if this Material will be placed on a Particle System. |
| Used with Beam Trails | Set if the Material will be used with Beam Trails. |
| Used with Mesh Particles | Indicates that the Material and its instances can be used with mesh particles. This will result in the shaders required to support mesh particles being compiled which will increase shader compile time and memory usage. |
| Used with Niagara Sprites | Set if the material will be used with Niagara Sprites. |
| Used with Niagara Ribbons | Set if the material will be used with Niagara Ribbons. |
| Used with Niagara Mesh Particles | Set if the material will be used with Niagara Mesh Particles. |
| Used with Geometry Cache | Set if the material will be used with Geometry Cache. |
| Used with Morph Targets | Set if this Material will be applied to a Skeletal Mesh that utilizes a Morph Target. |
| Used with Spline Meshes | Set if the Material will be applied to Landscape Spline meshes. |
| Used with Instanced Static Meshes | Set if the Material is intended to be applied to Instanced Static Meshes. |
| Used with Geometry Collections | Set if the material is intended to be used with geometry collections. |
| Used with Clothing | This should be set if the Material will be applied to Apex physically simulated clothing. |
| Used with Water | Used with materials that are intended to be used with Water mesh surfaces. |
| Used with Hair Strands | Used with materials that are intended to be used with hair grooms. |
| Used with Lidar Point Cloud | Used with materials that are intended to be used with Lidar Point Clouds. |
| Used with Landscape | Set if the Material will be used on a Landscape surface. |
| Used with UI | This indicates that this Material and any Material Instances can be used with Slate UI and UMG. |
| Automatically Set Usage in Editor | Whether to automatically set usage flags based on what the Material is applied to in the Editor. The default option for this is enabled. |
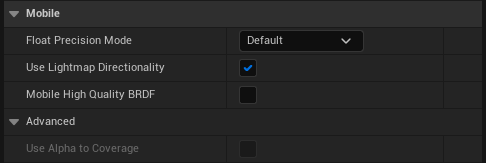
Mobile
| Property | Description |
|---|---|
| Full Precision Mode | Forces this Material to use full (highp) precision in the pixel shader. It is slower than the default (mediump) but provides a workaround for precision-related rendering errors. This setting has no effect on older mobile devices that do not support high precision. |
| Use Lightmap Directionality | This will use lightmap directionality and per pixel normal's. If disabled, lighting from lightmaps is flat but cheaper. |
| Mobile High Quality BRDF | Use the high quality brdf functions on mobile to get better visual effects. This adds GPU cost. |
Advanced Mobile Properties
| Property | Description |
|---|---|
| Use Alpha to Coverage | Use alph to coverage for masked materials on mobile. Multi-sampling anti-aliasing (MSAA) must be enabled for this setting to work. |
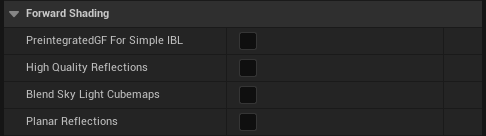
Forward Shading
| Property | Description |
|---|---|
| Preintegrated For Simple IBL | Forward (including mobile) renderer uses preintegrated GF LUT for simple IBL, but will use one more sampler. |
| High Quality Reflections | The forward renderer enables multiple parallax-corrected reflection captures that blend together. The Mobile forward renderer blends between the nearest three reflection captures, but reduces the number of samplers available to the Material as two more samplers are used for reflection cubemaps. |
| Blend Sky Light Cubemaps | Enables blending of sky light cubemap texture. When disabled, the secondary cubemap is only visible when the blend factor is 1. |
| Planar Reflections | Enables planar reflection when using the forward renderer or on mobile. Enabling this setting reduces the number of samplers available to the Material as one additional sampler is used for planar reflection. |
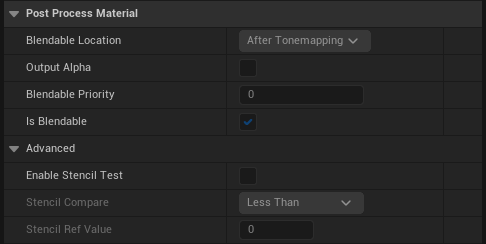
Post Process Material
| Property | Description |
|---|---|
| Blendable Location | If this Material is used as a Post Process Material, this property allows you to control whether the Material is calculated before or after Tonemapping. This is important if your Material is used to modify the color of the Post Process. |
| Output Alpha | If enabled, the blendable will output alpha. |
| Blendable Priority | If multiple nodes with the same type are inserted at the same point, this defines the order and whether or not they get combined. Only used if Material domain is set to PostProcess. |
| Is Blendable | Allows blendability to be turned off. It is only used if the Material Domain is set to Post Process. |
| Advanced Properties |
Advanced Post Process Material Properties
| Property | Description |
|---|---|
| Enable Stencil Test | Selectively executes post process Material only for pixels that pass the stencil test against the Custom Depth/Stencil buffer. Pixels that fail the stencil test are filled with the previous post process Material output or scene color. |
| Stencil Compare | Use the dropdown to compare the stencil test. |
| Stencil Ref Value | Set a stencil reference value. |
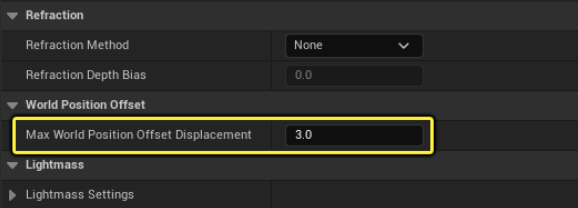
Refraction

| Property | Description |
|---|---|
| Refraction Method | This controls the type of refraction that will be employed by your Material.
|
| Refraction Depth Bias | This property offsets the depth of the refraction test. This is useful when refraction values are causing unwanted nearby objects (typically in front of the translucent object) to render into the Material surface. Higher values will offset distortion to separate refractions. However, this causes a visible break between the surface and the refracted objects. This property is not enabled unless you have connected some expression node into the Refraction input. |
World Position Offset
| Property | Description |
|---|---|
| Max World Position Offset Displacement | Specifies the max world position offset of the material. Use this value to resolve issues with culling and self-occlusion caused by world position offset, and to restrict how much offset is permitted. For example, values can be clamped on each axis. Note that a value of 0 effectively means "no maximum" to the offset and will not clamp the offsets. However, it will also not extend the culling bounds of the object either. |
Max World Position Offset Displacement Usage
There are times when you want to limit how much offset is permissible by World Position Offset in a material to mitigate artifacts from occurring, such as having geometry pushed too far outside of an object's bounds because it can result in visual artifacts and culling issues. These types of issues are more pronounced with Nanite meshes because they are split into smaller clusters. Each of those clusters have their own individual bounds and are culled individually on the GPU. Clamping WPO is a good way to manage this, and is useful for Nanite and non-Nanite geometry.
Use Max World Position Offset Displacement to limit the upper bound of the material's WPO to prevent typical WPO artifacts. When set to 0, the material acts as if it's not clamped, which is the legacy behavior.
This setting can be overridden in Material Instances. It is useful when a parameter's override has an effect on the magnitude of the WPO. You can override the Max World Position Offset Displacement supplied by the parent material in under the Material Property Overrides section.
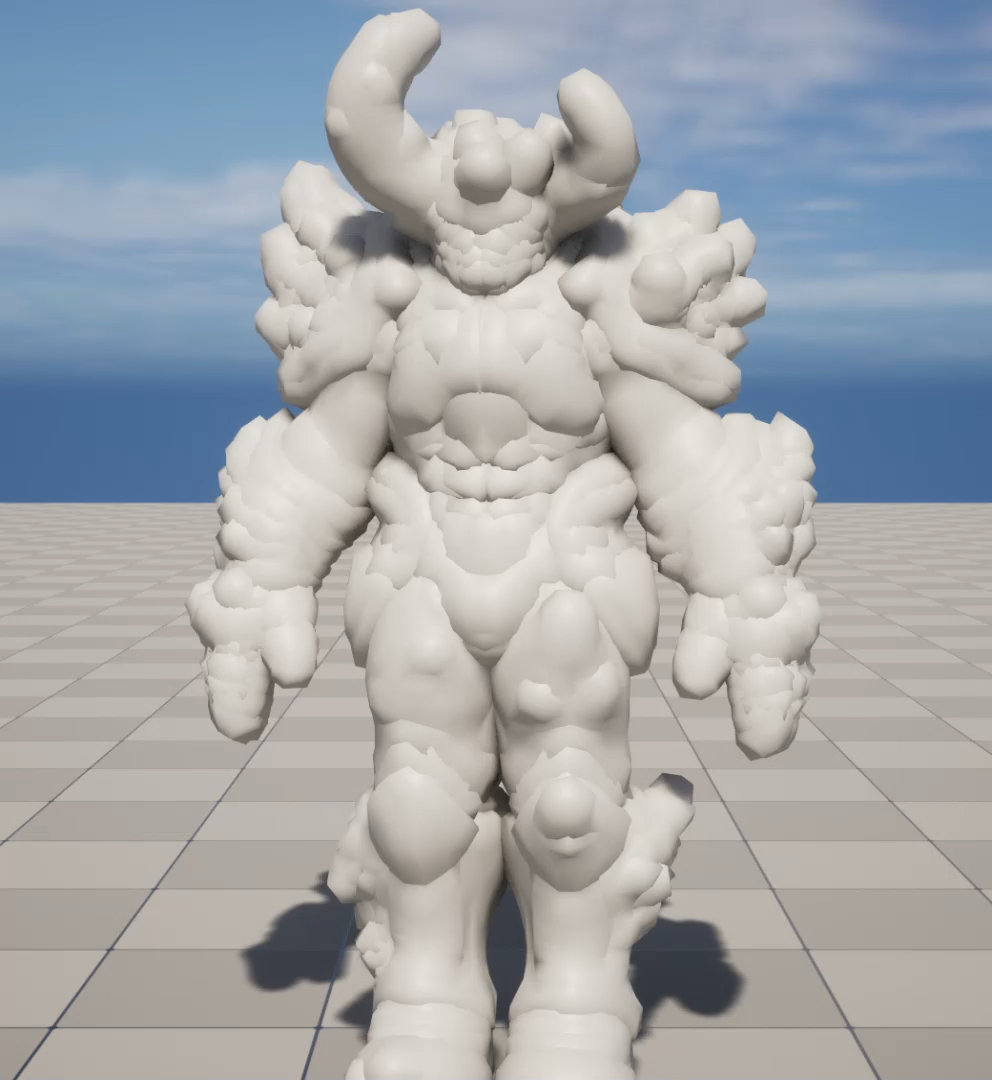
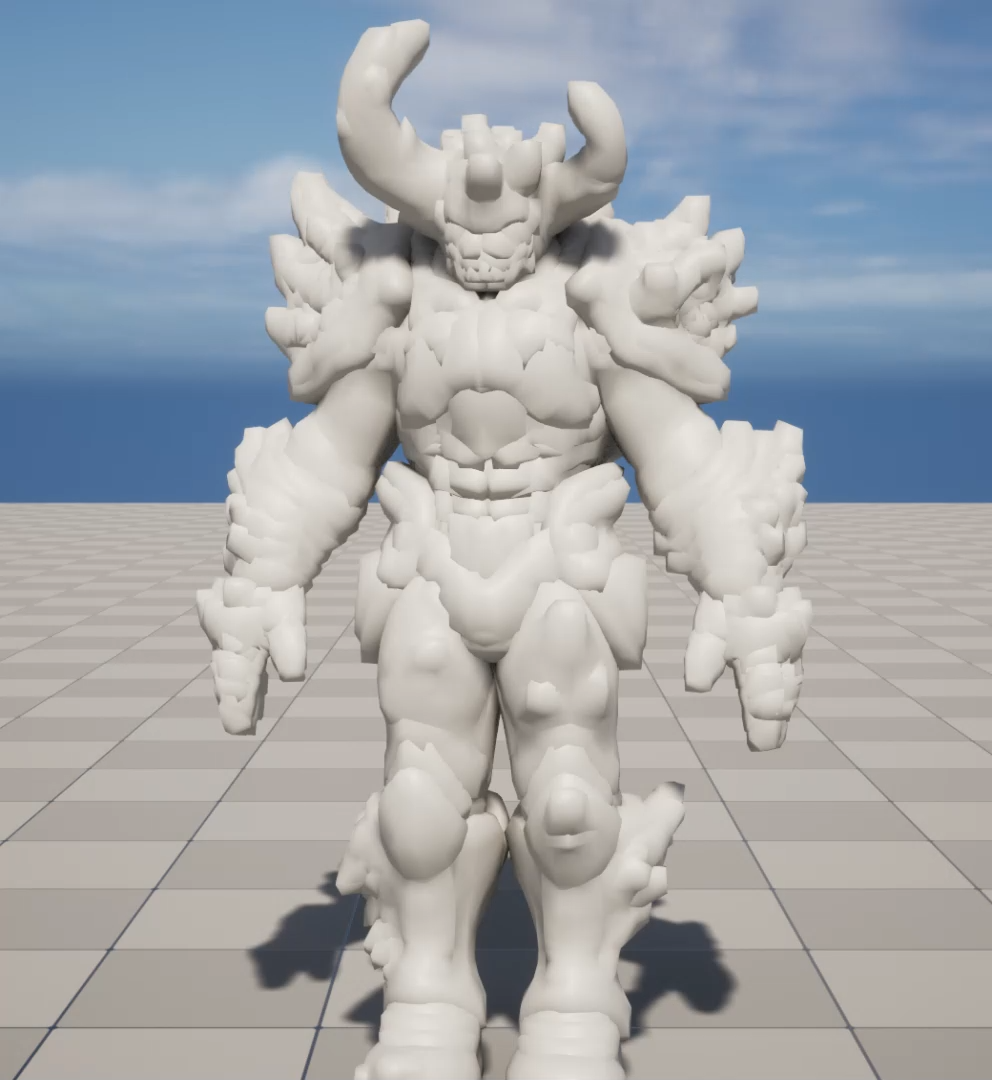
Meshes whose materials have a Max World Position Offset Displacement greater than zero automatically push the mesh's boundaries out by that amount. Pushing boundaries enforces the upper bound to prevent the mesh from ever exceeding the maximum offset. The mesh is never able to render outside of its bounds, preventing visual artifacts due to "popping." Clamping the WPO in the material doesn't come without its own artifacts, though. Offsets intended to be uniform could appear squished or flattened in places (see below). Another example is that animation driven by WPO that should be smooth or continuous may stall or hitch.
The example below shows a mesh with some amount of WPO displacement applied. Both meshes have the same amount of displacement but the one on the right is clamped by its Max WPO Displacement. Areas around the hands, knees, and horns have noticeable clamping compared to other parts.
In the example below, the WPO material animates the offset in the direction of the vertex normal using a sine wave. The material has an offset magnitude of 5.0. Applying a Max World Position Offset Displacement of values greater than 0 and less than the offset magnitude demonstrates how the offset can be clamped using this setting.
You can use the Out of Bounds Pixels show flag to inspect objects whose WPO is getting clamped. You can find it in the Level Viewport under the Show > Visualize menu.
The Out of Bounds Pixels show flag illuminates parts of the mesh that have been clamped due to the magnitude of the material's World Position Offset exceeding its Max World Position Offset Displacement.
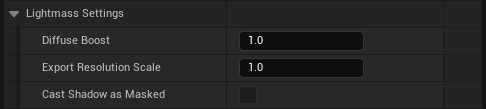
Lightmass
| Property | Description |
|---|---|
| Diffuse Boost | A multiplier for the amount of influence the diffuse component of the Material has on static lighting. |
| Export Resolution Scale | A multiplier for the resolution at which this Material's attributes are exported. This should be increased when details are needed. |
| Cast Shadow as Masked | If true, lit translucent objects will cast shadows as if they were using Masked lighting mode. This can help get sharper shadows on translucent objects. |
Previewing

| Property | Description |
|---|---|
| Preview Mesh | Sets a Static Mesh used to preview the Material in the Preview viewport. |
Import Settings

| Property | Description |
|---|---|
| Asset Import Data | A selection of import data types and options relevant to the selection for use with this Material. For example, selecting Fbx Texture Import Data provides its own set of properties that affect this import type. |