
Materials in Unreal Engine define the surface properties of the objects in your scene. In the broadest sense, you can think of a Material as the "paint" that is applied to a mesh to control its visual appearance.
More specifically, Materials tell the engine exactly how a surface should interact with the light in your scene. Materials define every aspect of a surface, including color, reflectivity, roughness, transparency, and so on.
Shading Pipeline Overview
In a rendering pipeline, shaders are programs that define how each vertex or pixel should be rendered. Shaders in Unreal Engine are written in High Level Shading Language (HLSL). Shader code is then converted to a list of Assembly Language instructions that the GPU hardware can execute. This is how the final pixel colors are output to your display.
In the Unreal Editor you do not need to write HLSL code to create shaders for your project. Instead, you will create assets called Materials in a visual scripting interface called the Material Editor.
Materials
Materials are built by combining nodes called Material Expressions in a shader graph and passing the results into the inputs on the Main Material Node.
Behind the scenes, these node graphs are silently translated to HLSL. As a user, you can view the HLSL code but cannot edit it directly. This makes Material creation in Unreal Engine intuitive and approachable.
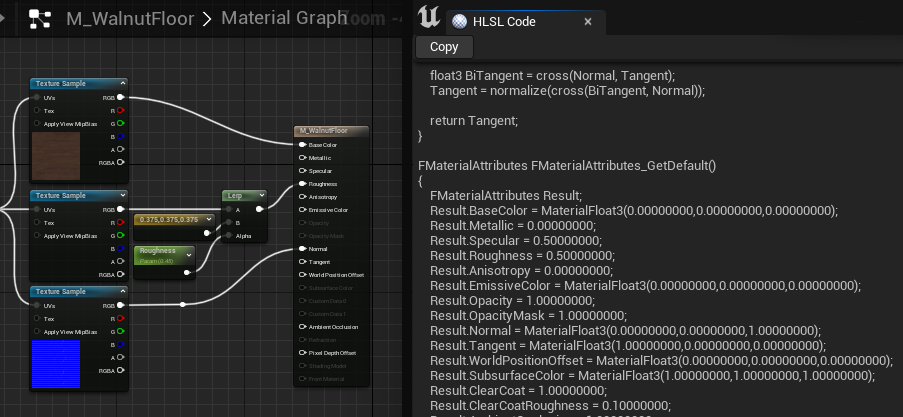
You can view the HLSL code of a Material by going to Window > Shader Code > HLSL Code in the Material Editor. Note that the HLSL Code tab is read-only. You cannot directly edit HLSL shader code within the Unreal Editor.
Materials Workflow Overview
This section provides a high-level overview of the Material creation process in Unreal Engine.
This is not a comprehensive step-by-step guide, but a broad conceptual overview. Read the pages in the Material Editor User Guide for detailed information about working in the Material Editor.
Creating a New Material
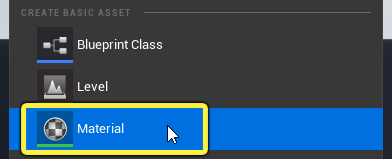
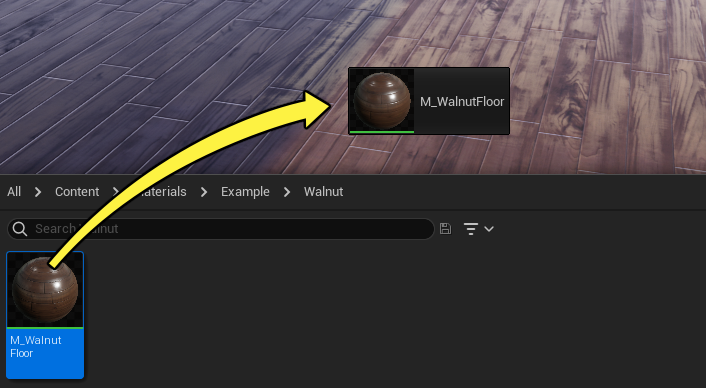
Materials in Unreal Engine are an asset class just like Static Meshes, Textures, or Blueprints. You can create new Materials from the Content Browser.
- Right-click in the Content Browser
-
Select Material in the Create Basic Asset setion of the context menu.
-
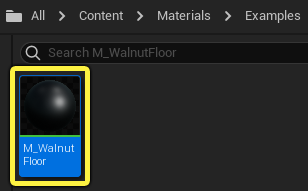
A Material is created in the Content Browser. Give it a unique and descriptive name.
Double-click the Material asset to begin editing the Material. The Material Editor window opens as shown below.
Click the image to enlarge.
The highlighted region is called the Material Graph, and this is where you will do the majority of your work while creating Materials. The Material Graph in a new Material is empty except for the Main Material Node, which contains all the inputs that dicate the appearance and behavior of the Material.
For a detailed breakdown of the Material Editor UI, read here.
Material Properties
When the Main Material Node is selected, the global Material properties and settings display in the Details panel. You can also display the Material properties by clicking any empty space in the Material Graph.
Three of these settings are particularly important at the beginning of the Material creation process, as they form the underlying foundation of a Material and dictate how it can be used.
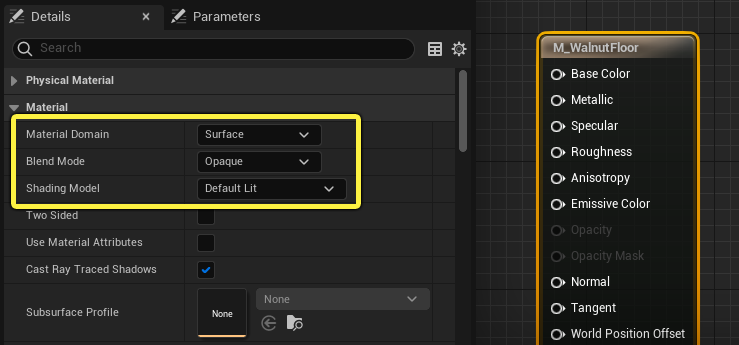
- Material Domain – Defines what the Material will be used for in your project. For example, Surface, User Interface, and Post-process Materials are different Material Domains.
- Blend Mode – Defines how the Material blends with the pixels behind it. For example, Opaque shaders completely occlude objects behind them, whereas Translucent and Additive shaders blend with the background in some way.
- Shading Model – Defines how the Material interacts with light. Very often your Materials will simply use the Default Lit shading model. However, Unreal Engine includes specific Shading models for things like Hair, Cloth, and Skin which provide context-specific inputs to make it easier to create those types of surfaces.
These properties determine exactly which inputs are enabled on the Main Material Node. In the image above, Opacity is grayed out because the Opaque blend mode does not support transparency.
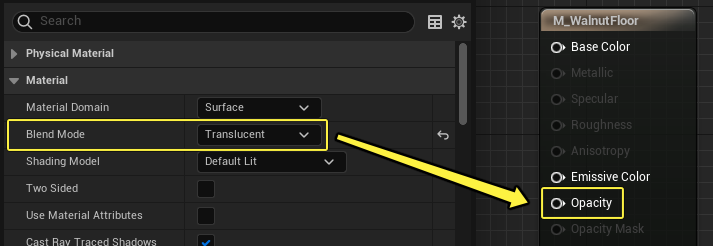
If you select the Translucent Blend Mode, the Opacity input is enabled, and several inputs that were previously enabled are grayed out.
When you create a new Material, it is recommended that you configure these three properties first.
Read the Material Properties documentation for information about the rest of the properties in the Details panel.
Material Expression Nodes
If Material properties are the foundation, Material Expressions are the building blocks of a Material.
Each Material Expression performs a specific action in the Material Graph. Technically, a Material Expression is simply a visual representation of a snippet of HLSL code. When you combine Material Expressions you are writing an HLSL shader without ever seeing the code itself.
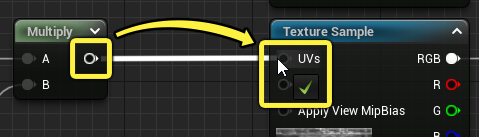
Data is passed between Material Expressions by dragging a cable connection from the output pin of one node to an input pin of another.
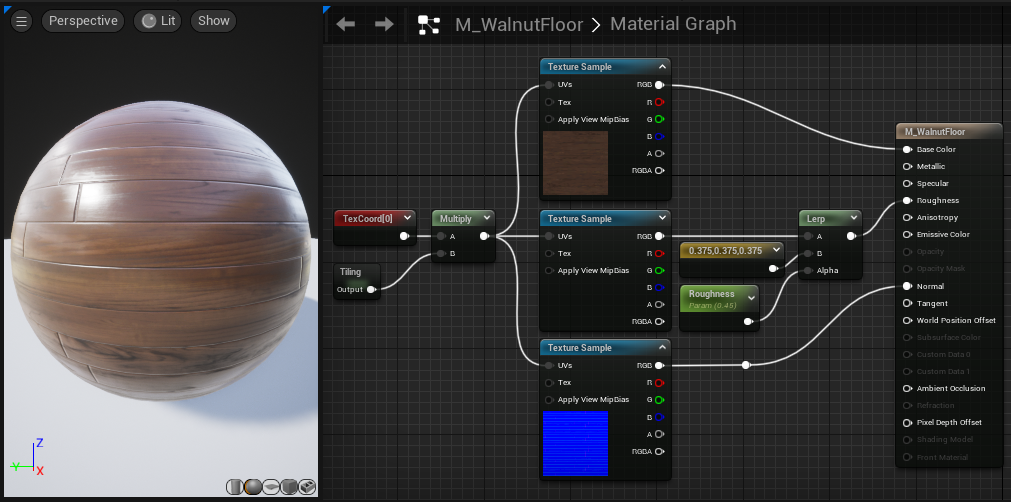
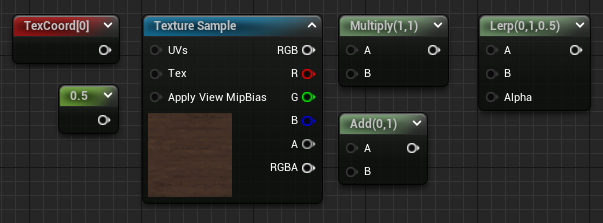
Simple surfaces might only require a few Material Expressions to define the Material, as below where the three texture samples carry most of the weight. The only other nodes in this graph are there to give artists finer control over the Roughness strength.
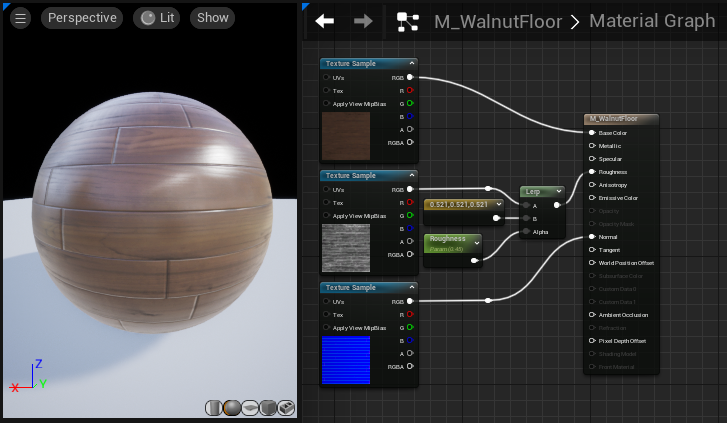
This could be a finished Material, or you could continue refining the surface using math and logic in the Material Graph. Understanding how to combine Material expressions to achieve specific results in your Materials is the basis of Material Creation in Unreal.
Read here to learn how to place Material Expressions in your graph.
Unreal Engine includes dozens of Material Expression nodes. Most of them have mouseover tooltips, but you can read the Material Expressions Reference pages to learn what each node is used for.
Material Expression Properties and Values
Each Material Expression has a set of properties and values you can view and modify in the Details Panel when the node is selected. In some cases these values are also editable directly on the node itself in the Material Graph.
Material Expression properties generally fall into a few categories.
Float Values
These values reflect the data stored by the node or used in the operation performed by the Material Expression. Examples include the values defined by Constant Material Expressions, or the arithmetic operators in Math Material Expressions. You can set these values in the Details Panel, inline on the node itself, or by passing data into the input pins on the node.
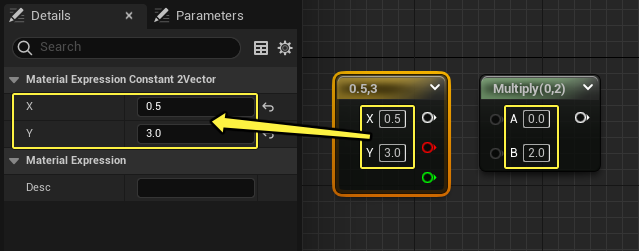
Values set in the Details Panel or inline are automatically overidden if data is passed into the input pin associated with that property.
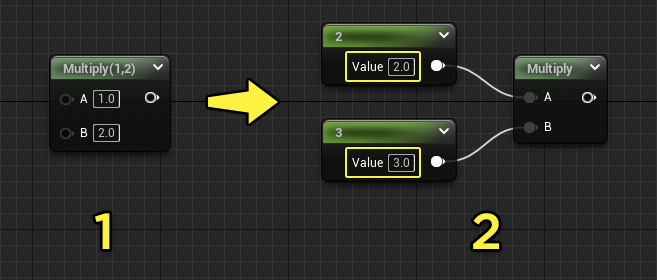
- The Multiply node on the left performs the operation 1 * 2 and outputs a value of 2.
- When Constants are plugged into that same Multiply node, the values connected to inputs A and B supercede the values in the Details Panel. This node performs the operation 2 * 3 and outputs a value of 6.
Feature Toggles
Material Expression properties also include toggles and dropdown menus to enable or disable features of that node or alter the way the node functions. For example, the View Property node has a dropdown selector to choose which View Property is output by the node. Similarly, the Component Mask node has a set of toggles that determine which data is allowed to pass through the outputs.
Variable Data
In some cases nodes will contain variables that enable you to reference the data in that Material Expression elsewhere, such as in Blueprint or code. Parameter names, Sort Priority, and Custom Primitive Data Index are examples of this kind of property. These values are usually integers or text strings.
Inline Editing of Values and Properties
Many of the most commonly used Material Expressions include the ability to edit constant values and properties on the node itself in the Material graph. For these expressions, you no longer need to select the node and edit values in the Details Panel, but can modify values using input fields on the node itself.
Click image to enlarge.
Some Material Expressions have inline properties that are not visible by default. You can click the dropdown caret at the bottom of a Material Expression to expand the node and display additional properties.
The Main Material Node
Data flows from left to right in the Material Graph, and the Main Material Node is the end-point of every Material network.
The Main Material Node contains the final input pins that determine what information is compiled with the Material. Material Expressions in your graph do not affect the Material unless they are part of a chain that connects to the Main Material Node.
In the video above, notice that the Material preview only updates once the Texture Samples are connected to their corresponding inputs on the Main Material Node.
Every input on the Main Material node defines a specific aspect of the overall Material. These two pages will help you understand what each input is used for:
- Physically Based Materials – Explains the principles and best practices of a Unreal's Physically Based Materials workflow.
- Material Inputs – Explains what each input on the Main Material Node does.
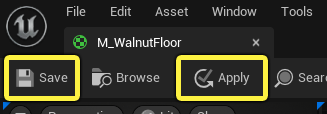
Compile and Apply
Changes to a Material cannot be seen in the level until the Material is compiled. To compile a Material, click the Apply or Save button in the toolbar at the top of the Material Editor.
After compilation, you can drag a Material directly from the Content Browser onto any Actor in your level.
Compilation can take a few seconds, or up to several minutes for complex Materials. This can potentially bottleneck your efforts when developing and testing Materials, but there are several ways to minimize compilation delays.
Material Instancing is one strategy to improve iteration time and avoid lengthy compilation delays while you work. Read more about instancing below.
Material Editor User Guide
The procedure outlined above covers the basic Materials workflow in Unreal Engine. Each one of the steps discussed above is documented more comprehensively in the Material Editor User Guide.
It is recommended you read these pages to get started with Material creation:
- Material Editor User Interface
- Placing Material Expressions and Functions
- Using the Main Material Node
- Previewing and Applying Materials
- Organizing a Material Graph
Workflow Efficiency Concepts
The Materials you create are very rarely single-use assets. Authoring an entirely new Material for every Actor in your project is inefficient, particularly because similar assets tend to require very similar Materials.
Material Instances and Material Functions make it easier to customize and reuse Materials so that you can iterate faster and avoid doing the same work twice.
Material Instances and Parameterization
Material Instances provide a way to quickly create multiple variations, or instances, from a single parent Material.
Instances are used when a group of related assets require the same basic Material, but with different superficial characteristics. An example might be a piece of furniture that has several color variations.

Material Instancing lets you create a single parent Material for the furniture set. You would then create a Material Instance for each color, as shown above on the chairs.
There are several advantages gained from using instances:
- You can customize Material Instances without recompiling the parent Material. This means changes you make to instances are visible immediately, in all viewports.
- You can expose parameters to artists in the Material Instance Editor. This means they can quickly and intuitively create variations of a Material without ever editing the more complicated node graph.
Read the Material instances learning track here.
Material Functions
Material Functions enable you to package parts of a Material graph into a reusable asset that you can share to a common library and easily insert into other Materials.
Their purpose is to streamline Material creation by giving instant access to commonly used networks of Material nodes.
For example, the Blend_Overlay function shown below contains the entire Material expression network shown on the right side of the image. Instead of constructing this node network over and over, you can insert it directly into your graph from the function library.
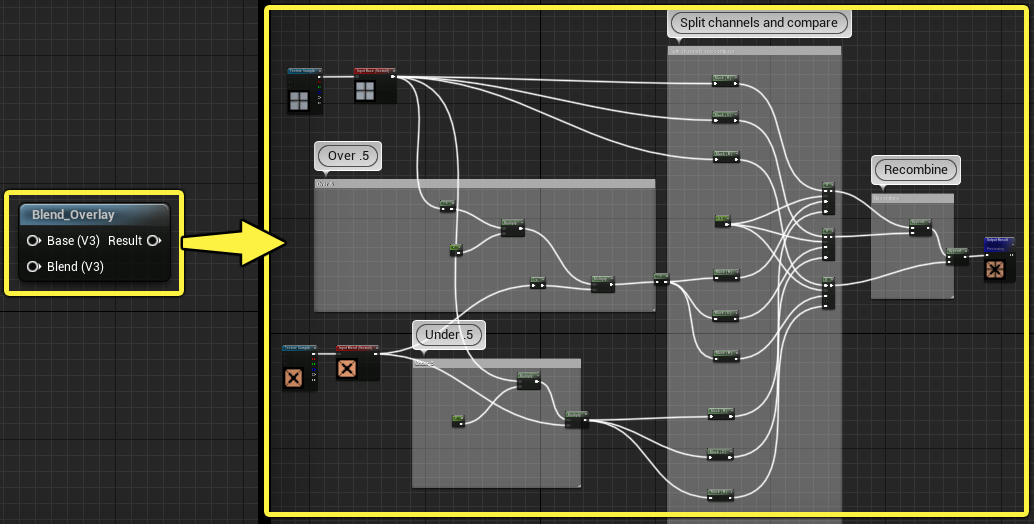
The Unreal Editor includes several dozen premade Material Functions. You can edit any Material Function to alter its behavior or create your own functions directly in the editor.
Read more about creating and using Material Functions here.
Working with Color and Data
Unreal Engine uses the RGBA color model, meaning every pixel is defined by four values which represent the Red, Green, Blue, and Alpha channels.
For example, RGBA values of (0.0, 0.0, 1.0, 1.0) describe a pixel that is pure blue and fully opaque. In the Material Editor, a set of four values like this is called a float4, because it stores four floating-point values.
All the information that travels through a Material Graph is represented by floating-point values, but values are not always stored in sets of four as in the example above. There are four data types in the Material Editor:
| Data Type | Definition | Example |
|---|---|---|
| Float | Stores a single floating-point value | (1.0) |
| Float2 | Stores two floating-point values | (1.5, 2.0) |
| Float3 | Stores three floating-point values | (0.0, 1.0, 3.5) |
| Float4 | Stores four floating-point values | (0.5, 1.0, 0.2, 0.9) |
Nodes and input pins in the Material Editor are generally designed to accept a specific kind of data. For example, many Material Expressions that perform per-channel operations will only work when the correct data type is passed into their inputs.
Because of this, it is crucially important to understand the four data types listed above, and know the techniques and strategies you can use to manipulate data and control the way information flows through your graph. The two pages linked below are strongly recommended as you continue your introduction to Unreal Engine Material creation.