This sample game project is deprecated, and is not supported for any version of the Unreal Engine after 4.24. Please make sure you have an appropriate engine version installed before loading this project. For more information on updating a project to the latest engine version, refer to Updating to the Latest Changes from Epic.
This document refers to a sample game project called Strategy Game. You can find this project by doing the following:
- Click the Learn tab in the Epic Launcher and scroll down to the Legacy Samples section.
- Click the image for Strategy Game to see a description of the project. Click the yellow button named Free.
- After a short time loading, the button will change to Create Project. Click this button and the launcher will prompt you to choose a project name and location.
- Click Create and the project will download to your designated folder.
The Tower Defense sample is an example of a RTS/Tower Defense game.
A complete list of the featured concepts:
- Simple AI Logic
- Automated Pawns
- Top-view Camera
- Building Construction
- Main Menu
- In-Game HUD with Combination of Canvas Drawing and Slate Widgets
- In-Game Menu
In the Tower Defense, the player must defend their brewery by building arbalest, auto-arbalest, and flamethrower turrets, which can be supplemented with minion Pawns. The Pawns can be outfitted with hammers and shields if upgrades are purchased for their brewery. Turrets, minions, and upgrades all cost gold, which can be harvested from gold nodes and also collected upon killing enemies. If the player can survive the five waves of enemies, including a final boss, without losing their three lives, they win the game!
AI Logic and Automated Pawns
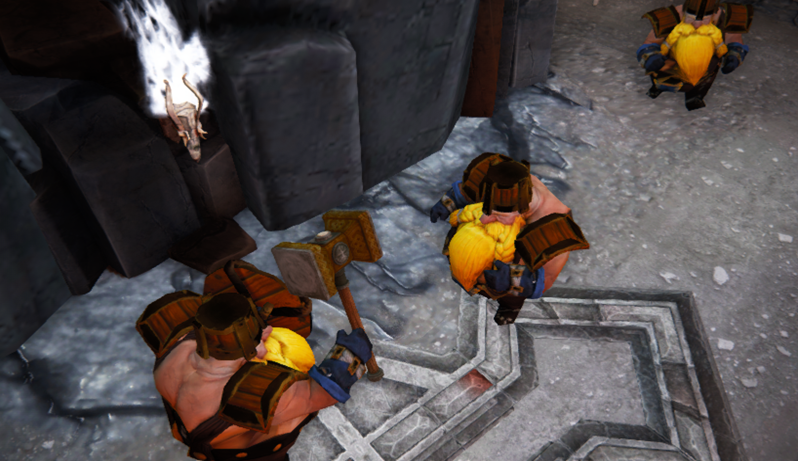
The AI logic in Tower Defense is a simple finite-state machine (FSM) implementation. The two possible states are moving toward the enemy base and attacking enemies, both of which are
separate classes inherited from StrategyAIAction. The states are in a priority array, with the most important action first. This array is iterated and the most suitable action to execute is
selected, and the current action can be stopped if there is an action with higher priority to be executed.
Both enemy and friendly Pawns operate with the AI logic, moving towards the opposing base and attacking Pawns of the other team if they encounter them. While players cannot control the movement or behavior of their friendly Pawns, they are able to buy new units to spawn.
Blueprint are also used to add logic to Minion Pawns. Both friendly and enemy Pawns can be equipped with shields; friendly Pawns get shields if the armory upgrade has been purchased for the brewery, and enemy Pawns get shields if they were spawned due to the SpawnHeavyFunction or SpawnEndBossFunction being called in the Level Blueprint. If a Pawn has a shield, projectiles from the auto-arbalest will be destroyed and do no damage. This logic is carried out using Blueprint Interfaces. The Minion Blueprint also contains a network to slow down enemy Pawns when they are hit by a charged-up fire turret.
Building Construction
There are two building classes in Tower Defense - StrategyBuilding and StrategyBuilding_Brewery. All the turret types in Tower Defense, as well as the empty building slot, are designed using
Blueprint with StrategyBuilding as the parent class. Players can click on an empty building slot to show the context menu and select a new building to construct. When a building is constructed, the empty building slot is destroyed and the new building is spawned.
There is a mechanism in place for upgrading buildings as well. The StrategyBuilding_Brewery class implements this case so that upgrades are built in connected slots near the brewery base.
Again, the code in Tower Defense simply creates the base building classes. All logic and design of the buildings in the Tower Defense were made by level designers in Blueprint.
Brewery
The Brewery Blueprint has the parent class StrategyBuilding_Brewery, and also includes an AIDirector component. There are two breweries placed in the TowerDefenseMap, one for the enemy where enemy
Pawns spawn, and one friendly brewery where an armory and a smithy upgrade can be built, and friendly Pawns can be spawned. There is no graph logic present in the Brewery Blueprint, just Defaults set for the
building properties and a Components list including the AIDirector, a TriggerBox, and a Static Mesh.
Upgrades
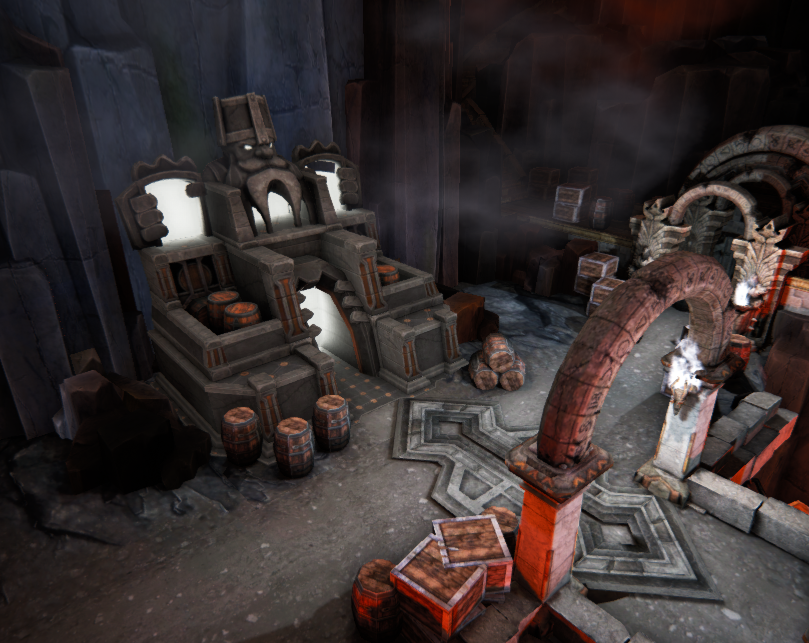
There are two upgrade slots attached to the friendly brewery. These slots are Blueprint Classes which are also derived from the StrategyBuilding class. If an upgrade is selected from the Brewery menu,
one slot will be replaced by that upgrade. Only one smithy upgrade and one armory upgrade can be purchased.
Once a smithy upgrade is purchased, the build will be started, firing the OnBuildStarted event in the Wall_Smithy Blueprint. This Blueprint also informs the system that the upgrade has been built,
once the build completes. After this point, any friendly Pawns that are spawned will be equipped with a shield attachment, a Blueprint derived from the StrategyAttachment class. The network which assigns the
"shield-attaching" behavior after the armory reports that it has been constructed is present in the PlayerBaseUpgrades collapsed graph in the TowerDefenseMap Level Blueprint. The StrategyAttachment
class simply contains a SkeletalMeshComponent; the mesh and attachment point for the attachment are set in the Defaults for the Attachment_Armorer Blueprint.
The armory Blueprint contains the same logic setup with OnBuildStarted and OnBuildFinished events. After construction of the armory, any friendly Pawns spawned will be equipped with a hammer, also derived from the
StrategyAttachment class. The network which assigns the "hammer-attaching" behavior after the smithy reports that it has been constructed is also present in the PlayerBaseUpgrades collapsed graph in the TowerDefenseMap Level Blueprint.
Turrets
Empty Slot
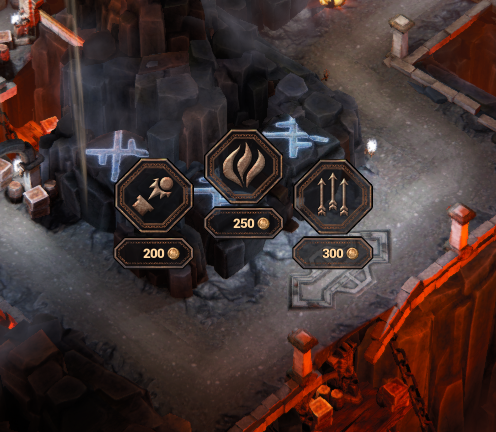
The empty slot is also a Blueprint with the StrategyBuilding parent class, Wall_EmptySlot. No logic is present in the Blueprint graphs. This is a Blueprint Class with Defaults set for building
properties and Static Meshes and a trigger box set as the Components.
The possible turret upgrades are all set in the Defaults of the Wall_EmptySlot Blueprint, in the Upgrades section of the Building category.
Arbalest
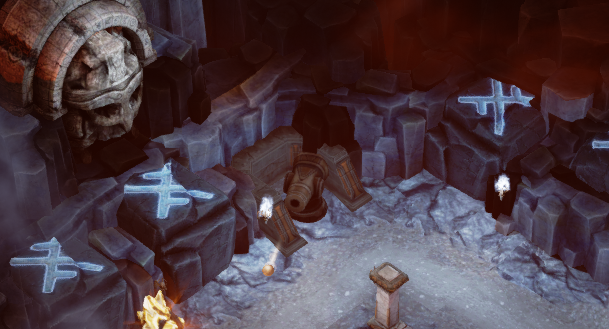
The Wall_arbalest Blueprint contains the logic for the arbalest, the basic turret type. The arbalest shoots the closest enemy with a medium-strength projectile, automatically firing arrows in its default mode. The player can manually fire the arbalest as well, by clicking on it and dragging in the direction they want the arrow to fire. The longer the mouse drag is, the stronger the shot will be.
The arbalest projectile is stored in another Blueprint, Projectile_arbalest, derived from the Blueprint TestProjectile which has StrategyProjectile. The Wall_arbalest Blueprint has a number of sub-networks, all contained within the EventGraph. No Blueprint logic is present in the ConstructionScript.
Auto-Arbalest
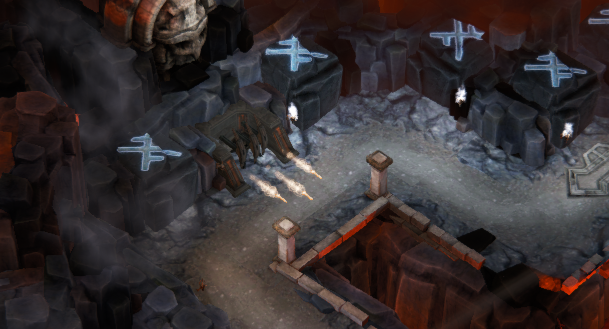
The Wall_arbalest_auto Blueprint contains the logic for the auto-arbalest. The auto-arbalest shoots projectiles in a straight line from the wall, doing a small amount of damage to every unit the projectiles pass through. The auto-arbalest arrows are not destroyed unless they hit a wall or an enemy with a shield. It is possible to aim the auto-arbalest by clicking and dragging so that the auto-arbalest faces the desired direction; the auto-arbalest will continue to fire in the aimed direction while the mouse button is held down, and will return to its default firing position when the mouse button is released.
Like the arbalest, this turret shoots projectile arrows contained in a separate Blueprint. The Projectile_arbalest_auto auto-arbalest arrows are not destroyed unless they hit an enemy Pawn with a shield or a wall, and this behavior is carried out with the aid of Blueprint Interfaces, Interface_Auto_Arbalest and Interface_Auto_Projectile.
Flamethrower
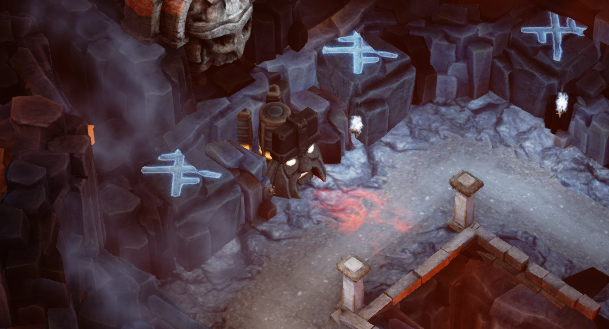
The flamethrower does not shoot projectiles like the other turret types. Instead, it burns all enemies in the flame area. It is possible for the player to charge the flamethrower by clicking on it and holding; depending on how long the mouse button is held, the flame released after charging can do up to three times more damage, as well as slowing down any enemy Pawns hit by the charged fire. If the player charges up the flamethrower, there is a small cool down afterwards and then the regular fire attack continues.
Camera
The camera in Tower Defense has a fixed view angle and the ability to zoom in and out with the mouse scroll wheel. The camera calculations are made inside the CalcCamera function in the StrategyPlayerController class, while
constants like the camera minimum and maximum offset, camera angle, and camera speed can be set in DefaultGame.ini.
A spectator Pawn is used to create a player without a visible Pawn.
In-Game HUD
The in-game HUD is created with a mixture of Canvas drawing and Slate widgets.
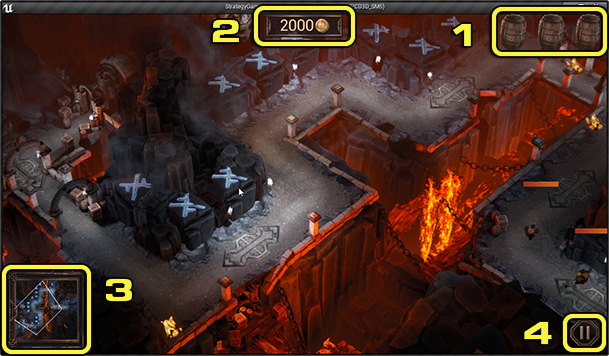
In the top-left corner, a game timer counts down the warm-up time for the game, using the function GetGameTime in the class SStrategySlateHUDWidget. After the game begins, this countdown disappears,
and the display for the number of lives left (1) is revealed. The properties for the "lives left" display are set in the DrawLives function of the AStrategyHUD class; the initial number of lives
is set in the PlayerBaseUpgrades subgraph in the TowerDefenseMap Level Blueprint.
The current gold resources are displayed in the top-center of the screen (2). Both the game timer and the resource display are defined using basic widgets in the SStrategySlateHUDWidget. The same class
is used to create all top level widgets, but not all of these widgets are displayed by default.
The mini-map is in the bottom-left corner of the HUD (3). It is built from an invisible Slate widget overlay which handles the input and the actual map image, which is drawn using Canvas. SStrategyMiniMapWidget
is responsible for moving the camera when the button is clicked or held on the mini-map area.
When a building slot is clicked on, the SStrategyActionGrid menu appears. There is only one instance of this widget; its location is determined by the active building slot. Calculating the screen
position of the menu is done in the DrawHUD method, which projects the selected Actor location to 2D coordinates. The look and event mapping of the action buttons for this menu are defined in the
AStrategyBuilding class in either the ShowActionMenu method or the ShowCustomAction method. The Button widget is defined in the SStrategyButtonWidget class, and any additional information
bound to the action buttons is stored in the FActionButton information structure.
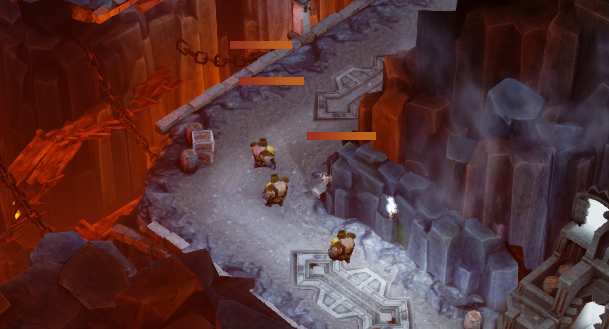
The health bars of Pawns and buildings are drawn on the canvas using the DrawActorsHealth method. Each team has a different healthbar texture.
In the bottom-right corner of the HUD, there is a PauseButton (4) which toggles pausing the game and the in-game menu visibility.
After the game time is up, or one of the bases is destroyed, the game will pause and "Victory" or "Defeat" text will be animated from the center of the screen. The animation changes the font size over time.
This text is created using a simple STextBlock widget with delegates for Visibility, Font, and Text.
Menus
Main Menu
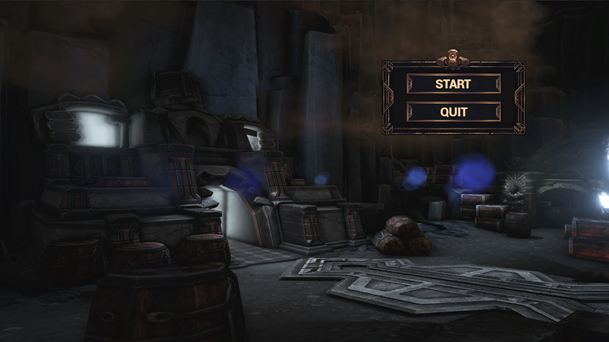
The main menu is contained in the StrategyMenu map, which loads the main menu specific HUD. The menu is Slate-based, with SStrategyMenuWidget being responsible for the main menu animations,
layout, and event handling. The SStrategyMenuItem class inherits from the SStrategyButtonWidget used in the In-Game HUD and describes a single menu item. Each menu item (and events attached to the items)
is defined in the StrategyMenuHUD.
To go back to previous menus, an array of shared pointers to menus is stored in the MenuHistory variable. This variable acts like a stack to hold previously viewed menus, so that it is easy to go back while
also removing the requirement to store the parent of a menu so that menus can be reused in multiple places.
Menu animations use interpolation curves defined in SStrategyMenuWidget::SetupAnimations. Each curve has a start time, duration, and interpolation method defined, and can be played forward and in reverse.
To play animation attributes at a specific time, GetLerp() is used, which returns a value between 0.0f and 1.0f.
In-Game Menu
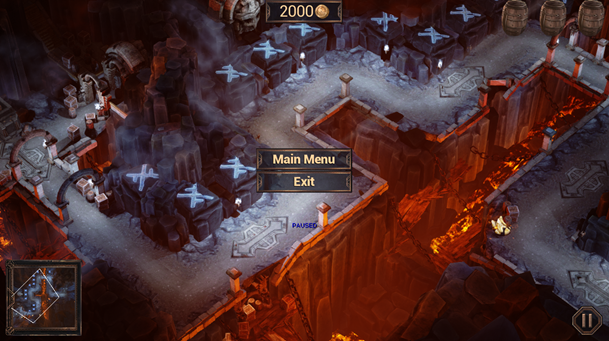
When the in-game menu is active, a semi-transparent full-screen Slate overlay is shown, and the game is paused. PauseMenuButtons are defined in SStrategySlateHUDWidget. There are two buttons for the in-game pause
menu: one exits the game, and the second returns to the main menu. To exit the in-game menu, the player should press the pause button in the bottom right corner a second time.
Level Blueprint
The Level Blueprint has a modular structure for spawning each wave, as well as initialization and win/lose conditions.
Enemy Spawns
The waves are constructed using three Blueprint Macros: spawn fast, spawn normal, and spawn heavy. Each of these sets up the desired unit parameters and attachments and then waits for the SpawnMinions function in the
StrategyAIDirector to fire. The macro waits for the enemy brewery's StrategyAIDirector to report back that the wave has been spawned, and then execution is allowed to leave the sub-network.
Each spawn macro takes two execution inputs, one for beginning the macro and one for opening the Gate after the OnWaveSpawned event fires, and an integer input for the number of Pawns to spawn.
Functions from the class StrategyAIDirector are called, with inputs specific to each type of Pawn wave. The three functions are SetDefaultWeapon, SetDefaultArmor, and SetBuffModifier.
SetDefaultWeapon and SetDefaultArmor take Blueprint as inputs and assign those Blueprint as the new default weapon or default armor for the spawn. For example, all enemy Pawns spawned by
the SpawnFastMacro have the Attachment_Smithy hammer Blueprint as their default weapon, and all enemy Pawns spawned by the SpawnHeavyMacro have the Attachment_Armorer shield Blueprint as their default armor.
The last StrategyAIDirector function called by the spawning Blueprint functions is SetBuffModifier, which has a number of data inputs including the attack abilities, health bonus, speed, and size
of the Pawns. These inputs are all exposed to the Blueprint, so it is straightforward for a level designer to create a new class of enemy Pawn to spawn. Finally, each spawning Blueprint function sets the WaveSize
property of the enemy brewery's StrategyAIDirector.
There are five waves of enemies, each with different combinations of fast, normal, and heavy enemy Pawns. At the beginning of a wave, the Show Wave Title node displays the wave number. Then, the first enemy spawn of the wave is called. There are two types of delays after a spawn: a timer delay set by a Delay node, or a Pawn-based delay set by a WaitForWaveMacro. The WaitForWaveMacro macro continually checks to see how many enemy Pawns are alive and will not let execution leave the macro until either the delay time has expired or all of the enemy Pawns are dead. After all the spawns for a wave are complete and all of the enemy Pawns for that wave are dead (or two minutes have passed), a Remote Event node is used to call the Custom Event for the next wave.
Win and Lose Conditions
In the game, your base has 3 lives. A life is subtracted if an enemy Pawn makes it to the friendly brewery, and the game is lost if all lives are lost. The enemy boss reaching the friendly brewery also results
in losing the game. To win the game, you must defeat all five waves of enemy Pawns before losing all of your lives. The networks setting up both the win condition and the lose condition are in TowerDefenseMap's Level Blueprint, and call functions set up
in the class StrategyGameMode, which is derived from the AGameModeBase class. The StrategyGameMode class also contains functions such as InitGame which initializes the game and is called before the Actors' PreInitializeComponents, SetGamePaused, and SetGameDifficulty.
After the end boss spawned in Wave 5 has been killed, a Remote Event node is used to call the Winning Custom Event. This Custom Event, located in the Win Condition comment box, then fires and triggers execution of a sub-network WaitForWin,
which checks that no other enemy Pawns are still alive. If this is found to be true, the Finish Game function is called with the WinningTeam input set to "Player".
There are two nodes in the Lose Condition comment box which call the Finish Game function with the WinningTeam input set to "Enemy", causing the player to lose the game. The first is triggered when all three lives have
been lost, due to enemy Pawns reaching the friendly brewery. A MultiGate node is triggered each time an enemy Pawn reaches the friendly brewery. The first and second output execution pins of the MultiGate node each connect to nodes which update the
NumberOfLives of the friendly brewery, decreasing the value by one each time. The last output execution pin sets the number of lives of the friendly brewery to zero, and then triggers the Finish Game function with the WinningTeam set to
"Enemy". Once the enemy boss has spawned, the BossSpawned Custom Event closes the Gate node leading to the "3 lives version" MultiGate, and opens another GateNode leading to the second Finish Game function with the WinningTeam set to
"Enemy". This creates an open network so that if the end boss reaches the friendly brewery, the FinishGame function will be activated and the player will lose the game.
Resource Node - Gold
The gold nodes are Blueprint with the parent class StrategyResourceNode. This class contains the public functions GetAvailableResources and GetInitialResources, the protected function OnDepleted,
a BlueprintImplementableEvent to report when the resource has been depleted, and the protected property NumResources to set the amount of the resource present in the node.
The Blueprint for a gold node contains sub-networks to make the node appear and disappear on a timer. The ConstructionScript in the Blueprint sets the node to automatically be hidden when it is placed in the level. When the gold node appears, AppearFX particle effects are played along with an apparition noise. If the OnDepleted event fires because the node is successfully collected, the amount of gold present in the node is added to the player's total gold pool. The CollectFX particle effects and the CoinSound is played, and then the node is hidden again. If the player fails to collect the node in time by clicking on it, FadeFX particle effects and an appropriate sound is played.
