
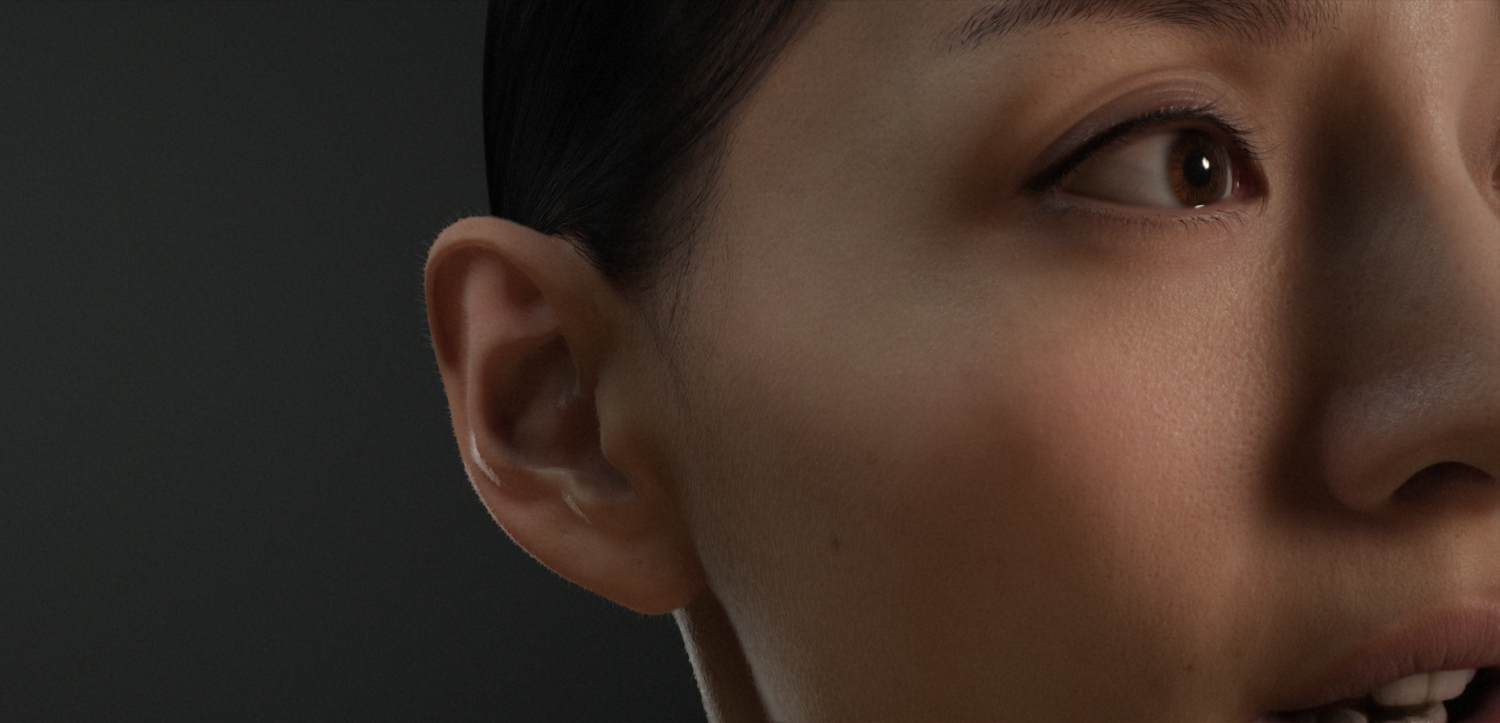
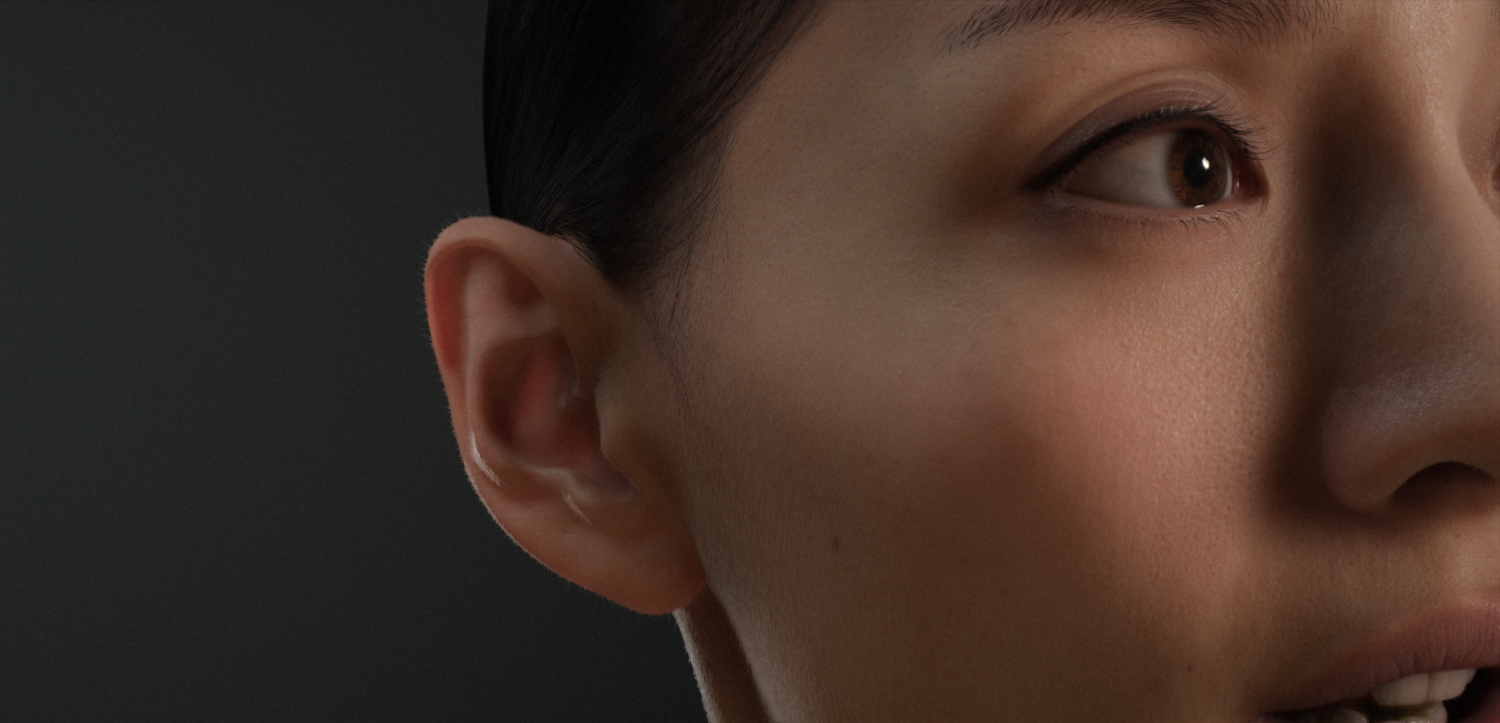
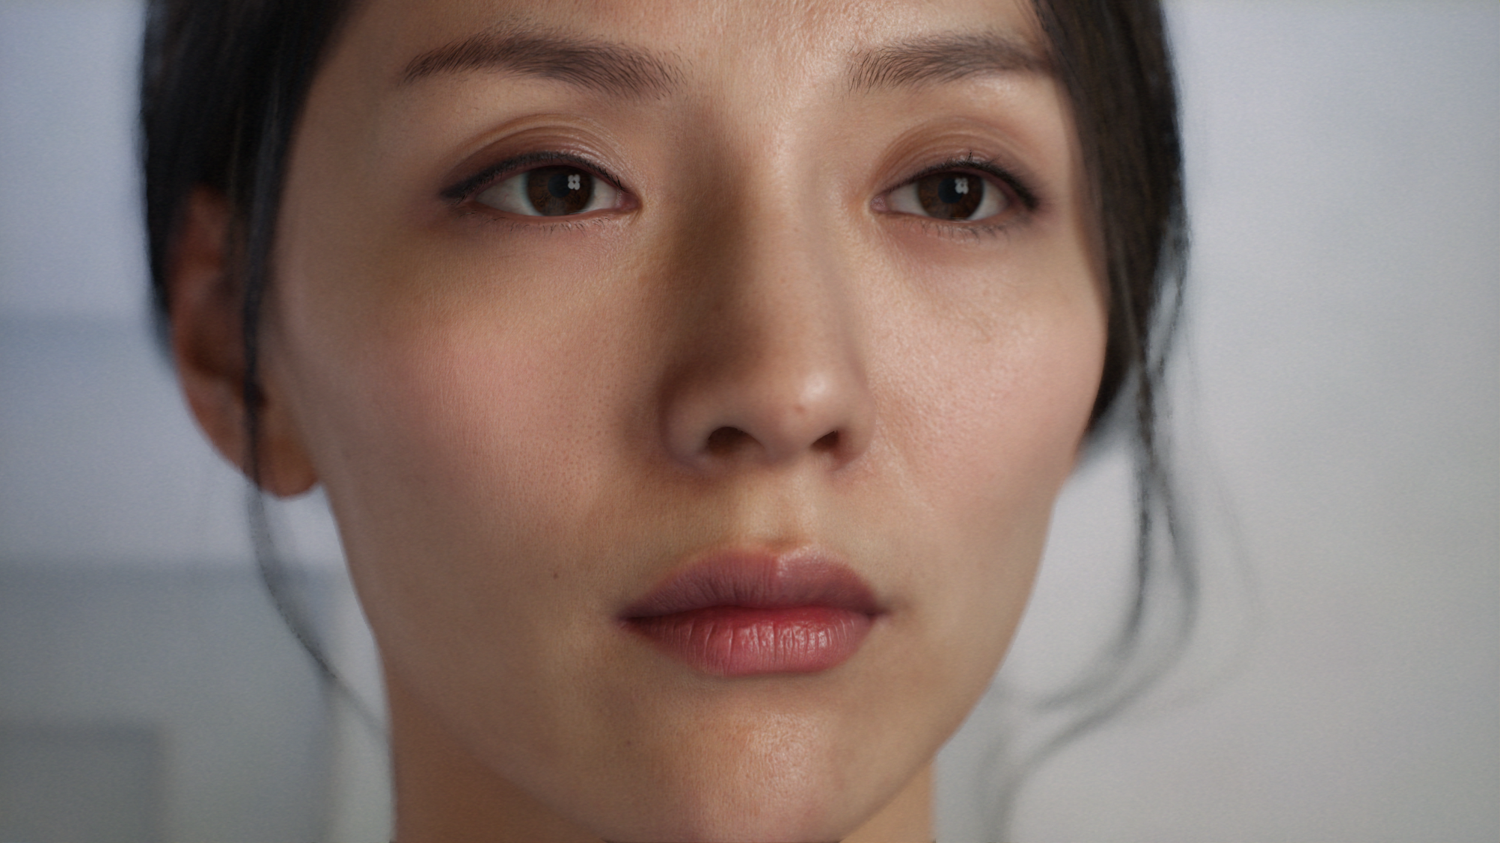
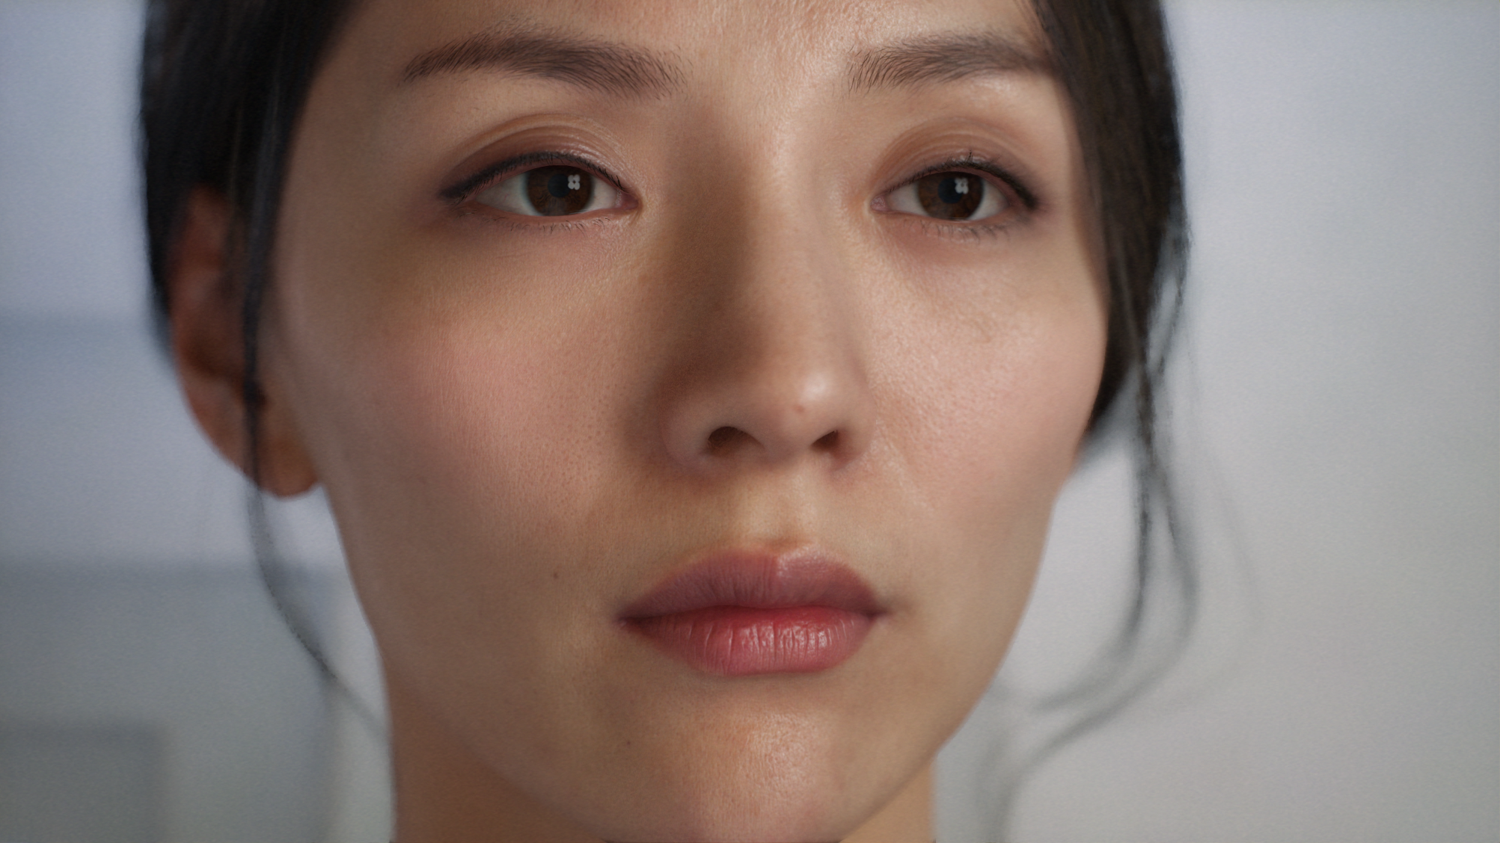
Images and characters provided by 3Lateral for Siren, Andy Serkis, and Osiris Black©.
Previously we demonstrated approaches to characters, like the ones used in Epic's own game Paragon, with the Photorealistic Character example. Since that time, we've explored and improved on how we can design more believable characters through our approach to high-quality character shader techniques, using data scans of Actors, improving our geometry workflow, and ultimately improving Unreal Engine 4's (UE4) rendering capabilities.
As part of our character explorations, we developed several Digital Humans (and a Non-Human) to drive our workflow and rendering improvements to produce highly realistic and believable characters. Below you'll find high-level overviews of our workflow processes and newly implemented features.
Also keep in mind that these features and techniques are not explicitly limited to only high-end machines. They can be applied to many real-time games and projects with good quality and FPS achievable.
To take a look at some of these improvements yourself, you can download the Digital Humans project from the Epic Games Launcher under the Learn tab. This project includes the original Photorealistic Character bust from Paragon along with the Mike Seymour Digital Human first shown at SIGGRAPH 2017.
Digital Human Performances
Improved Character Rendering Features
Over the course of development of Digital Human characters, Epic has developed or improved the following features:
- Using a new specular model.
- Light Transmission using Backscatter.
- Better contact shadowing for Subsurface Profiles.
- Short Distance Dynamic Irradiance for Screen Space Indirect Bounce approximation through Post Process Materials.
- Added detail for eyes using a separate normal map for the Iris.
Each of the sections below gives detail for these newly developed features or improvements with their own sections for Skin, Hair, and Eyes.
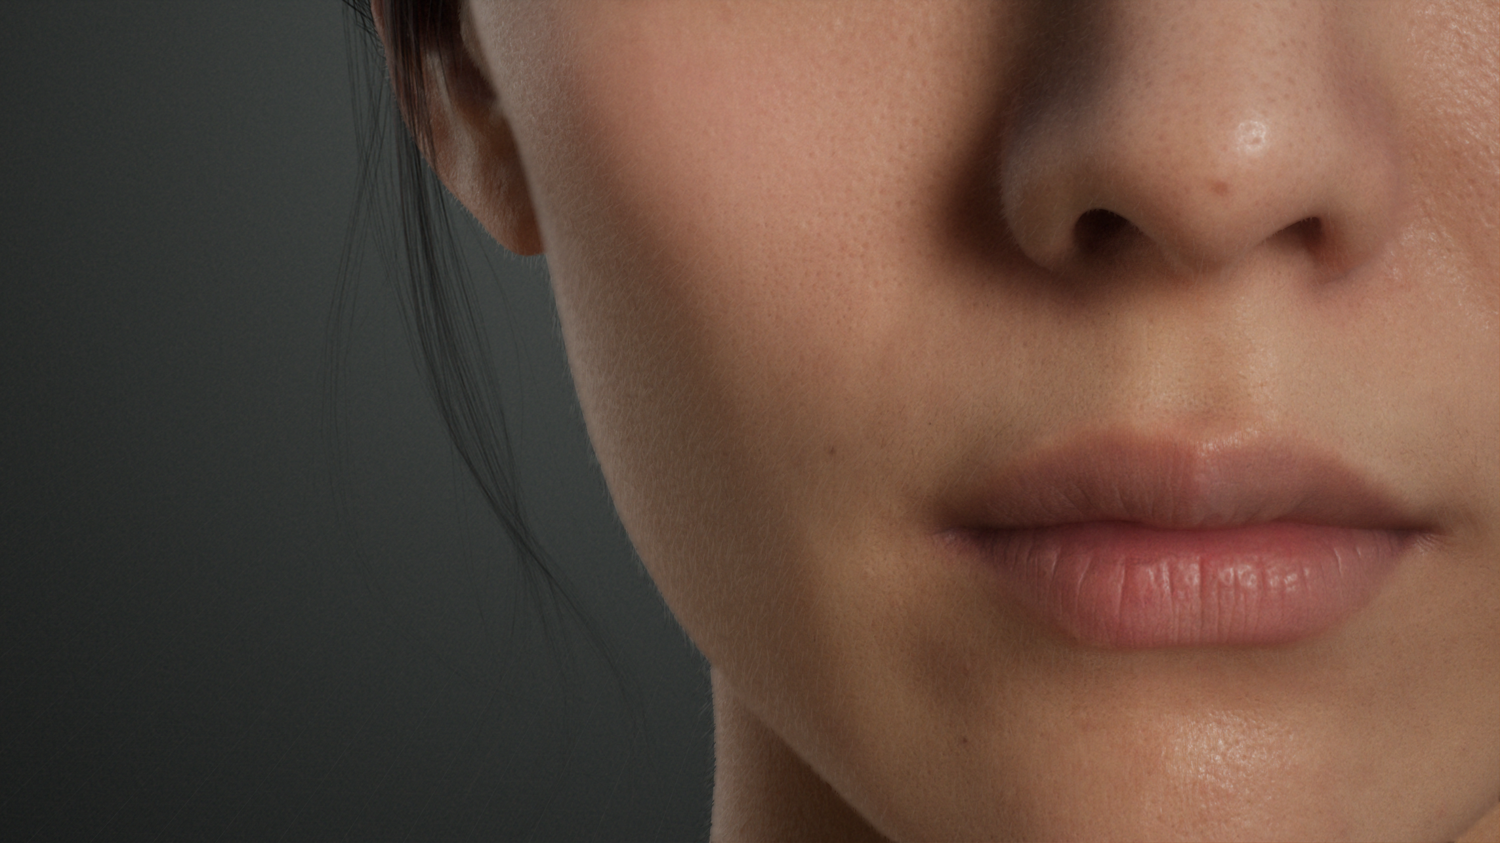
Skin Shading
The character's skin uses UE4's Subsurface Profile shading model.

Note that these projects use Material Functions to set up the base for the skin material. There are a couple of reasons for taking this approach:it provides reusable authoring for materials, and we can use masks to blend animations with the material as it changes. With Material Functions, artists can standardize their approach to development because when a change is made to a single function, all Materials that use that function automatically reflect the change.
You can take a look at some of the Material Functions for the Mike Seymour bust in /Content/Characters/Mike/Functions.
Skin Shading Techniques
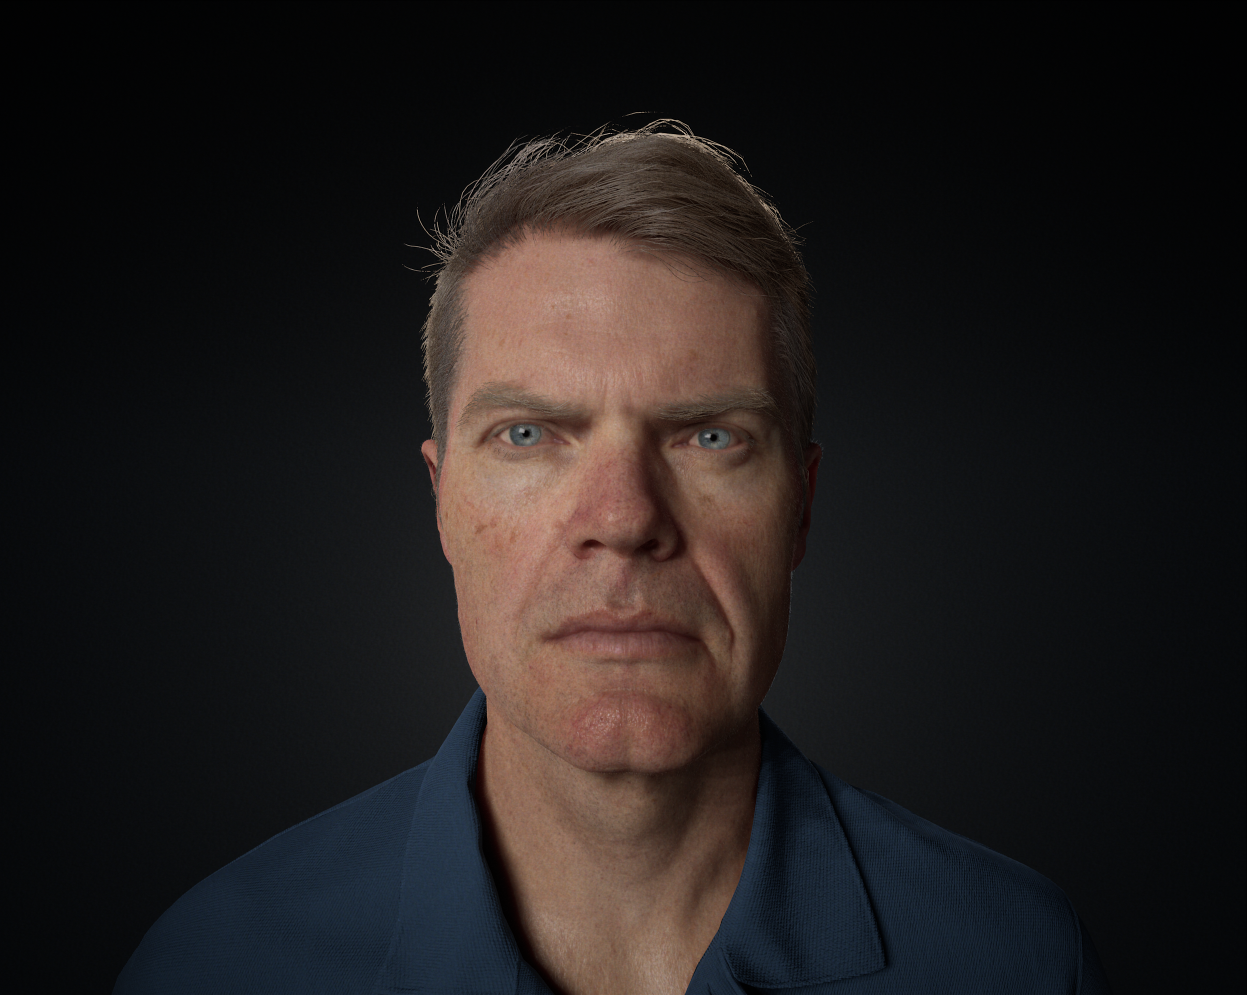
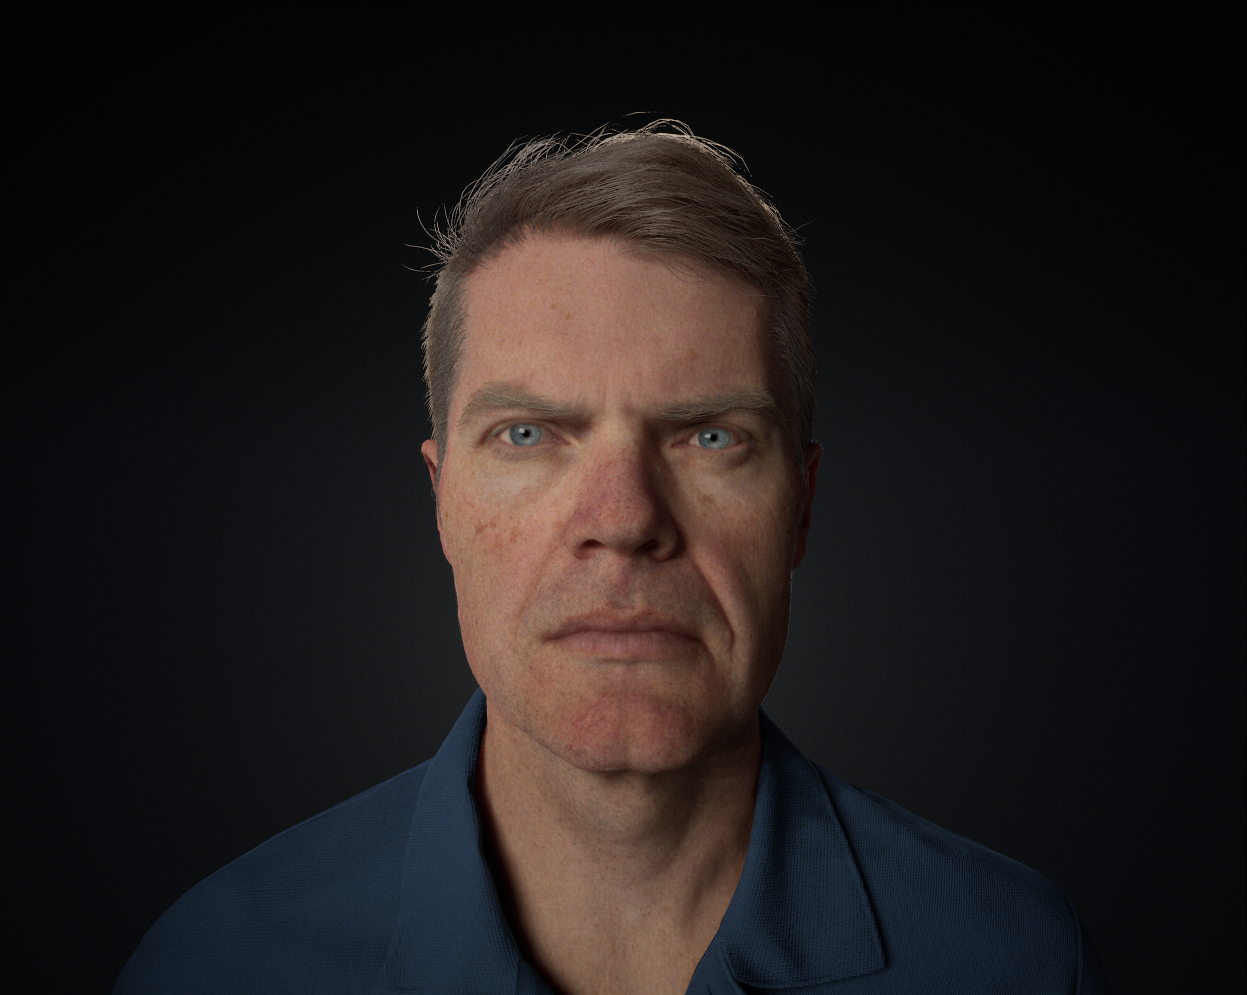
To maintain believability and high-quality realism, the Digital Humans all use 4K texture resolution produced from facial scans of the subject, in this particular example, Mike Seymour. After acquiring the digital scans, the textures are cleaned up, tweaked, or generated by Artists at Epic.
The skin setup for characters can use various textures along with masks to achieve the desired look. The textures shown here are the core textures used to achieve the look of our Digital Humans: diffuse (albedo), roughness, specularity, scatter, and normal maps.
| Texture | Name | Description |
|---|---|---|
 |
Diffuse | The Diffuse map supplies the Base Color for the Material. At a 4K texture resolution, you can see the tiny capillaries just underneath the surface of the skin. Any darkening of wrinkles will accentuate the texture supplied by the Normal map. (T_head_diffuse_neutral) |
 |
Roughness | The Roughness map is not painted by an Artist. Instead, we're using a process in UE4 to convert the normal to roughness. (Toksvig_MikeMesoNormal) |
 |
Specular | The Specular map scales the amount of specular highlight visible across the surface of the skin. It is important to note that the default value for specularity is 0.5. This map boosts specularity in areas where the skin may be stretched a bit tighter or dampens it in areas where we don't want to see reflection, such as the center of the pores and within wrinkles. (Mike_T_specular_neutral) |
 |
Scatter | The Scatter map controls how much light is going to be scattered through the surface of the skin. Areas that are dark will exhibit very little scatter, such as the cheeks, while lighter areas will have higher amounts of perceived scatter, such as the nose, eyes, and ears. You'll notice that this is a simple mask to for areas around the ears, eyes, nose, and lips that we want to have the most amount of scattering. Other areas are darker but still light enough to have scattered, like real-world skin. The color of the scatter is managed by your Subsurface ProfileSubsurface Profile Shading Model asset assigned to your Skin material. (T_head_sss_ao_mask) |
 |
Normal | The Normal map works by supplying the tactile texture to the surface by perturbing pixel normals. For our Digital Humans, there are several normal maps that are blended between and combined in the Material setup to capture the medium-sized and micro-sized detail of the skin. |
Dual Lobe Specular
The Dual Lobe Specularity provides roughness values for two separate specular lobes that are combined for the final result. When these are combined these provide nice subpixel micro-frequencies in the skin for a natural look.
| Softer Lobe | Tighter Lobe | Combined Lobes |
This view is using a single Light with a Black base color plugged into to see blended Lobes.
In the Subsurface Profile Asset under the Dual Specular section, you can adjust the roughness of each specular lobe and how much they should mix.

Light Transmission using Back Scatter (Forward Scatter)
Lights now support Transmission through surfaces. This has been referred to as backscatter because it's a backlight effect. However, it's actually a "forward scatter" because the light is being scattered toward the view. We use a single scatter approach that samples depth from shadow maps with exponential falloff. Then a Henyey Greenstein phase function is used with the index of refraction (IOR) from the surface on that function to add a little more shaping to the scatter.
Once you've set up your Subsurface Scattering profile and assigned it to your Material, you can enable Transmission on a Light to have a backlit effect by looking under the Light section in the Advanced rollout properties and enabling Transmission.
You can use masks in your Material to control how much transmission is allowed for scattering by blocking similarly to how you would use a mask for opacity or roughness areas. Then, in your Subsurface Scattering profile, you can control transmission with these properties:
Boundary Color Bleed
For areas around the mouth and eyes where we use scattering for the teeth and eyeballs, we use a new property called Boundary Bleed Color. It defines how one subsurface material blends into another one.
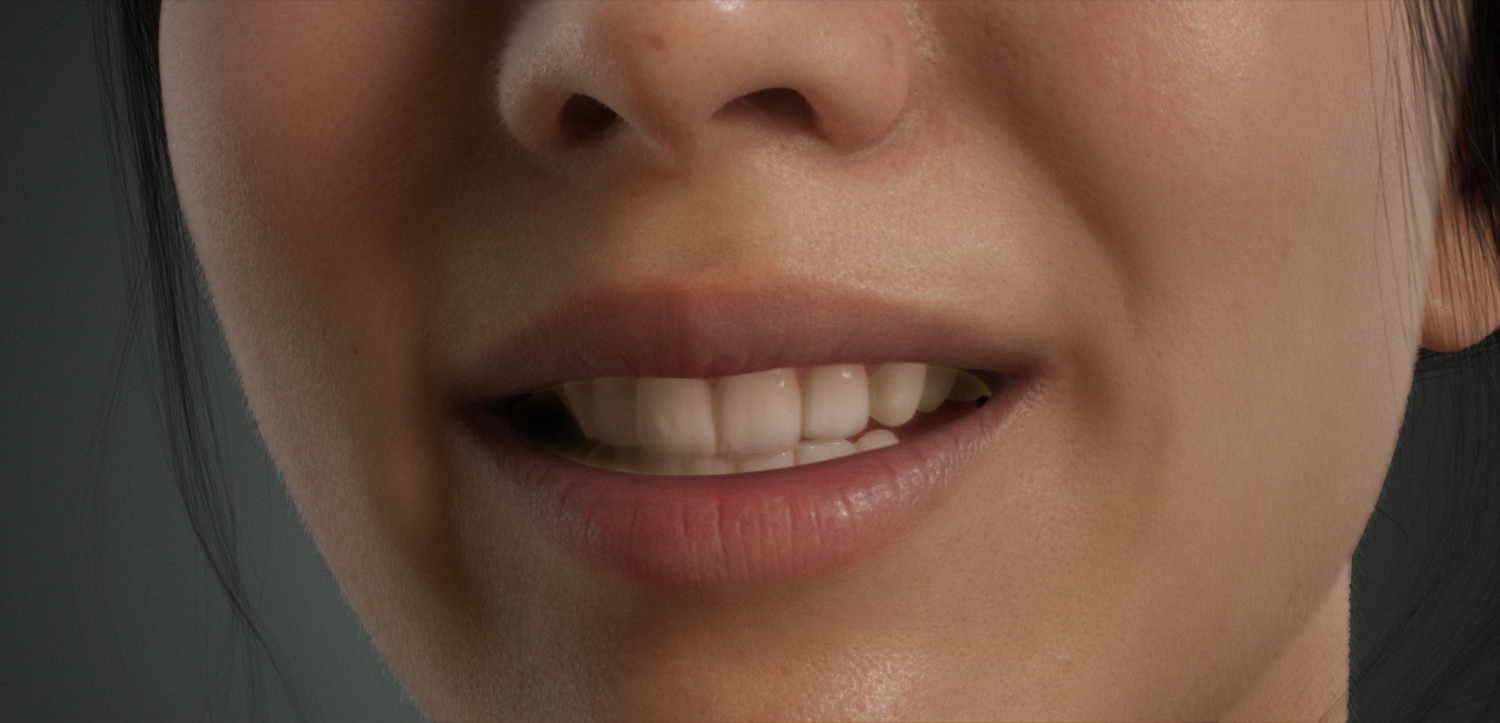

Subsurface scattering is a screen space effect that would often cause halo-type artifacts in areas with other subsurface materials, similar to the example above where some light areas from the lips blend into areas around the teeth.

Short Distance Dynamic Irradiance
Another improvement for digital human characters was to reduce the amount of darkened colors (blacks and grays) there were in corners around the nose and eye sockets. To make the look more natural, a screen space indirect bounce approximation technique was used. A Post Process Material is used for short distance dynamic global illumination, improving the lighting and believability by capturing the indirect bounce from the cheeks to the nose to the corners of the eyes.
Screen Space Irradiance is set up as a Post Process Material, so it can be used for anything it affects (see example below). You can take a look at the Material in the Digital Humans project located in Content\Shared\UtilityMaterials in the ScreenSpaceRealIrr Material.

Screen Space Irradiance Post Process Material casting short distance dynamic global illumination from emissive materials.
Hair Shading
Hair shading is handled by way of UE4's Hair Shading Model. This shader is a physically-based shading model based on research by Eugene d'Eon, Steve Marschner, and Johannes Hanikaand currently used by Weta Digital. The shader approximates the reflection of light from the surface of the hair with anisotropic specularity, the refraction of light through the surface, and the scatter of light through multiple strands.
To use the UE4 Hair shader, set the Shading Model property of your Material to Hair.

Hair and Specularity
In the real world, hair tends to have multiple specular highlights: one representing the color of the light and another that is a mix of hair color and light color. For sake of this document, we will refer to these as primary and secondary specular highlights. The Hair shader approximates the same effects with highly realistic results.

- The brighter brown hair represents the secondary specular highlight.
- The lighter hair represents the primary specular highlight.
The approximation algorithm used in UE4's hair shader creates these effects similarly to how they are made in the real-world. As light strikes the surface of a hair, it does not simply bounce off. Hair is translucent, allowing some light to pass through it, to potentially bounce around inside it, then exit. The hair shader approximates this with three possible paths for the light to travel as it interacts with the hair, as shown in the diagram below:

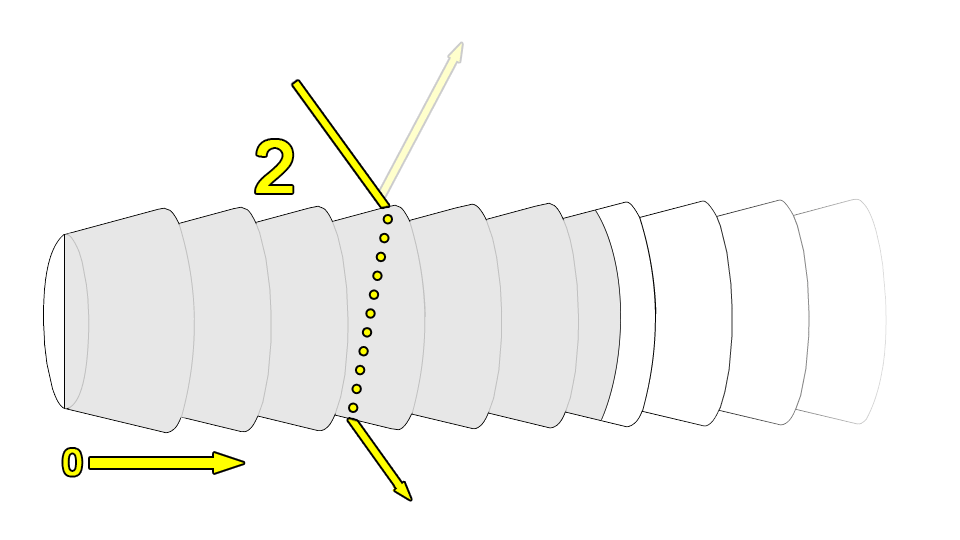
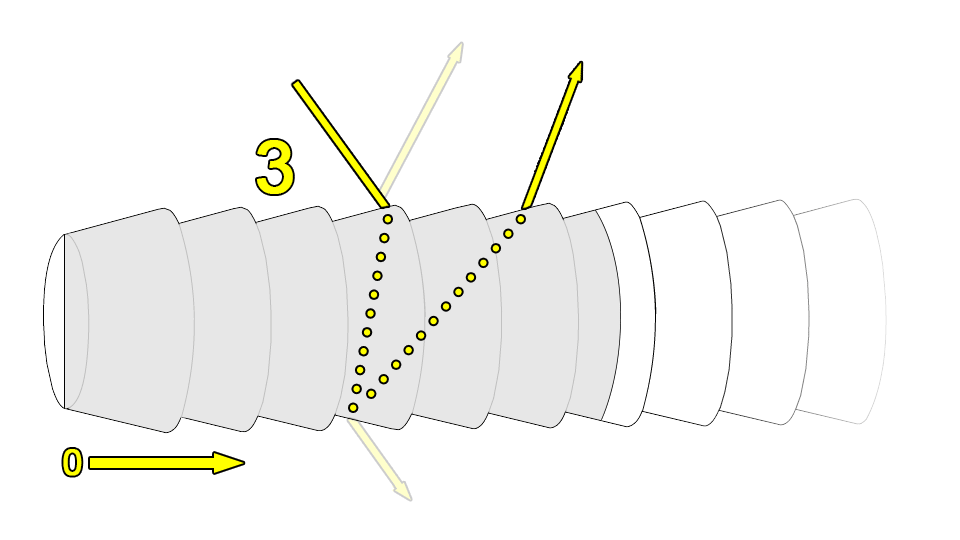
Cross section of single hair strand showing how the Hair shader approximates interaction with light, demonstrating the three primary types of paths light will take. See the table below for descriptions of each part of the process.
| Number | Description |
|---|---|
| 0 | The growth (root to tip) direction of the hair follicle. |
| 1 | Reflection-only path, with light bouncing off the surface of the hair. This produces the Primary specular highlight. |
| 2 | Transmission-Transmission path, in which light passes into the hair follicle and back out the other side. This is how light scatters within a volume of hair. |
| 3 | Transmission-Reflection-Transmission path, in which light enters the hair follicle, reflects off the inside boundary of the surface and then exits. This produces the Secondary specular highlight. |
As shown in the diagram, a strand of hair is not a perfect cylinder or tube. In actuality, hair appears more as a series of stacked cones. This means light bouncing off the surface of the hair will be scattered differently than it would be if the hair were perfectly smooth. Further, because each strand of hair is generally pointing in a different direction, the specular highlight will not be unified but will be independently placed based on the direction the hair is pointing. This is often referred to as anisotropic specularity, which is also supported by the UE4 Hair shader.
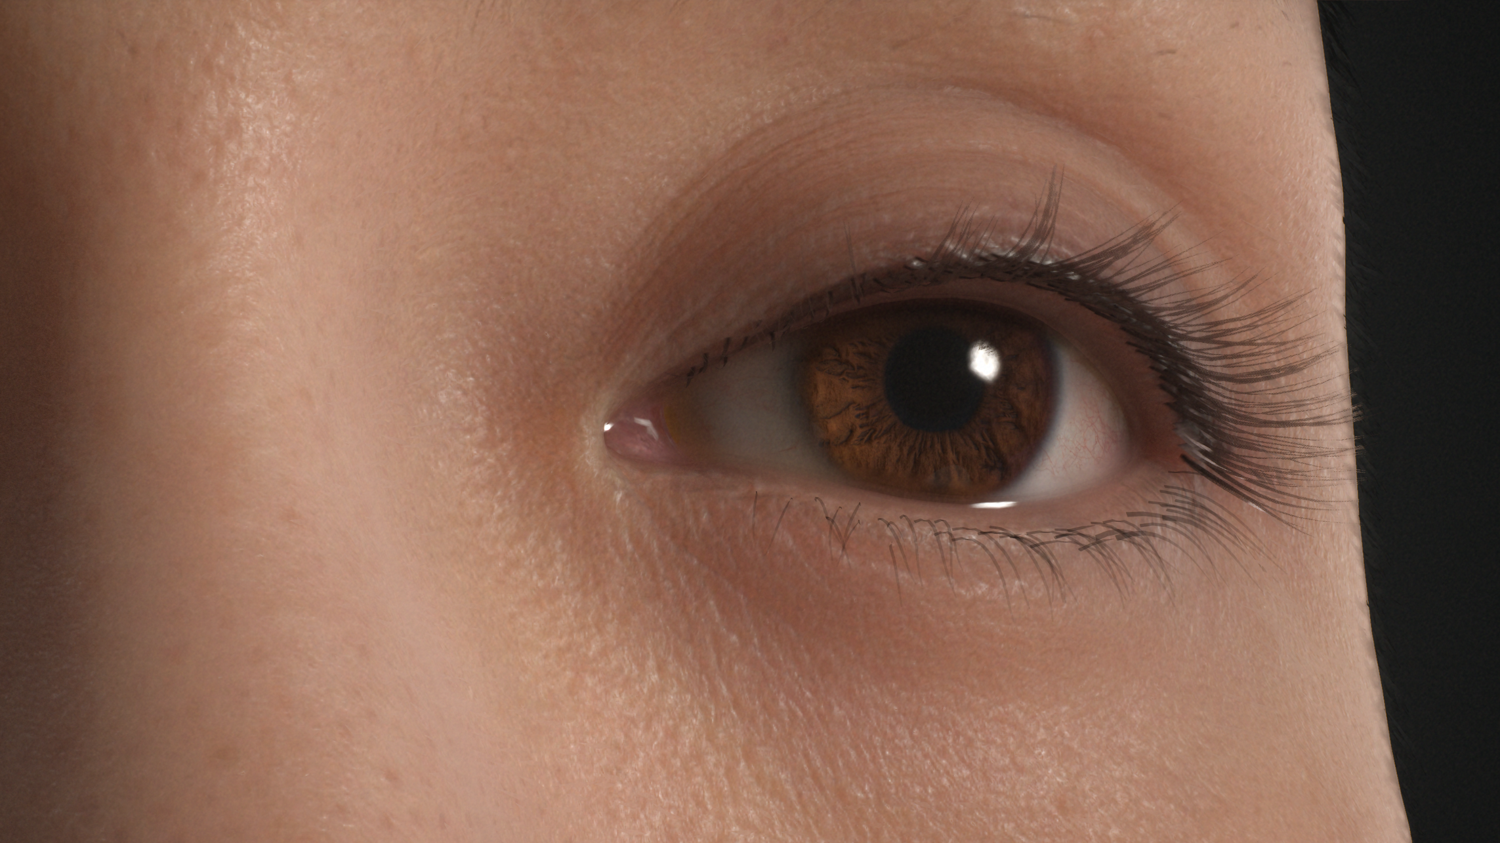
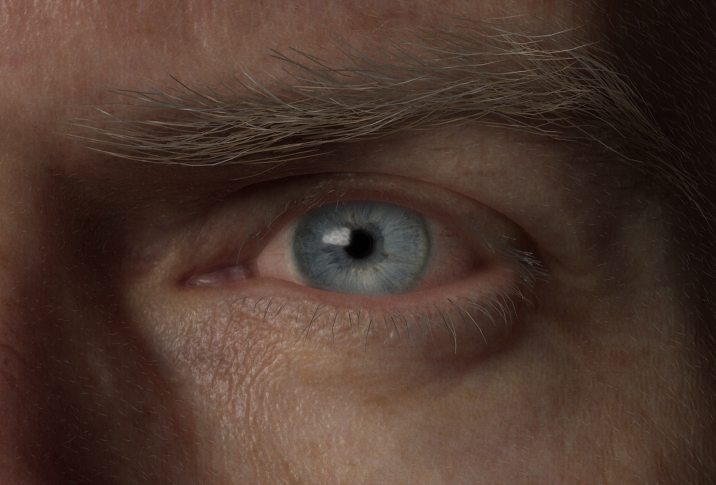
Eye Shading

Eyes are often referred to as "the windows to the soul." Few aspects of a character have as much influence on the viewer's perception of a character as a real person as the character's eyes. The Eye shader in UE4 is designed to bring realistic rendering of an eye surface, exposing artistic control over each of the biological parts of the eye itself.
The Eye shader in UE4 is highly technical and has been developed such that there are very strong dependencies between the shader code, the Material, the shape of the geometry, and the geometry's UV layout. Building an eye from scratch using this shader is not recommended without extensive experience in shader development. To that end, we strongly recommend, for those creating realistic humanoid eyes, that you extract the eye geometry from this example and use the eye Material as-is, replacing the necessary textures to suit your purpose.
Located within the Photoreal Character Project is a Static Mesh named PhotorealEyeGeo. This can be exported from the project into the DCC app of your choice via FBX to be used in your own projects.

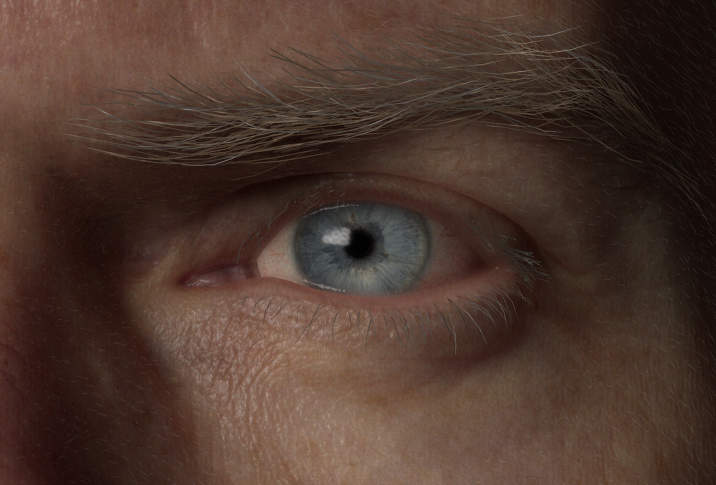
Eye Biology
In order to fully understand the features of the eye, it is best to know a little bit of eye biology. Each of the parts you see here is represented in the eye setup, and all can be modified in some way using the exposed parameters in the Material Instance applied to the example character's eyes (MI_EyeRefractive_Bust).
Here's a quick refresher:

| Number | Name | Description |
|---|---|---|
| 1 | Sclera | The sclera is also known as the "white of the eye." This area of the eye is generally very wet and has a slight amount of tactile textures. |
| 2 | Limbus | The limbus is the dark ring that is present between the iris and the sclera. It is more dominant in some eyes than others, and it will tend to fade away when viewed from edge-on. |
| 3 | Iris | The iris is the ring of color around the center of the eye. When one is said to have "green" eyes, it is because their iris is predominantly green. In a real eye, the iris is a ring of muscle-like fibers that expand and contract, allowing more light into – or closing light out of – the pupil. It is also worth noting that in the real world, the iris is actually more of a disc or cone shape, and does not bulge outward with the rest of the eye. |
| 4 | Pupil | The pupil is the dark spot at the center of the eye. It is the hole through which light passes so it can be picked up by the rods and cones of the retina. |
| 5 | Cornea | The cornea is the clear, fluid-filled dome that rests over the surface of the iris. |
Refraction within the Eye - Then and Now
Because the eyeball is filled with fluid, it is given to refracting any light that passes through it. This can be seen in the real world when looking at an eye from multiple angles. The iris and pupil will be distorted by refraction as they are viewed through the cornea. The traditional approach to solving this for games and film has been to create two separate eye surfaces; one that supplied the sclera, iris, and pupil; and another surface on top that supplied the cornea and overall wetness of the eye. This allowed for refraction as the underlying surface was viewed through the wet layer shell. Such an approach was used in Epic's A Boy and His Kite tech demo on the boy's eyes. The diagram below shows a representation of the two surfaces.

By using the Eye shading model, an even more realistic effect can be achieved with a single surface. The refraction of light through the surface of the cornea is now handled entirely within the shader, alleviating the need for underlying geometry. You can experiment with this yourself by opening M_EyeRefractive Material Instance and adjusting the Refraction On/Off property.
Eye Shader Parameters
Due to the complexity of the Eye shader and our recommendation to use it as-is, we have included a breakdown of the artistic parameters that are built into the Material. The following are the eye shader parameters that can be tweaked from within MI_EyeRefractiveMike_R Material Instances. Wherever possible, we will also include suggested parameter ranges.

| Name | Description | |
|---|---|---|
| Static Switch Parameter Values | ||
| Use Eye Bulge | Adjusts the refraction properties of the shader based on whether or not the eyeball geometry uses a physically modeled bulge for the cornea. | |
| Vector Parameter Values | ||
| Eye Corner Darkness Color | Sets a color value for the eye color darkness, which is controlled using the scalar variables for Shadow Hardness and Shadow Radius. | |
| Scalar Parameter Values | ||
| Depth Scale | This controls the depth of the refraction of the iris underneath the cornea. | |
| Flatten Normal | This value controls how much flattening of the eye's normal map is taking place, focused particularly on the sclera. | |
| Index of Refraction (IOR) | Index of refraction of the fluids underneath the cornea. Controls how much refraction takes place. | |
| Iris Concavity Power | Used alongside Iris Concavity Scale to control the shape and amount of light caustics that are calculated on the surface of the iris as light passes through the cornea. This will generally only be visible in an actual lit scene, and can be difficult to visualize within the Material Instance Editor. | |
| Iris Concavity Scale | Used alongside Iris Concavity Power to control the shape and amount of light caustics that are calculated on the surface of the iris as light passes through the cornea. This will generally only be visible in an actual lit scene, and can be difficult to visualize within the Material Instance Editor. | |
| Iris UV Radius | Controls the overall size of the iris on the eyeball. | |
| Iris Brightness | Controls the brightness of the iris. | |
| IrisDispScaleUV | Scales the displacement of the iris when using an iris normal map. | |
| Iris Roughness | This value drives how shiny the cornea is (the surface directly over the iris). | |
| Limbus Dark Scale | Controls the size of the darkening ring of the limbus. | |
| Limbus Power | Controls the overall darkening of the limbus area. Overdriven values will darken the entire corneal area. | |
| Limbus UV Width Color | Controls the sample size for the limbus, or how much of the eye surface will be alloted for showing the limbus. This is a fairly delicate setting and should be adjusted with care. | |
| Limbus UV Width Shading | Controls how much light will affect the shading of the limbus. Very delicate setting, adjust with care. | |
| Normal UV Scale | Controls the scale of the normal map texture used across the surface of the eye. | |
| Pupil Scale | Controls the size of the pupil. This is the setting you would use to dilate the eyes. | |
| Refraction On/Off | Blends between refracting and non-refracting versions of the shader. | |
| Scale By Center | Adjusts the scale of the entire iris/pupil area from its center. | |
| Sclera Brightness | Controls the brightness of the sclera, or white of the eye. | |
| Sclera Roughness | Controls the Material Roughness value of the sclera. | |
| Shadow Hardness | Controls the sharpness of the blend between the sclera inner and outer color. Used with Shadow Radius to help drive shading across the surface of the sclera, approximating the effect of the eyelid casting subsurface scattered shadows across the surface of the eyeball. | |
| Shadow Radius | Controls the size of the blend between the inner and outer colors of the sclera. Used with Shadow Hardness. | |
| Specularity Iris | Controls specularity level across the cornea (iris and pupil). | |
| Specularity Sclera | Controls the specularity level across the sclera. | |
| Texture Parameter Values | ||
| Iris Color | See Eye Textures below. | |
| Iris Normal Map | See Eye Textures below. | |
| Sclera Color | See Eye Textures below. |
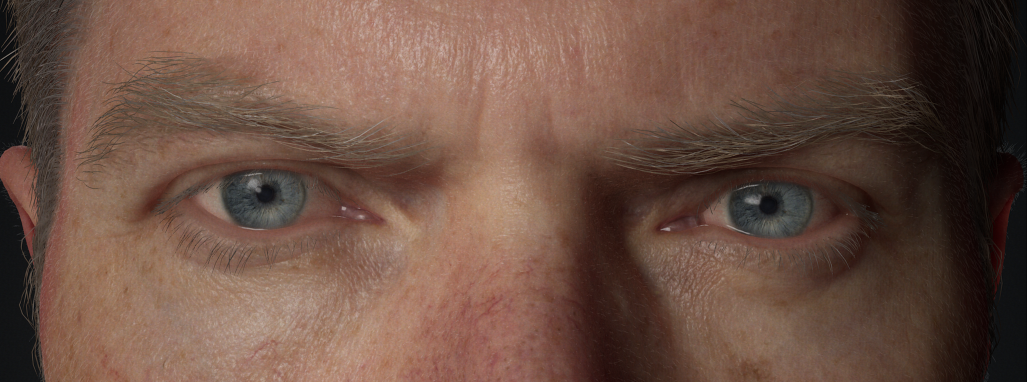
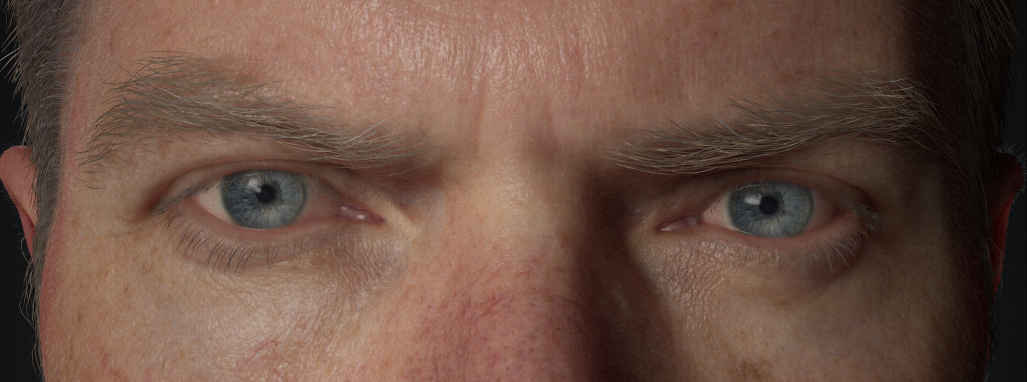
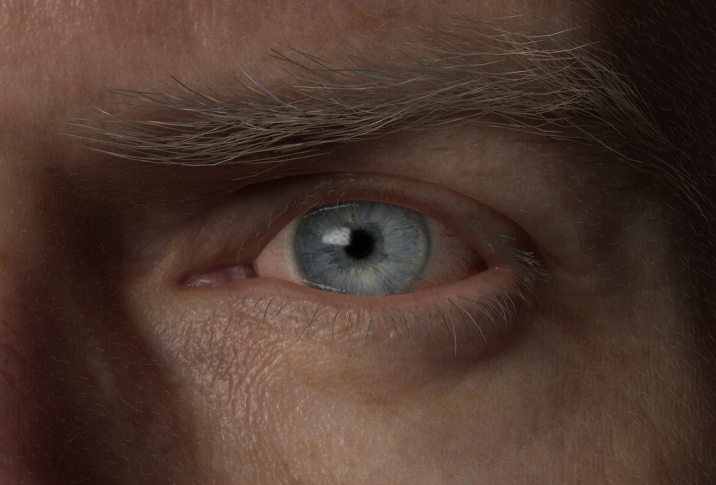
Eye Iris Normal
For eyes, there is now support for a Dual Normal to add additional detail and light directionality to the eye through the Iris Normal.

The eye in this shot is also using Boundary Bleed Color improvements to soften the illumination and light leaking between materials.
The iris normal can be enabled by adding the following console variable to your DefaultEngine.ini:
r.IrisNormal=1
The normal for the iris is fed into the Clear Coat Bottom Normal node in the Material.
Click image for full size.
Eye Textures
Many of the textures you'll create for the eyes will be based on the UV layout created above, with the exception of the Iris map. The list of primary editable textures includes:
| Texture | Name | Description |
|---|---|---|
 |
Sclera Map | The sclera map controls the colors of the eye whites, as well as the vein and tissue color that will be present at the edges of the eye. If you wanted your character to be able to have bloodshot eyes, for example, this is the texture you would modify. (Sclera_Tweak_R) |
 |
Mid Plane Displacement Map | The mid-plane displacement map is used to lock down a plane that cuts through the center of the eye, and is used as a basis for offsetting the depth of the iris. (T_EyeMidPlaneDisplacement) |
 |
Normal Map | The normal map does the same job as normal maps in all shaders – it supplies tactile texture variation. In the case of the example character eye setup, it produces tiny lumps and bumps along the wet surface of the eye. (iris08_leftEye_nml) |
 |
Tangent Map | The tangent map is used to control the direction the surface is flowing in tangent space. In the case of the example character's eye setup, this is used to accentuate the change in direction where the cornea meets the sclera. (T_Eye_N) |
 |
Iris Map | The iris texture is unique in that it does not match the UV layout. Instead, the texture fills the entirety of the resolution. UVs and Alpha masks control the overall iris size, as well as the size of the pupil. If making your own iris maps, try to keep the pupil size reasonably close to the proportions in the supplied texture. (eye_iris_clr) |
Note that the Tangent map is not fed directly into the Normal map input. Instead, it is connected to the Tangent Output node which must be created separately, as seen in the master Material.

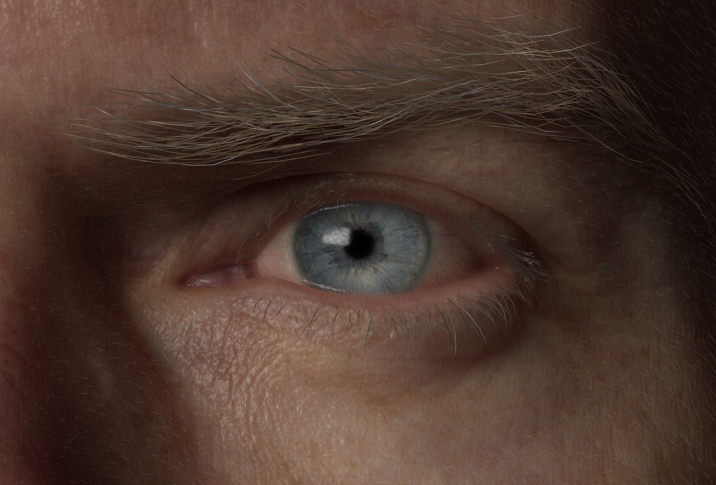
Eye Soft Ambient Shadowing
There are two ways to approach soft ambient shadowing for the eye so that it feels natural and believable. In the real world – wherever you eye comes in contact with other tissues, such as the eyelid or the tear duct (caruncle) – you will see very soft shadowing. This softness is due to the fact that the eye itself is translucent, allowing light to scatter through it. To help simulate this effect, you can use one of the following methods using a thin piece of geometry under the eyelid or enable contact shadowing for translucent materials. You may find that one method works better than the other depending on your own characters and the look you are developing.
Note that both of these methods use Boundary Bleed Color to soften areas around the eye - just like the mouth - to reduce haloing artifacts from subsurface scattering screen space limitations.
Eye Ambient Occlusion
One way to help simulate realistic shadowing for the eye is to place a thin sheet of geometry that covers the eye. It provides approximated occlusion, creating a richer degree of realism across the eye.
The Material applied to this sheet is named MI_Eye_Occlusion_Mike and can be found in Material Element 17 slot of the example character model.
Note that we did not use this method with Mike's bust. Instead we developed and used Contact Shadows for Translucent Materials, which we felt worked better for this character. You can enable Contact Shadows by applying a value to the variable Shadow Amount in the Material Instance.

The eye geometry used for ambient shadowing.
If authoring your own content for character eyes, you will very likely need to build this piece of geometry yourself. Note that it should be made to fit the area of the open eyelid and that its UVs should cleanly fill the 0-1 UV space in your 3D modeling application.
Contact Shadows for Translucent Materials
Translucent Materials can enable Contact Shadows. This uses similar functionality as the Contact Shadows for Lights but it's not linked to the light's contact shadow parameter. This is a screen space effect and can be used in addition to or in place of geometry to make the eye feel seated in the socket for believability.
You can enable Contact Shadows in your material Details panel under the main Material node'sTranslucency tab:

Material Techniques
Below are some key takeaways that we learned while working on creating the look of our digital humans.
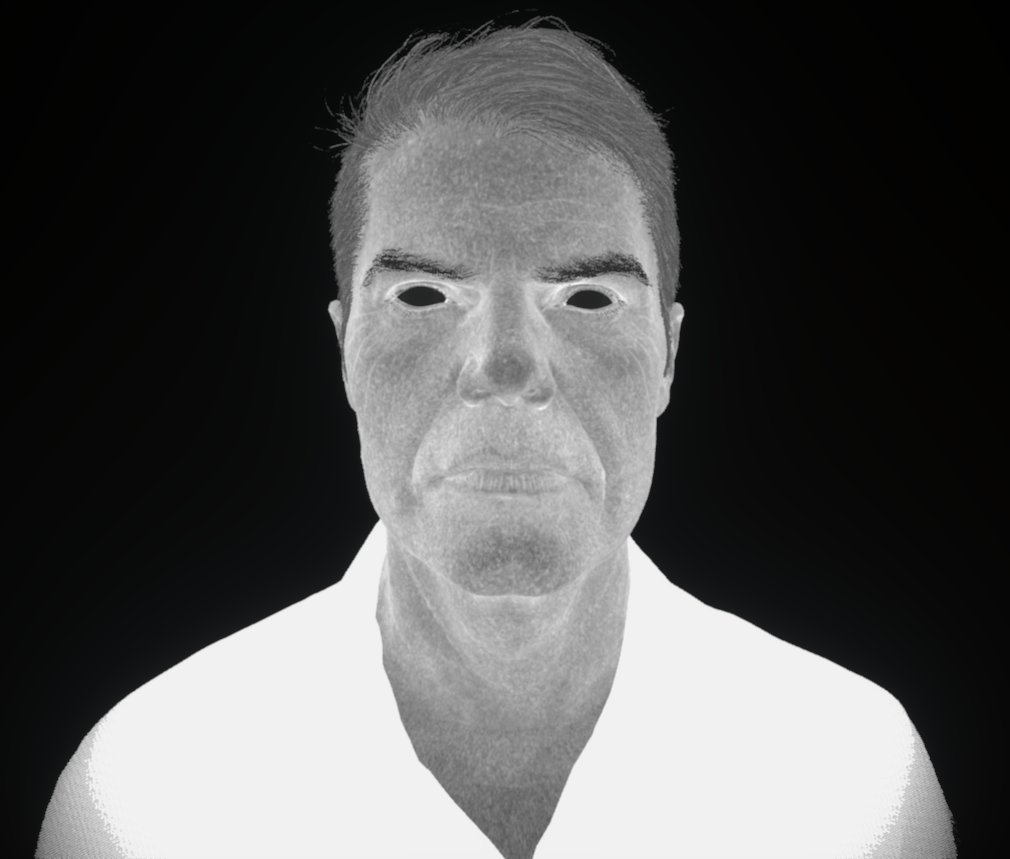
Normal Maps
There are two types of Normal maps used to create the look of realistic and believable skin for characters; Meso (or medium-sized) normals and Micro normals.
Meso Normals
Meso normals represent the medium-sized details of the skin like the primary wrinkles around the eyes, lips, and forehead. Multiple meso normals are used and animated with different animated poses.

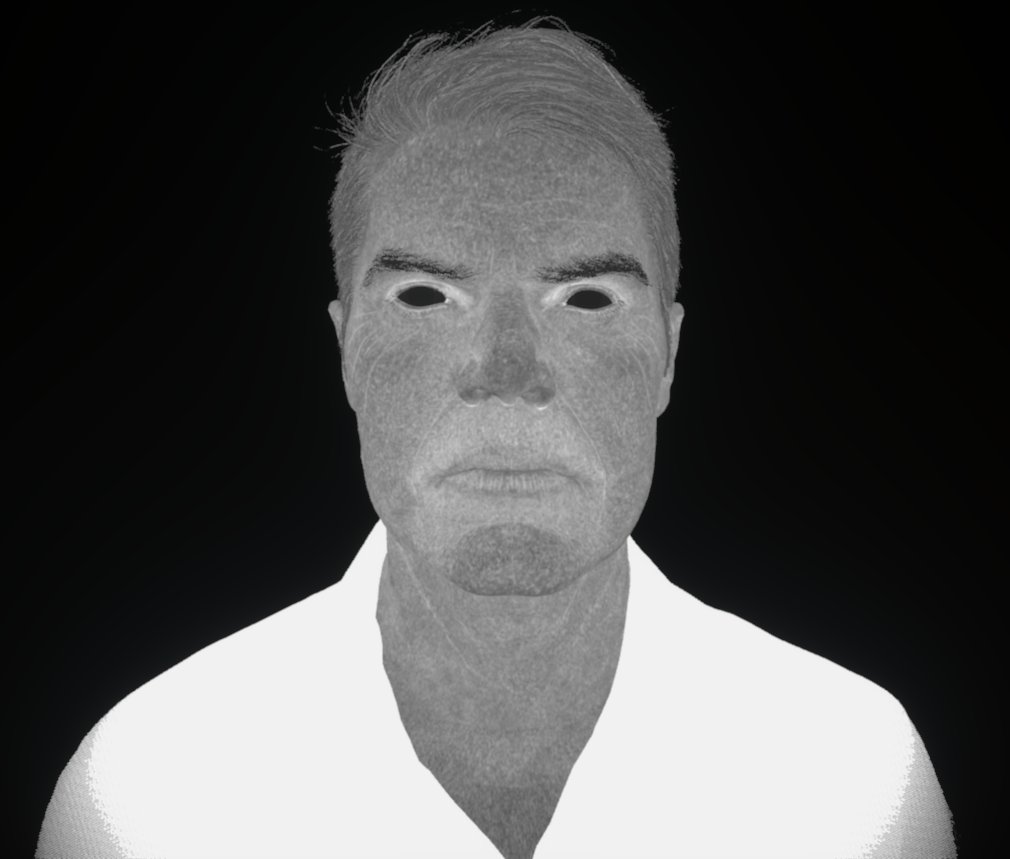
The poses are split into several different normal maps (see below). They are driven by the animation so that when the subject is acting or running an animation, the correct normal is triggered and blended between the different poses. This helps to create a realistic and believable result in the process.


The poses and masked normal maps driven by Andy Serkis' facial capture performance.
Micro Normals
Micro Normals represent the small details of the skin such as pores and small imperfections. These details are extracted in one of two ways: from scan data of the subject, or from the Specular map.

Roughness Maps
The Roughness map was generated from the Normal map, using a technique called "Normal to Roughness." Inside the Texture Editor, you can apply any texture to the Composite Texture slot and set the mode of the texture so that it becomes the basis for the roughness.


In this example, we applied the Normal to the meso normal texture named Toksvig_mesoNormal to generate a roughness texture from the Green channel instead of hand painting roughness. By using this method and also having animated normals, we get the basis for all roughness maps for the micro and meso normals that are being animated. The animated normals also help with the transitions of roughness amounts while the skin is stretching or contracting in different animated poses, again adding to believability and realism of the character.
Fresnel Edge Roughness
To soften the edges of the Roughness maps, a Fresnel is used on the edges to approximate peach fuzz on the face.
Example of how we control the edge roughness we used a Scalar Parameter that could be controlled through a Material Instance.

Region Masks for Roughness
For roughness variations in the skin that couldn't be captured with a camera, we created painted region masks for these nano-variations. Part of this involved studying the capture information and using artistic license to match the roughness to the reference.
Skin Specular Based on IOR Constant
The specularity of skin uses a constant value based on the index of refraction (IOR) for the skin. We use this because painted specular is not physically accurate.
Cavity Map
Because we can't raytrace every single displacement of the skin, we exclude that specular to break up the result by generating the map from displacement maps of the subject. It works as specular occlusion with the effect being reduced at Fresnel edges.
Scalp and Hair Occlusion
In addition to using a cavity map, the hair has to be baked into the specular map since our digital human characters are using splines to represent hair instead of cards. Rendering hair splines is very costly for a significant amount of geometry, so the hair in UE4 isn't as thick, causing some light to get through. Using an occlusion mask prevents some (or possibly all) of the light leaks from happening.

The occlusion is baked into the Specular map since we cannot (for cost reasons) raytrace every possible occlusion point. The comparison example (see below), shows a very subtle difference in the amount of occlusion that happens. Depending on your model and how the hair is setup, you can see different results with more or less light leak.
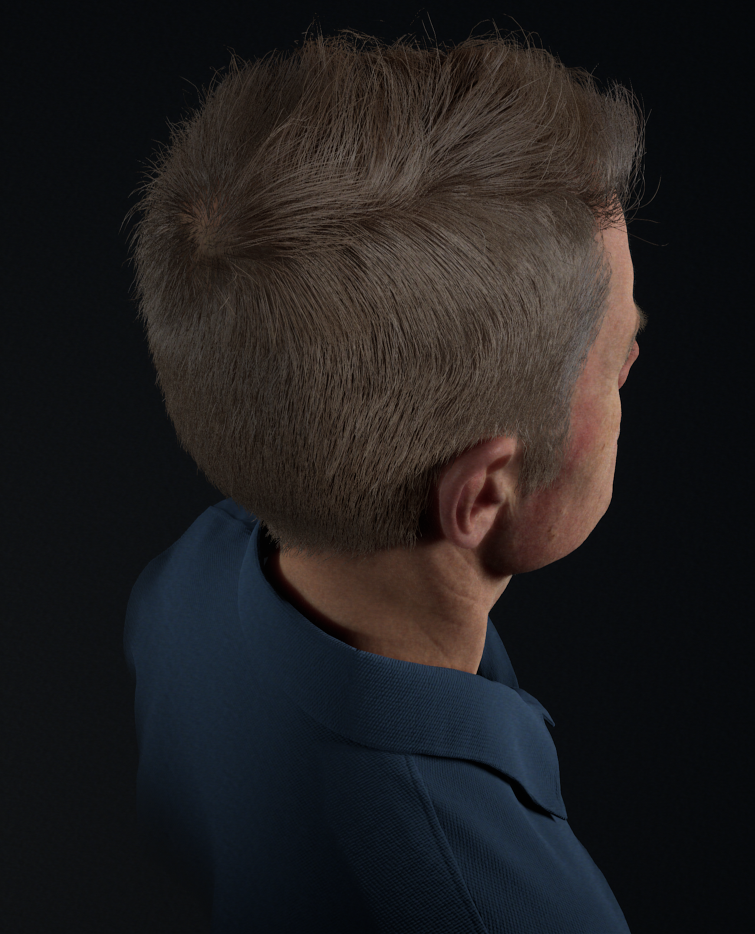

Hair
For the majority of digital humans we've created, we use poly strips which enables us to do painted hair and procedural hair. Because the UVs are laid out in a specific way with this method, an artist can paint the hair as needed on the scalp in an application like Maya. We also add a per-hair noise variation to vary the length of each hair strand, and to vary the roughness and color along the length of the strand.
Since hair is not a perfect cylinder, we want to vary the tangents along the length to add some "scraggle" to the hair.

Final result of the "scraggle" hair in the UE4.
Hair Fuzz
To simulate the short hair fuzz found on skin, the fuzz needs to be really subtle.
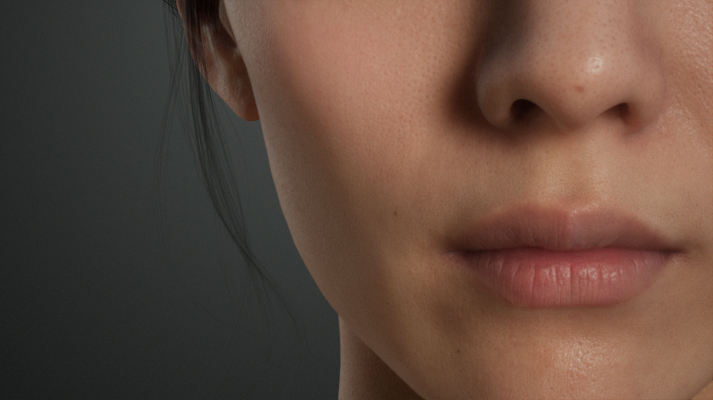
To create the effect, we used a Translucent shader model with an emissive material. We did not use the Hair shading model, because using a Hair shading model's specular is very difficult to match meaning that it's too bright or too dark all over in a lot of cases. By using a Translucent Emissive shader, we started with the base color, then added variation by darkening, brightening the tips, and sampling the surface normal to add subtle Fresnel edges.
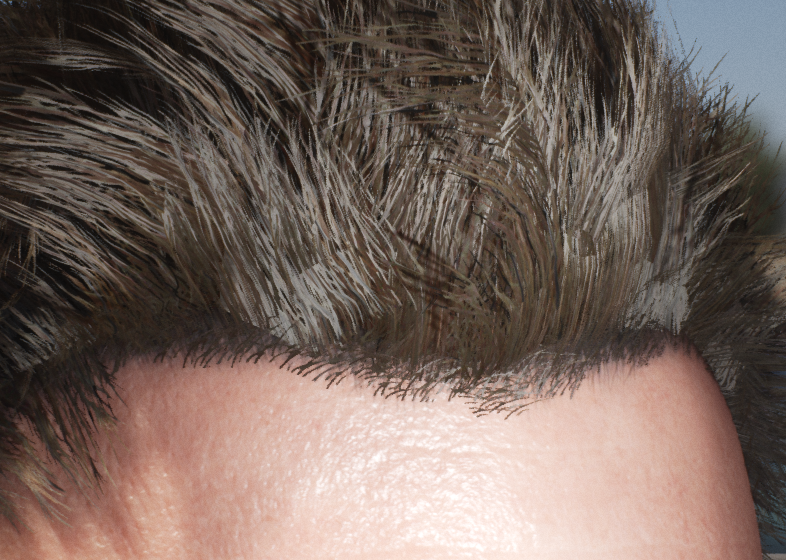
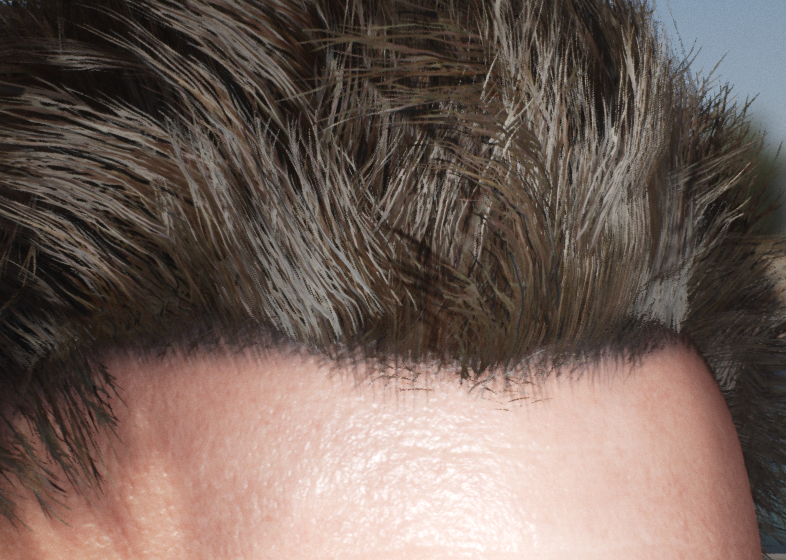
Using Pixel Depth Offset
Pixel Depth Offset (PDO) is not a property unique to the Hair shading model. For Hair, we use PDO to blend the edges of the hairline to not look so harsh. Pixel Depth Offset causes pixels to look recessed away from the camera, creating an artificial sense of depth along the surface. Since hair is made up of simple sheets of geometry, the use of PDO can provide a triangle sense of depth to the hair shape as a whole. It also breaks up the intersection point where a plane of the hair geometry contacts the scalp (shown below).
Data Acquisition and Character Modeling Approaches
Another significant part of getting the look and feel of the characters correct was in how our subject was captured and to do this, we partnered with 3Lateral to capture these high-quality results. These capture techniques and processes are similar to what is used for performance capture in modern day movies.
We achieved our result by using a combination of the following:
- Detailed Facial Scans
- Dental Molds
- Performance Capture with Mult-Camera Setups
- Sensors that closely captures Actor's Likeness
The scan data is the closest thing you'll get to a ground truth for the subject in 3D. Any adjustment or cleanup pass performed on the modeling side is going to be an interpretation of how it "should be" and will affect animation and material comparisons from that point forward. Part of the artist's job when looking at this scan data is to maintain the integrity of the scan data. This includes supplementing, or even correcting, areas where the system can't capture accurate detail, like areas in the mouth, around the upper eyelid, or the ears. This often requires good artistry with a deep understanding of anatomy, but most of all, the reference captures are critical here to recreate an accurate representation of the subject.

(Left to Right) Raw Scan Data, New Topology with scan details projected, and Displacement added on top of the center topology.
In this example, you can see how the original scan data was taken, retopologized, and cleaned up to accurately reflect the subject, in this case, Andy Serkis.
Facial Capture
Through the process of capturing an Actor's performance, we captured 50 different FACS (Facial Animation Coding System) poses where each pose helps isolate different muscle groups in the face. This information enabled us to create physically accurate data for different textures, such as the Diffuse, Normal, Specular, Ambient Occlusion, and Translucency.
Microgeometry
The minute details of the face, such as pores and minor imperfections, are captured from every pose the actor performed. This detail is the basis for blending the animated poses of the actor using these Micro Normal maps to provide accurate detail for how the shape of the face and wrinkles change during performance.
Displacement Map
The Displacement map is created from tertiary normal information during the scan process with the normals being captured from multiple lighting directions. Once we have that map, we can apply it in a sculpting application, like ZBrush or Mudbox. The accuracy of scan forms the macro details (or the ground truth) of the capture. However, the intensity of those tertiary details is arbitrary and needs to be matched by eye from reference shots of the subject.
Various Texture Maps
The texture maps created for use with our digital human characters are a combination of Artist created ones and ones generated from the original scan data. Below are some details on how we captured a few of the different types of textures.
- Albedo (Diffuse)
- This was captured during scan-time with the hair being projected onto the scalp. Artists would clean up any areas of the texture that required it.

- This was captured during scan-time with the hair being projected onto the scalp. Artists would clean up any areas of the texture that required it.
- Normals
- These consisted of two maps: a base map baked from the high-poly model, and a micro normal that captures the detailed micro-structure of the skin.

- A mask is also created to remove micro detail in some areas where it gives too much break-up, like around the tip of the nose where it gets too tight, or around the eyes for the tear duct and inner eyelid.
- These consisted of two maps: a base map baked from the high-poly model, and a micro normal that captures the detailed micro-structure of the skin.
In addition to these specific maps, we also used some painted regional masks to control the look of the character. For hair, we used scalp and cavity ambient occlusion maps, and to better control subsurface scattering we used some masks for thickness to control the amount of light transmission.
Mouth and Eye Setup
For the mouth and eyes, we used an approach that was similar to how the Photorealistic Character was set up with the exception that we use some additional geometry around the eyes and mouth to better blend materials or to provide better contact shadowing.
Here is an example of the geometry setup we use for our digital human characters.

- Lacrimal Meniscus (tear duct)
- Caruncle Blend Mesh
- Eyelid Occlusion and Blur Mesh
- Eyeball
- Gums
- Teeth/Gum Blur Mesh
- Teeth
- Saliva Bubbles
- Tongue
The combination of this and supporting geometry translates to the believability of our characters.
Eye Authoring Techniques
While developing our digital human characters, we improved the fidelity of our character's eyes using some different techniques in the model and with Materials. As we warned above, a lot of the eyes setup is inter-dependent on the Material setup and the reference material captured. We strongly recommend using our eye setup to at least get you started. The following is an overview of what we did to achieve a realistic looking result:
When building your own eyes, we strongly recommend that you start using the actual eye geometry and Material provided in this project. Most of the information here will be based on this particular eye geometry and Material. The PhotorealEyeGeo mesh can be exported from the project as an FBX and imported into your modeling application of choice in order to be used with your own characters and projects.
Shape and UV Layout
Much like the human eye of the real world, the eye mesh is not modeled to be perfectly spherical. It has a distinct dome at the front to represent the cornea, giving the eye an almost egg-like shape.

In this image, you can see the side view of the eye geometry. Note the raised area of the cornea at the front.
The UV layout for the eye is also critical since it is from this layout that proportions of each eye texture are produced. Fortunately, the UV layout that works best with the Eye shading model is relatively basic: a planar projection along the front axis of the eye. The inclusion of backfaces is not extremely important since they're hidden behind the eye anyway.
The UV layout is centered within the 0-1 UV space with the projection looking directly into the cornea of the eye.
Additional Eye Notes
Below are some additional details about the eye geometry and material techniques used.
Eyeball Geometry
In addition to the bulge of the eye geometry built in for the cornea, we also include a bulge near the nasal side of the eye, which is based off the detailed eye scan data we acquired of the subject's eyes.
Caruncle Blend Geometry
This geometry is used to soften the transition of the head geometry to the eyeball geometry.

Lacrimal Fluid Geometry
This represents the wetness that gathers underneath the eye and the lower eyelid.

Occlusion and Blur Geometry
This geometry is used to better seat the eye into the head.
Mouth Authoring Techniques
For areas around the mouth, we used techniques similar to those we used for the eyes. For the gums and teeth, we use a blur mesh around the teeth and gums to blend them more realistically. We added saliva bubbles in some of the characters to add to believability.
These parts of the Mike Seymour head are not readily visible since this is Static Mesh. Also, it does not include some geometry, like the blur mesh for the gums or saliva bubbles that our later digital humans do have. See how the eye blur meshes were set up to blend between the eye and the head to get an idea of how to set it up on your own.
Hair Authoring Techniques
We use a combination of techniques when authoring hair for digital humans such as using both cards and splines to achieve the look of a realistic, believable digital human. In creating all of the hair for our characters, we used XGen for Maya to interactively groom a character's hair, as was the case with Mike Seymour, or we use Guide Curves to position the hair, as was done with Siren. After that, Arnold for Maya was used to render out any textures we required for the hair to be later used in UE4's Materials.
In the example of Siren (seen in the image below), we used both hair cards and hair splines layered over the cards to produce her hair. This enabled us to reduce the geometry due to her hair length and use what works best with both techniques: reducing the light leaks with splines due to hair thickness, and reducing the amount of cost associated with rendering the hair in realtime.

Siren's hair layers (from left to right) hair cards, hair splines, and additional short hair splines.
Hair Splines
We converted hair splines to thin poly strips (or billboards). When this was done with XGen, it would make the billboards camera-facing. Before exporting from XGen, we'd make sure this was disabled so that it works well with UE4.

Spline hair that is layered over hair cards.
Since the hair was converted to poly strips, we would use three UV sets: one to control the hair root, tip, and color, another for regional masking, and a final one to store bake hair ambient occlusion.

- UV 1
- This UV is auto-generated by XGen when the tiling option is turned off. Each UV shell is overlapping for all the hair strands, which we then use to globally control the root and tip width along with the color of the hair.
- UV 2
- This UV set enables regional control for things like hand painted masks, or if we wanted to add noise for color variations, it could be done here.
- UV maps were generated using some tricks that mimic the scalp.
- The groomed XGen primitives were converted to geometry using the default UV settings.
- We re-selected the XGen groom and added an XGen modifier to shrink the hairs down to be very short (similar to stubble). And because XGen doesn't change its topology order based on vertex color or length, a blend shape can be created later. The shortened hair is once again converted to poly strips using default settings.
- We then create a second UV based on the shortened hair and transfer the scalp geometry and transfer the UVs in world space.
- Finally, we create a blend with the overlapping hair UVs and the scalp-type layout that gives us one hair mesh with two UV sets with one being global and another that gives you granular control over its look.
- UV 3
- This UV is used for baked hair ambient occlusion by laying out all the poly strips flat in a single texture. The only caveat here was that the map had to be fairly large to capture the pixels that were affected to appropriately display the AO.
Hair Cards
In creating hair cards for our characters to get the correct look, XGen was used for the hair and we rendered out different textures using Arnold.

Example of hair rendered to a texture sheet.
To mimic the slope of the skull and avoid doll-like looking hair, we used a slanted plane as the surface for the hair to break up the roots of the texture so that they are not all the same length. You can see this in various roots of the hair, especially in the examples in the middle (see above).
The Diffuse texture was rendered out using Arnold, which is mostly flat with minor strand variations added in, an Ambient Occlusion texture that is used for specular occlusion, and a root/tip gradient that is used for blending the hair to the scalp. Any specularity in the hair was handled using UE4's own Hair shading model in the material.
We preferred placing hair cards by hand to produce the result we wanted. Using a procedural method or instancing typically required more time to clean up.
Additional Information
If you'd like additional details of how we achieved and created our Digital Human characters, you can check out the videos below from our various talks at SIGGRAPH and GDC.
Contributing Partners
3Lateral worked closely with our teams here at Epic Games and provided detailed scanning data, animated maps, rigging, and more for our digital human demos and "A Boy and His Kite" open world demo.
- For Andy Serkis and Osiris Black©, 3D Scanning, Character, Concept, Creature, Face, Film, Games, and Motion were provided.
- For Siren, 3D Scanning, Face, and Motion capture were provided.
- For The Kid, Concept, and Motion were provided.