
Once you have finished rigging your Control Rig, you can animate it in various ways, such as directly in Sequencer, or more procedurally with Animation Blueprints.
This document provides an overview of these animation methods, their tools, and features.
Prerequisites
- You have created a Control Rig Asset. See the Control Rig Quick Start page for information on how to do this.
Animating in Sequencer
A Control Rig can be interacted with and animated in Sequencer. You can either add a new Control Rig capable character to your sequence, or add the Control Rig to a currently existing character.
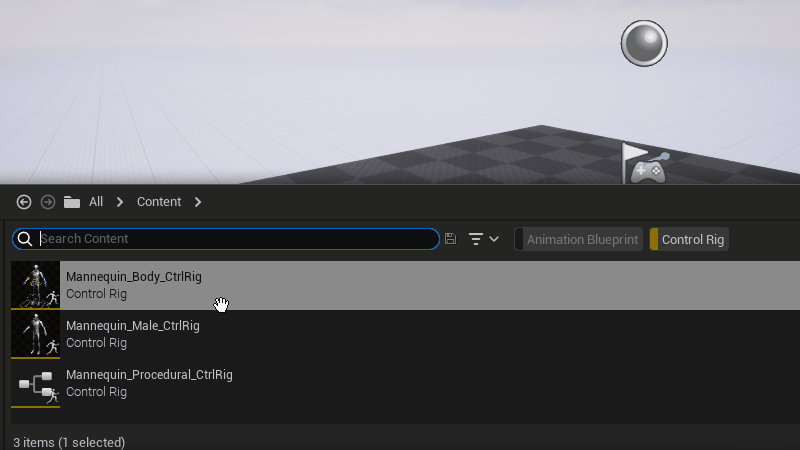
Begin animating a Control Rig by dragging the Control Rig Asset from the Content Browser into your level. This will open a new Sequencer, and add the Skeletal Mesh with Control Rig tracks to it.
If your Sequencer already contains a Skeletal Mesh Actor and you want to add a Control Rig to it, then click the Add (+) Track button on the Skeletal Mesh Track, and select Control Rig > Control Rig Classes and select from the list of available Control Rig Classes for the Skeletal Mesh asset.

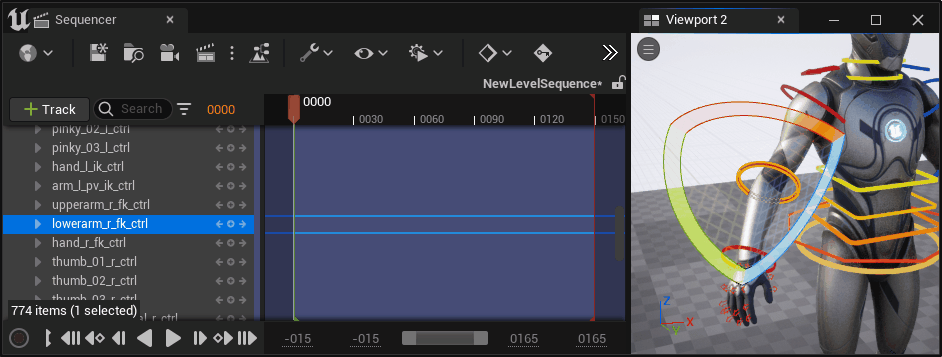
Expanding the Control Rig Track will reveal the list of controls that can be animated. Selecting a control here will also select it in the Viewport, and conversely selecting the control in the Viewport will select the Track.

Controls can be Keyframed similar to most objects in Sequencer. Additionally, pressing the S Key with a Control selected will create a Transform keyframe on the selected control at the current playhead time.
Multiple Control Rigs
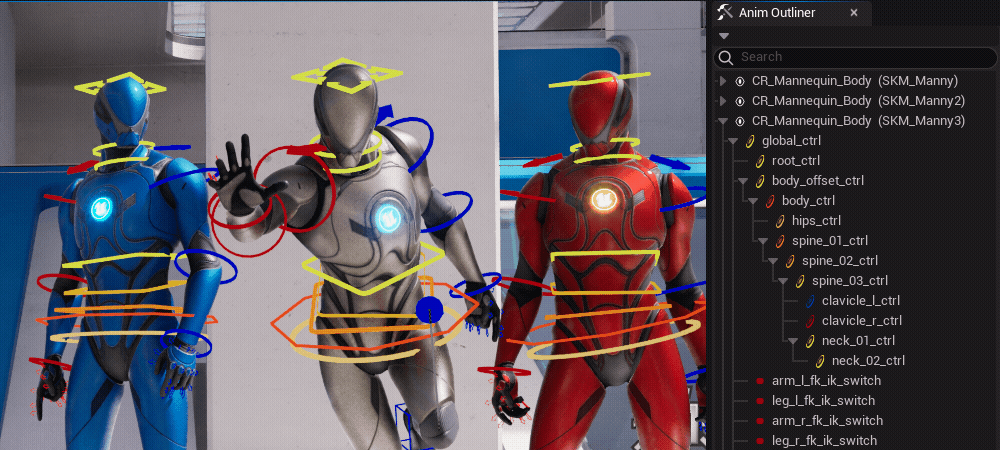
Sequencer supports the display and animation of multiple Control Rigs at the same time. All Control Rigs and their Controls will display in the viewport and the Anim Outliner. You can also change their visibility by clicking the eyeball icon to show or hide the Control Rig.
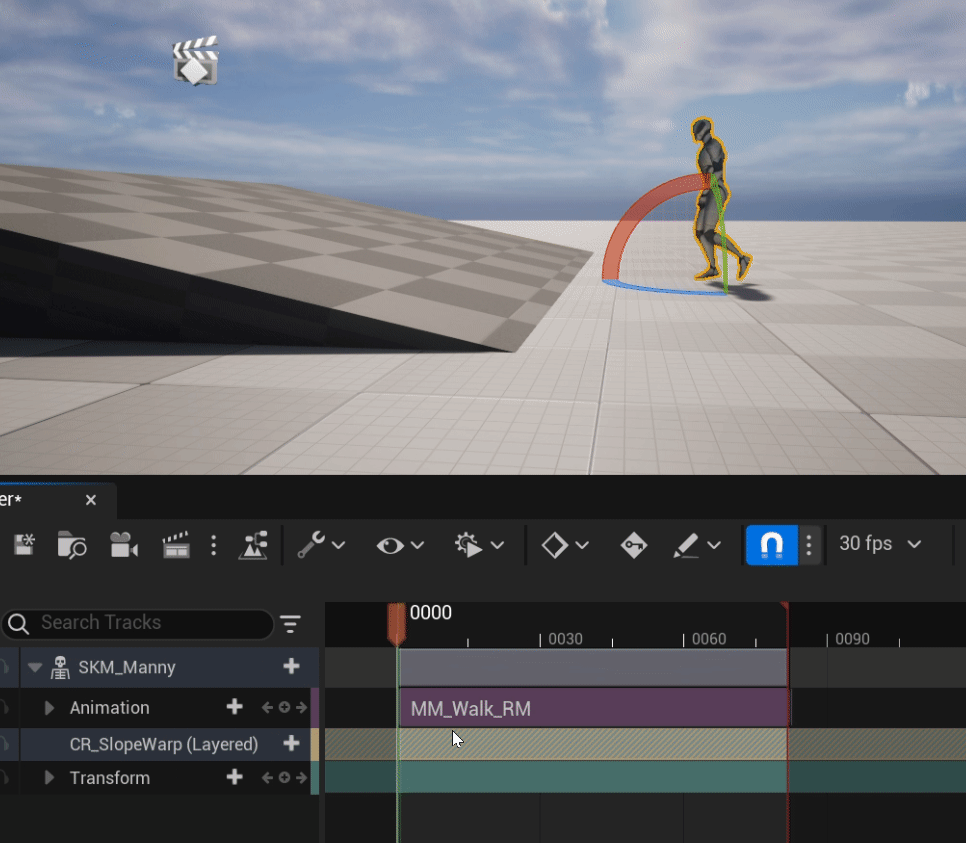
Layered Control Rig Track
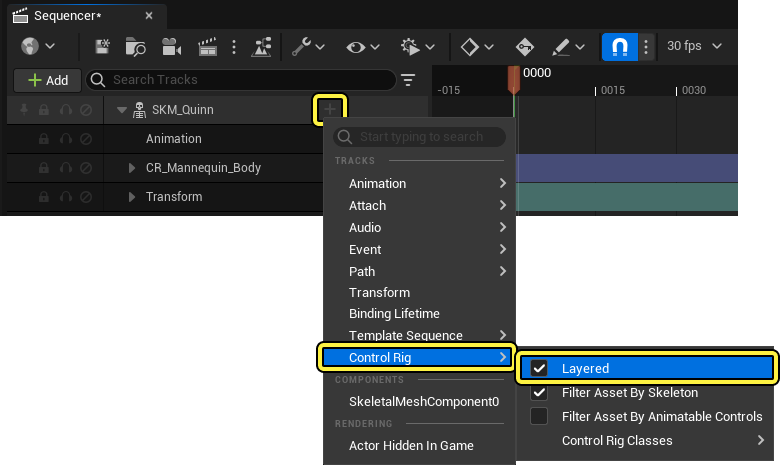
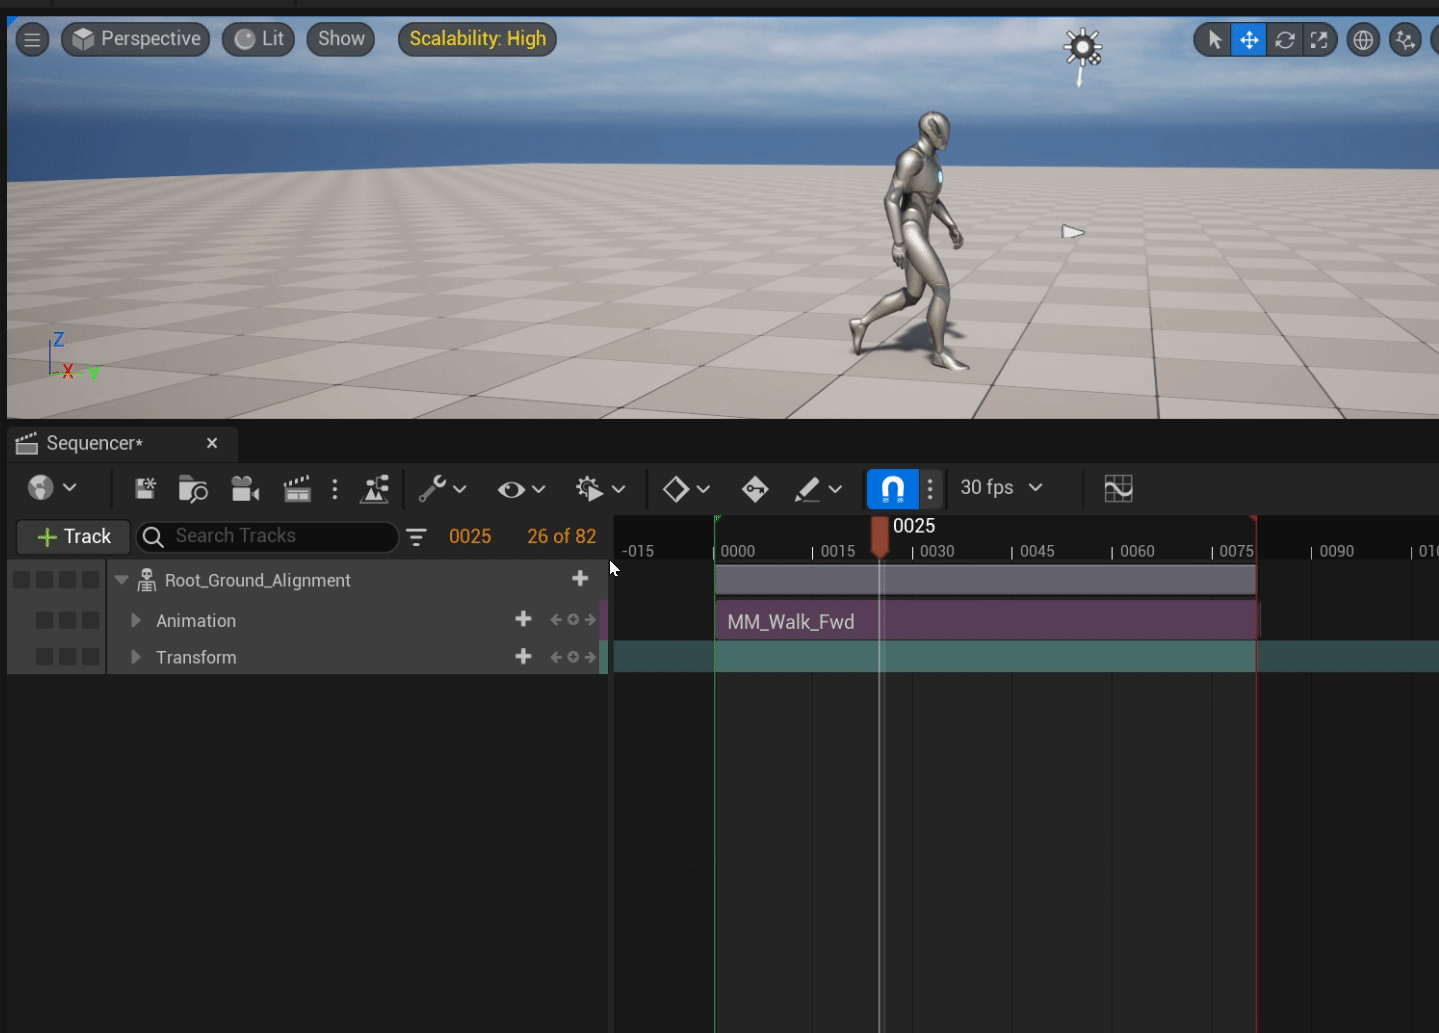
When using Control Rigs in Sequencer, you may want to layer other animations or rigs in order to create a more dynamic animation system or workflows. To set a Control Rig track to be a Layered Control Rig track, click the (+) Add Track button adjacent to the Skeletal Mesh track, then navigate to Control Rig > Layered and check the box.
In order for a Control Rig to function as a layered Control Rig it must have an operational Backwards Solve graph. For more information about setting up a Backwards Solve graph for your Control Rig, see the Backwards Solve section of the Control Rig Solve Directions documentation.
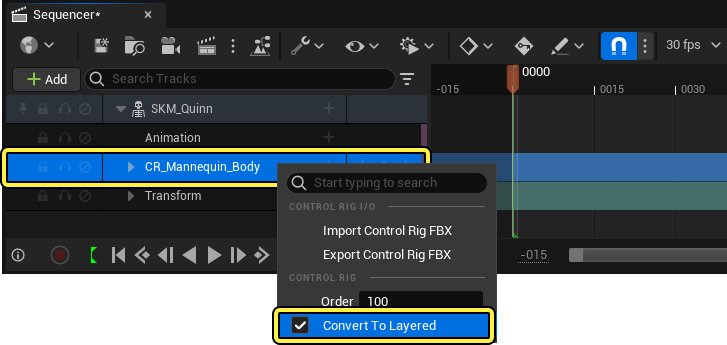
You can also set a Control Rig track to be layered by right-clicking the track in the Sequencer Timeline’s Outliner, and enabling the Convert To Layered property in the context menu. The default value of a Layered Control Rig track is 100.
Animation Sequences will now be layered with the Control Rig without the need to bake animation sequences to the Control Rig, by running the animation track through the Control Rig’s Backwards Solve graph.
You can also use multiple Control Rig tracks to make modular edits to your character’s pose. After creating and setting a layered Control Rig track in the Sequencer Timeline, you can set the order the Control Rigs are layered, to set the behavior of how the different tracks influence the final pose. To edit a Layered Control Rig track’s order, right-click the track in the Sequence Timeline’s outliner, and set a value for the Order property. The order begins at 100, tracks will be evaluated in descending order, beginning with the track with the highest order value.

Sequencer tracks that are not enabled as layered are also usable alongside layered Control Rig tracks and can be affected by the order property. However, if a Control Rig track that is not labeled as layered is set to a lower order value than a layered track, it may clobber the pose the layered track is generating. It is important to consider your order when using a combination of layered and non-layered Control Rig tracks. It is recommended to add layered Control Rig changes on top of Animation Sequence tracks or non-layered Control Rig tracks, in order to preserve the pose modifications they are making.
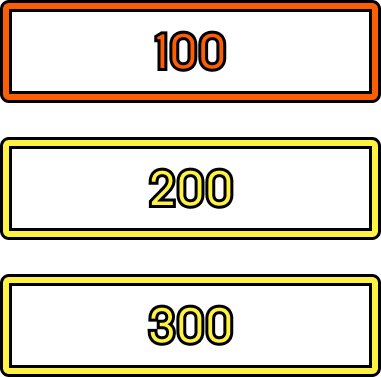
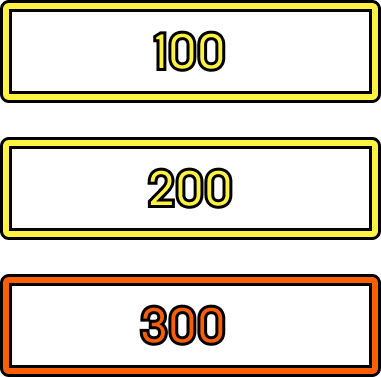
| Incorrect Ordering | Correct Ordering |
|---|---|
Here the non layered Control Rig track (Orange) is placed at the lowest value in the order, 100, and will therefore clobber the pose generated by the two layered Control Rig tracks (Yellow), ordered 200 and 300. |
Here the non layered Control Rig track (Orange) is placed at the highest value in the order, 300, meaning the layered Control Rig tracks (Yellow) will be additively layered on top, ordered 100 and 200. |
 |
 |
You can adjust or key the weight of the Layered Control Rig tracks by right-clicking the track in the Sequencer Timeline and toggling the Weight property.
When working with multiple layered Control Rig tracks, you can revert selected key values to their default values, for all selected Control Rig tracks, using the hot key Ctrl+G, or revert all keys for the selected Control Rig tracks using Ctrl+Shift+G.
You can also set all selected keys to zero using the hot key Ctrl+I, or set all key values for the selected Control Rig to zero using Ctrl+Shift+I.
Animation Features
The following features are available to help you animate your Control Rig in Unreal Engine.