
For character garments, you typically model the clothing in an external DCC (digital content creation) application and import it as a static mesh. You then transfer the skin weights from the skeletal mesh to the static mesh instead of manually painting weights. This functionality is available in-engine through the Panel Cloth Editor. However, you can create custom workflows using Blueprints.
This guide shows how to create an action utility to transfer skin weights (bone weights) to a static mesh in Unreal Engine. The action utility takes a given skeletal mesh asset (source) and a static mesh asset (target) to create a new skeletal mesh asset. The new asset contains the geometry of the static mesh and skin weights from the source. The action utility consists of Geometry Scripting functions to convert the geometry.
Prerequisites
The action utility in this guide builds on the utility created in the Convert Mesh Actor to Skeletal Mesh Asset tutorial. Use that tutorial to create and understand the concepts of the base script. You can also download the zip file below to continue.
To follow this guide, make sure to:
-
Have the Geometry Script plugin enabled. To learn more, see Working with Plugins.
-
Unzip the Example Content file and place the ActorActions folder inside the Content folder of your project. To learn more, see Importing Assets Directly.
Blueprint and Function Setup
Because the goal is to create a new skeletal mesh asset from a given static and skeletal mesh through a right-click menu, you can use the same Blueprint utility from the Binding Assets to a Skeletal Mesh tutorial. You then create a function that appears in the context menu.
To create the new actor action function, follow these steps:
-
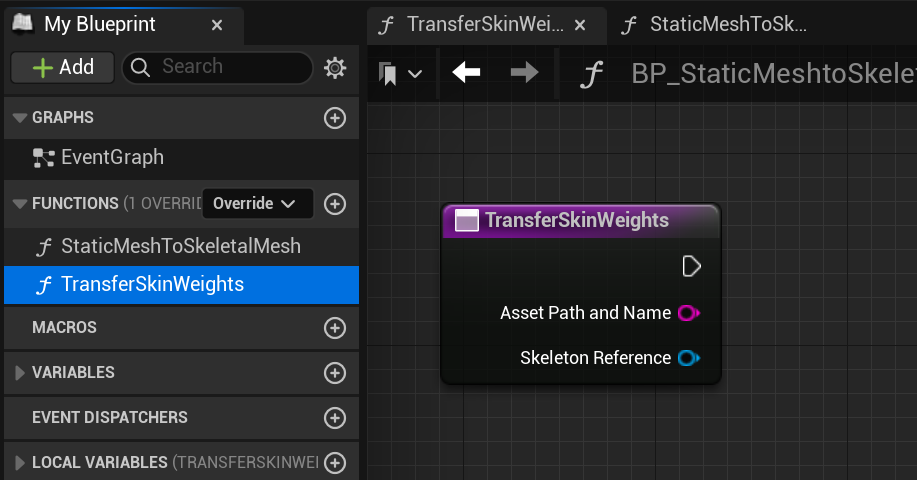
From the Content Drawer, double-click BP_StaticMeshtoSkeletalMesh_ActorAction to open it.
-
In the My Blueprint panel, create a function by clicking the plus icon next to Functions.
-
Name the function TransferSkinWeights. The name appears in the context menu.
-
Copy the script from the StaticMeshtoSkeletal Mesh function into the TransferSkinWeights function.
-
Delete the nodes for copying the bone index and weights:
-
The Bone Name variable's Set node.
-
Copy Bones from Mesh
-
Mesh Create Bone Weights
-
Get Bone Index
-
Make Bone Weights
-
Make Array
-
Set All Vertex Bone Weights
-
-
Connect the TransferSkinWeights function node to the respective variable sets.
-
Connect the Skeleton Reference output pin to its Set node.
-
From the TransferSkinWeights node, connect the execution pin to the Skeleton Reference variable's Set node.
-
Connect the Skeleton Reference variable's Set node execution pin to the Asset Path and Name variable's Set node.
-
Connect the Asset Path and Name output pin to its Set node.
-
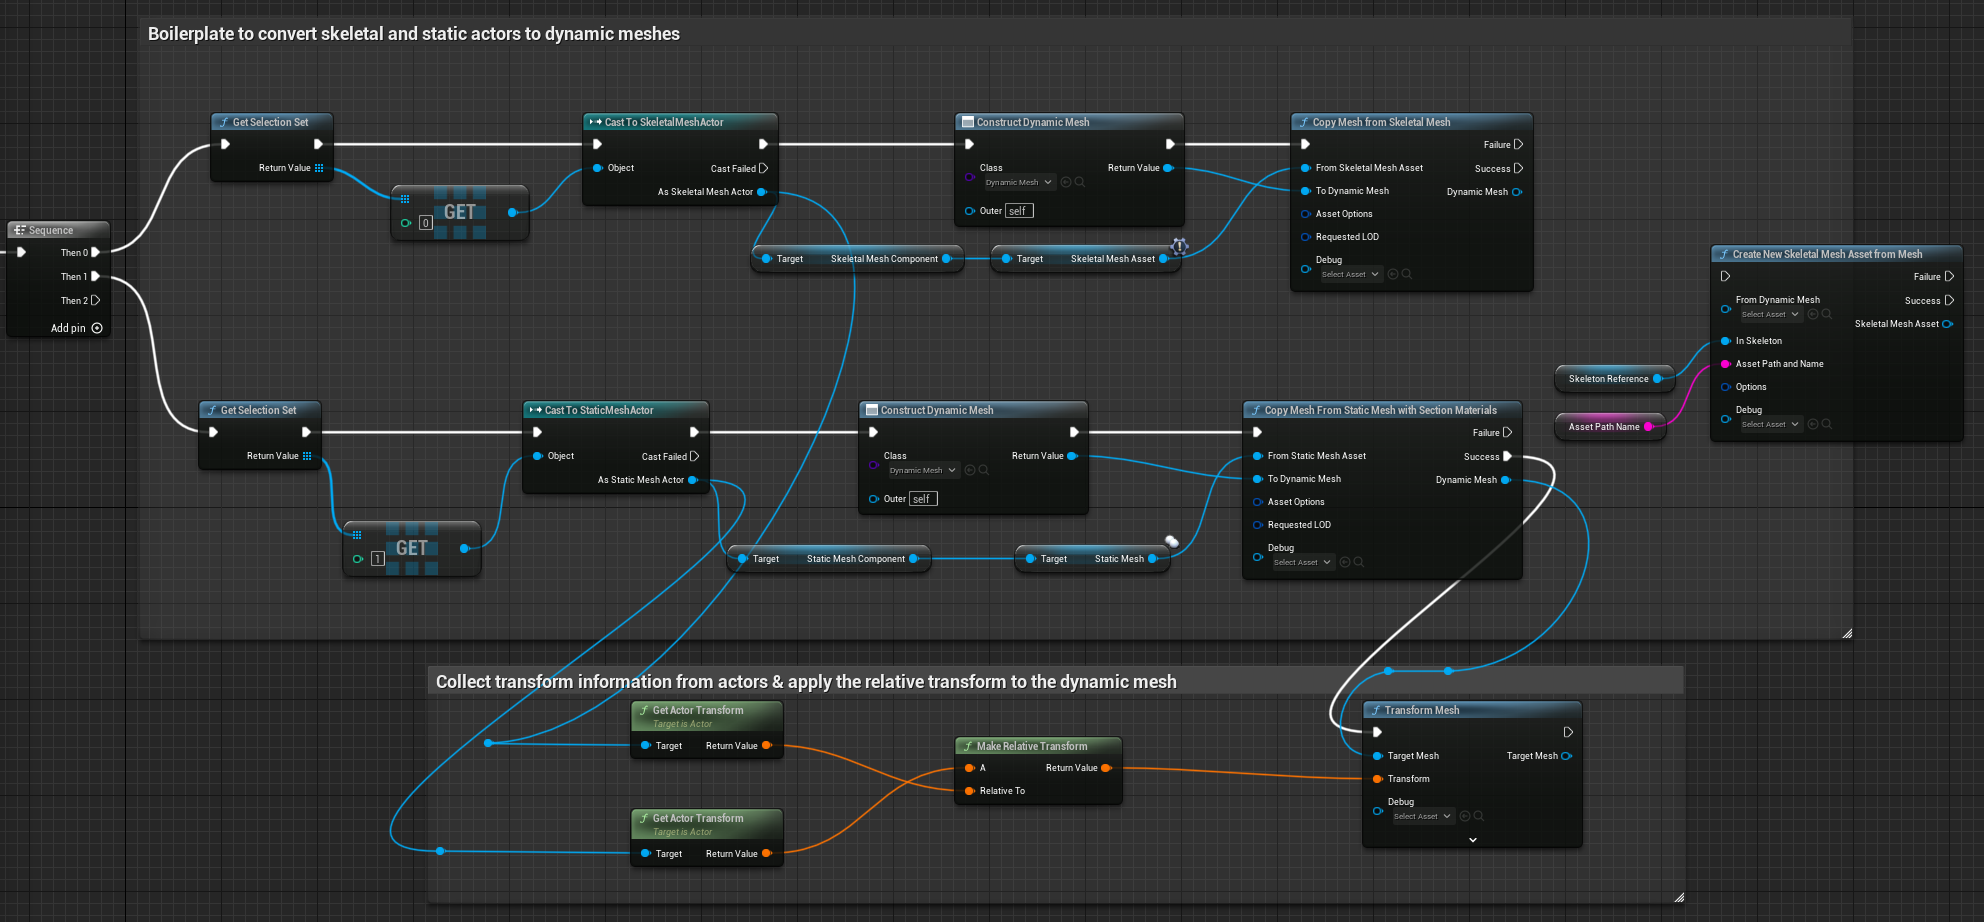
The base of the script does the following:
-
Gets the selection of a skeletal and static mesh and converts them to dynamic meshes.
-
Captures the relative transformation of the target and source mesh.
-
Converts the target dynamic mesh to a new skeletal mesh asset.
Material Map
To apply the materials from the static mesh to the target mesh, you must create a material map. The material map saves to the new skeletal mesh asset, retaining any material information from the static mesh. To capture the material information, set up a material variable.
To create a material variable, follow these steps:
-
In My Blueprint > Local Variable, click the plus icon to create a material variable.
-
Name the variable "Materials" and set the pin type to Name.
-
In Details > Variable Type, set the container for the type to Map, then set the value type to Material Interface.

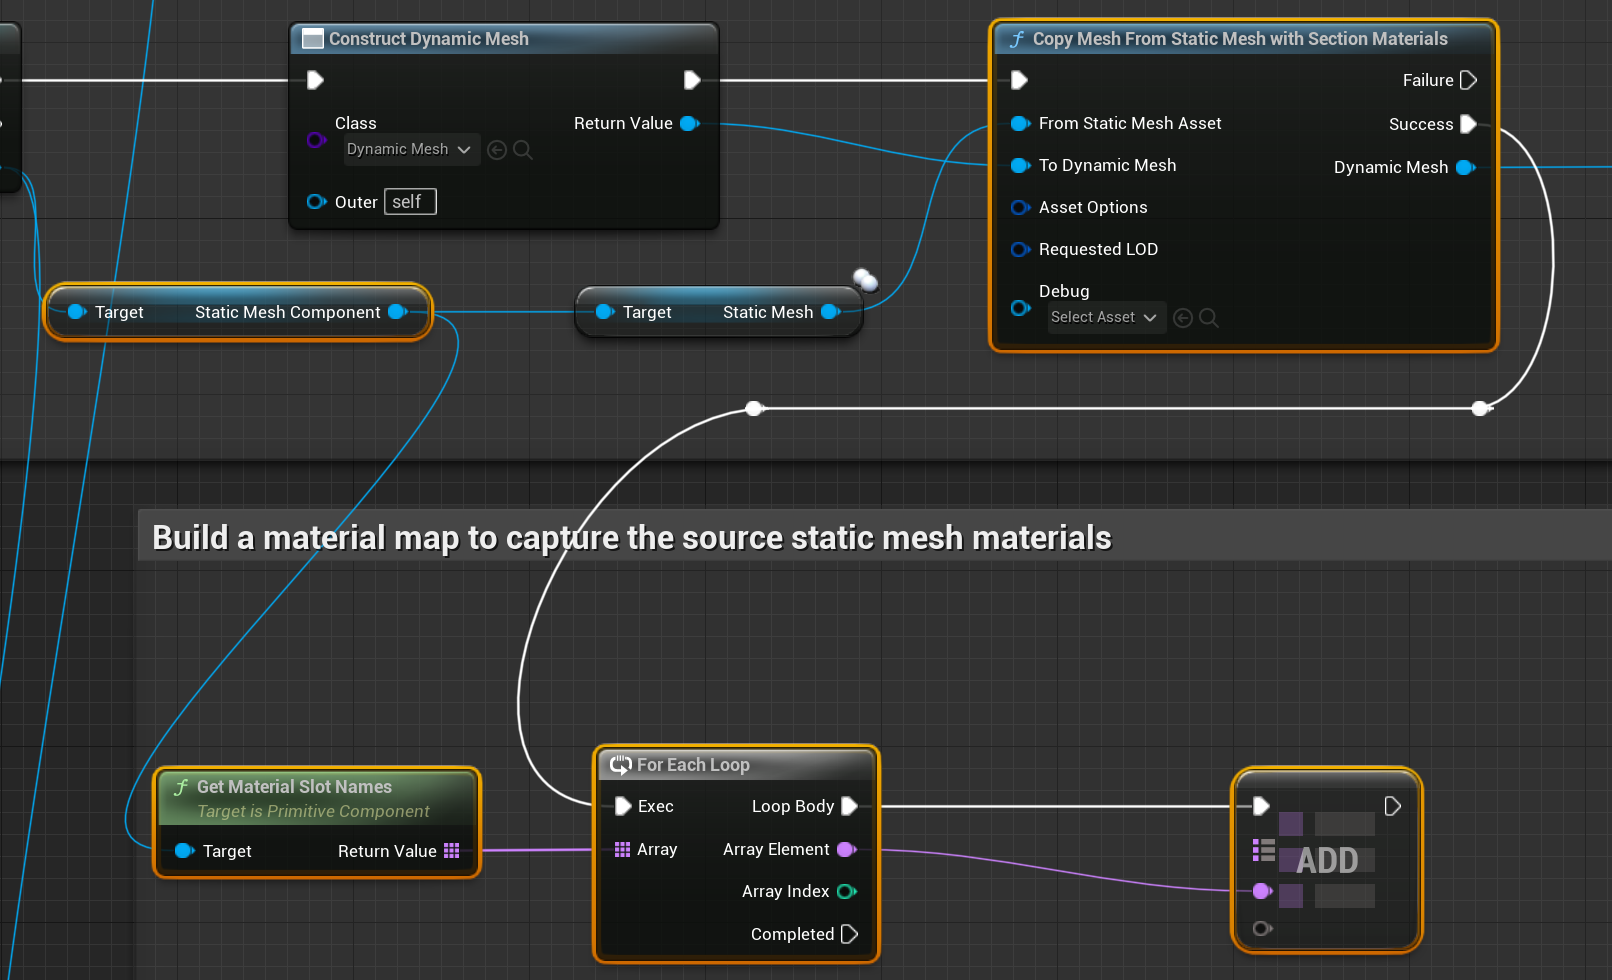
To pull the material information from the static mesh and apply it to the target mesh, follow these steps:
-
From the Static Mesh Component node, drag off the output pin, then search for and select Get Material Slot Name.
-
Drag off the Return Value pin, then search for and select For Each Loop.
-
Connect the Exec input to the Success pin of Copy Mesh From Static Mesh with Section Materials.
-
Drag off the Loop Body output, then search for and select Add (from the Map category).
-
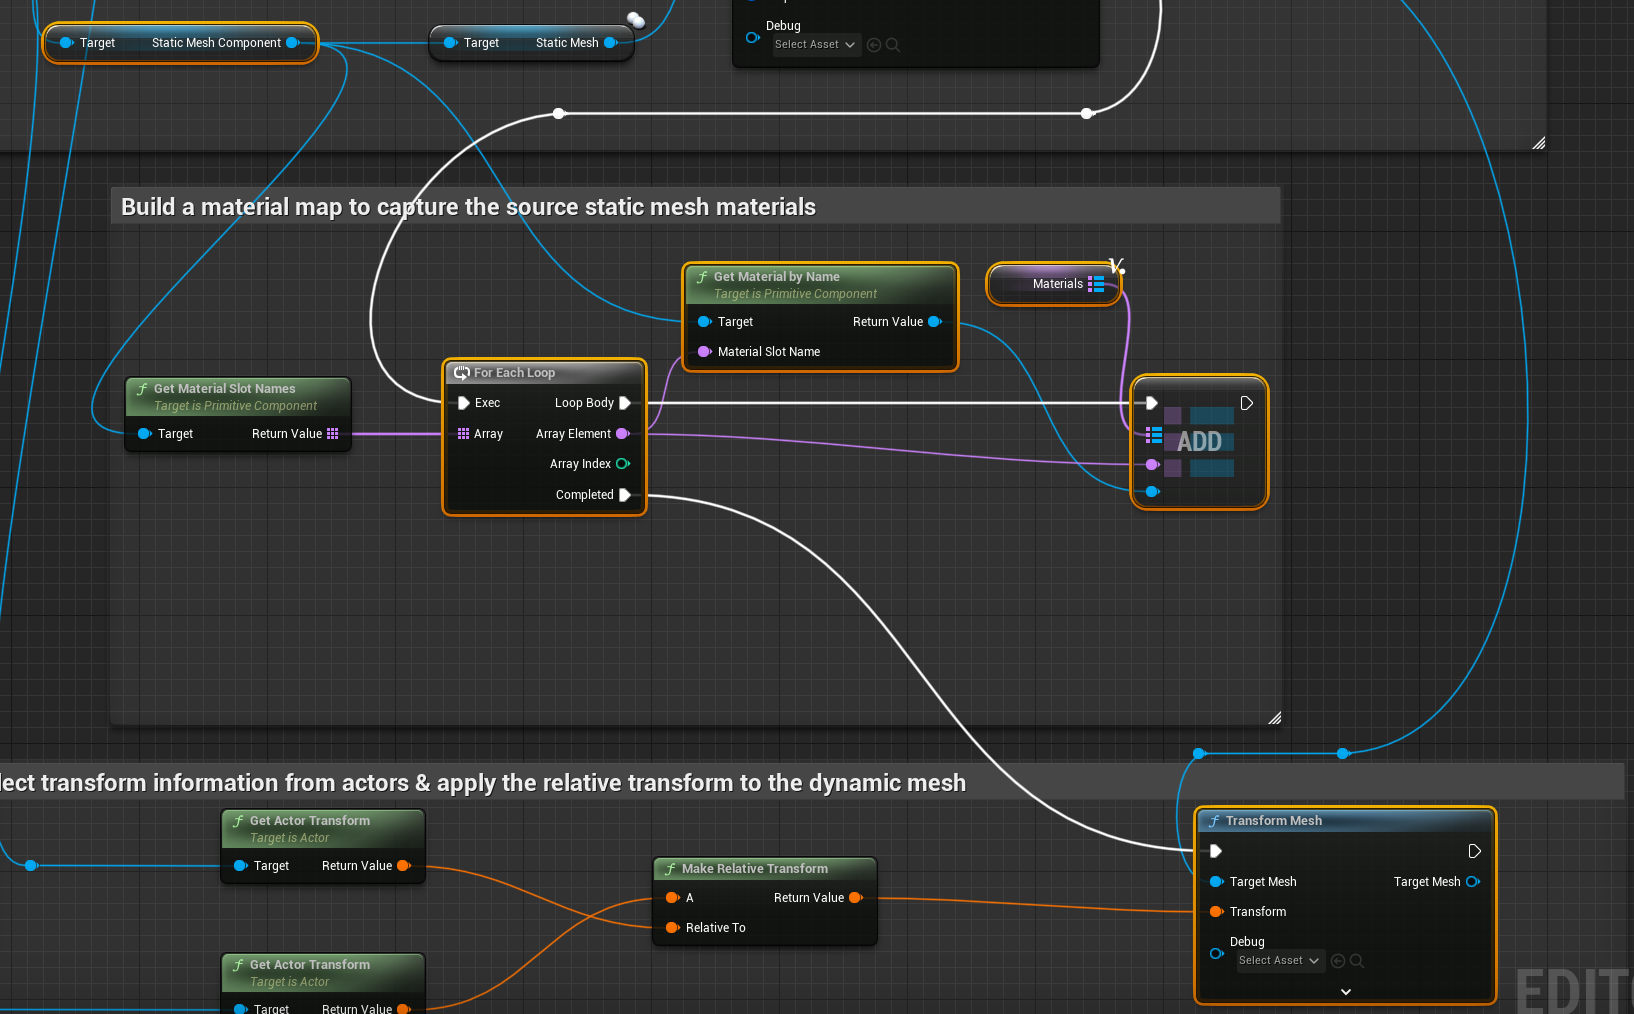
Connect the Array Element to the key input (third pin) of the Add node.
-
Drag in the Materials variable and click Get Materials.
-
Connect the Materials output to the target map (second input pin) of the Add node.
-
From the Static Mesh Component node, drag off the output pin, then search for and select Get Material by Name.
-
Connect the Material Slot Name input pin to the Array Element output pin.
-
Connect the Return Value output to the value input (third input pin) of the Add node.
-
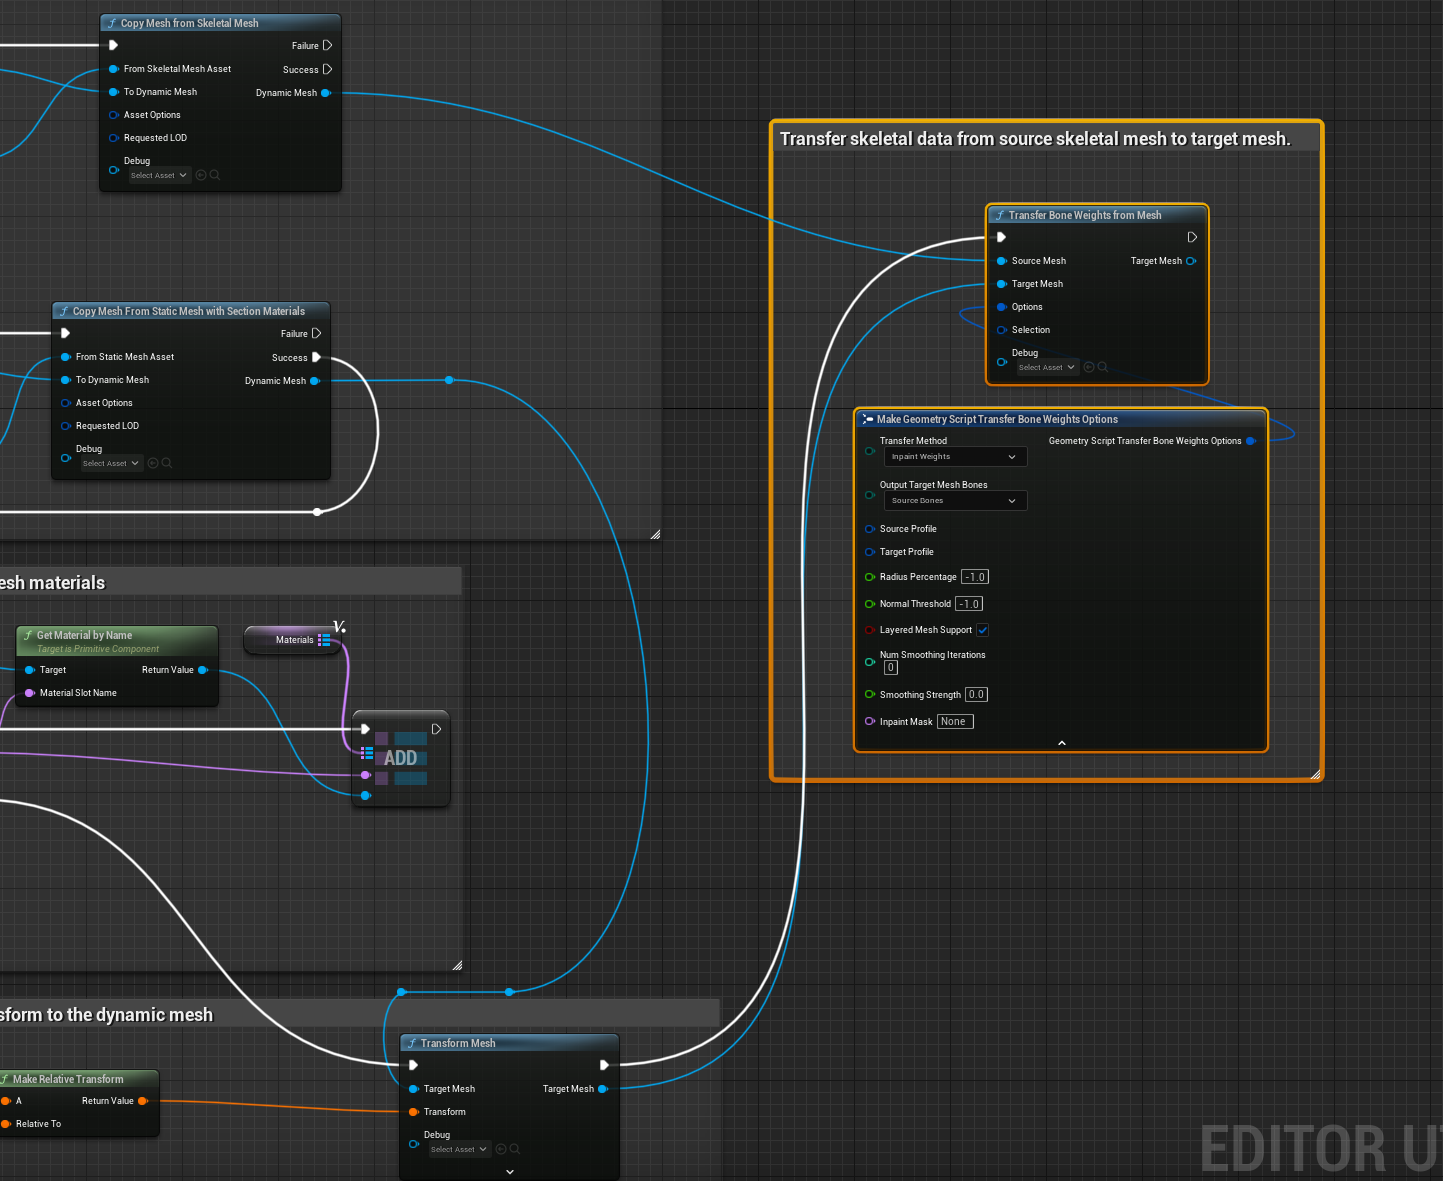
From the For Each Loop node, connect the Completed output to the execution pin of the Transform Mesh node.
Transfer Bone Weights
Like the StaticMeshtoSkeletalMesh function, a static mesh has no skeletal data or bone weights. Therefore, when you convert it to a dynamic mesh, it still lacks that data.
The difference is, instead of collecting a specific bone index to bind and add weights to, you use only the Transfer Bone Weights From Mesh node to copy the skeletal information. The node checks the vertices of the target mesh to the closest points on the source skeletal mesh to copy bone weights. You can use the options to control the behavior of the node.
To copy the bone weights, follow these steps:
-
From the Transform Mesh node, drag off the execution pin, then search for and select Transfer Bone Weights from Mesh.
-
Connect the Target Mesh input and output pins.
-
From the Copy Mesh from Skeletal Mesh node, connect the Dynamic Mesh output to the Source Mesh input.
-
Drag off the Options pin and select Make Geometry Script Transfer Bone Weights Options.
-
Set Transfer Method to Inpaint Weights.
-
Compile (Ctrl + Alt) and save (Ctrl + S).
Inpaint Weights Transfer Method
Inpaint Weights is much better at handling non-skin-tight clothing at the cost of slightly slower execution times. It works in two stages:
-
Similar to the Closest Point On Surface option, for each vertex of the target mesh, it finds the closest point on the source skeletal mesh.
-
Instead of copying the weights over, it validates if it's a good match by checking that the closest point is within a certain distance and that their normals do not deviate too much.
To learn more about these options, see the Panel Cloth Transfer Skin Weights Node guide. The Chaos node is essentially the same as the node in Blueprints. It shares the same underlying code.
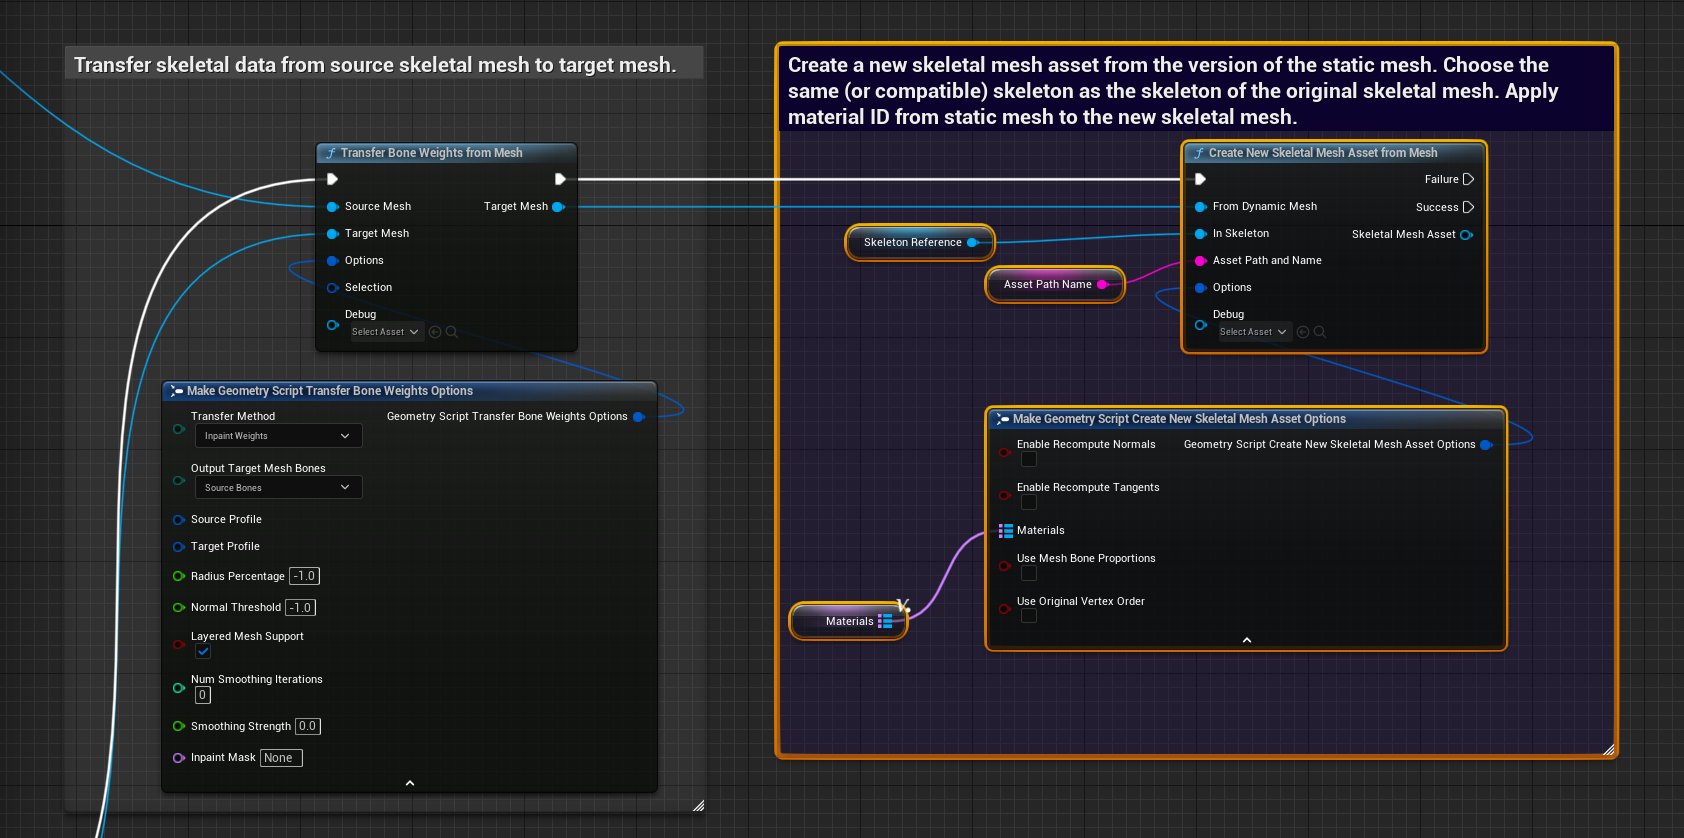
Convert Dynamic Mesh to Skeletal Mesh Asset
As your dynamic mesh now contains the needed information from the source meshes, you can convert it to a new skeletal mesh asset along with the material information.
To convert to a new skeletal mesh asset and apply the material map, follow these steps:
-
Connect the execution pins of the Transfer Bone Weights from Mesh and Create New Skeletal Mesh Asset from Mesh nodes together.
-
From the Create New Skeletal Mesh Asset from Mesh node, drag off the Options pin and select Make Geometry Script Create New Skeletal Mesh Asset Options.
-
Click the down arrow to expand the options list.
-
Drag in the Materials variable and click Get Materials.
-
Connect the variable to the Materials input option.
Run the Action Utility
Your utility is complete and ready for use. Below is the snippet of the utility function.

To run the action utility, follow these steps:
-
Place the source skeletal mesh in the viewport and align one of the shirt assets to the skeletal mesh body.
-
Click the skeletal mesh first, and then Shift + click the static mesh, to select both.
-
Right-click the actors and choose Scripted Actor Actions > Transfer Skin Weights (your name for the function).
-
Fill out the prompt.
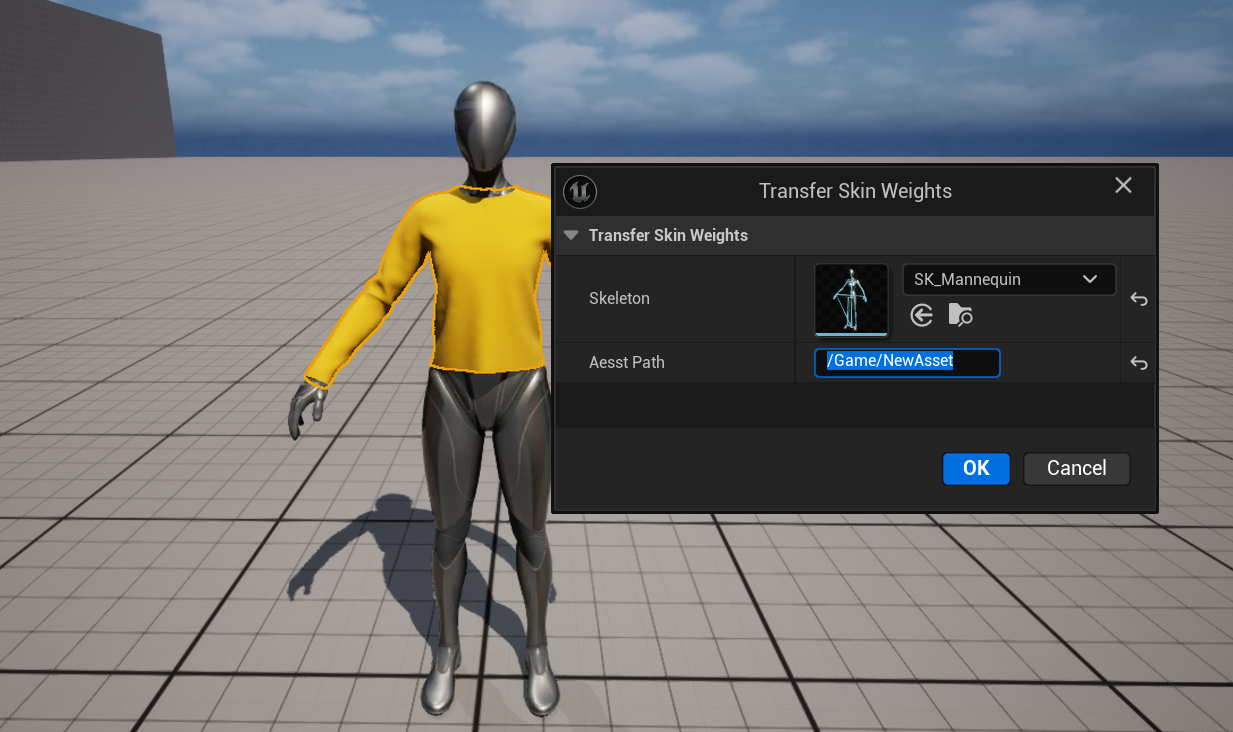
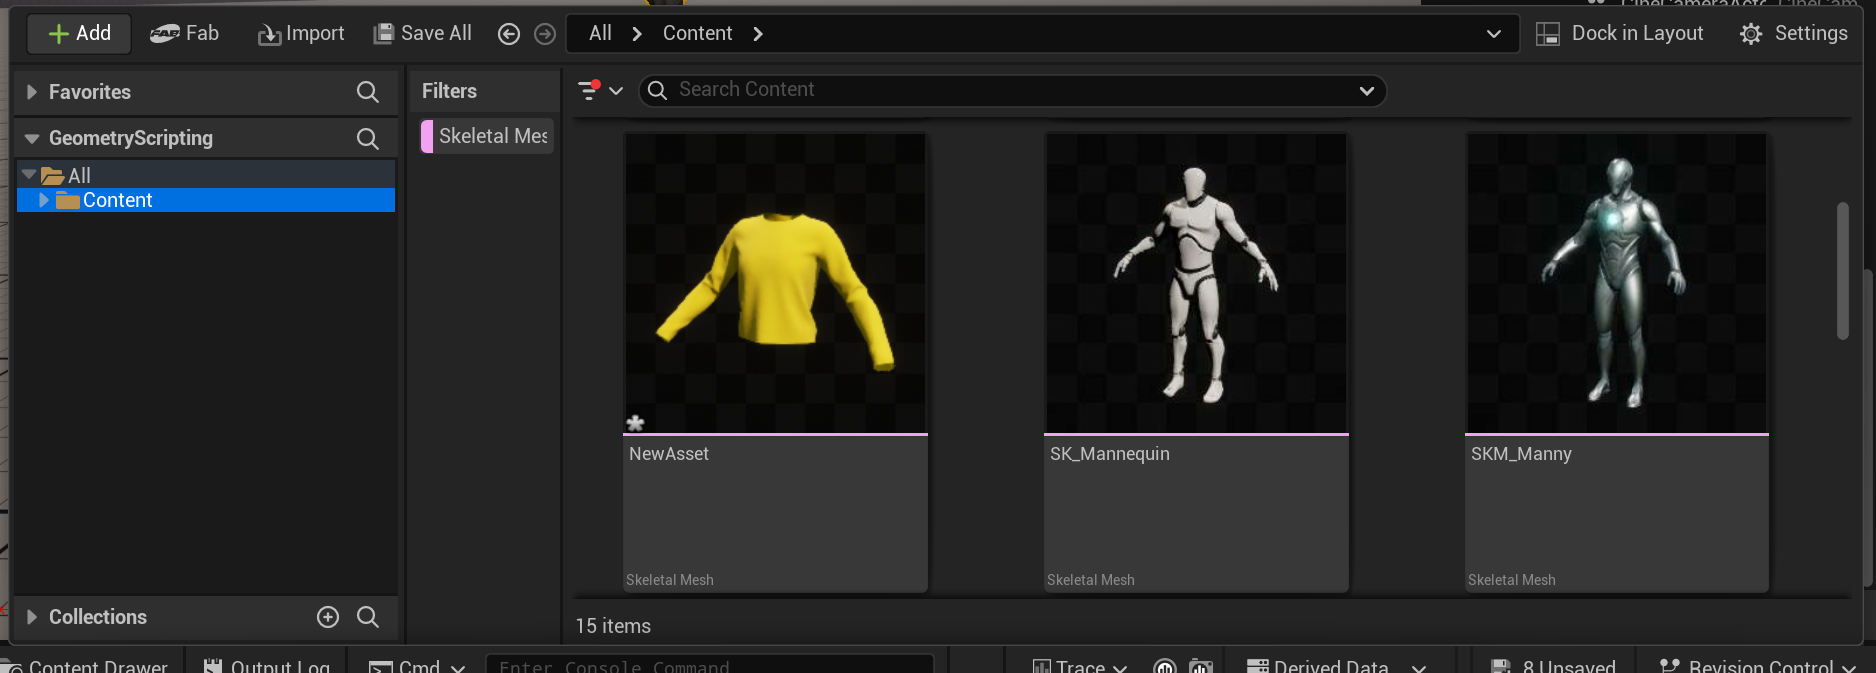
The utility converts a static mesh to a skeletal mesh asset with skeletal data from the source. The asset should appear in the folder you have chosen.
You can test the bone weight transfer in the Skeleton Editor.