
Neural Post Processing is a user-friendly way to use neural networks in the post processing pipeline. You can use the material editor to setup Post Process Materials that utilize neural networks without writing any code.
Enabling Neural Post Processing
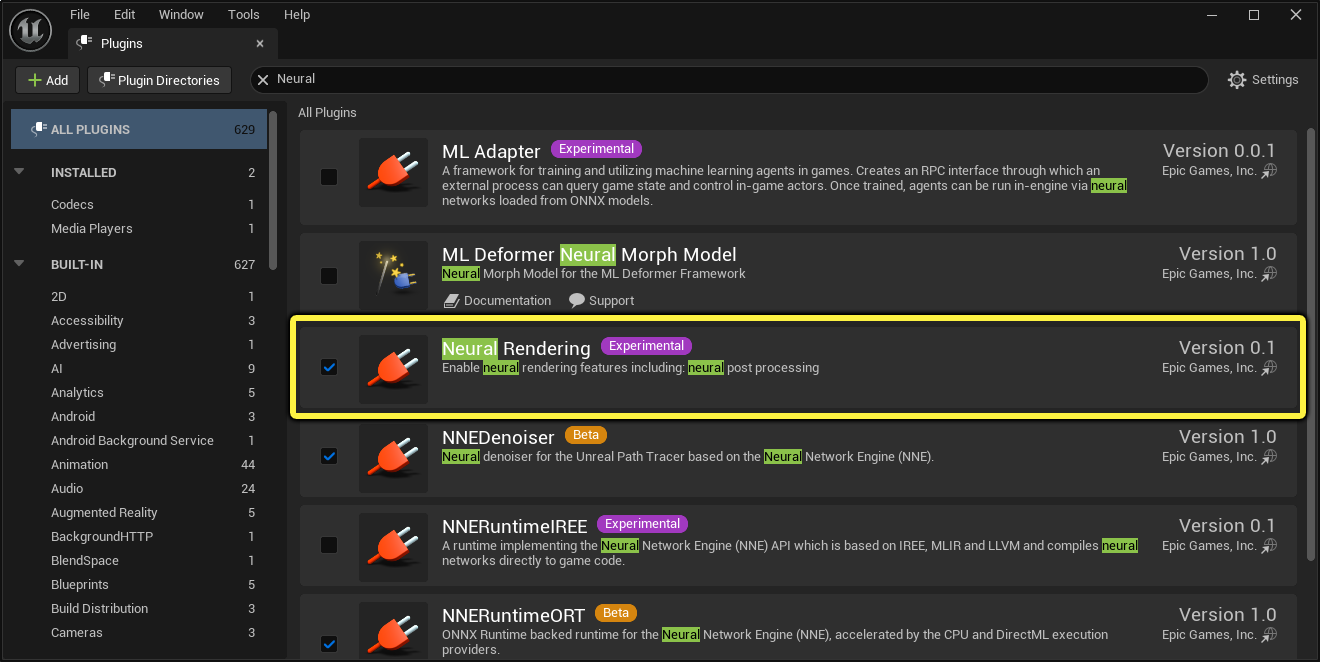
Before you can begin, you must first enable the Neural Rendering plugin in your project. You can do so from the Plugins browser located in the main menu under Edit. This plugin contains all the necessary code to run the network based on the neural profile and the neural buffer / texture set by the material editor.
Setting up a Neural Post Processing Material
Follow the sections below to import and set up an ONNX format neural network, and create a Post Process Material that can use this neural network.
Setting up the Neural Network Profile
Follow these steps to import and set up a compatible neural network model in Unreal Engine.
- Import an ONNX (*.onnx) machine learning model file into Unreal Engine to create a NNE Model Data asset.
-
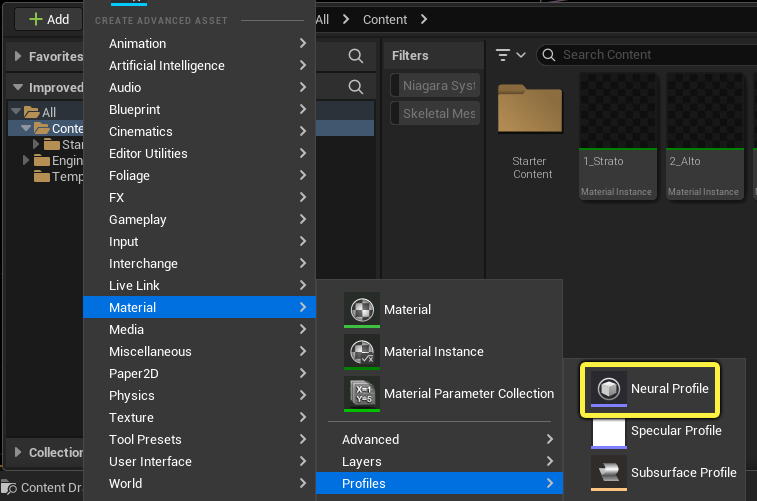
In the Content Browser, use the Add (+) menu to create a Neural Profile asset. You can add one from the Material > Profiles rollout menu.
-
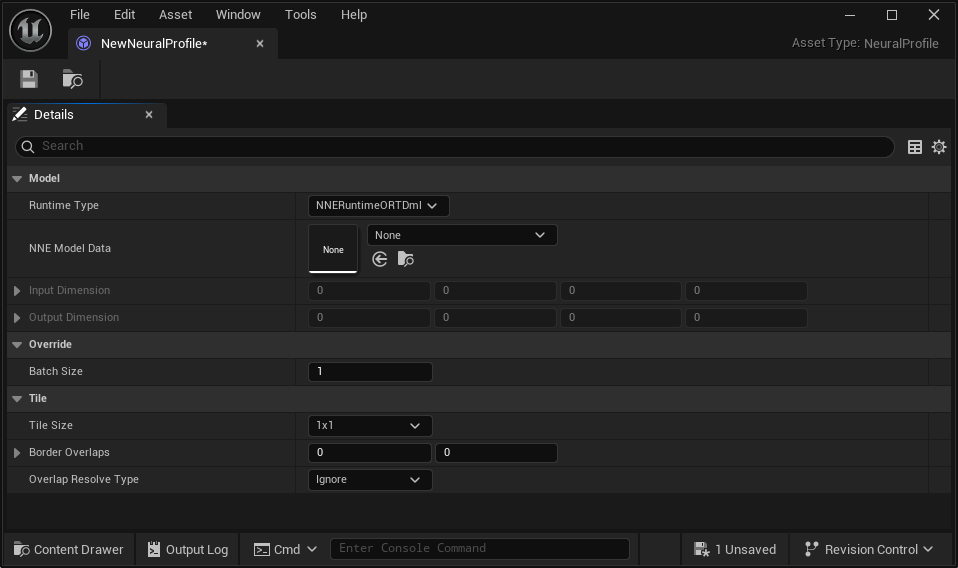
Open the newly created Neural Profile asset.
-
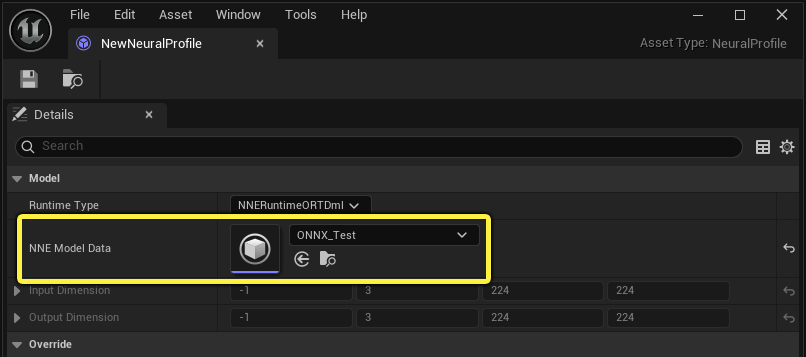
Use the NNE Model Data assignment slot to set the NNE Model Data asset created when you imported your ONNX file.
Creating the Post Process Material
Follow these steps to set up a Post Process Material that uses the Neural Profile with some graph logic.
- In the Content Browser, create a new Material and open it.
-
In the Material Editor, use the Details panel to set the following:

- Material Domain: Post Process
- Used with Neural Networks: Checked
- Neural Profile: Neural Profile asset.
-
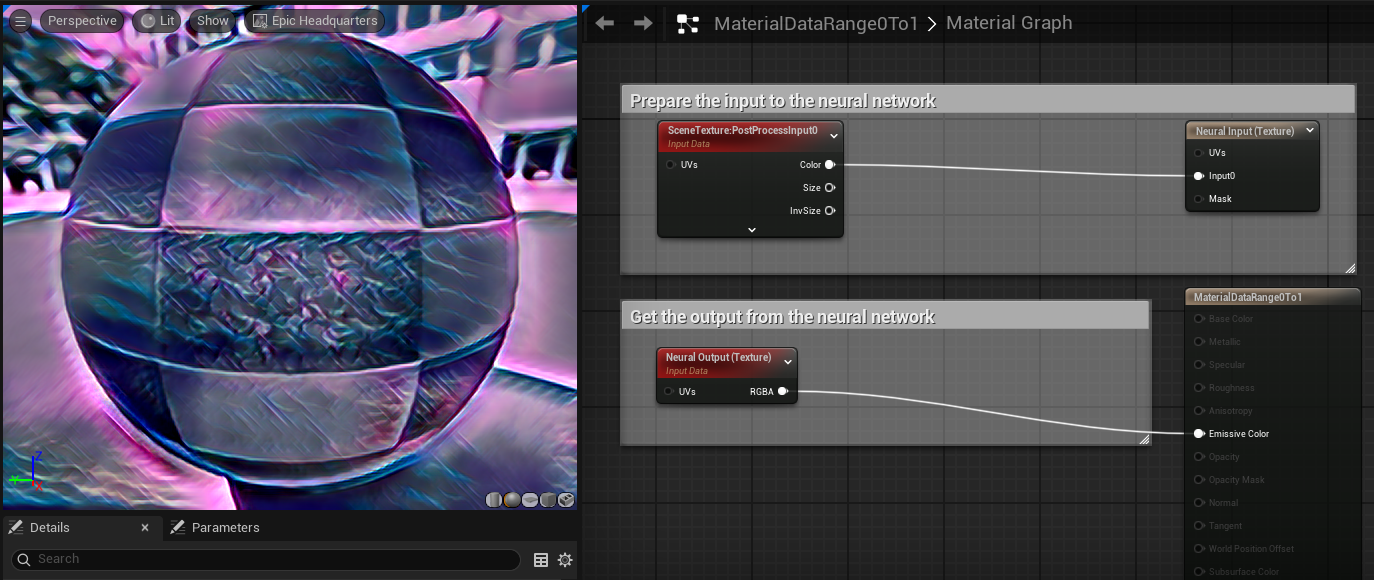
In the Material Graph, prepare the input to the network using the Neural Input node, and get the output from the network through the Neural Output node. Once connected to the Emissive Color pin of the main material node so that you have something that looks like this:
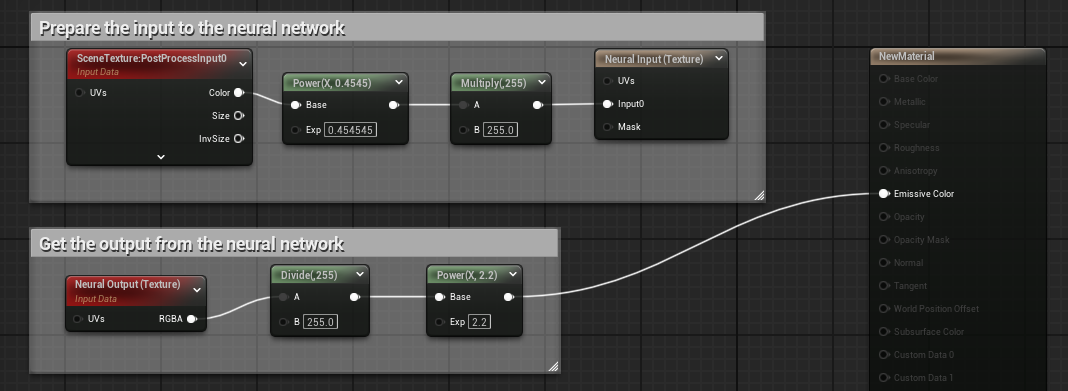
- Click Apply in the Material Editor toolbar.
With this setup, the material can pre-process and post-process the data using all available nodes in the material editor. This example applies a simple gamma correction of 1/2.2 and scales the value range from 0 ~ 1 to 0 ~ 255 for the input, and reverses it back for the display after getting the output from the neural output. Scaling is not always required. It depends on the neural network model input and output range. If the model input and output is in range 0 ~ 1, we have a simpler setup as below:
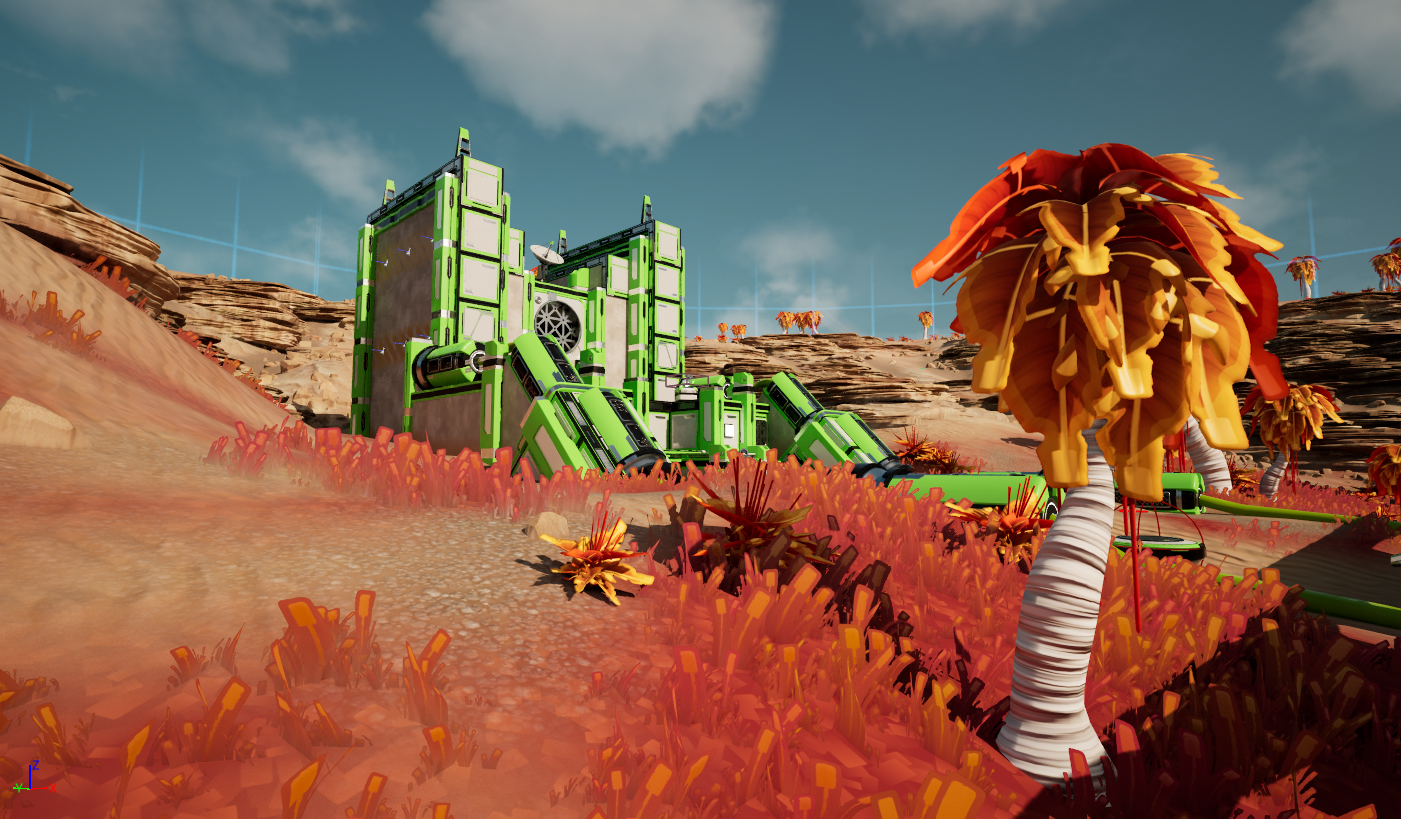
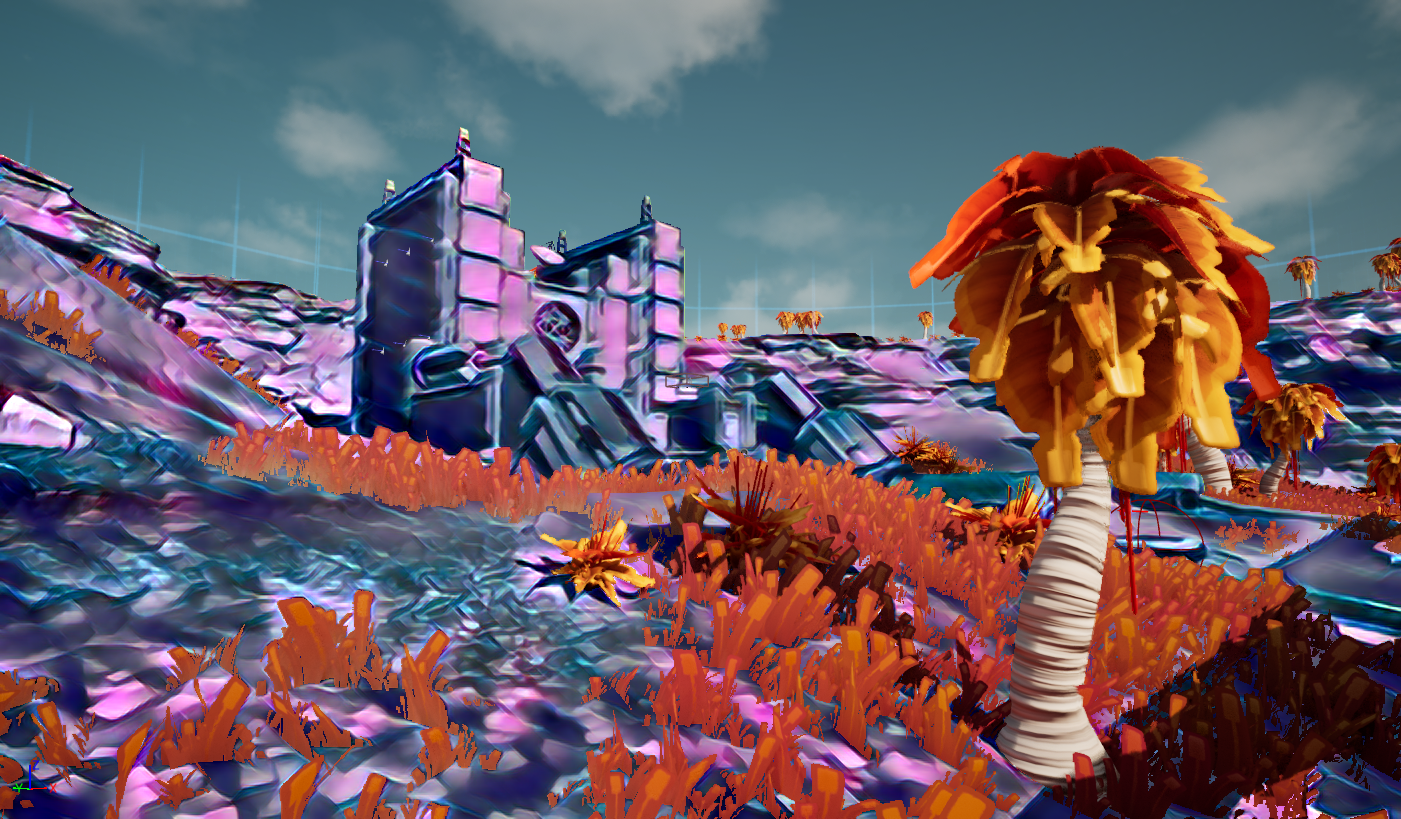
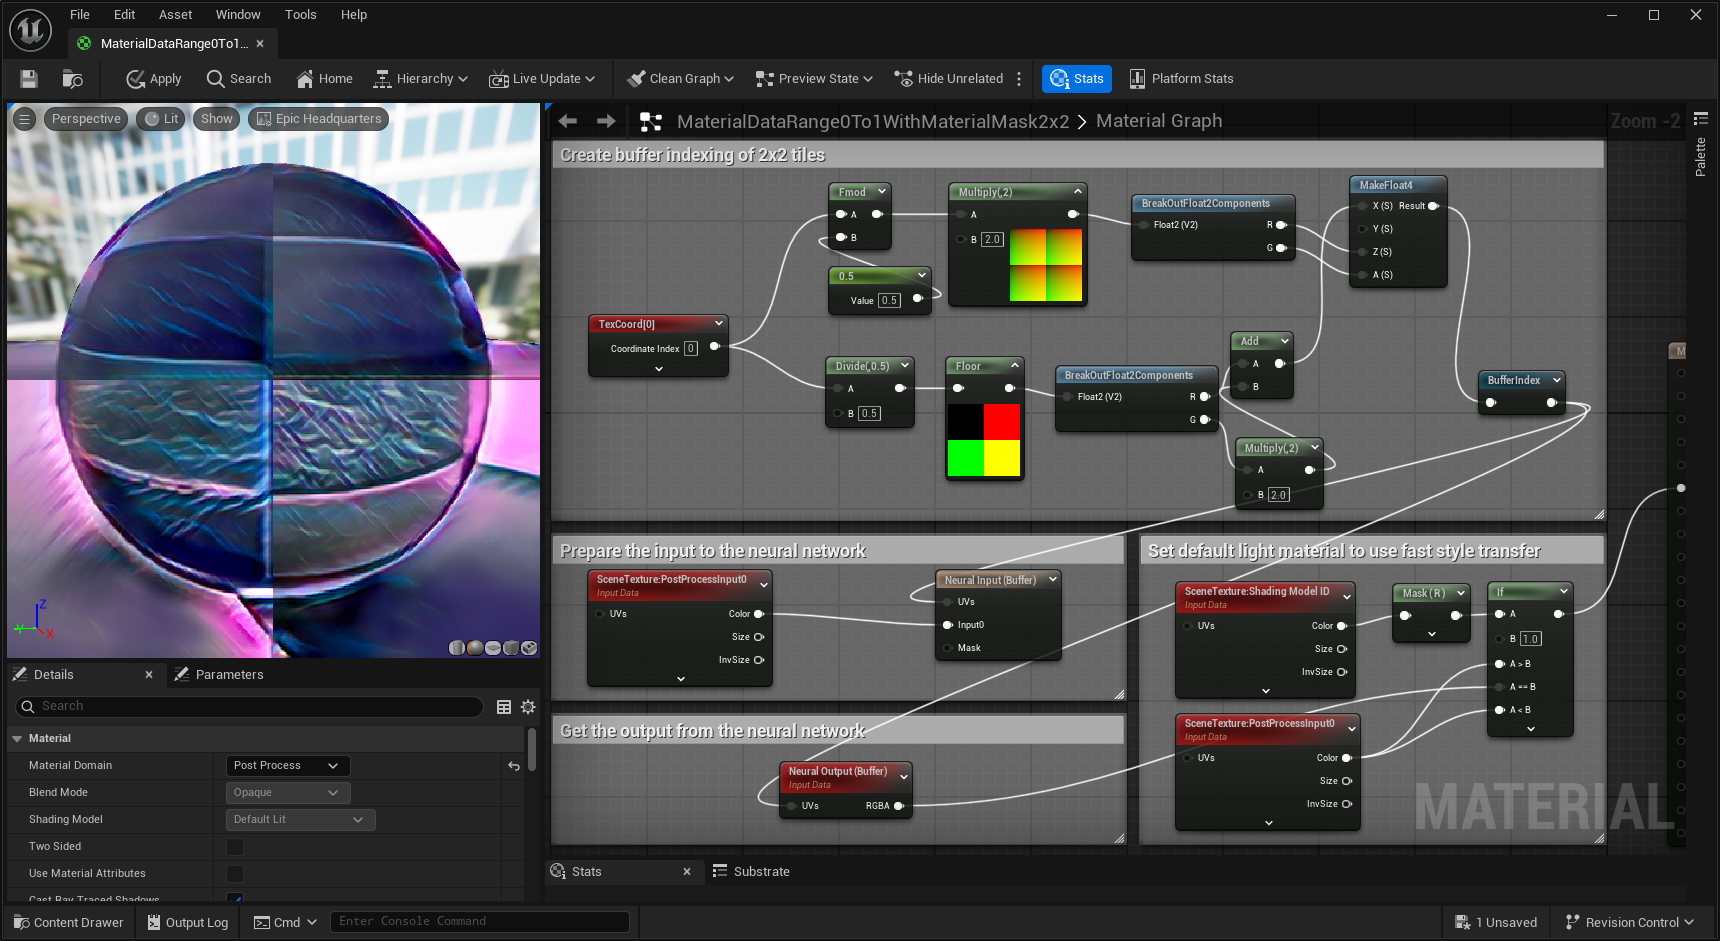
Below is an example taking this further to apply custom regions to use a default light material as a mask.

This setup can create results like the following:
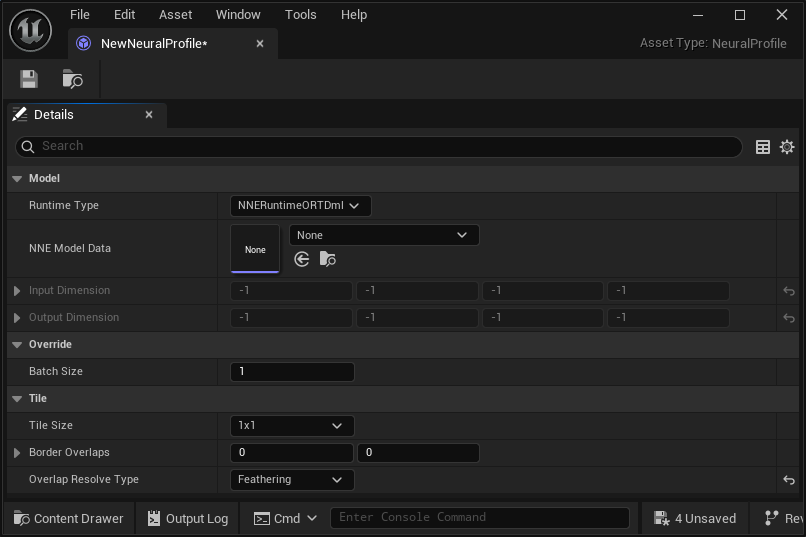
Neural Profile Asset Settings
The neural profile is used to bind with neural networks, specify the runtime, batch size and tile configuration.
| Property | Description |
|---|---|
| Model | |
| Runtime Type | The type of NNE runtime to support; NNERuntimeORTDml or NNERuntimeRDGHlsl. |
| NNE Model Data | Stores the NNE model data imported into the engine, for example, the ONNX model. |
| Input Dimension | The input dimensions of the NNE model data being used. |
| Output Dimension | The output dimensions of the NNE model data being used. |
| Override | |
| Batch Size | used to override the batch size if the batch dimension is dynamic (-1). |
| Tile | |
| Tile Size | The total tiles used. Each tile will be executed by 1 batch. The NNE model is loaded and used as is with no dimension augmentation. For example, if the input texture has different dimensions, it will be scaled down before application. If set to Auto, tiled buffers are created in batch dimensions automatically, where each tile runs the neural model. For example, if the model input dimension is (1x3x200x200) and the used buffer size of the post processing is 1000x1000, then 5x5 tiles ((5x5)x3x200x200) are run and recombined. |
| Border Overlaps | Tile border overlaps (left / right, top / bottom). The larger this value, the more tiles are required to cover the whole screen when the Tile Size is set to auto. |
| Overlap Resolve Type | Sets how overlap is resolved. Ignore means the overlapped tile regions have no contribution to adjacent tiles. Feathering means overlapped regions are blended linearly to adjacent tiles. |
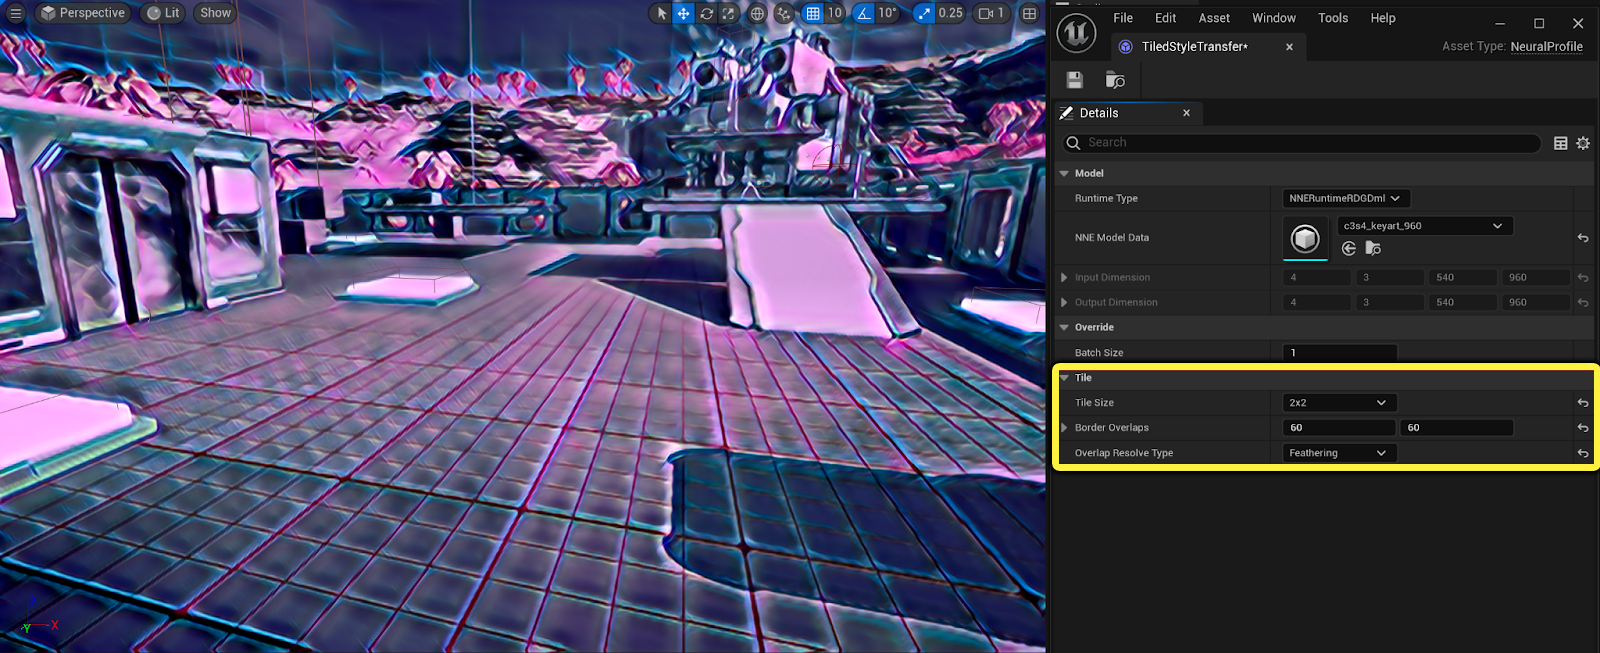
Tiling
Tiling is supported with the texture indexing mode, including overlapping of tiles. Overlapped tile regions can be set to either Ignored or Feathered during concatenation to support applications like neural filtering and style transfer. More tiles can help increase details but might be costly based on the network complexity.
This is an example of a neural style transfer using 2x2 tiling with feathering, and the seams are hidden.
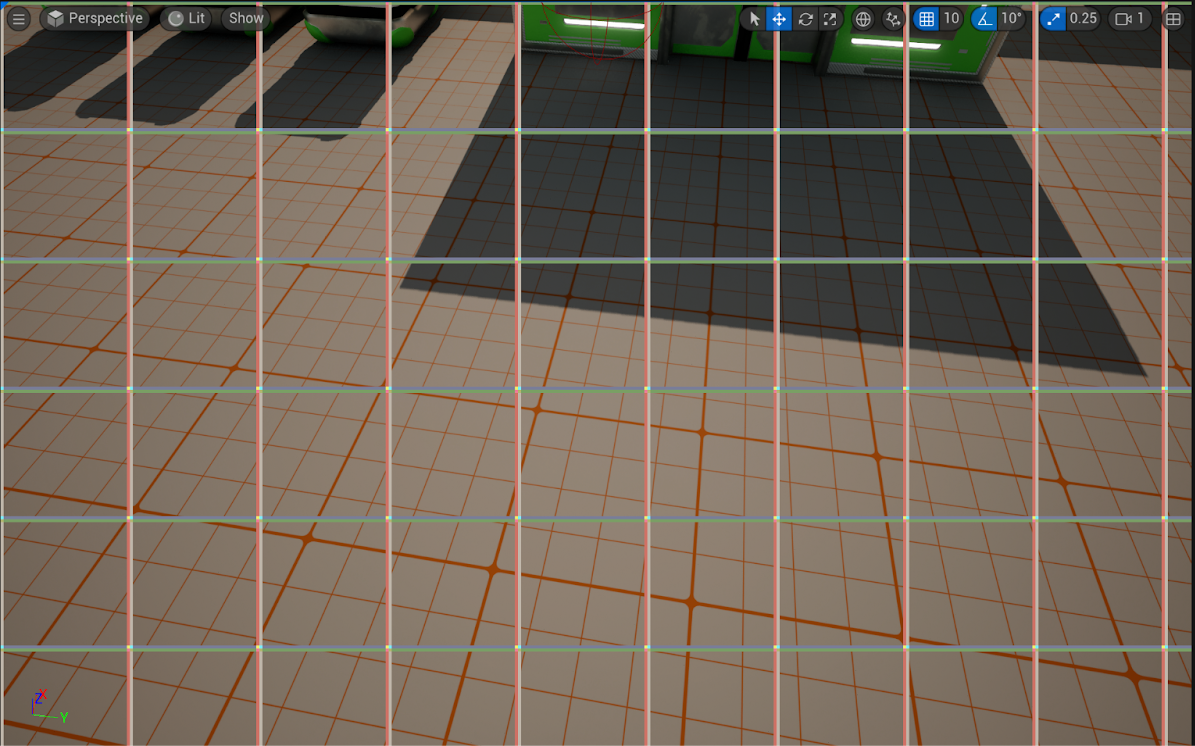
You can visualize tile overlapping with the visualization console command r.Neuralpostprocess.TileOverlap.Visualize 1.
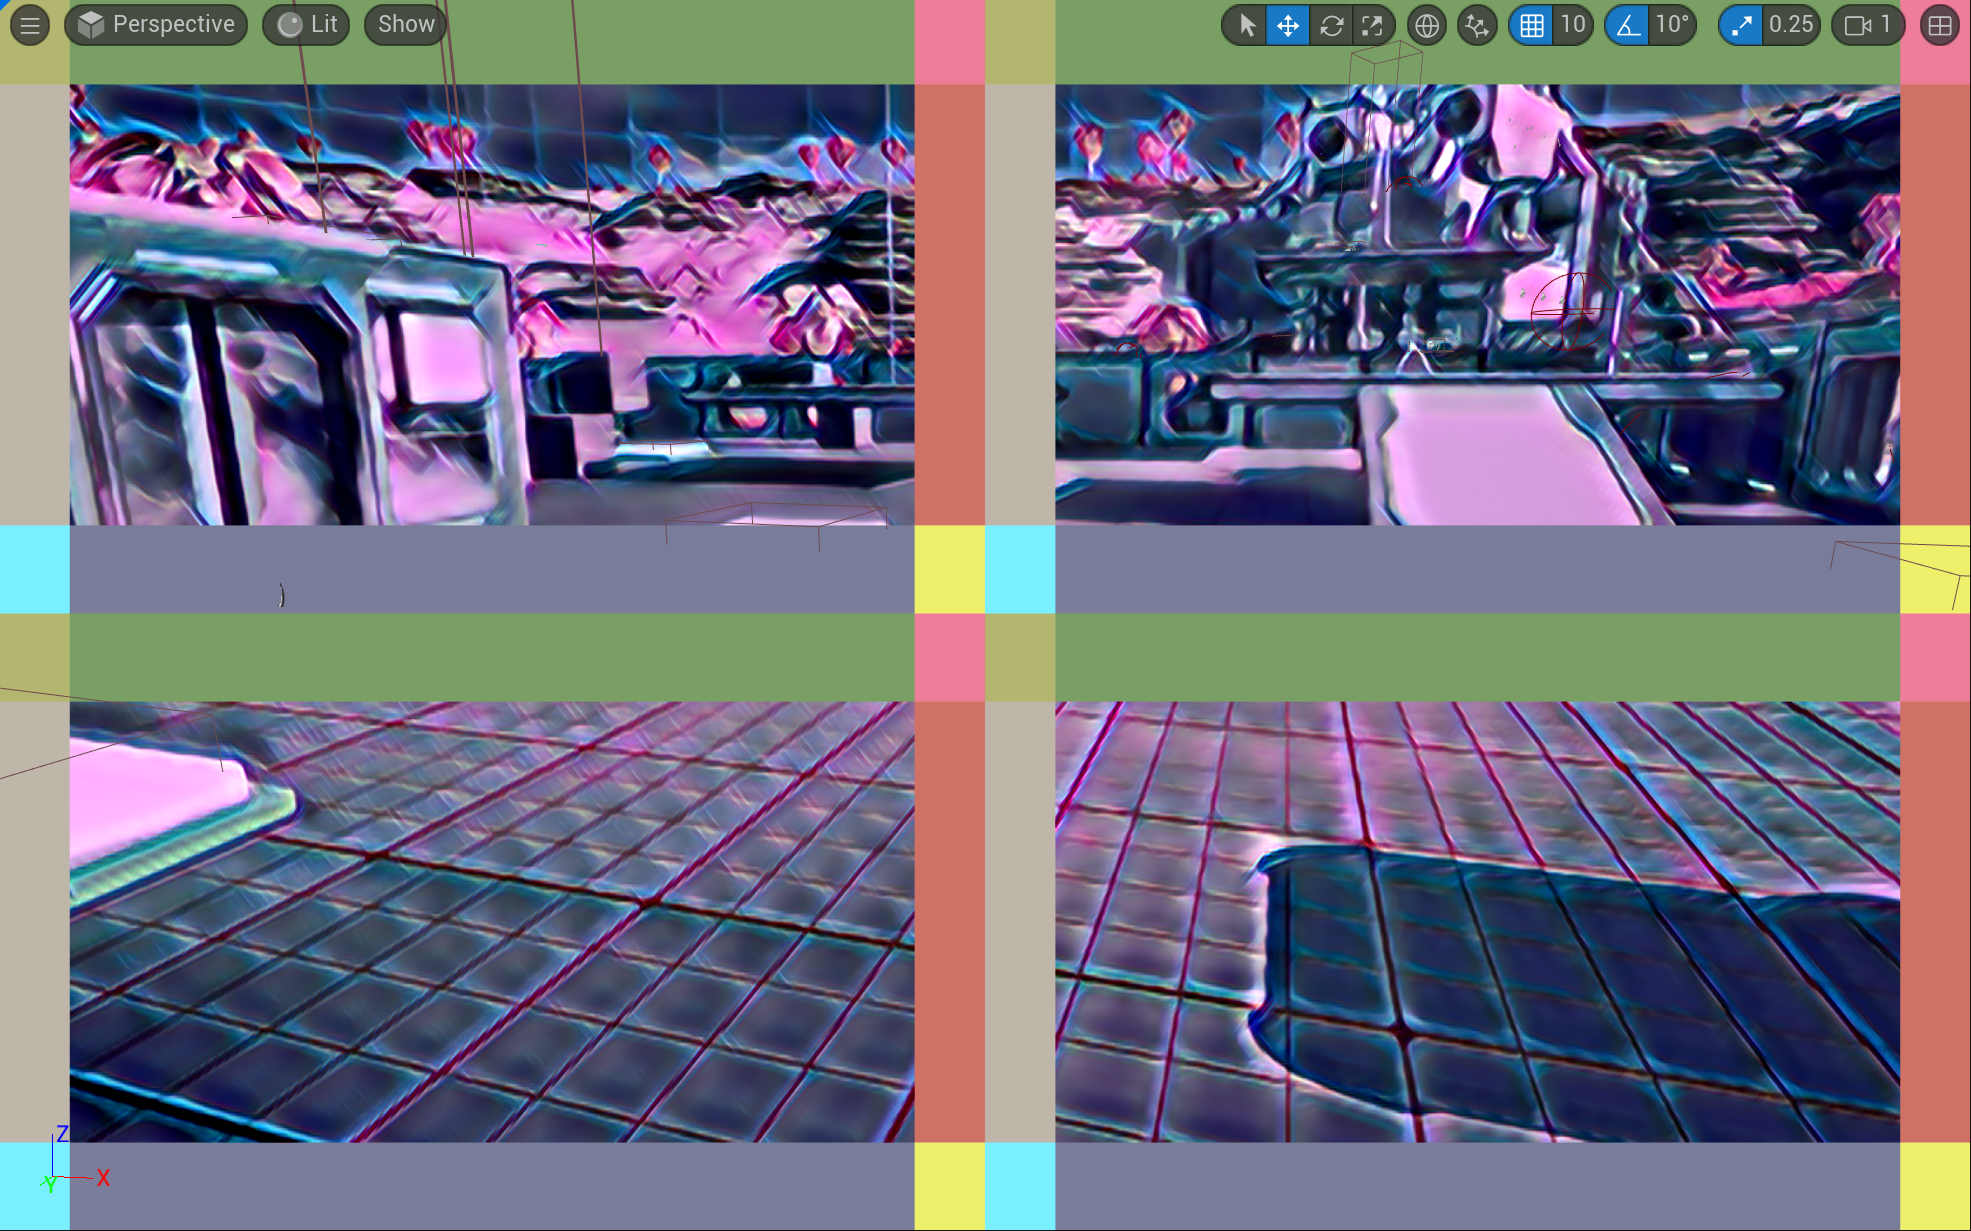
When Tile Size is set to Auto, the tile size will not apply scaling but directly apply the network over the neural input texture. Tiles outside of the texture are mirrored at this moment.Here is an example of this with the visualization of the tile overlap when the tile size is set to auto.
Buffer Indexing
Textures are downscaled and upscaled to and from their target dimension or kept the same if Auto is set for the Tile Size. The current texture indexing mode supports [1 x 3 x H x W] for texture indexing mode as the default.
To use an arbitrary ONNX model with other dimensions [B x C x H x W], you can use the Buffer Indexing Mode. This mode provides full control of the actual value read / written. There is no filtering done natively, you would need to apply any filters needed using either material logic in a material graph or write custom shader code.
Below is an example of breaking the scene into B=2x2 batches and they are set through the Neural Input and Neural Output (Buffer) nodes.
You’ll also need to modify some settings in the Neural Profile asset. You can use either of the following options:
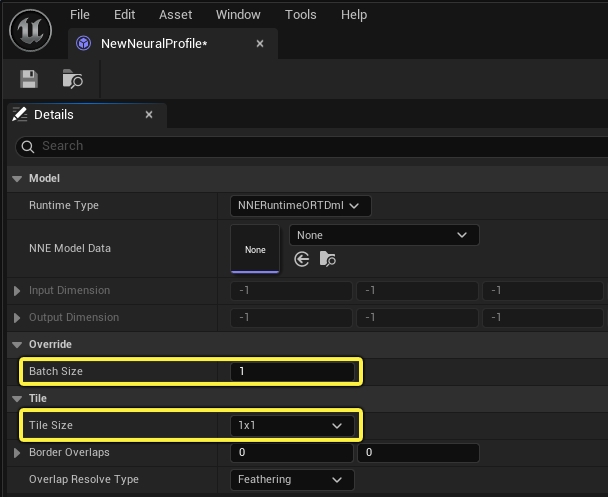
- Set Batch Size Override to 4 if dynamic batch is supported.
- Set the Tile Size to 2x2 if dynamic batch is not supported.
Tiles are called sequentially, while batches are distributed in a single run. These two options can also be used together, as it depends on your design of how to read / write from / to the buffers. At this moment, each call of the Neural Output node reads three consecutive channels.
Runtime Type
You can choose between two NNE Runtimes:
- NNERuntimeORTDml: This uses DirectML as the backend.
- NNERuntimeRDGHlsl: This uses convolution optimized for output width as a modulo of 32.
Applications
You can use neural post processing in your project in real time rendering or as a tool through Scene Capture. Below are some potential applications:
- Stylization: Fast style transfer, AnimeGAN, CartoonGAN, Pix2Pix, CycleGAN
- Sketch: ShadeSketch
- Neural tone mapping
- Image segmentation and Classification
Additional Notes
- Number of calls of neural input/output nodes.
- While only one Neural Input node can be called in one post process material, multiple calls of Neural Output are legitimate.
- Mask of Neural Input.
- A mask can be used to select a portion of the screen to write to the buffer / texture. For example, if a rectangular figure is at top left, you could set that region to 1 to make the UVs and input effective and write to the buffer while ignoring other UVs and inputs if the mask is set to 0.
- If the result resolution is low.
- The result resolution is affected by the model output dimension. Check the output dimension in the Neural Profile. To increase the resolution, you can either export a higher resolution model, or use buffer indexing / tiling mentioned above to increase the dimension. Note that some models might have discontinuity at the borders.
- Buffer layout.
- In texture indexing mode, the natively supported layout is BCHW. Since the layout of models developed can be in BHWC (for example, tensorflow), you should explicitly export to BCHW.
Useful Console Commands
r.Neuralpostprocess.Applyto enable or disable the application of neural networks. When disabled, the neural input is directly returned as neural output.