When creating splash-screens, screenshots, or other in-game static versions characters, it can be helpful to non-destructively convert a posed Skeletal Mesh assets to Static Mesh, in order to preserve its position and reduce the render cost of the still objects.
The following document will provide an example workflow of how to pose and convert a Skeletal Mesh asset to a Static Mesh asset in Unreal Engine.
Prerequisite
- Your project contains a Skeletal Mesh character.
Posing Skeletal Meshes
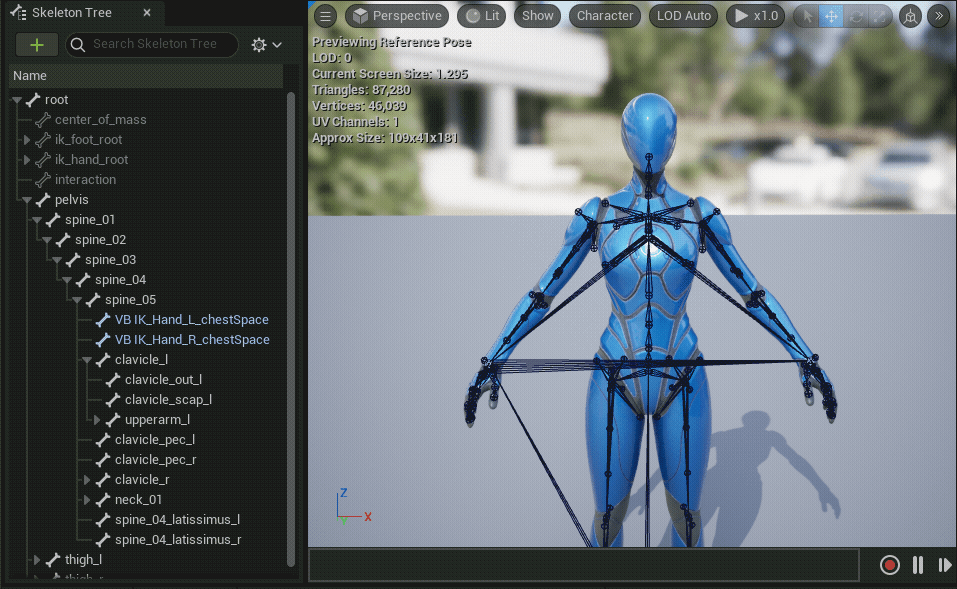
To begin posing a Character in Unreal Engine, open the Skeletal Mesh asset in the Skeletal Mesh Editor.

To expose the Skeletal Mesh's bones, in order to manipulate their position, navigate in the Viewport panel to Character > Bones and toggle the All Hierarchy option.

Select a bone to adjust by clicking on it, and then use the Move, Rotate, and Scale tools, to manipulate your character's pose.
Saving Skeletal Mesh Poses
After Manipulating your character's pose to your desired position, you can then save the pose as a Static Mesh asset using the Make Static Mesh button in the Skeletal Mesh Editor's toolbar.

Name and select a location to save the new Static Mesh asset, and then select Save.
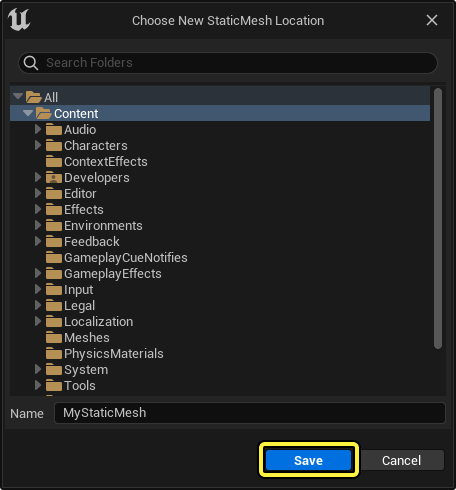
You can now use your converted Static Mesh in your project.

After converting your Skeletal Mesh to a Static Mesh you can safely reposition your mesh to its reference pose by re-importing your Skeletal Mesh's .fbx source file using the Reimport Base Mesh button in the Skeletal Mesh Editor's toolbar or by manually reverting your manipulation edits using Ctrl + Z.
If you do not revert your bone manipulation edits, your Skeletal Mesh's Animation Sequences will not play properly.
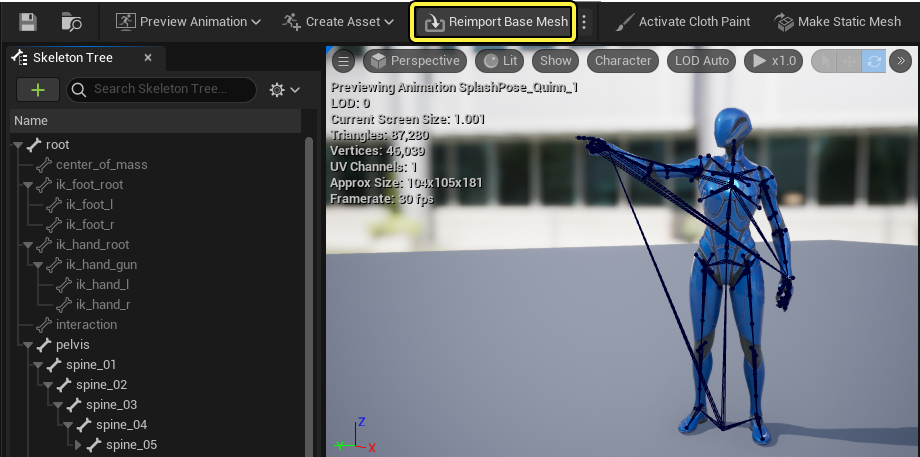
You can also save posed Skeletal Meshes as Animation Sequences and Pose assets for other more dynamic use cases using the Create Asset button in the Skeletal Mesh Editor's toolbar.

For more information about using saved Skeletal Mesh poses, see the following documentation:
Converting Multiple Skeletal & Static Meshes
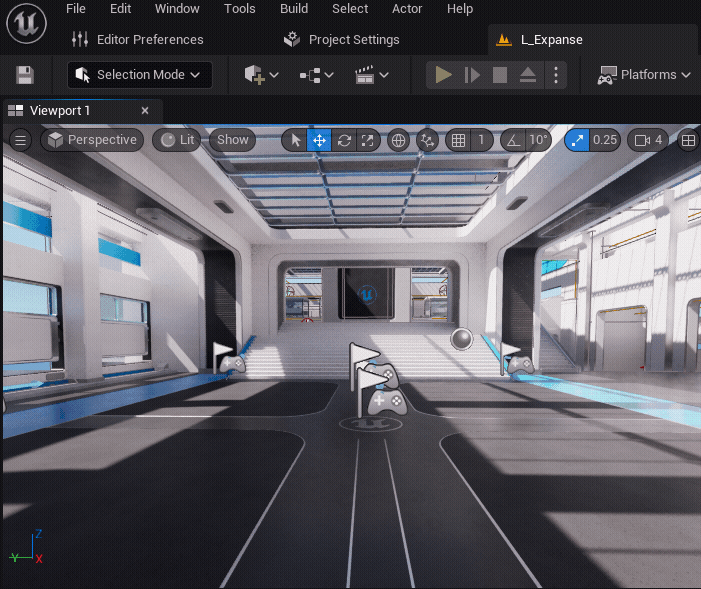
You can also convert a group of Static or Skeletal mesh objects, that have been placed into a level, to a single Static Mesh asset, in order to pose multiple characters together, or combine characters with other objects such as backgrounds or weapons. After placing and positioning your objects in a level, you can multi-select each object you want to convert to a static mesh, and then navigate in the Menu Bar to Actor > Convert Actors to Static Mesh.

Name and select a location to save the new Static Mesh asset and then select Save. You can now use the converted Static Mesh in your project.

You can also convert groups of game objects to a single Static Mesh during Play In Editor (PIE), and other simulation modes within the editor, such as recorded gameplay segments using the Rewind Debugger to save more dynamic gameplay snapshots.