
The Paint Maps tool stores values from 0 to 1 in the vertices of a mesh to create weight maps. The range of values determines the strength at which mesh vertices are affected by a selected procedure. You can use the weight maps in other Modeling Mode tools to perform operations on specific vertex regions.
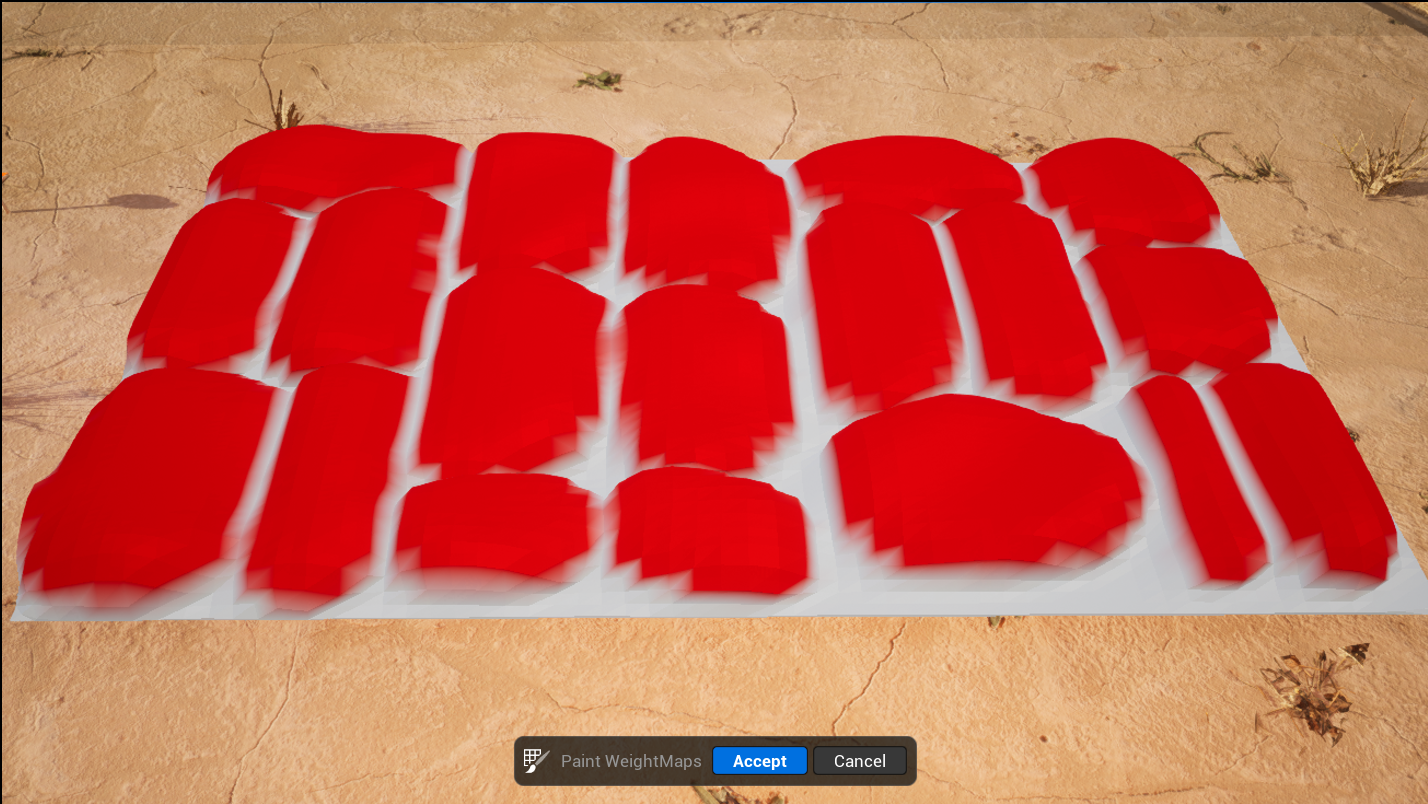
Using a weight map in the Offset tool to define vertices that move along the normal (areas in red) - creating a cobblestone effect.
The following modeling tools support weight maps:
The weight maps you create with the Paint Maps tool are not accessible by materials. You can use the Paint Vertex Colors tool to copy over your weight maps, which you can then use for materials and additional workflows.
Accessing the Tool
You can access the Paint Maps tool from the following:
- The Attributes category in Modeling Mode. To learn more about Modeling Mode and how to access it, see Modeling Mode Overview.
- The Editing Tools tab in the Skeleton Editor. To learn more, see Skeleton Editing.
Using Paint Maps
Before using the Paint Maps tool, you must create a weight map layer in the Edit Attributes tool.
The Paint Maps tool works similarly to the other brush-based tools in Modeling Mode. You can interactively paint weight map values onto mesh vertices using a brush and adjust the various brush settings. A mesh can have multiple weight map layers, and you can switch between each layer in a single tool session.
If your brush strength is higher than 0 but your brush strokes are not appearing, the result could indicate you're not hitting a vertex but the area of a triangle. You can increase the resolution of the geometry using the Remesh tool. This increase in vertices can help create a continuous painting flow when creating weight maps.
Once you are done using the tool, you can accept or cancel the changes in the Tool Confirmation panel.
Settings
| Brush Action | Description |
|---|---|
| Paint | Create weight maps through brush strokes. |
| Flood Fill | Set the entire mesh to the brush settings. |
| Brush | Description |
|---|---|
| Size | Set the size of the brush relative to the mesh's size. |
| Strength | Determines what value (0-1) of color is applied with each brush stroke. Higher values create a solid color, while lower values create more opaque colors. |
| Falloff | From the center of the brush, determine the strength of the radius. The value of the setting is the percentage of the falloff circle size to brush size. A lower value creates harder edges, and a higher value makes blurred edges. |
| Specify Radius | Enable to ignore relative brush size and use explicit world radius. |
| Radius | Size of the radius. |
You can switch between the mesh's weight map layers using the Selected Attribute property.
Hotkeys
| Hotkey | Description |
|---|---|
| Shift + Click | Blend the color values. Click and hold to continuously blend. |
| CTRL + Click | Erase color. Click and hold to continuously erase. |
| [ or S | Decreases the brush size by 0.025 with each key press. Holding the Shift key reduces the size by 0.005 for each key press. |
| ] or D | Increases the brush size by 0.025 with each key press. Holding the Shift key will increase the size by 0.005 for each key press. |
| F | Zooms into the location of the brush. |
| Enter | Accept tool changes. |
| ESC | To cancel the changes and exit the tool. |