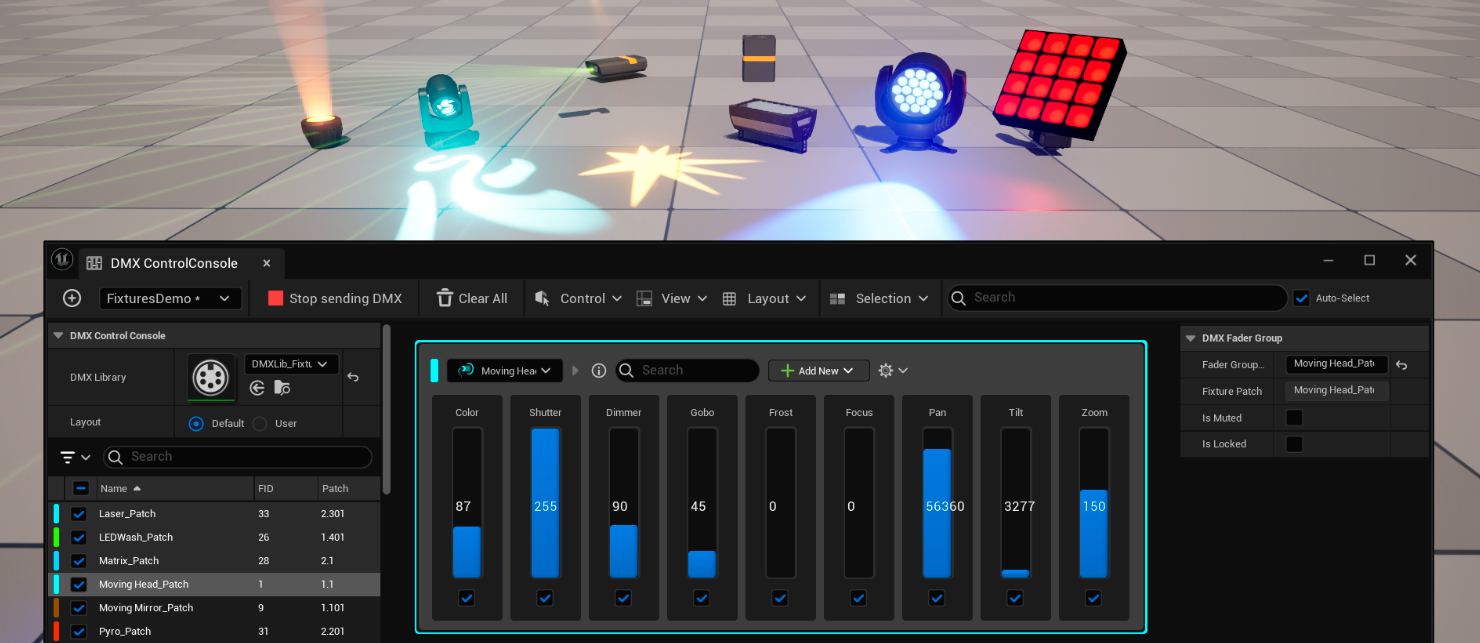
The Control Console simplifies DMX debugging and gives you quick control of a set of fixtures, which can be virtual or physical. It auto-generates and populates faders based on your library and patch selection. You can then use these faders to generate and send DMX data.
Workflow
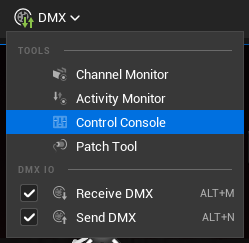
To open the DMX Control Console, go to the Main Toolbar and click DMX > Control Console.
Library Selection
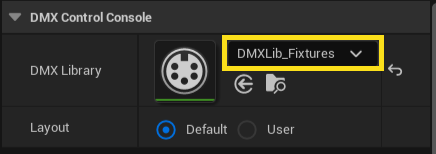
A Control Console can use a single DMX Library. In the DMX Control Console details panel, use the dropdown to browse to the DMX Library asset that contains the patch and fixture database to use in the console.
Library Layout Options
You can select one of two layout modes for a DMX Library:
- Auto: A layout that auto-generates Fader groups only for selected Fixture Patches. If you select more than one Patch, then multiple Fader Groups will be created and then organized using the global Layout options.
- Custom: A user-defined layout where you manually create Fader groups for Fixture Patches in the right panel.
If you select the Auto layout mode, you can also select Auto-Group Patches to automatically create Patch Groups when selecting multiple Patches.
Patch Selection
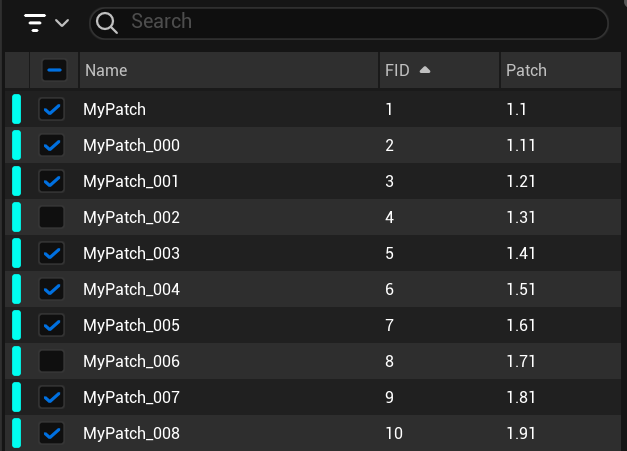
The Fixture Patch list shows all the Patches in the current DMX Library. You can toggle each Fixture Patch to enable or disable sending DMX for the specific Patch.
| Number | Name | Description |
|---|---|---|
| 1 | Search bar | Filter patches in the list by search term. |
| 2 | Filter dropdown | Filter patches in the list and the columns shown. |
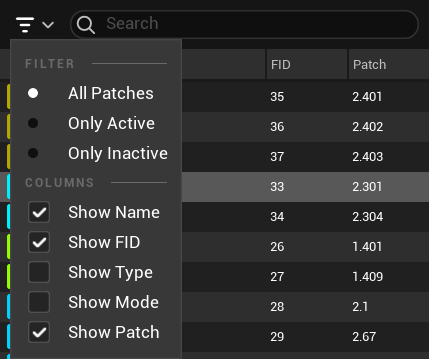
The Filter dropdown has the following options:
- Filter:
- All Patches
- Only Active
- Only Inactive
- Columns:
- Show Name
- Show FID
- Show Type
- Show Mode
- Show Patch
Add Fixture Patches
In Auto layout mode, patches are added to the console by selecting them (see Layout Options).
In Custom layout mode, you can add fixture patches to the console by selecting them one by one or already in group form:
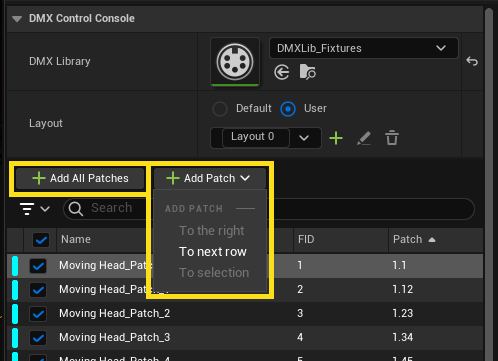
- + Add All Patches: Add all fixture Patches in the list to Fader groups.
- + Add Patch: Add the selected Fixture Patches to the layout.
- To the right: Add the selected Fixture Patches to the right side of the selected row.
- To the next row: Add the selected Fixture Patches to a new row.
- To selection: Add the selected Fixture Patches to the selected Fader group, replacing the previous Patch.
- Group to the right: Add the selected Fixture Patches to a new Fader group on the right side of the selected row.
- Group to the next row: Add the selected Fixture Patches to a new Fader group on a new row.
- + Add Empty: Add an empty Fader group to the layout.
- To the right: Add an empty Fader group to the right side of the selected row.
- To the next row: Add an empty Fader group to a new row.
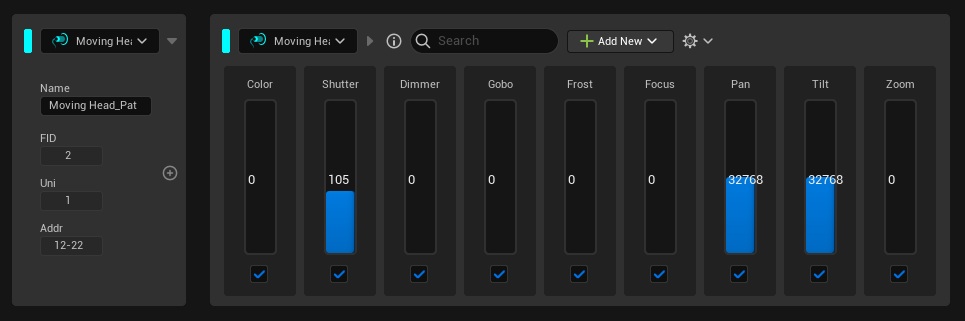
When you add a fixture patch to the Console, a Fader is created for each of its functions and placed in a Fader group. You can inspect a Fader group's details, and edit them where applicable, in the Details View on the right side.

Send DMX Data to Output Ports
To start sending DMX data to external devices, click Send DMX in the Control Console toolbar. To stop sending DMX data, click Stop sending DMX.
While DMX data is being sent, you can change Fader values and see the changes reflected in real time in Unreal Engine or your fixture.

Sent DMX data can be received back in Unreal Engine, either by adding a corresponding Input Port, or by internal loopback when Send or Receive DMX is disabled in the Level Editor Toolbar menu. When set up like this, you can change Fader values and see the changes reflected in real time in Unreal Engine.
For Fixture Patch-based faders, DMX is sent to the Output Ports used in the DMX Library. For raw faders, DMX is sent to the first Output Port. For more on defining Input and Output Ports, see DMX Quickstart.
Add Raw Faders
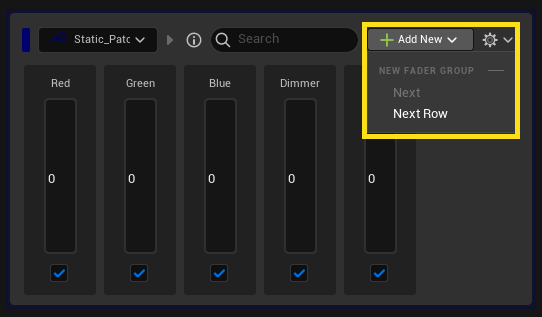
A Raw Fader is a DMX Fader that's not connected to a fixture patch. To create a Raw Fader:
-
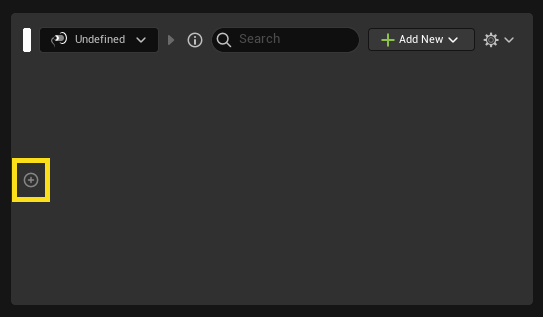
In the Fader group area, click the Add New (+) button and then click Next or Next Row.
-
Click on the Add (+) button inside the fader group to create a Raw Fader.
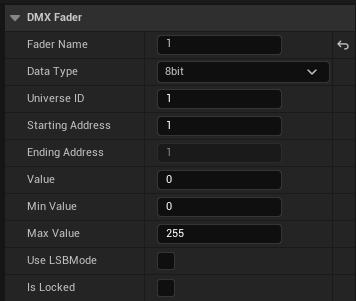
-
Select the Raw Fader and edit the Fader properties in the Details panel to specify its precision (8-bit, 16-bit, or 24-bit) and other required parameters such as the Universe ID, Starting Address, Min Value, and Max Value.
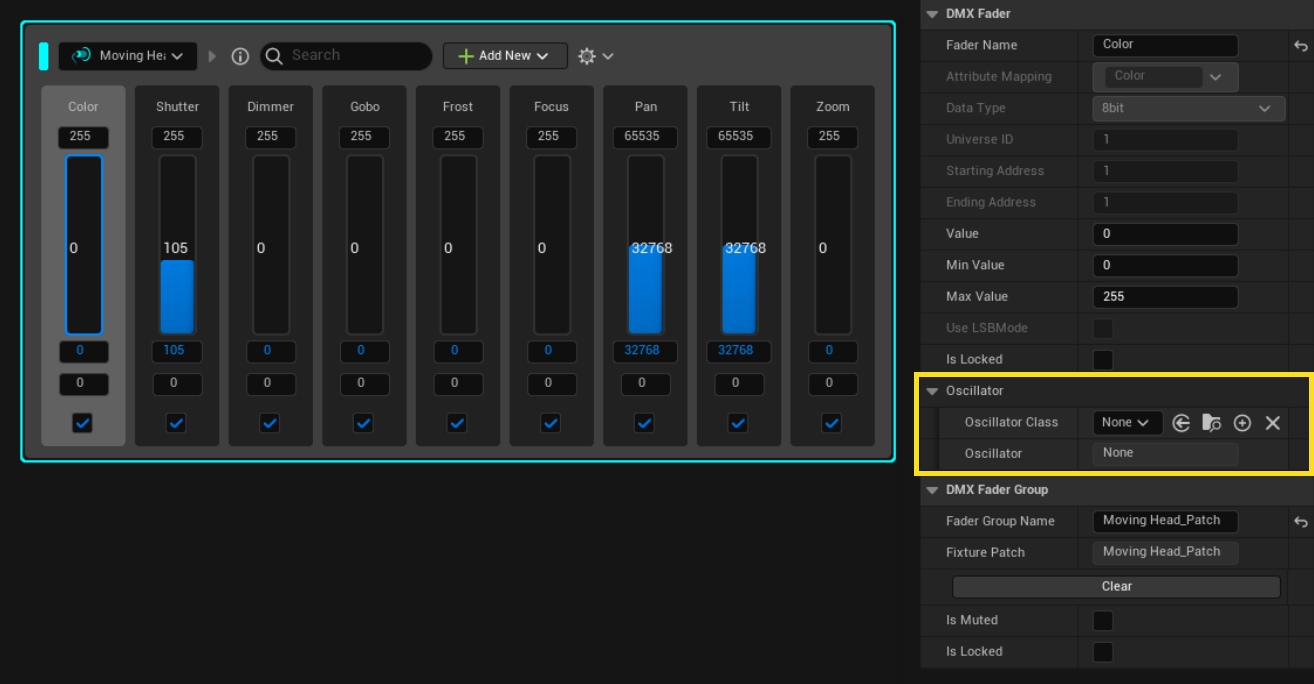
Oscillators
Oscillators provide a way to animate selected sliders. By default, the Control Console provides a square wave and sine wave oscillator. Custom oscillators can be created in Blueprints.
Create Custom Oscillator Blueprints
-
In the Content Drawer, click Add + > Blueprint > Blueprint Class.
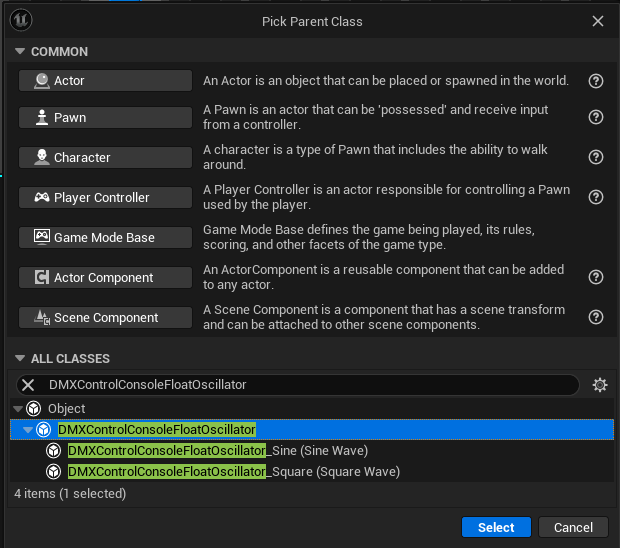
-
Under All Classes, search for and select DMXControlConsoleOscillator.
-
Click Select to confirm.
-
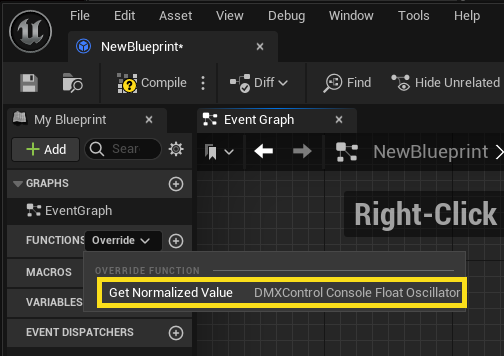
In the Content Drawer, go to the Blueprints folder and open your new blueprint.
-
Click Override Get Normalized Value.
Options
Clear Options
The Clear options help you to clear or reset Control Console data.
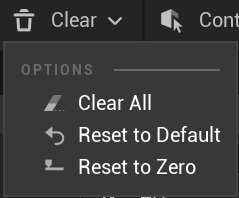
- Clear All: Clear all the groups in the current layout. If you are in Auto layout mode, then this option also resets the DMX Library.
- Reset to Default: The values of all the Faders are reset to the default, as set in the DMX Library.
- Reset to Zero: The values of all the Faders are reset to zero.
- Reload: Reloads the Control Console data from the disk.
Control Options
The Control options change how Fader controls work:
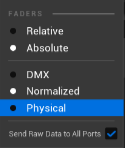
- Absolute: The values of all selected Faders are set to the same percentage.
- Relative: The values of all selected Faders are increased or decreased by the same percentage. If the Faders start with different values, they keep this difference so long as you don't clamp them to either lower or upper bounds.
- DMX: The values of all selected Faders are displayed according to their bitcoded data type (8-24 bit).
- Normalized: The values of all selected Faders are displayed in a decimal range 0 to 1.
- Physical: The values of all selected Faders are displayed using physical units as specified in the GDTF model. You can set physical values per channel for non-GDTF fixtures in the DMX library.
- *Send Raw Data to All Ports**: Sends DMX data that is not using a patch to all created Ports in the Project Config.
View Options
The View options adjust the shape and exposed properties of Fader Groups.
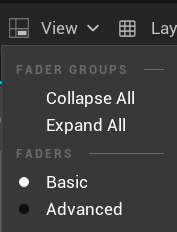
- Collapse All or Expand All Fader Groups. In the following example, the left is collapsed and the right is expanded.
- Set Faders view to Basic or Advanced mode. In Advanced mode, you can set min/max Fader values.

Layout Options
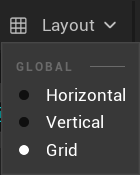
The Layout options change the way that Fader groups are displayed:
- Horizontal: Sets all Fader groups to be on the same line.
- Vertical: Sets all Fader groups vertically one on top of each other.
- Grid: Sets all Fader groups in a grid pattern. In default layout mode, Patches of the same Universe appear on the same horizontal line.
Selection Options
Selection options can select all Fader groups in the DMX Library or only filtered ones:
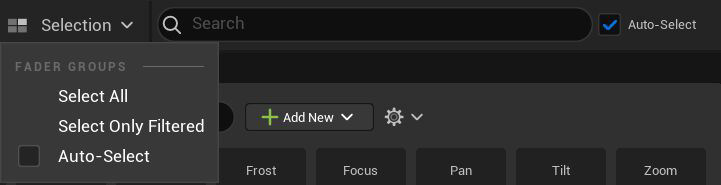
- Select All: Select all Faders regardless of the active search filter.
- Select Only Filtered: Select Faders that correspond to the search filter.
- Auto-Select: Automatically select Faders inside a Fader group when selecting a Patch or multiple Patches from the DMX Library.
Search Options
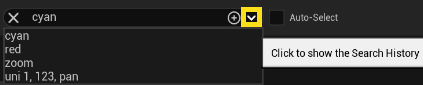
Use global search to quickly filter the exposed control sliders. It accepts a range of inputs such as Fader group names, attribute names ("Red, Green, Blue, Dimmer"), fixture IDs ("1, 2, 4-5"), universes ("Uni 1, 2, 4-5"), or addresses ("1.512").
To access the search history, click the dropdown arrow on the right.
Filters
Use the Filters tab to create and quickly select filters that update the Global Search results. The user can click the filters to enable or disable them.
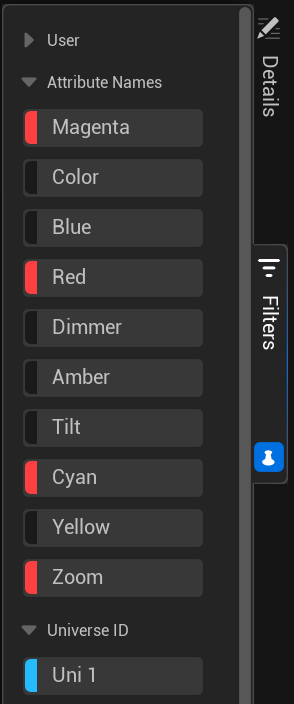
Each time a DMX Library is loaded, the filter tab is automatically updated with ready-to-use filters based on the attributes, universes, and fixture IDs of the patches in the library. You can also create a custom filter.
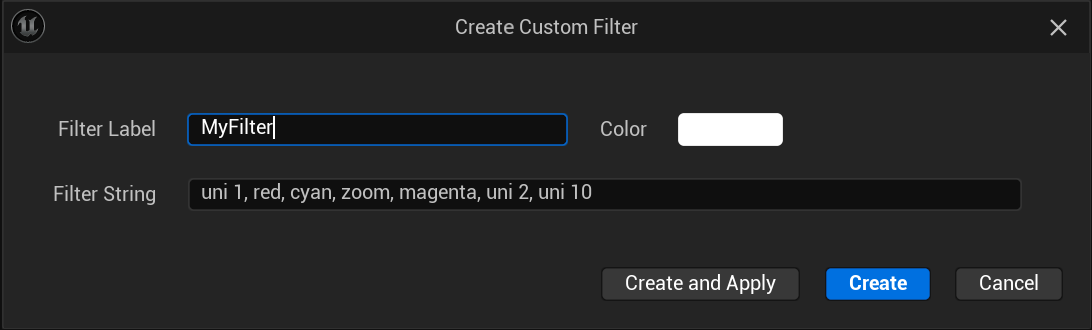
Create a Custom Filter
To create a custom filter, follow these steps:
- In the Global Search bar, click the Add (+) button.
- In the pop-up window, set the Filter Label, Filter String, and Color.
-
Click Create.
User filters are displayed in the User dropdown at the top of the Filters tab.
Show Compact Editor
Click Show Compact Editor to show a compact version of the Control Console that can be docked in the level editor.

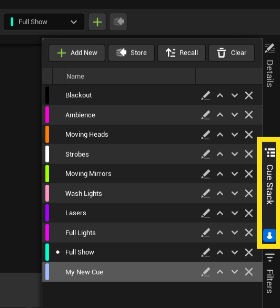
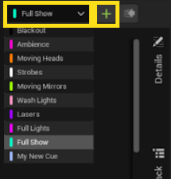
Cues
Use cues to quickly store multiple versions of the faders configurations alongside their values and to load them back up on demand while the tool is actively sending DMX.
Click Add (+) to add a cue. Use the dropdown menu to load an existing cue.
To rename, reorder, and manage cues, click Cue Stack.