
The UnrealVS extension for Visual Studio (VS) can be used for easy access to common actions when developing with Unreal Engine (UE). This document will explain how to install the extension and how to use it with your project.
Content Covered:
- Extension installation and setup
- Setting the Startup Project
- Bindable command for building the Startup Project
- Setting the command line arguments
- Batch building projects
- Quick Build project menu
The UnrealVS extension does not work with Visual Studio Express. It is only compatible with Visual Studio Community and Professional editions.
Installation and Setup
The following installation and setup steps were drafted while using VS Community 2022 Version 17.4.1. Depending on which version of VS you are using, these steps might vary.
Install UnrealVS Visual Studio Extension
-
Find the extension for your version of Visual Studio located at
<UNREAL_ENGINE_ROOT>\Engine\Extras\UnrealVS\VS_VERSION\UnrealVS.vsixFor example,C:\Program Files\Epic Games\UE5\Engine\Extras\UnrealVS\VS2019\UnrealVS.vsix. -
Run the
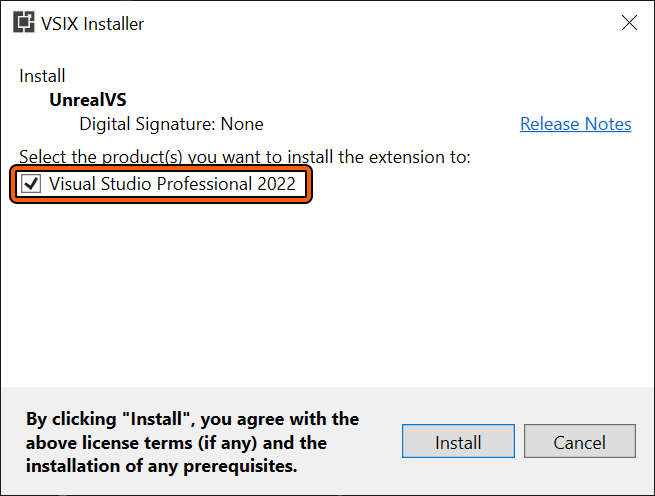
UnrealVS.vsixfile by double-clicking it to begin the installation. -
The UnrealVS extension should detect and target your version of VS. Check that the installer is targeting the correct version of VS and that the box is ticked. If everything looks good, click Install to proceed.
-
Click the Close button once the installation is complete.
-
Run VS and in Extensions > Manage Extensions > Installed you should see the extension.
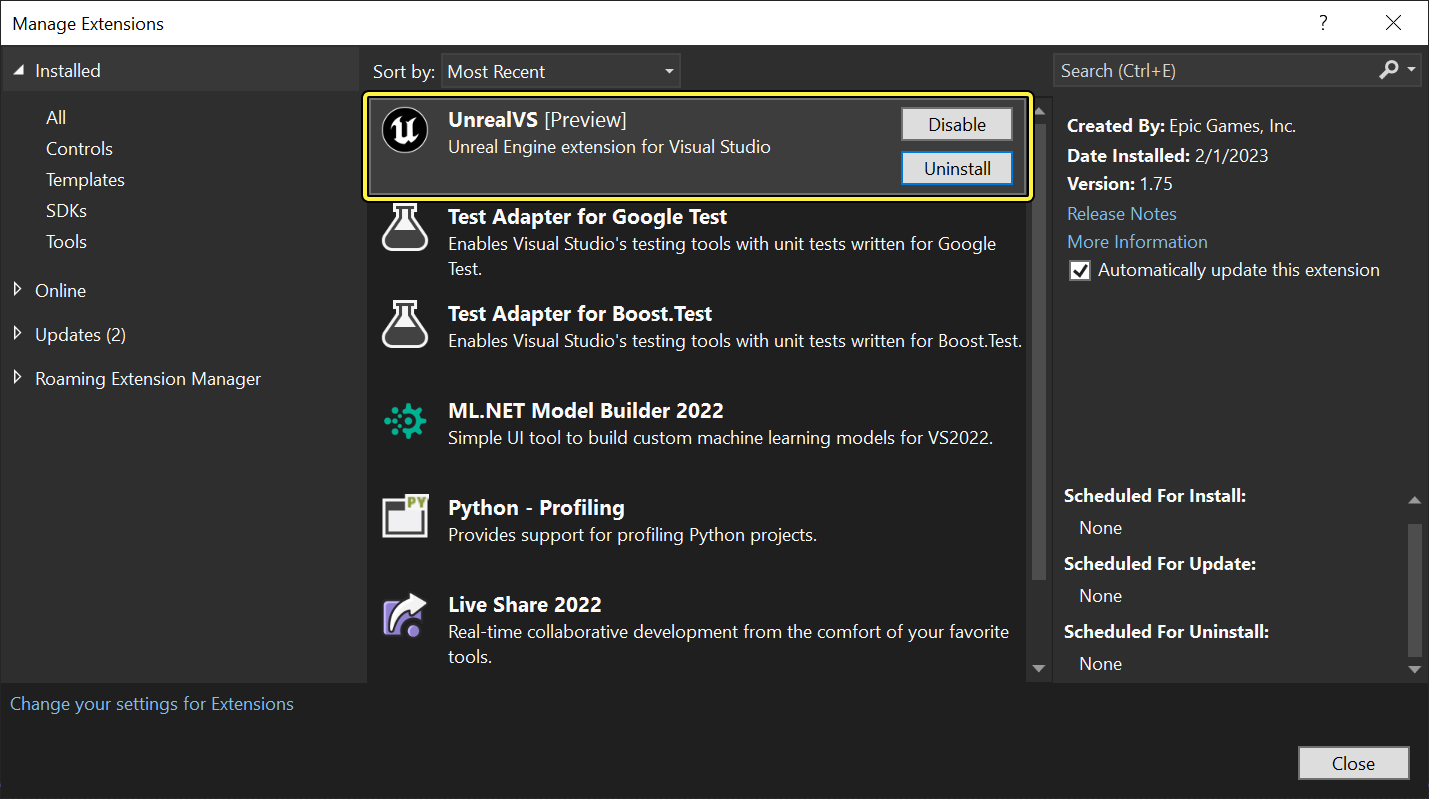
If Visual Studio is already running, you will need to restart before the extension will be loaded and displayed. The extension is also shown in the Installed Products list in the Help > About Microsoft Visual Studio dialog.
-
Go to View > Toolbars (or Right-click the Visual Studio toolbar area) and select UnrealVS to display the extension's toolbar.

-
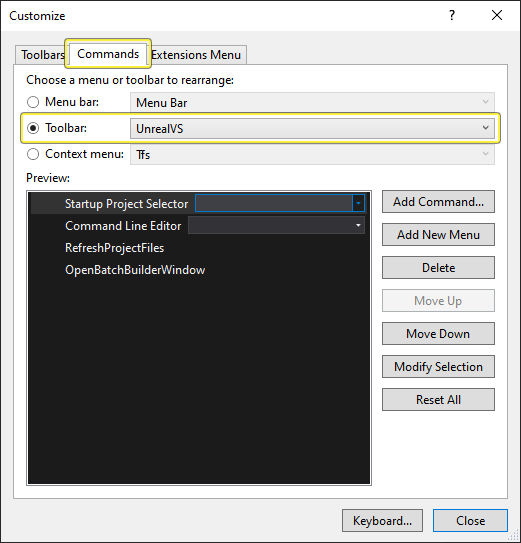
By default the toolbar appears as above. However, its contents can be customized by going to Tools > Customize... > Commands tab > Toolbar radio button > UnrealVS.
-
In the Customize box, choose Add Command... and select Extensions from the Categories list to see a list of UnrealVS commands that can be added to the toolbar. When you have finished adding commands, click OK.
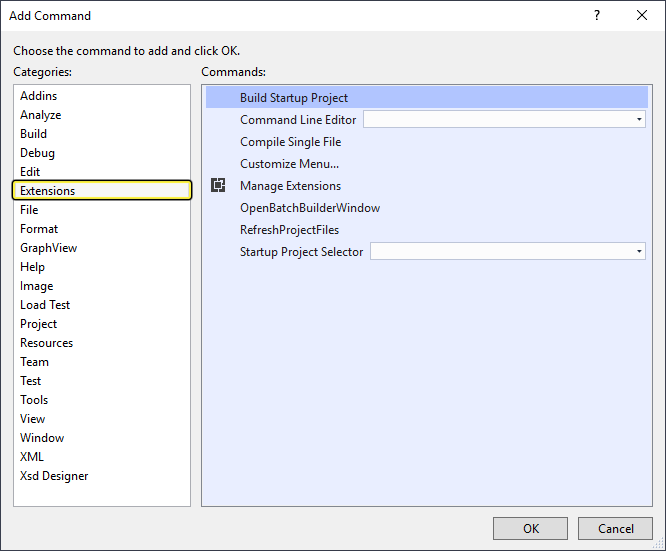
Now you can add various commands, such as the Startup Project, various command line arguments, Refresh Projects, Batch Builder, and the Quick Build Menu.
Setting the Startup Project
The Startup Project dropdown is a means of quickly setting or switching between startup projects. It automatically lists all available projects that build executables in the solution. Selecting a project from the list sets that as the current startup project.
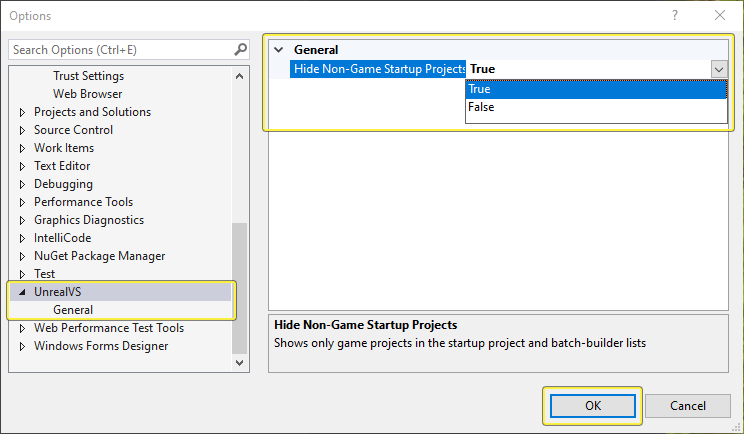
You can change which projects are listed in the UnrealVS options. To show only Game projects, go to Tools > Options... and select UnrealVS. Click the dropdown next to Hide Non-Game Startup Projects and select True. Then click OK.
Building the Startup Project
The extension also contains a command for building the current startup project which can be bound to a hotkey or other means of running custom commands.
Binding the Command to a Hotkey
-
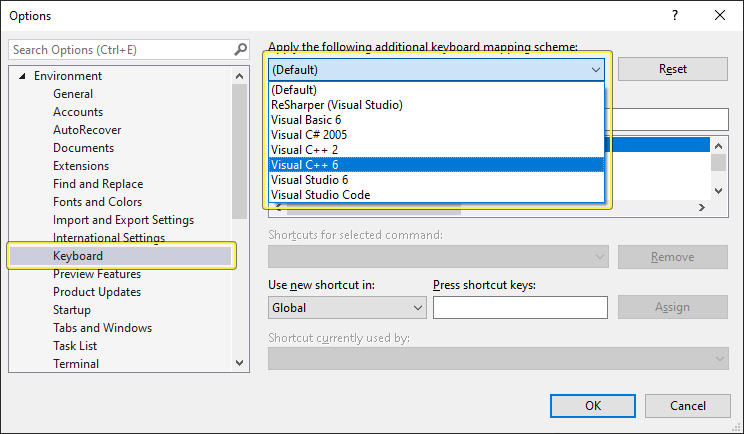
Go to Tools > Options... and select Keyboard under the Environment tree. Under Apply the following additional keyboard mapping scheme click the dropdown and select Visual C++ 6.
-
Select the UnrealVS.BuildStartupProject command in the commands list.

You can type "Unreal" in the search box to filter the list.
-
With the command selected, click in the Press Shortcut Keys box and then press the combination of keys you want to use to perform the command (for example, Ctrl + Shift + Alt + B is shown in the example below).
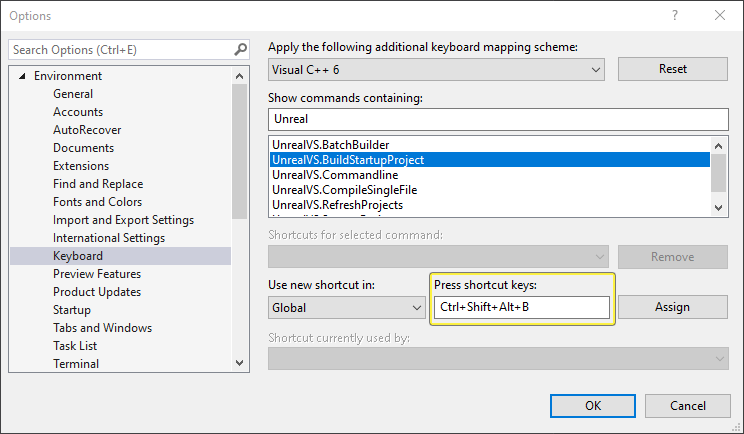
You should choose a combination of keys not already assigned to another command. The Shortcut currently used by box will alert you to the fact that the chosen combination is already in use.
-
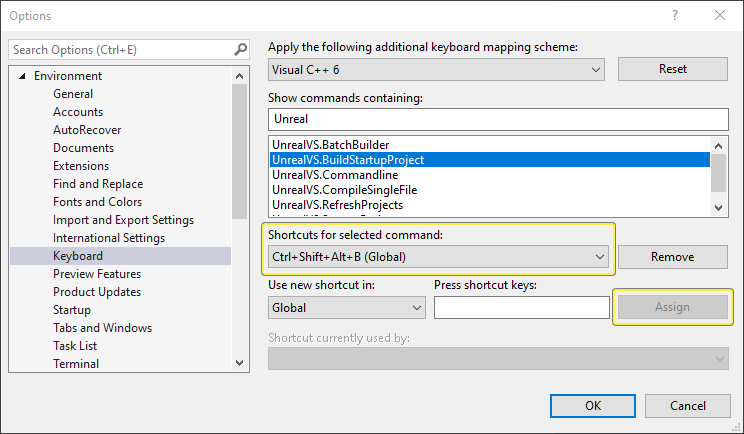
Press the Assign button to bind the keys to the command. The key combination is displayed under Shortcuts for selected command.
-
Press the OK button to save the changes. Now, when you use the shortcut, the project set as the startup project will automatically build.
Iterating on a Single Source File
If you are used to iterating on updates to a single source (.cpp) file using Ctrl+F7 in Visual Studio, you can bind Ctrl+F7 to the UnrealVS.CompileSingleFile command. This will build your active project with the current solution configuration, platform, and the -singlefile=PATH/TO/OPEN/FILE argument.
Command Line Arguments
The Command-Line control is used to set the Command Arguments for the current project when running a debugging session. You can use this shortcut rather than setting them through the project Properties. In fact, changes made here will be reflected automatically in the Properties.
Enter the arguments in the text box or choose from a list of recent arguments using the dropdown list. These arguments will be passed to the executable when a debugging session is started.

Project configurations for game projects that build Unreal Editor add the project name to the command line automatically, to tell the editor executable which project you are using.
For example, if you build QAGame using the build config 'Debug Editor', the command line will have QAGame.uproject added to the command arguments without the need to type it in the box. To launch the editor for QAGame, you can leave the command-line control empty and the editor will still know which project you are running.
Refresh Projects
Project files can be generated inside of Visual Studio using the Automatic Project File Generation. This makes it much quicker to sync and update all the project files, since you do not have to navigate to the .bat file and run it manually.
To refresh project files:
-
Press the Refresh Projects button on the UnrealVS toolbar.

-
The project generation process will be displayed in the Output window as it occurs.
-
Reload any projects that require it, as you are prompted.
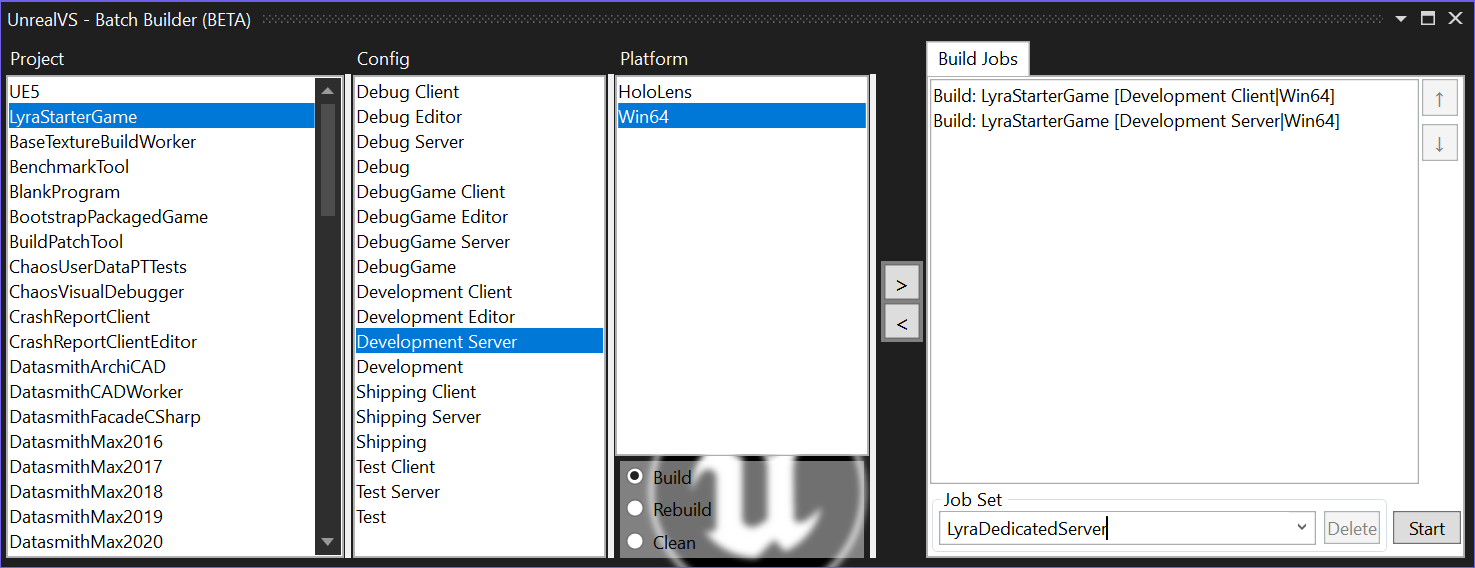
Batch Builder
Create and run custom sets of build jobs with UnrealVS Batch Builder. It is more versatile than the Build > Batch Build... option in Visual Studio.
To open the Batch Builder window:
-
Press the Batch Builder button on the UnrealVS toolbar or use a keyboard shortcut that you have assigned to the command UnrealVS.BatchBuilder (see Build Startup Project above for instructions on setting up keyboard shortcuts with UnrealVS commands).

-
The UnrealVS Batch Builder window appears.
-
Create a Build Job by selecting from the Project, Config, Platform, and then clicking the radio button for the job type.
-
Add/remove jobs with the > and < buttons.
-
In the Build Jobs list, move selected jobs up or down the list with the arrow buttons on the right.
-
Select the Job Set you want to edit in the dropdown under the Build Jobs list.
-
To create a new Job Set, type a new name into the field.
-
The Delete button deletes the selected Job Set from the list.
-
Start or Stop the batch build task on the current Job Set with the Start button.
-
Job Sets are stored for next time in the .suo file for the loaded solution.
-
-
When you click Start, the Output tab displays, showing the progress of the batch build.
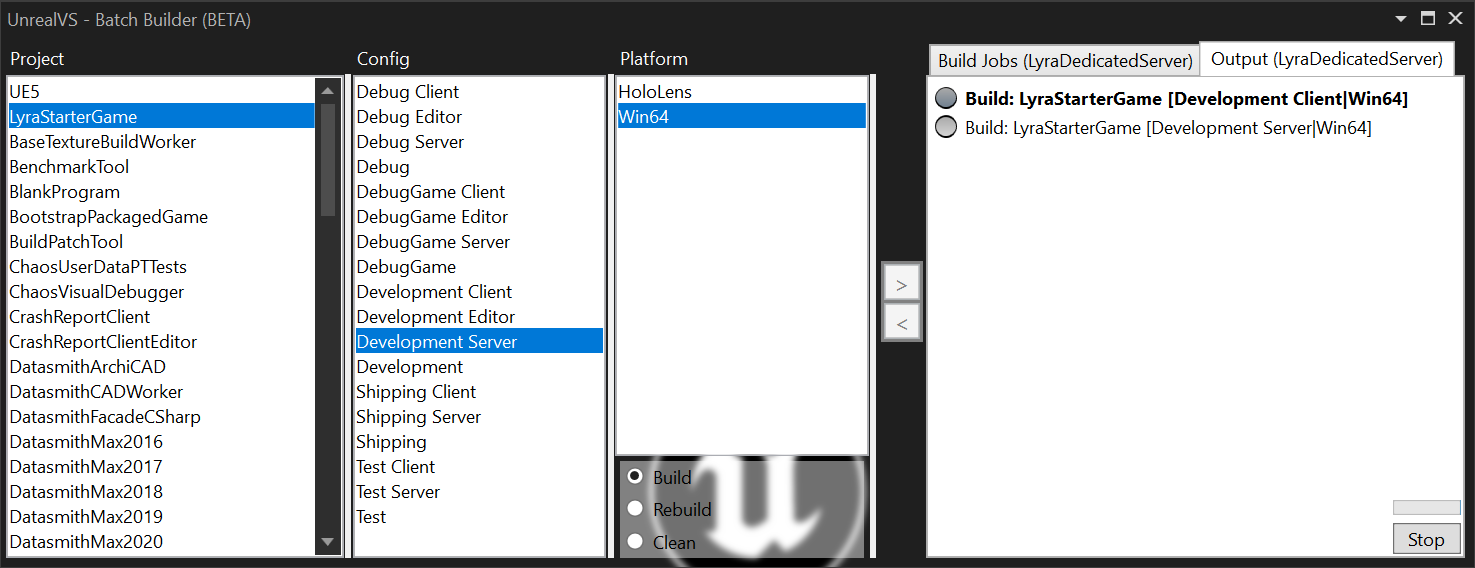
The Build Jobs in the running set are shown in the output list. The current executing build job is shown in bold.
-
 = Queued job
 -
 = Job complete, succeeded
 -
 = Failed job
 -
 = Cancelled job
A busy animation, and the Stop button, are shown when a batch build is running.
-
-
You can view the output from individual Build Jobs by double-clicking an item in the Output tab, or by right-clicking and selecting Show Output from the context menu.
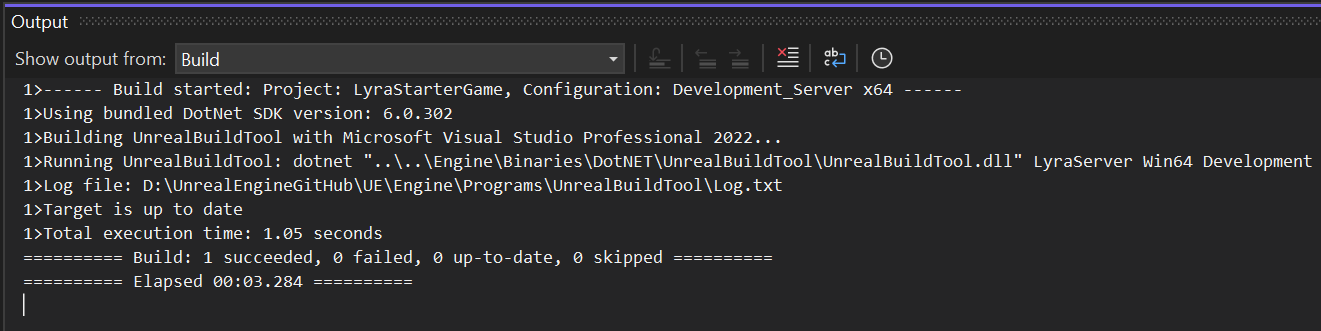
Batch Builder output for individual items is shown in the Visual Studio Output window, in a pane named UnrealVS - BatchBuild. This is not to be confused with the Build pane that shows the output of the current/last build job.
Quick Build Menu
Use the Quick Build menu to build a project using any config and platform combination, without having to change the main solution build config.
-
Right-click a Project node in the Solution Explorer.
-
The UnrealVS Quick Build menu contains sub-menus for the available platforms, and build configs, in the Unreal Engine solution.
-
Select an item to build the selected project, platform, and config. This method is much quicker than changing the Solution Configuration and Solution Platform in the IDE, starting a build, then switching the config and platform back again.
This method is much quicker than changing the Solution Configuration and Solution Platform in the IDE, starting a build, then switching the config and platform back again.