
No matter which Source Control software you end up using, the manner in which you interface with that software from inside of UE is the same. The following guide will detail everything you need to know about using Source Control inside of UE.
Collaboration Workflow inside of Unreal Editor
Unreal Engine makes it very easy for multiple user collaboration on projects. In the following section, we will be going over how all of the various collaboration tools work inside of the Unreal Editor.
Checking Out Files in Unreal Editor
The main way to share content with collaborators is via the Content Browser. All source control operations are accessible via the context menu for files and folders. For instance, to Check Out a file (i.e. lock it for editing), Right-click on the asset in the Content Browser and then select the Check Out option.

You can set the editor to automatically check out files on save by enabling Prompt for Checkout on Asset Modification. You can find these options by going to Editor Preferences -> Loading & Saving -> Source Control.
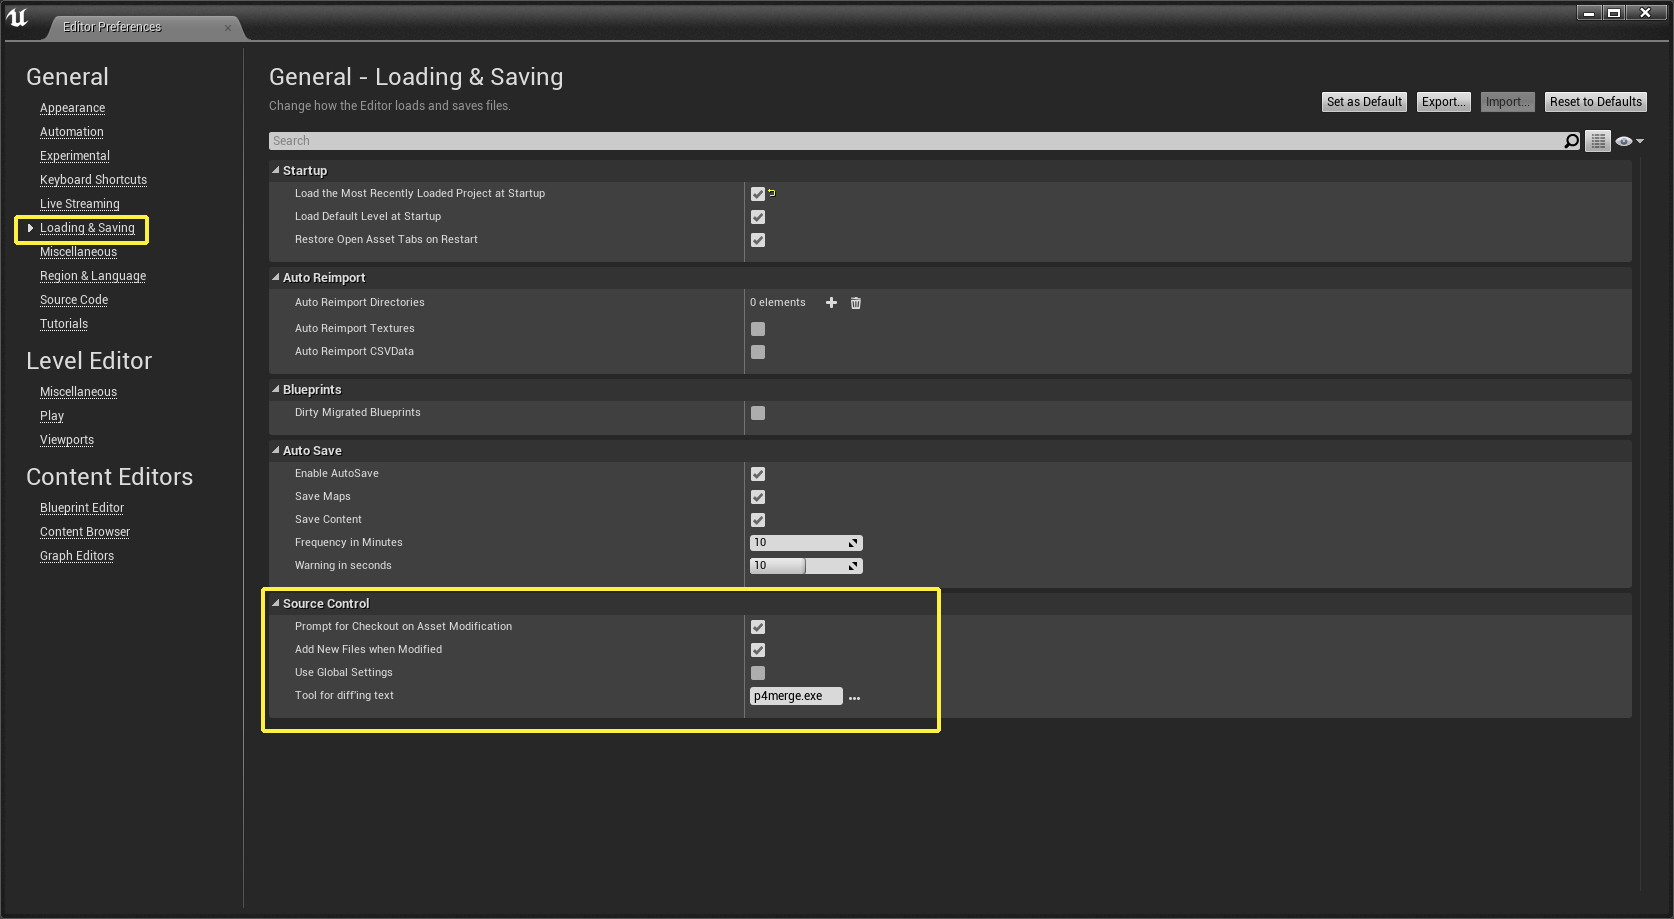
You can also set the Unreal Editor to automatically add new files to Source Control when they are first saved inside of the Editor. You can find these options by going to Editor Preferences -> Loading & Saving -> Source Control. To do this, all you have to do is enable the Add New Files when Modified option which is on by default. When you start editing an asset, you will be presented with a notification in the bottom-right hand corner of the screen asking you whether you want to check the file(s) out:

This allows you to check out assets in advance of editing them. If you click the Check-Out link, then you will be presented with this dialog:

| Number | Property Name | Description |
|---|---|---|
| 1: | Check Out Selected | Checks out the files that are checked in the list. |
| 2: | Make Writable | Clears the read-only flag (if one exists) allowing local edits to a file. |
| 3: | Ask Me Later | Allows you to carry on working and check files out at a later time. |
When you Right-click on an object in the Content Browser and then go under the Source Control option, you will see various symbols that show the current state of the assets.
| Icon | Description |
|---|---|
 |
Checks out the files that are checked in the list. |
 |
Marked for addition to source control. |
 |
A newer version of a file exists in source control. |
 |
File is not under source control. |
 |
Checked out by anther user (hover over the asset to see who has the file checked out). |
 |
File is checked out for branch/copy (displayed with some providers when the file has been copied from another location |
Submitting to Source Control
Submitting to Source Control inside of Unreal Engine is a vital part of the Source Control process as if you do not submit anything to Source Control, other users will not be able to see what you have been working on/created. A workflow that is convenient if you are working on many changes, or you are not tracking changes you are making too closely, is to make use of the Submit to Source Control option in the File menu of the Editor.

This will scan your project and the Engine for changes made to assets that can be submitted and then present you with the Submit Files dialog.

You can then enter a description of your changes and then click OK and you will then commit/submit the files to Source Control.
Syncing Files
If you want to get changes that other people have made, you can Right-click on files or folders in the Content Browser and select the Sync option. Alternatively, you can Sync using an external program such as Perforce (P4V). However, it is recommended that you shut the Editor down if you do this as it may lock some files for editing while open.
When a file is Out of Sync (i.e. a newer version exists on the Source Control server to the one you have locally), the following icon,  ,
will be displayed by the asset in the Content Browser.
,
will be displayed by the asset in the Content Browser.
Adding Files
Similar to the Check-Out workflow, you can auto-add new files to source control using the Add New Files When Modified option in the preferences.
Files that are added appear with a  symbol on them in the Content Browser and can also be checked in, in the same manner that files are checked out.
Deleting Files
Deleting assets that are already in Source Control is more complex as they are usually referenced by other assets. If you select a file in the Content Browser and press Delete (or select it from the Right-click menu), you will be presented with the Delete Assets dialog.

| Number | Name | Description |
|---|---|---|
| 1 | Pending Deleted Assets | This is the asset(s) that you are going to delete. |
| 2 | Assets Referencing the Pending Deleted Assets | This shows asset(s) that are referencing the assets you are about to delete. |
| 3 | Replace References | Here you specify what assets you want other assets that reference this asset(s) to reference when this asset is deleted. |
| 4 | Force Delete | Here you can force delete an asset. However be very careful doing this as it can have a very negative impact on your project. You should only use this option as a last resort if nothing else works. |
| 5 | Cancel | This will cancel the delete operation. |
Once you have chosen how to handle the deletion, the file will generally be replaced by a hidden Asset known as a Redirector. If you want to clean up the Redirector that is created when deleting assets, you can Right-click on a folder in the Content Browser and select the Fix Up Redirectors in Folders. This will fix up the references in your project and permanently delete the redirectors, marking the files for delete in source control. Presently, to commit these deletions, you need to use an external tool such as P4V or TortoiseSVN.
Level Files
Levels can be managed in source control just like any other asset via the Content Browser. However levels can also be worked with via the Level Browser's menu,
which contains options for source control in the Source Control sub-menu.

Config (.ini) Files
Many configuration options for the Editor and Projects are stored in Configuration Files, or Config files for short. Some of these will need to be kept under source control (see above when adding the Config/ directory to source control). The settings editor provides a way to check these in and out so team members can share various settings. For example, in Edit -> Project Settings you will see the following indicator.

Checking out the file allows these settings to be edited. Unfortunately there is currently no way to check these files back into source control via the Editor, so you will need to use an external tool such as P4V or TortoiseSVN to check these files in outside of your Unreal Editor session.