
This tutorial will show you how to create a basic dialogue setup in Unreal Engine by using MetaHumans as in-game characters. You will also learn how to use Dialogue Voices and Dialogue Waves to adjust a character's tone depending on who they are speaking to.
For longer conversations, you will likely want to create a conversation manager system.
Required Knowledge and Setup
This page requires basic knowledge of Animation Blueprints in Unreal Engine.
Before you can follow the steps outlined on this page, create a new Unreal Engine project based on the Third Person Template.
Downloading and Exporting the MetaHumans
Open Quixel Bridge and download three MetaHumans. This tutorial uses the Ada, Cooper and Hana Presets. You can download multiple MetaHumans at the same time.
After downloading them to your local machine, import the MetaHumans to your project.

You will find your downloaded MetaHuman files in the MetaHumans > [MetaHumanName] folder inside the Content Browser. For example, the location for Ada will be MetaHumans > Ada.

If you need help completing this step, refer to the MetaHumans Getting Started page.
Animating the MetaHumans
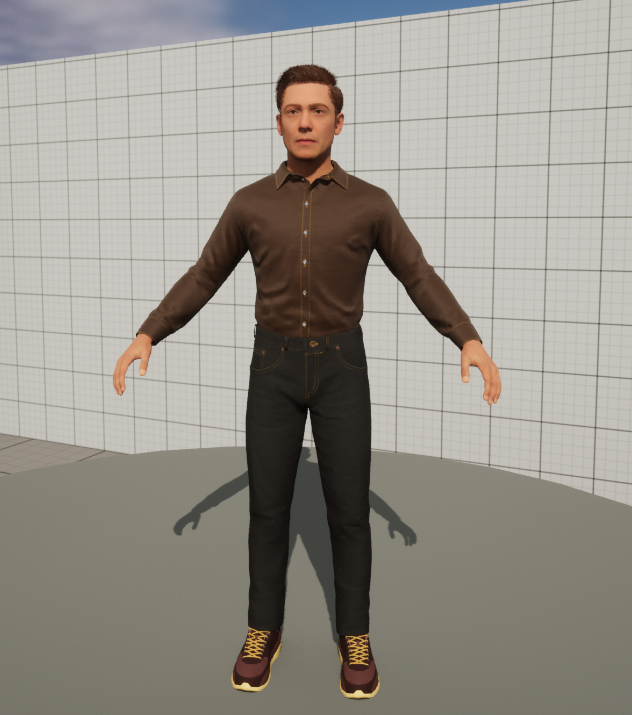
After successfully importing your MetaHumans, you can set them up to be used as in-game characters. Follow the Runtime Animation Retargeting guide to learn how to retarget the animations from the UE5 Mannequin to a MetaHuman at runtime.
After completing the guide, you will have controllable Blueprints for each MetaHuman that you can use as playable characters in your level.
Click image for full size.
Refer to the Animating MetaHumans section of the documentation to learn more about animating MetaHumans. This section includes guides on creating Animation Blueprints and Assets, animation retargeting, using Control Rig and using facial rigs.
Creating Dialogue Voices
In this tutorial, Ada will be a quest NPC and Cooper and Hana will be playable characters.
Here is a snippet of an example design document:
- Cooper is a mercenary who prefers stealth over direct confrontation.
- Hana is an ex-soldier who joined Cooper's team after the last major Galactic Skirmish.
-
Ada is a soldier who wants to hire someone from Cooper's team as backup on a supply escort mission.


Ada (Quest NPC) Cooper Hana
-
First you need to add a Dialogue Voice variable to each of your MetaHuman characters. In the Content Browser, double-click Ada's Blueprint you created in the previous section. In this example, the Blueprint is called BP_AdaCharacter.

-
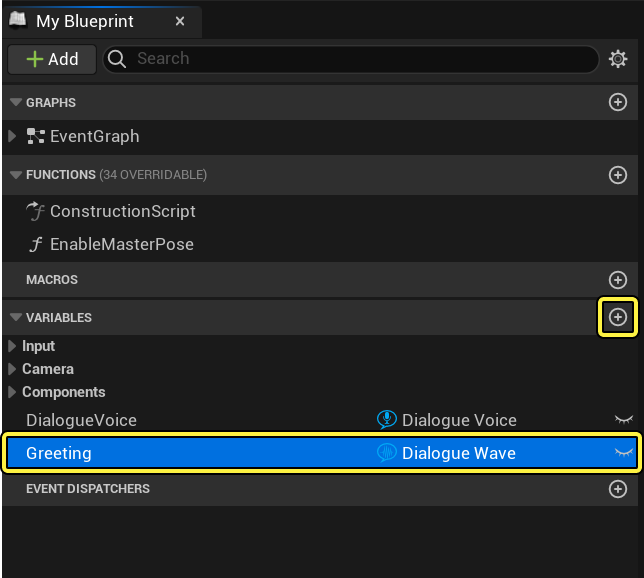
Add a new variable by clicking the Add (+) button.

-
Name the new variable DialogueVoice, then set its type to a DialogueVoice Object Reference. Compile and save the Blueprint. Repeat the process for the other character's Blueprints.

-
Now, you will create Dialogue Voice Assets to use for each of the characters. In the Content Browser, right-click and select Sounds > Dialogue > Dialogue Voice.

-
Name the new Asset Ada, then open it by double-clicking.

-
Referring to the design document, Ada's voice is Feminine and Singular. Click the dropdown and set the Gender and Plurality accordingly.

-
Repeat the process two more times to create a Dialogue Voice Asset for Cooper that is Masculine and Singular, and a Dialogue Voice Asset for Hana that is Feminine and Singular.


-
Save and close all your Dialogue Voice Assets.
You will now associate the Dialogue Voice Assets with their respective MetaHumans.
-
Switch to the BP_AdaCharacter Blueprint. Select the DialogueVoice variable and go to the Details panel. Set the Dialogue Voice property to Ada.

-
Repeat the process and set the Dialogue Voice properties for Cooper and Hana.


-
(Optional) Add a custom thumbnail to each Dialogue Voice Asset.
Place your character in the world and frame them in the viewport. Right-click the Dialogue Voice Asset in the Content Browser. Select Asset Actions > Capture Thumbnail. This will add the MetaHuman to the thumbnail for each of the Dialogue Voice Assets.

Building Dialogue Waves
This example implements a greeting from Ada to Cooper and Hana. Each line of dialogue needs a Dialogue Wave Asset associated with it.
-
In the Content Browser, right-click and select Sounds > Dialogue > Dialogue Wave to create a new Dialogue Wave Asset.

- Name the new Asset QuestGreeting, then open it by double-clicking.
-
For the Spoken Text, enter "Hey! Could you come over here? I need your help with something important." Although the same text is spoken when Ada is talking to Cooper and Hana, the game design document gives us some hints that the way the text is spoken may be different for each listener. That means you need to set up two different Dialogue Contexts.

-
One context is already created by default. Fill in the Speaker entry with Ada. Click the Add (+) icon to add a listener. Set the Directed At property to Cooper.

-
Click Add Dialogue Context to add a new Dialogue Context.

-
Set this context's Speaker to Ada, and Directed At to Hana.

-
You can also make some notes about how the voice actor should sound friendlier toward Hana, as they have a shared military background, and be more abrupt with Cooper, who she doesn't trust because of his mercenary past. Enter these notes in the Voice Actor Direction field.

-
Finally, after the voice actor recordings come back, you can import those as Sound Waves and set them in the Sound Wave field for each context. You can create new Sound Waves or use Sound Waves from the Starter Content for testing purposes.

The Dialogue Wave is also where you can set a Subtitle Override. This is useful for effort sounds, as well as some other cases, such as characters speaking in a foreign language not known to the player.
Setting the Context
Now that you have your Dialogue Voices and Dialogue Wave set up, you can add logic to the Ada Blueprint to create the right context for her greeting.
A Dialogue Context involves at least two Dialogue Voices, a Speaker and at least one Dialogue Voice that the dialogue is Directed At.
-
Add a Box component to the BP_AdaCharacter Blueprint.

-
In the Viewport, scale the Box component so it is about the height of the character, and extends some distance in front of her. Make sure it doesn't overlap her, or she will trigger the conversation logic herself.

-
Add a new Dialogue Wave variable named Greeting.
-
Compile your Blueprint and set the Default Value of Greeting to the QuestGreeting Dialogue Wave you made previously.

-
Set up the following Blueprint graph.
Click image for full size.
This graph:
- Executes after something overlaps the Box component.
- Casts the Overlapping Actor to the BP_HanaCharacter and BP_CooperCharacter Blueprints, where you added the Dialogue Voice variable.
- Gets the voice from the Overlapping Actor and uses it as the Target for your Dialogue Context.
- Uses Ada's voice as the Speaker for your Dialogue Context.
- Plays the Dialogue Wave named Greeting at Ada's location, using the correct Dialogue Context.
The Blueprint graph above is used for illustration purposes only and does not demonstrate best practices. We recommend using Blueprint Interfaces or another method of Actor communication to accomplish that functionality.
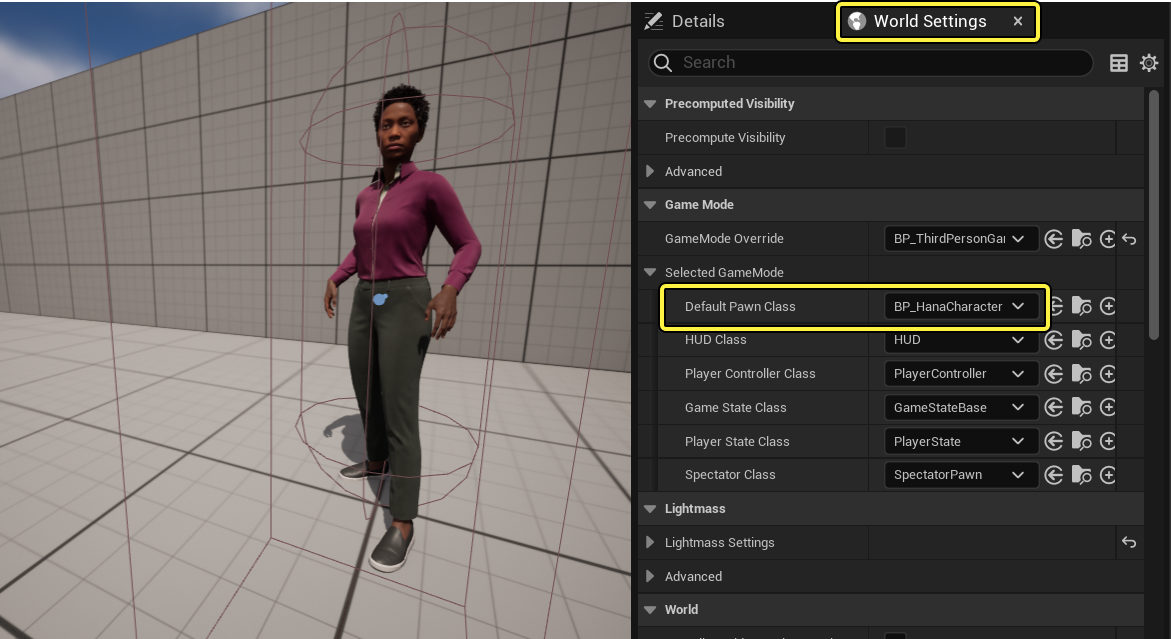
Open the World Settings and expand the Selected GameMode option under the Game Mode section. Set the Default Pawn Class to BP_CooperCharacter or BP_HanaCharacter.
Now, if your quest NPC is placed in the level, you can run up to them with either Cooper or Hana and trigger the dialogue.
Enabling Subtitles
Subtitles are enabled by default, but if you need to verify this, follow these steps:
-
Click Settings > Project Settings to open Project Settings.

-
Under General Settings, locate the Subtitles section and make sure the Subtitles Enabled checkbox is enabled.

Now, when you trigger a quest NPC's dialogue, the accompanying subtitle text appears at the bottom of the screen.

Subtitles will not display unless there is a Sound Wave set in your Dialogue Wave for the context that is currently happening.