
Unreal Engine (UE) is designed to integrate smoothly with Visual Studio (VS), allowing you to make code changes in your projects quickly and easily, and immediately see results upon compilation. Setting up VS to work with UE can help improve efficiency and the overall user experience for developers using UE.
This document covers the basics for setting up your Unreal Engine-to-Visual Studio workflow.
Version Compatibility
The following table lists which versions of VS are integrated with the binary version of UE.
| Unreal Engine Version | VS 2019 Version | VS 2022 Version |
|---|---|---|
| 5.2 | 16.11.5 or later | 17.4 or later (Default) |
| 5.1 | 16.11.5 or later (Default) | 17.4 or later |
As of UE 5.1, Unreal Build Tool (UBT) now generates the Visual Studio solution file for the latest version of Visual Studio installed, unless you have a Platform SDK installed that does not support the latest version. In this case, UBT generates the Visual Studio solution file for the latest version of Visual Studio that supports the Platform SDK in question.
As of UE 5.2, VS 2022 is the default Visual Studio Version for compiling Unreal Engine.
If you are precompiling plugins for UE 5.2, we recommend that you compile your plugin using VS 2019. This enables all users of UE 5.2 to use your plugin regardless of whether they are using VS 2019 or VS 2022. For more information about plugins, see the Plugins documentation.
Unreal Engine Prerequisite Installer
When installing UE from the Epic Launcher — or if you clone it from GitHub — the UE prerequisite installer runs automatically. However, if you install or sync UE from Perforce, you will need to manually run the prerequisite installer before running any UE tools you have built locally. This installer is located at UNREAL_ENGINE_ROOT\Engine\Extras\Redist\en-us\ in the code base.
New Visual Studio Installation
If you are installing VS for the first time, you will want to make sure that you have the following options enabled.
Visual Studio Workloads
Unreal Engine development with VS requires installing the following optional Workloads:
- .NET desktop development
- Desktop development with C++
- Universal Windows Platform development
- Game development with C++
C++ Tools
To add C++ tools to your VS installation, make sure you select Game development with C++ under Workloads, as well as these additional options.
- C++ profiling tools
- C++ AddressSanitizer
- Windows 10 SDK (10.0.18362 or Newer)
- Unreal Engine installer

Recommended Settings
The following settings are recommended for developers using VS with UE.
If the version of VS below looks a little different, it is because the theme was changed to Dark. You can do this by going to Tools > Options > Environment > General > Color theme.
Increase the Width of Solution Configurations Dropdown Menu
-
Launch VS. If you open VS for the first time Get Started window appears. Click Continue without code.
Click to enlarge image.
-
Right-click the toolbar and select Customize at the bottom of the menu that appears.
Click to enlarge image.
-
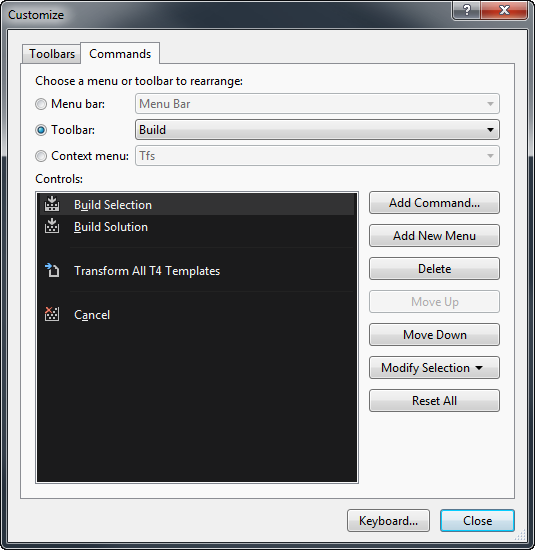
Click the Commands tab and select the Toolbar radio button.
-
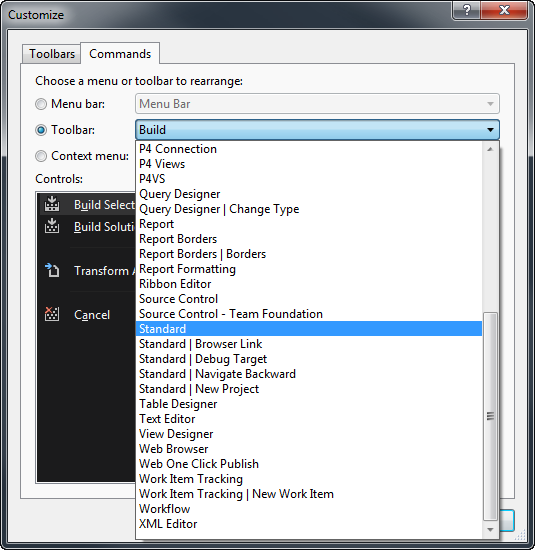
In the dropdown next to the Toolbar, choose Standard.
-
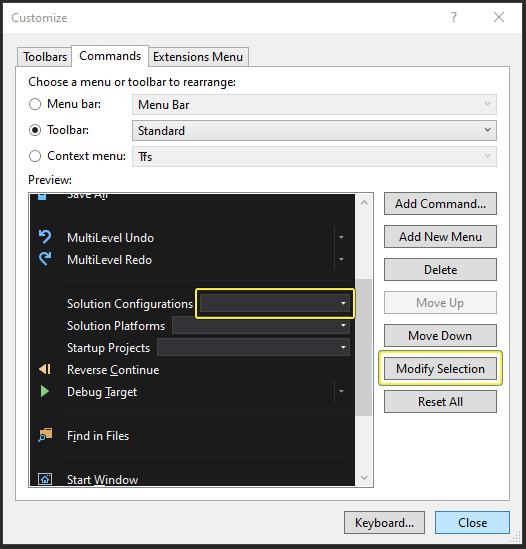
In the Preview list, select the Solution Configurations control (you may need to scroll down), then click Modify Selection.
-
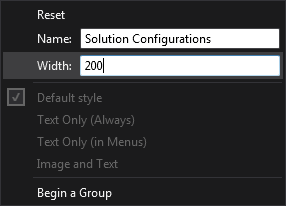
Set the Width to 200, then click OK.
-
Click Close on the Customization . Your toolbar should update immediately.
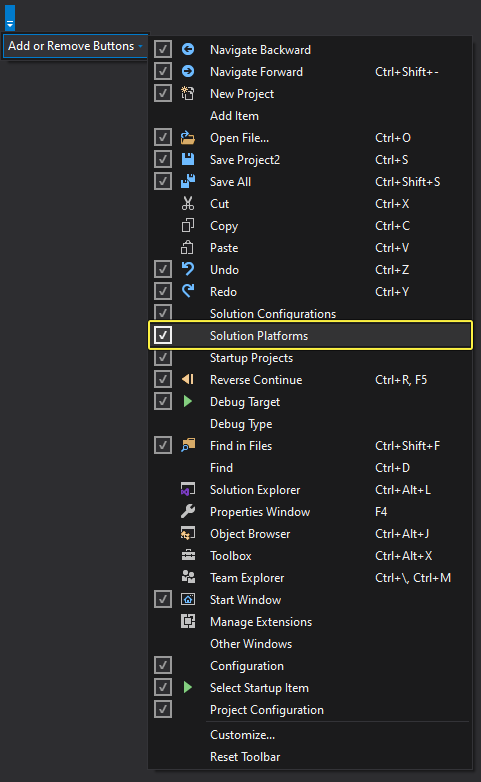
Add the Solution Platforms Dropdown
-
Locate the far right button on the Standard toolbar (if you hover the mouse over it, it is labeled Standard Toolbar Options).

-
Click the dropdown button, choose Add or Remove Buttons, then click on Solution Platforms to add the menu to the toolbar (this may be enabled by default).
Turn Off the Error List Window
Typically, the Error List window pops up automatically when you have an error in your code. However, when working with UE, the Error List window can display false error information. It's best to disable the Error List window and use the Output window to see real code errors when working with UE. The following steps show how to turn off the Error List window.
-
Close the Error List window if it is open.
-
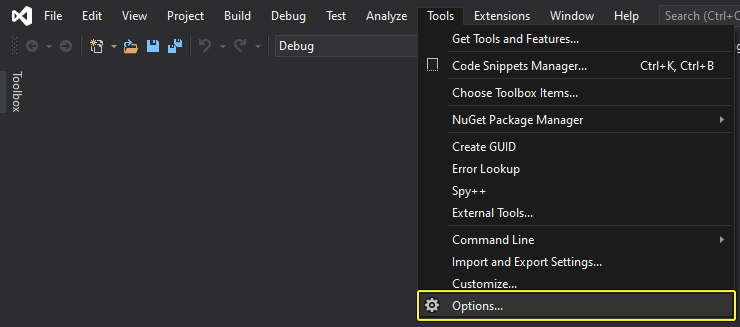
From the Tools menu, open the Options dialog.
-
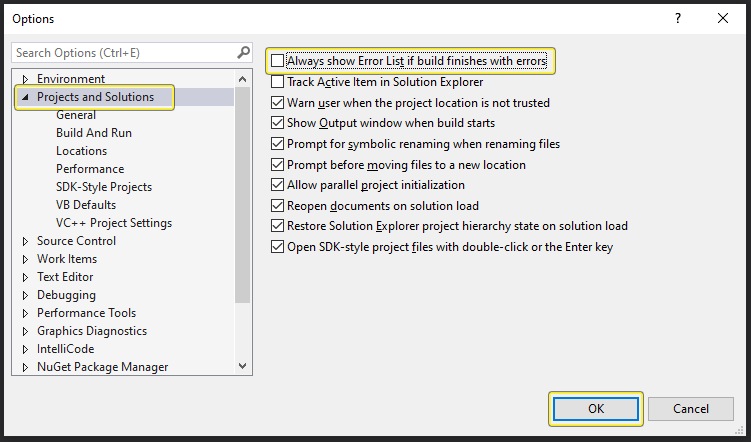
Select Projects and Solutions and disable Always show Error List if build finishes with error.
-
Click OK.
Here are some other configuration settings you might find useful:
-
Turn off Show Inactive Blocks. If you do not, chunks of code may appear grayed out in the text editor. Go to Tools > Options > Text Editor > C/C++ > View to turn off this setting.
-
Set Disable External Dependencies Folders to True to hide unneeded folders in the Solution Explorer. Find Disable External Dependencies Folder in Tools > Options > Text Editor > C/C++ > Advanced.
-
Turn off Edit & Continue features; you do not need them. Go to Tools > Options > Debugging > Edit and Continue.
-
Turn on IntelliSense.