Editor modules are Unreal Engine (UE) C++modules whose code is only compiled for editor builds. This facilitates creating classes that support custom editor features without bloating runtime (shipping) builds.
Setting up an editor module requires a few extra steps compared to runtime modules, as you will often want to use the module class to register details panel customizations or custom editor windows. This guide walks through the process of setting up an editor module with those goals in mind.
Set Up Your Module's Directory Structure
In your Project's Source directory, add a folder for both your runtime and editor module, then add a Private and Public folder to each one. For example:
- CustomGameplay
- Private
- Public
- CustomGameplayEditor
- Private
- Public
In this example, the CustomGameplay module is a runtime module, and the CustomGameplayEditor module is an editor module that provides editor customization that supports the classes and types in CustomGameplay.
CustomGameplay compiles for both editor and runtime builds, while CustomGameplayEditor only compiles for editor builds, as the code for editor customizations isn't necessary when shipping your project.
We strongly recommend organizing your editor features into parallel runtime and editor modules. This makes it clear which classes or gameplay features any given editor module is supposed to support, and maintains a strong sense of encapsulation. Refer to Unreal Engine Modules for more information about the benefits of runtime modules.
Make sure the Private and Public folders begin with uppercase lettering. While Windows is not case-sensitive, many source control systems are, and using uppercase letters at the start of folder names makes sure that they do not produce duplicate folders.
Populate Your Runtime Module
To fill out the boilerplate classes for your runtime module:
-
In the CustomGameplay folder, create a file called
CustomGameplay.Build.cs. Populate it as follows:CustomGameplay.Build.cs
using UnrealBuildTool; public class CustomGameplay: ModuleRules { public CustomGameplay(ReadOnlyTargetRules Target) : base(Target) { PrivateDependencyModuleNames.AddRange(new string[] {"Core", "CoreUObject", "Engine"}); } }Add public or private dependencies as needed to support your code.
-
In CustomGameplay/Private, create a file called
CustomGameplayModule.cpp. implement it as follows:CustomGameplayModule.cpp
#include "Modules/ModuleManager.h" IMPLEMENT_MODULE(FDefaultModuleImpl, CustomGameplay);
This default implementation is sufficient for this example. The Editor module features an example of a more detailed module class implementation.
Populate Your Editor Module
Setting up the boilerplate code for your editor module is similar to the process for the runtime module, but there are a few modifications to include the Slate UI framework and provide Startup and Shutdown modules for initializing and cleaning up your editor features.
-
In the CustomGameplayEditor folder, create a file called
CustomGameplayEditor.Build.cs. Populate it as follows:CustomGameplayEditor.Build.cs
using UnrealBuildTool; public class CustomGameplayEditor: ModuleRules { public CustomGameplayEditor(ReadOnlyTargetRules Target) : base(Target) { PrivateDependencyModuleNames.AddRange(new string[] {"Core", "CoreUObject", "Engine", "CustomGameplay", "Slate", "SlateCore"}); } }This file includes Slate and SlateCore since it will be used to customize the editor. It also includes CustomGameplay as a dependency because it is intended to provide editors for CustomGameplay's classes. These are set as private dependencies since you do not need to provide exposure to these modules through this one.
-
In the CustomGameplayEditor/Public folder, create a file called
CustomGameplayEditorModule.h. Populate it with the following:CustomGameplayEditorModule.h
#pragma once #include "Modules/ModuleInterface.h" #include "Modules/ModuleManager.h" class FCustomGameplayEditorModule : public IModuleInterface { public: virtual void StartupModule() override; virtual void ShutdownModule() override; };This exposes the
StartupModuleandShutdownModulefunctions for this module, which are used to register and clean up custom editor functions and subsystems. -
In the CustomGameplayEditor/Private folder, create a file called
CustomGameplayEditorModule.cpp. Populate it with the following:CustomGameplayEditorModule.cpp
#include "CustomGameplayEditorModule.h" IMPLEMENT_GAME_MODULE(FCustomGameplayEditorModule, CustomGameplayEditor); void FCustomGameplayEditorModule::StartupModule() { } void FCustomGameplayEditorModule::ShutdownModule() { }This implements the functions from
CustomGameplayEditorModule.h.
The name you provide in the second field for IMPLEMENT_GAME_MODULE must be valid, otherwise your project will crash at runtime with cooked data, which is difficult to debug. Make sure the name matches the module's folder name.
Register Your Modules in Your Project
Now that both of your modules are implemented, you need to add the modules to your project.
-
Open your
.uprojectfile in a text editor. Add new entries to the "Modules" section. -
To register the runtime module, add the following:
.uproject file
{ "Name": "CustomGameplay", "Type": "Runtime", "LoadingPhase": "Default" },-
To register the editor module, add the following:
.uproject file
{ "Name": "CustomGameplayEditor", "Type": "Editor", "LoadingPhase": "Default" }Using Editor as your Type denotes that this is an editor module. Therefore, it will not be compiled when you create a runtime build of your project.
-
-
Open your project's
Target.csfile. Add "CustomGameplay" toExtraModuleNames.Target.cs
ExtraModuleNames.Add("CustomGameplay"); -
Open your project's Editor.Target.cs file. Add "CustomGameplayEditor" and "CustomGameplay" to ExtraModuleNames.
Editor.Target.cs
ExtraModuleNames.AddRange(new string[]("CustomGameplayEditor", "CustomGameplay")); -
Open your project's Build.cs file. In PublicDependencyModuleNames.AddRange, add an entry for "CustomGameplay":
Build.cs
PublicDependencyModuleNames.AddRange(new string[] { "Core", "CoreUObject", "Engine", "InputCore", "CustomGameplay" }); -
Save all the files you have edited, then right-click your .uproject and regenerate your project files.
-
Build your project's code.
Final Result
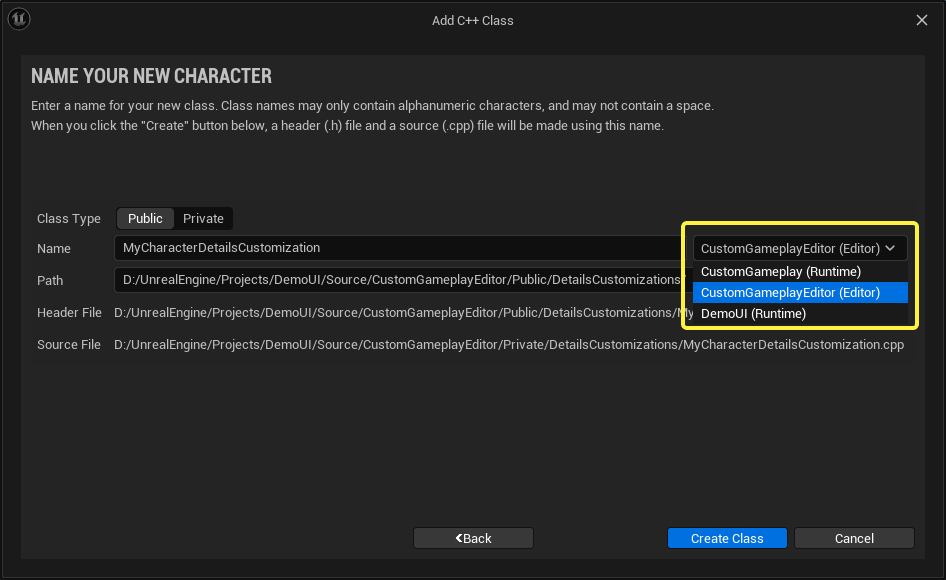
When you view your project in your IDE, your solution file will now display both of your new modules alongside your main application module. Additionally, when you compile your project, you will see your modules in the module dropdown for the New C++ Class wizard.