
This is an experimental feature that is currently undergoing development. Some aspects may not work as expected or may change in future revisions.
When working with and creating Sequences, there may be situations where you want to reuse the functionality of a Sequence in other places or instances. With the Actor Sequence Plugin and Actor Sequence Component, it is possible to embed Sequences directly into an Actor Blueprint. This enables reuse of Sequences by binding the animations to the Blueprint instance and triggering them automatically or through the Event Graph of the Blueprint. Additionally, you can add an Actor Sequence Component to any Actor in the world to add animations to a single instance of an Actor.
In this how-to guide, you'll create a Blueprint with an embedded Sequence that animates and changes the color of a Spot Light over time.

The Blueprint can then be placed in any level or duplicated and the embedded Sequence will play automatically when called.
Steps
For this how-to guide, we are using the Blueprint Third Person Template with Starter Content enabled.
-
With your project open, from the Edit menu select Plugins.
-
From the Plugins menu, under Built-in, enable the Actor Sequence Editor option and restart the editor when prompted.

You may see the Experimental confirmation dialog window when enabling the Actor Sequence Editor, click Yes to proceed.
-
Create a new Blueprint of the Actor type can call it Light_BP.

-
Inside the Light_BP, click Add Component and add a Spot Light.

-
In the Details panel for the Spot Light, change the Rotation value for Y to -60.

This will rotate and angle the light slightly downward in the viewport.
-
Add another Component of the Static Mesh type, then in the Details panel set the mesh to Floor_400x400 with its Location set to -180 (X), -180 (Y), -100 (Z).

We will use this Floor Mesh to shine our Lights on and to see the effects of Sequencer driving the parameter changes.
-
Add another Component of the Actor Sequence type.

-
In the Details panel for the Actor Sequence, set Loop Indefinitely, Random Start Time and Auto Play, then click Open in Tab.

After clicking Open in Tab, the Sequencer Editor will open within the Blueprint.

For this example we will automatically trigger and play the Sequence, however, you can also call this to play from the Event Graph.
-
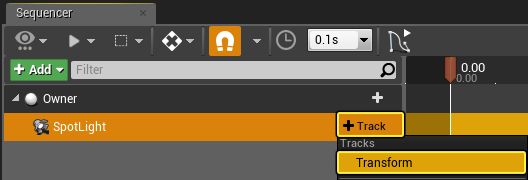
In the Sequencer tab, click Add then under Component select SpotLight.

-
On the SpotLight track, click the Track button and select Transform.
-
Click the Track button again for the SpotLight track and add the Light Color track.

-
For the Transform track under Rotation, click the + icon for the Z value to add a key of 0 at frame 0.

-
Select the key that was added, then press the 4 key to change the interpolation type to Linear.

You can change the type of interpolation with the number keys or by right-clicking on the keyframe and selecting your interpolation method.
-
Add a key at 2.00 for the Z value of Rotation set to -180.0 and change the interpolation to Linear by pressing 4 on the key.

-
Add a key at 4.00 for the Z value of Rotation set to -360.0 and change the interpolation to Linear by pressing 4 on the key.

You can also move the red End Marker back to 4.00 so the Sequence ends where it began.
-
For the Light Color track, click the Add (+) button to add a key at frame 0.

-
Add a key at 1.00 for Red with a value of 0.0.

-
Add a key at 2.00 for Green with a value of 0.0.

-
Add keys at 3.00 for Blue with a value of 0.0, and both Red and Green at 1.0.

-
Add a key at 4.00 for Blue with a value of 1.0.

This will cause the light to go from white to various colors before returning back to white at the end of the Sequence.
-
In the Components window, select and Delete the StaticMesh floor.

Now that our light is set up, we no longer need this mesh as a way to preview the light in the viewport.
-
In the Main Level Editor Viewport, select the floor, then while holding Alt drag up a copy of the floor to create a roof encapsulating the level.

-
From the Content Browser, drag and place instances of the Light_BP in the level (you can also press E and rotate them if desired).

-
From the Build drop-down menu, select Build Lighting Only to rebuild the lighting in the level.

-
Click the Play button to play in the editor.
End Result
When you play in the level, you will see that the lights you placed start rotating and changing colors playing the embedded Sequence.
Since the Sequence is embedded within the Actor Blueprint, it has no dependencies and can play in any level or can be duplicated without any issues.
In our example we've set the Sequence to Auto Play, however, you can also use the Event Graph to script when the Sequence should Play.

Above, upon Event BeginPlay we have allowed the Actor to receive input from a Player Controller. When the P key is pressed, we take the Actor Sequence Component and get the Sequence Player which allows us to make a call to the function Play to start playing the Sequence. You can use any method you desire to make the call to the Play function if you prefer not to have the Sequence Auto Play upon level load.