
In addition to rendering using the Movie Render Queue user interface, you can also execute renders using Blueprints on runtime distributed builds. This makes it so that renders can be created on end-user devices.
This document provides an overview of how to create renders using Blueprints, and the functions available to you to configure various settings.
Prerequisites
- You have completed the prerequisite steps from the Movie Render Queue page.
- You have an understanding of using Blueprints in Unreal Engine.
Movie Pipeline Subsystem
Movie Render Queue in Blueprints is accessed using the Movie Pipeline Runtime Subsystem node. This subsystem features a Queue which contains a list of rendering jobs. Each job can contain one or more shots, and each job also has its own configuration, which contains the render settings used to render its shots. To render a video, you need to build a list of jobs, allocate them to the queue, then call the Movie Render Queue subsystem's Executor to process the queue.
To add this, right-click in the Event Graph and select Engine Subsystems > Get MoviePipelineQueueEngineSubsystem.

Creating a Basic Render
From the Movie Pipeline Runtime Subsystem node, there are three main functions and steps required for successfully rendering using Blueprints.
- Allocate Job, which is a function used to assign a Level Sequence to the render job.
- Set Configuration, which is used to assign a render configuration.
- Render Job, which renders the job using the provided sequence and configuration.
Allocate Job
First, drag off the Movie Pipeline Runtime Subsystem node and select Movie Render Pipeline > Rendering > Allocate Job.

Connect the Subsystem node to the Target pin, and then assign the Level Sequence you want to render to the In Sequence pin.

Set Configuration
Next, drag off the Allocate Job node's Return Value pin and create a Set Configuration node.

Assuming you already saved a custom render configuration as a Preset, assign it in the In Preset pin.

Render Job
Lastly, drag off the Movie Pipeline Runtime Subsystem node and create a Render Job Function. It should execute after Set Configuration, and In Job should connect to Allocate Job.

Executing these functions performs a render on the local machine using the sequence assigned in Allocate Job, and the render settings assigned in Set Configuration.
Additional Functions and Settings
For more advanced render controls, you can use the following functions and workflows.
Customize Render Configurations
If you want to edit or create new render settings for a job, you can connect Get Configuration and Find or Add Setting by Class nodes after Allocate Job.

Next, set the specific export format, image setting, or render pass in the In Class pin.

After you choose a setting, you can now drag from the Return Value pin to get or set property variables related to that setting class.

If you are building custom render configurations without setting a base configuration, you are required to add a base render pass and output format. Typically this means adding Deferred Pass and an output such as PNG or JPG. Unlike the editor, these settings will not be added by default.
Canceling Jobs
You can also cancel active render jobs using functions. This can be important as a protection for cases when the simulation ends while a render is ongoing. Without this protection, it could cause the editor to enter into a softlock state.
To cancel all render jobs, connect the Movie Pipeline Runtime Subsystem node to Get Active Executor, then Cancel All Jobs.

To implement the cancellation as a protection when the simulation ends, create an End Play Event, connect it to an Is Valid check, then connect Is Valid it to Cancel All Jobs.

Render Finish Event
Render finish events can be created by binding to a custom event from the Movie Pipeline Runtime Subsystem. To do this, drag off the subsystem and select either Assign On Render Finished (to create both a Bind and Custom Event node), or Bind Event to On Render Finished (to create only a Bind node to connect to an already existing custom event).

Once connected to a custom event, right-click on the Results pin and select Split Struct Pin. A Render Finish event outputs the following information related to the render that occurred when this event fires:

| Name | Description |
|---|---|
| Results Pipeline | The internal UMoviePipeline object that generated this event. This is an advanced option and is only meant for tracking. |
| Results Job | The UMoviePipelineExecutorJob that generated the event. This is the same result as Allocate Job earlier, and can be used for tracking. |
| Results Success | Outputs true or false depending on if the render was successful. |
| Results Shot Data | This contains lists of the render passes and the file paths for the files that were generated on disk. This can be used in the event you want to load these images for further processing. |
Change Render UI
The Debug Widget is the UI Widget that displays the preview frames of your movie while it renders. You can set the Executor to use a different Debug Widget by using Set Configuration from the Movie Pipeline Runtime Subsystem.

Select the In Progress Widget Class dropdown menu to select which widget to use. You can select from the following:
- MovieRenderDebugWidget, which is the base class and shows a blank screen.
- UI_MovieRenderPipelineScreenOverlay, which shows the default rendering progress UI seen above.
- UI_MovieRenderPipelineScreenOverlayBlank, which shows a blank screen.

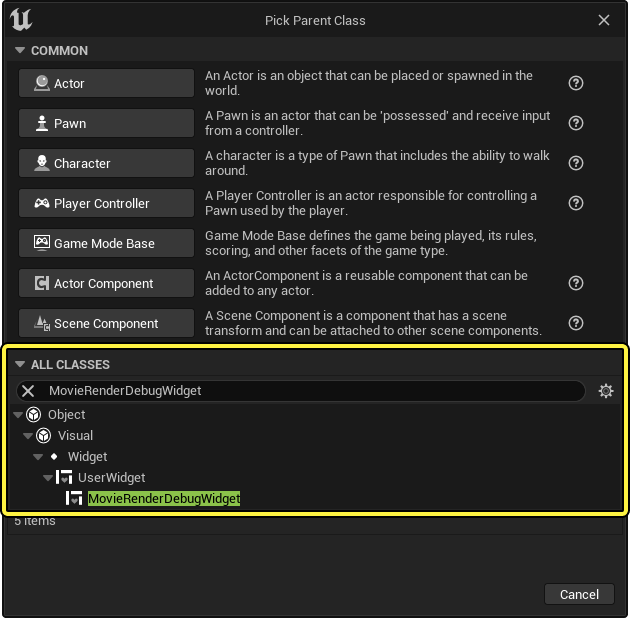
You can create your own custom debug widget by creating a Widget Blueprint, then setting its Parent Class to MovieRenderDebugWidget. You can then select this custom widget as your Debug Widget Class for your Executor.
Limitations
Some settings are unavailable in runtime builds, as they depend on editor-specific functionality. These include:
- The FinalCut Pro XML output format
- Object ID render passes
- Wav Output (unless your application is launched with
-deterministicaudioand-audiomixer).