
Live Link provides a common interface for streaming and processing animation data from external sources into Unreal Engine (UE). It is designed to be extensible through Unreal Plugins, allowing third parties to develop new features— with no need to make and maintain Engine changes.
LiveLinkXR extends this functionality to be used with XR devices. By using the LiveLinkXR plugin, you can add XR sources such as Vive Trackers and HMDs for use with the Live Link tool.
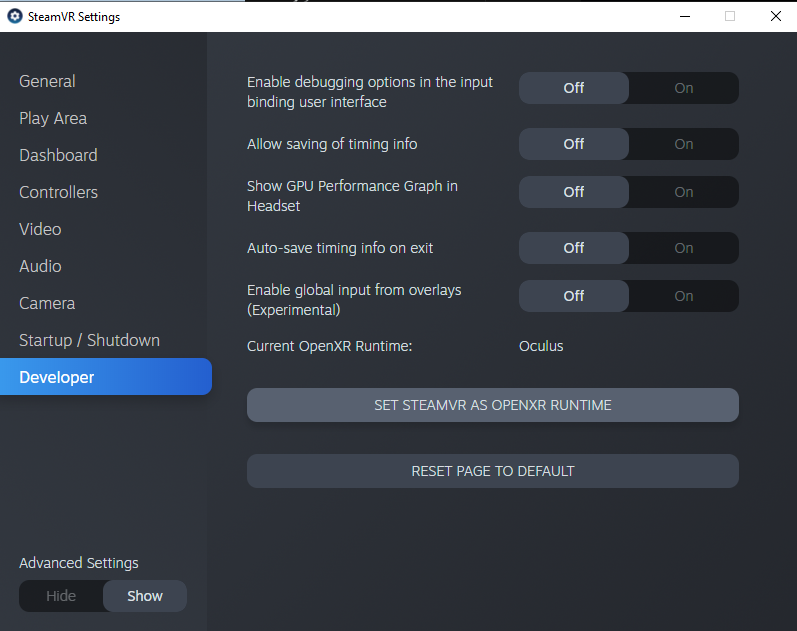
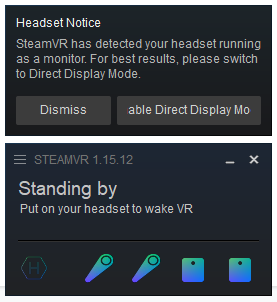
LiveLinkXR currently only supports OpenXR. Currently the SteamVR platform supports headless rendering via OpenXR (running VR without invoking a render). To use Vive Trackers you must have SteamVR running and set it as your open XR runtime:
This article walks you through setting up and configuring the LiveLinkXR plugin, adjusting the tools various settings, and provides potential troubleshooting and workaround steps.
Enabling LiveLinkXR
-
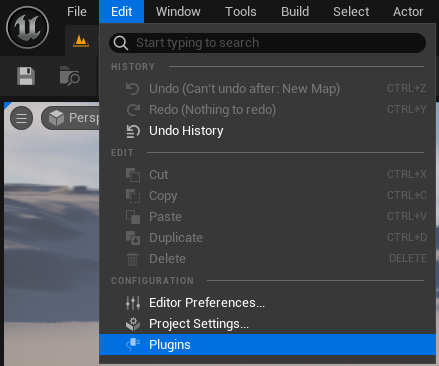
Click the Edit tab to expand., Under the Configuration heading, click Plugins.
-
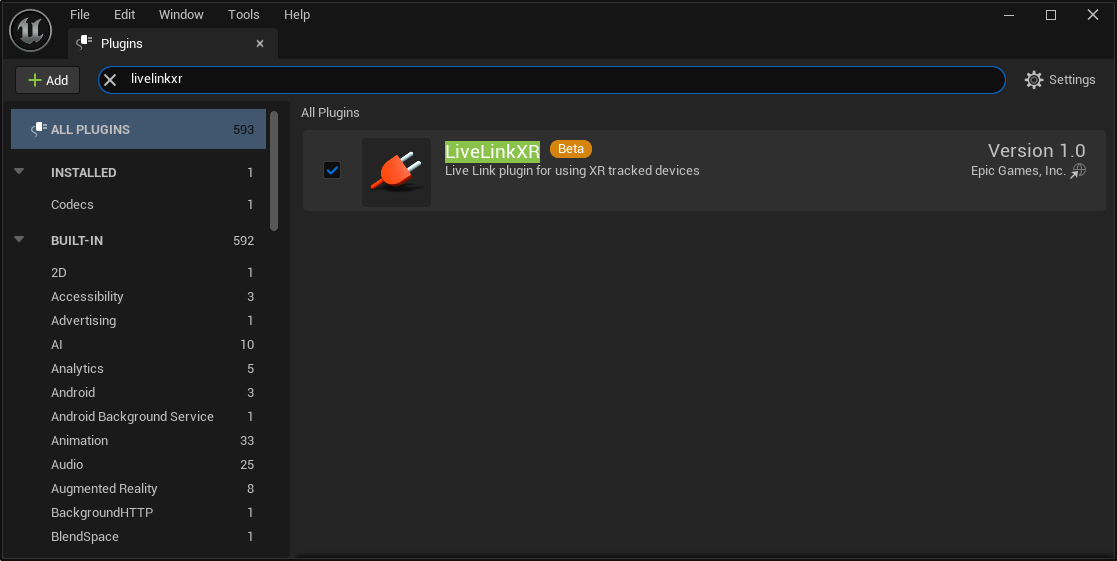
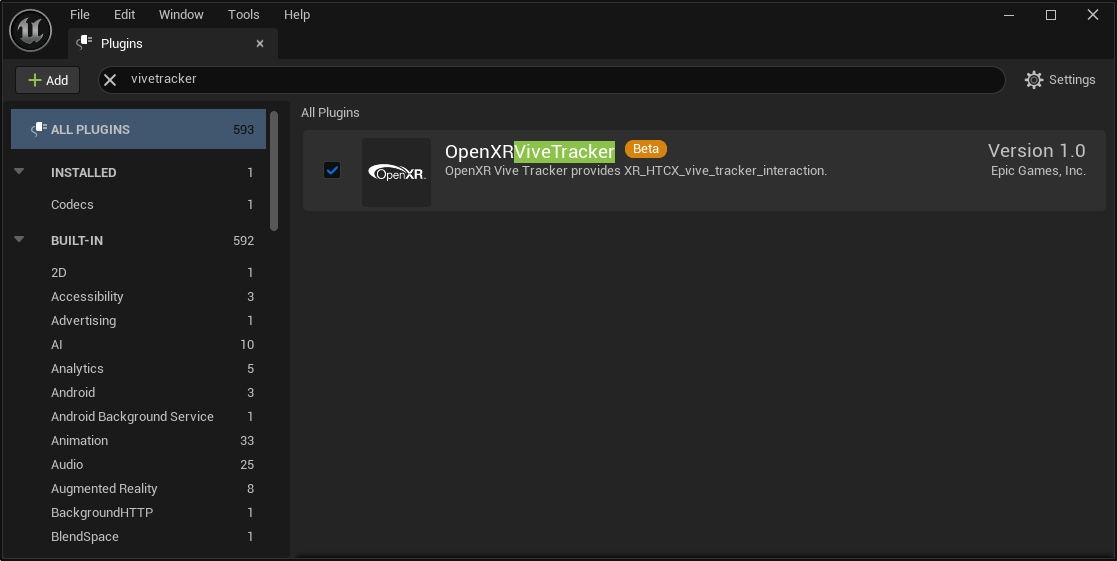
Use the search box to find the LiveLinkXR plugin, then click Enabled.
-
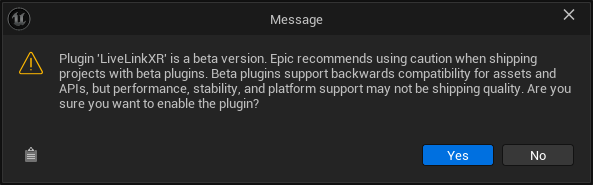
Click Yes in the box that appears.
-
Use the searchbox to find the Vivetracker plugin, then click Enabled.
-
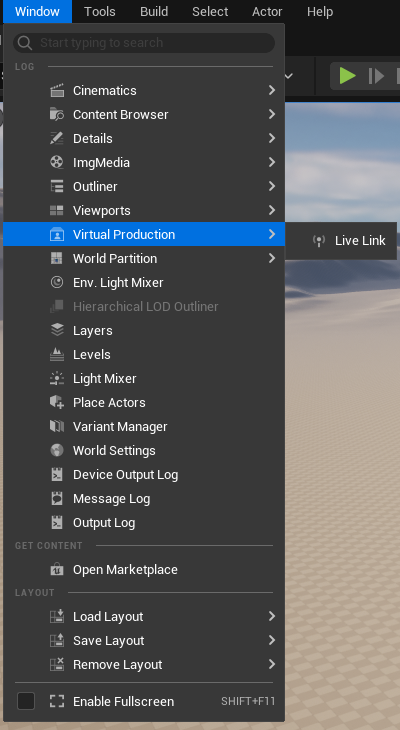
Launch the Live Link tool by expanding the Window tab and clicking Live Link.
-
Close and restart the engine with the following commandline parameter -xrtrackingonly
Eg: D:\Program Files\UE_5.2\Engine\Binaries\Win64\UnrealEditor.exe -xrtrackingonly
If you do not use this command line parameter your trackers, controllers and headset will only be available while you are in VR preview mode or VR Editor mode. -
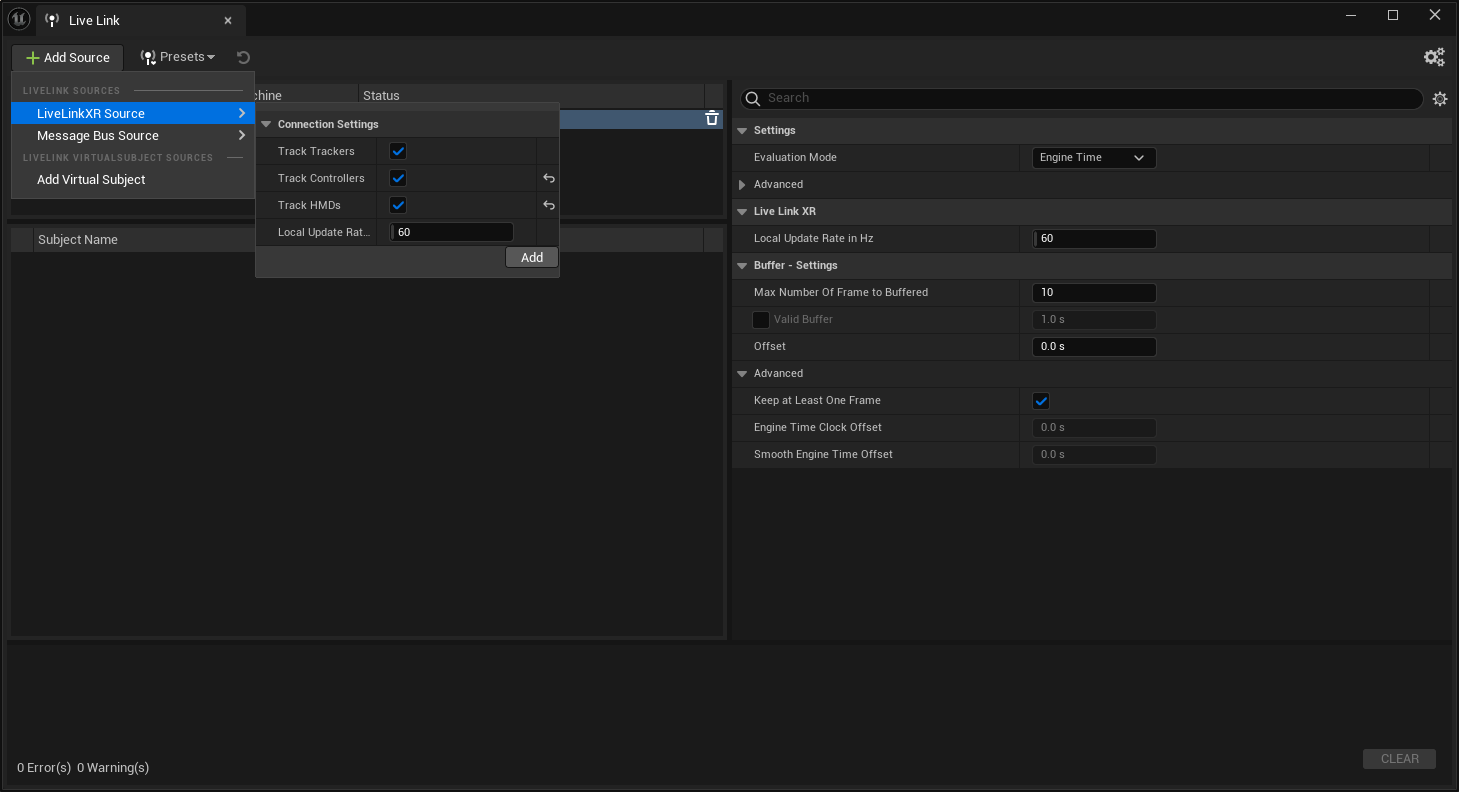
Expand the LiveLinkXR Source option to view the various settings associated with it.

Source Settings
The LiveLinkXR Source settings allow you to adjust data sources and adjust the local update rate.
| Setting Name | Purpose |
|---|---|
| Track Trackers | Track all Vive Trackers within OpenXR. |
| Track Controllers | Track all controllers. |
| Track HMDs | Track all HMDs. |
| Local Update Rate in Hz | Update rate (in Hz) at which to read the tracking data for each device. |
Adding a LiveLinkXR Source
Although the process below was drafted using a Vive HMD with trackers, you should be able to use Live Link XR with any VR device that is supported by SteamVR.
SteamVR must be running to add a new LiveLinkXR source. Consult the SteamVR Troubleshooting page for help setting up SteamVR.
Once the LiveLinkXR plugin is enabled and you have adjusted the settings to match your needs, you will be able to add a XR source.
-
Launch the Live Link tool, expand the Source window, and under LiveLinkXR Source click Add.
-
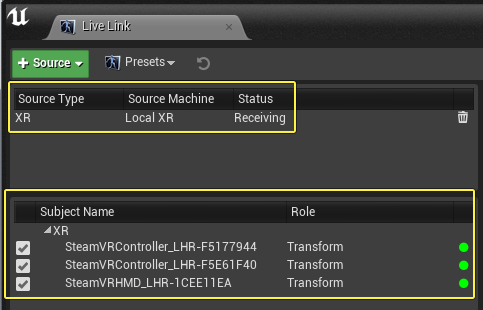
If you have configured everything correctly, after clicking Add you should see items added to the tables in the Live Link tool. These items should correspond to the Data Sources you have selected under the Data Source settings.
If you want to use more than one Tracker Puck then you must set the role for each puck in SteamVR using the SteamVR Vive Tracker settings window:
![]()
Associating VR Sources with Blueprints and Meshes
After you enable the LiveLinkXR plugin, your project will gain access to LiveLinkXR Blueprints and Meshes. These valuable premade items can help you get started. This section will walk you through locating and using those items.
-
Navigate to the Content Browser, expand the View Options menu, and select Show Engine Content and Show Plugin Content.
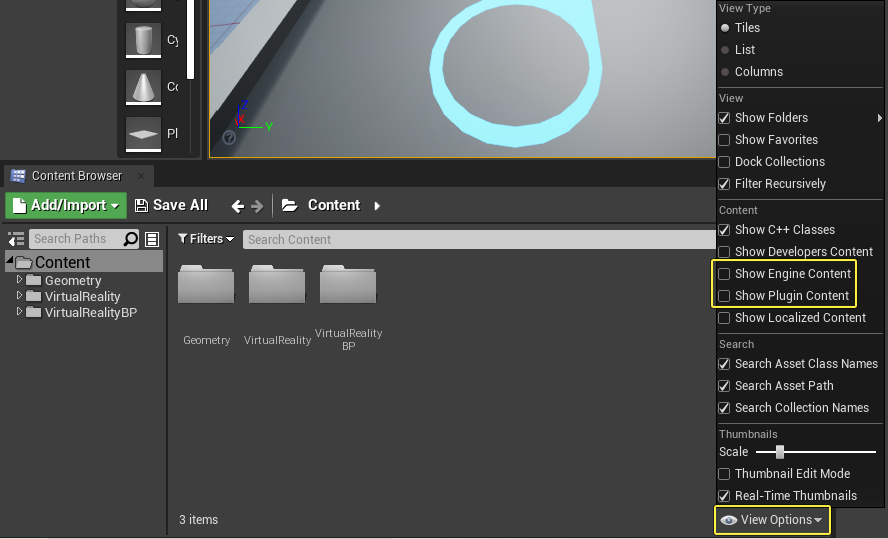
-
You should immediately see new items appear within the Content Browser navigation window.

-
Within the Content Browser, locate the LiveLinkXR Content folder and open the Blueprints folder under it.
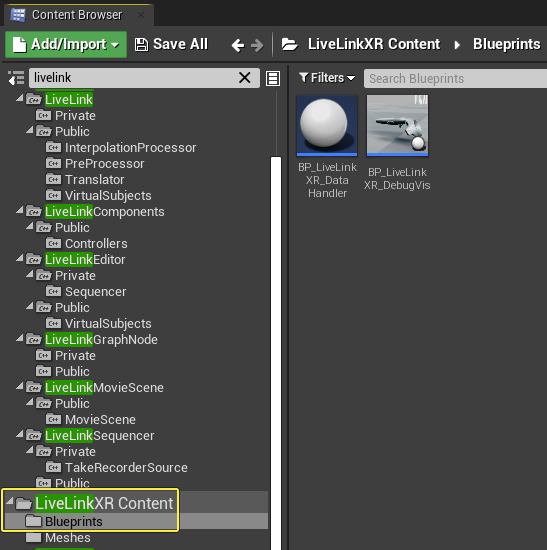
-
Drag the BP_LiveLinkXR_DataHandler into your scene.
You can verify the tracking data you're receiving with the Toggle Debug Vis option. Do this by using the Toggle Debug Vis debugging tool.
1. After you have set up sources in Live Link and have dragged the BP_LiveLinkXR_DataHandler into your scene, select the handler from the World Outlier and navigate to the Details panel. 1. Expand the Default category and click the Toggle Debug Vis button.
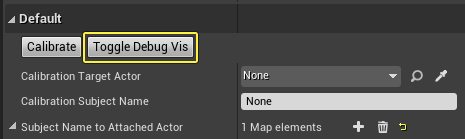
1. A BP_LiveLinkXR_DebugVis debug visualization should appear in your level for each Live Link Source that you have set up. 1. These items should then move around based on their real-world movements.
-
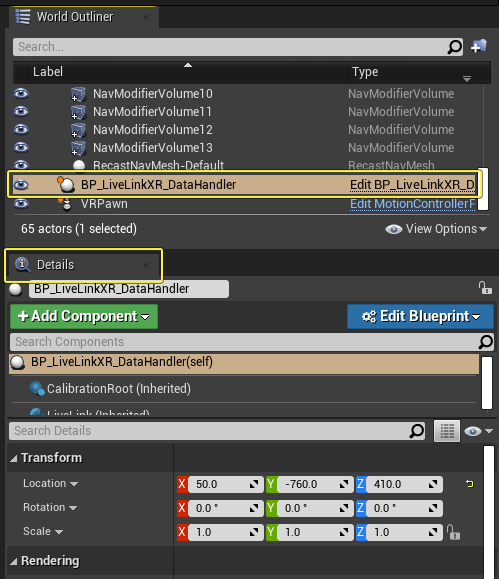
Select BP_LiveLinkXR_DataHandler from the World Outliner and navigate to the Details panel.
-
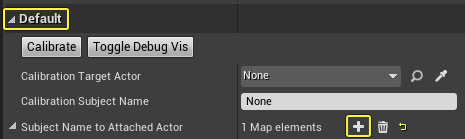
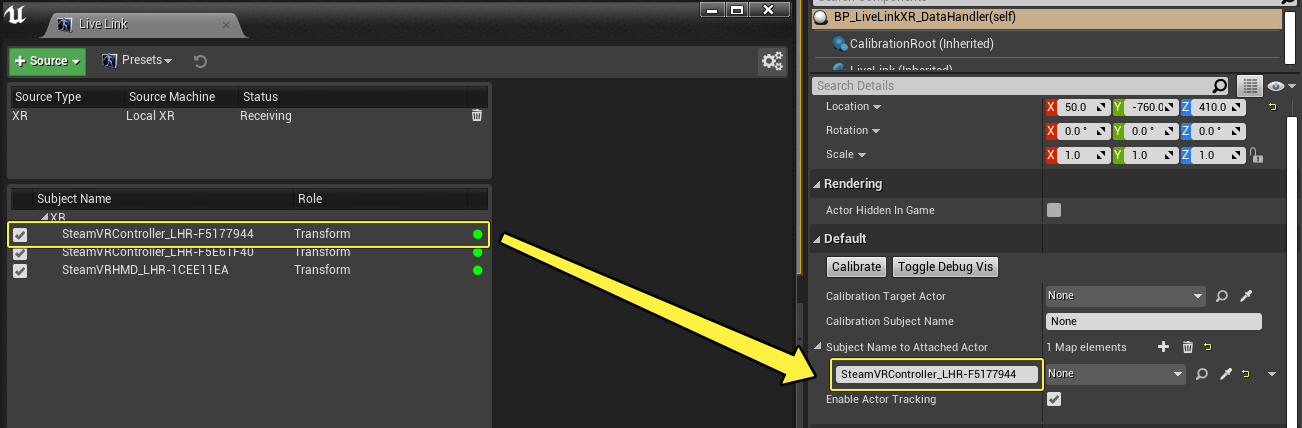
To add a new entry, expand the Default section under Details, and click the Add (+) button next to Subject Name to Attached Actor .
-
In the textbox next to the new element, enter the Subject Name from the Live Link window.
- Repeat this process as needed for all sources that you want to track.
-
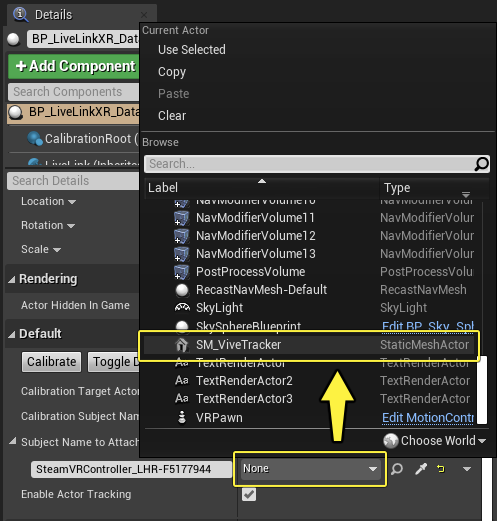
Use the dropdown menu next to your element to map the tracking data to the Object or Actor in the scene.
Calibration
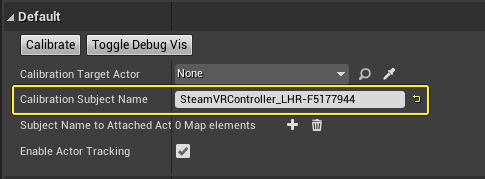
You can use the Calibrate button next to Toggle Debug Vis to set a new tracking origin relative to an arbitrary actor in the world. When you click it, the transform from the LiveLink Subject Calibration Subject Name is used to calculate a new world origin transform relative to the transform of the Calibration Target Actor.
-
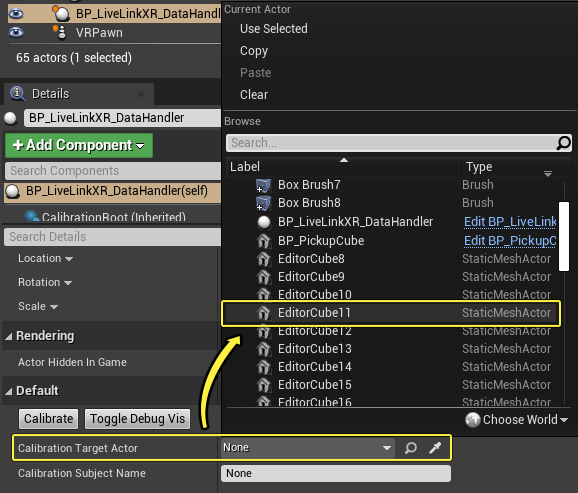
To take advantage of the Calibrate feature, first select BP_LiveLinkXR_DataHandler from the World Outliner. In the Details panel, select an actor in your level from the dropdown next to Calibration Target Actor.
-
After selecting the target actor, enter the Calibration Subject Name in the box provided. This should match one of the LiveLink Subject names being tracked.
- After adjusting the settings, click the Calibrate button next to Toggle Debug Vis.
- Notice that the relative tracking origin of the devices is now relative to your new calibration.


On the left is the location information for the BP_LiveLinkXR_DataHandler actor when initially dragged into the level. On the right is the location information after calibration relative to another actor in the level.
Using Vive Trackers without an HMD
By default, you cannot use the Vive Trackers without an HMD. This section outlines a potential workaround that should allow you to use Trackers without an HMD within UE.
This process is a potential workaround that is unsupported by Valve, HTC, or Epic. It has the potential to stop working unexpectedly or cause unexpected issues with SteamVR. We recommend that you only attempt this workaround if you are an expert with SteamVR troubleshooting.
-
First, fully shut down Steam and SteamVR.
Ensure this by checking the Task Manager for any lingering Steam processes after closing the main program.
-
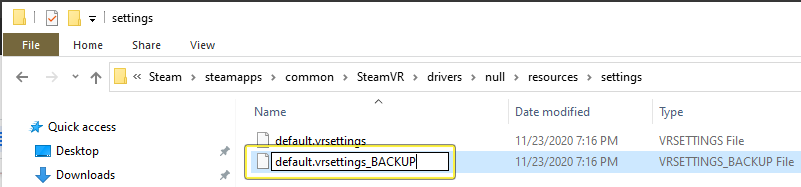
Locate the following file on your computer:
<Steam Install Directory> /steamapps/common/SteamVR/drivers/null/resources/settings/default.vrsettings.
-
Copy the file and add "_BACKUP" to the end of the file extension.
-
There are a few ways to back up the files outlined in this process. Copying the original and changing the file extension is the method shown below.
-
Open the original
default.vrsettingsfile in a text editor. -
In the
driver_nullobject, change theenableproperty value fromfalsetotrue.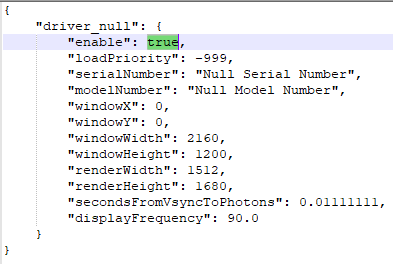
If using nDisplay, set
windowWidth,windowHeight,renderWidth, andrenderHeightto 0 (zero). This will help you to avoid the un-minimizable VR Composer window in the middle of the screen. - Save and close.
-
Locate the following file:
<Steam Install Directory>/steamapps/common/SteamVR/resources/settings/default.vrsettings.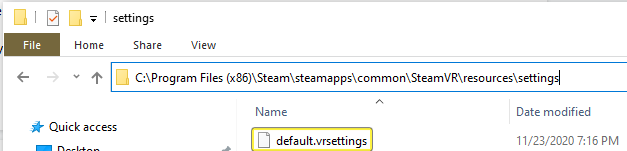
The file names are similar, but they are located in different folders.
-
Create a backup of the
default.vrsettingsfile.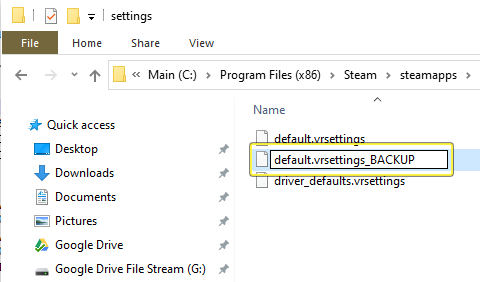
- Under the
steamvrheading, change therequireHmdsetting tofalse. - Under the
steamvrheading, change theforcedDriversetting to"null". - Under the
steamvrheading, change theactivateMultipleDriverssetting totrue. -
Once you have updated the correct settings, the file should look something like this:
"steamvr": { "requireHmd": false, "forcedDriver": "null", "forcedHmd": "", "displayDebug": false, "debugProcessPipe": "", "enableDistortion": true, "displayDebugX": 0, "displayDebugY": 0, "allowDisplayLockedMode": false, "sendSystemButtonToAllApps": false, "loglevel": 3, "ipd": 0.063, "ipdOffset": 0.0, "background": "", "backgroundUseDomeProjection": false, "backgroundCameraHeight": 1.6, "backgroundDomeRadius": 0.0, "environment": "", "hdcp14legacyCompatibility": false, "gridColor": "", "playAreaColor": "", "showStage": false, "activateMultipleDrivers": true, - Save and close the
default.vrsettingsfile. - Launch Steam and SteamVR.
- Because you have altered the SteamVR settings, you may need to run the Room Calibration setup again.
-
After completing Room Calibration, relaunch SteamVR and you should be able to track devices without the need for an HMD.
- When you are ready to use the HMD again, close SteamVR, restore the edited files from the backups, and relaunch SteamVR.
Troubleshooting
SteamVR Issues
If your HMD, Controllers, or Trackers are not appearing in SteamVR, then they will not appear in UE. If you are having issues setting up your VR devices, it is recommended that you review the Steam VR Troubleshooting guide for assistance.