
Landscape Blueprint Brushes provde a stack of user-defined sculting brushes that can be manipulated non-destructively, so that any changes to a brush lower in the stack automatically flow through to the brushes above it in the stack. These brushes can be used to layer multiple terrain manipulations on top of one another while maintaining separation of those manipulations, enabling them to be reordered or moved around the terrain as necessary.
To use Landscape Blueprint Brushes, you must enable the Landmass plugin in the Plugins Browser and check Enable Edit Layers when creating your Landscape.
To enable the Landmass plugin in the Plugins Browser:
-
From the main menu, open the Plugins Browser.

-
Search for Landmass and click Enable.

To enable Edit Layers when creating your Landscape:
-
Check the Enable Edit Layers property in the New Landscape section.

Adding Landscape Blueprint Brushes to Edit Layers
To add a new Landscape Blueprint Brush to an existing Edit Layer:
-
With the Landsape mode selected in the Level Editor Toolbar, select the Sculpt tab and select Blueprint from the available sculting tools.

-
Click the Blueprint Brush dropdown and select one of the available types of brushes.

-
In the viewport, click the Landscape to add the new brush.

Built-In Landscape Blueprint Brush Types
CustomBrush_Landmass Brush
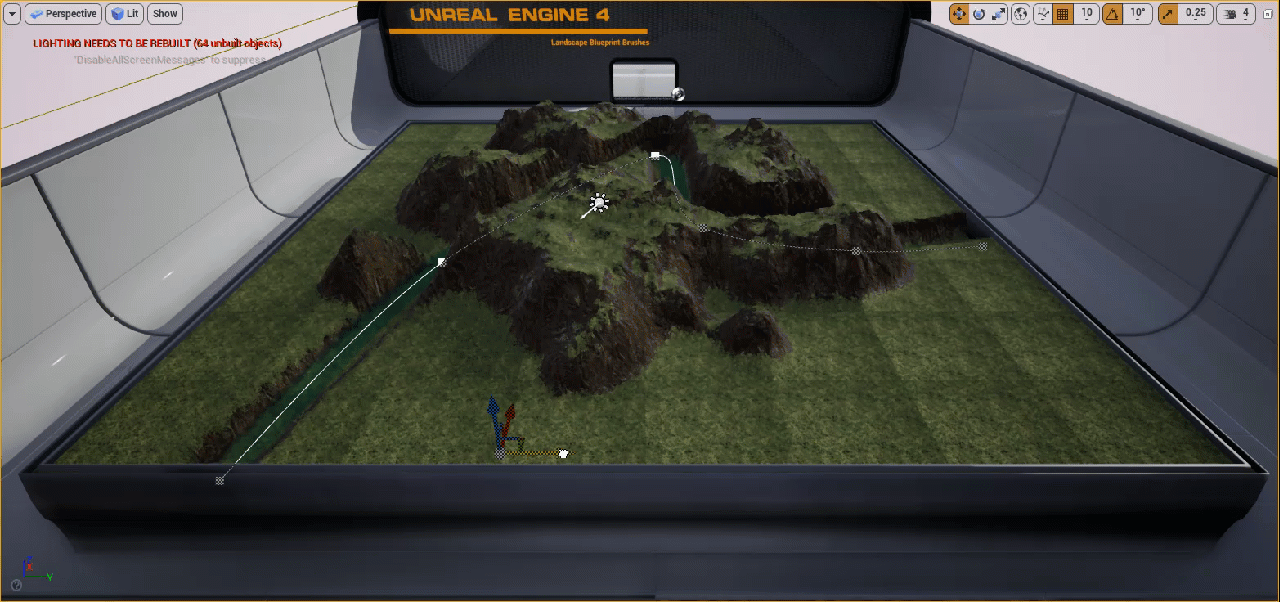
The CustomBursh_Landmass brush generates a landmass shape from a user-defined spline shape and a collection of configurable effects—such as erosion, curl noise, and displacement—and applies the resulting shape to the terrain

Blend Modes
The Blend Mode determines how the shape is added to, or cut into, the terrain—similar to CSG or boolean operations. There are four blend modes available:
| Blend Mode | Description |
|---|---|
| Alpha Blend | Raises and lowers the terrain by generating both a regular and inverted version of the landmass shape and applying the inverted shape to the portion that is located below the underlying terrain |
| Min | Lowers the terrain by generating an inverted version of the landmass shape and applying only the portion that is located below the underlying terrain. |
| Max | Raises the terrain by applying only the portion of the landmass shape that is located above the underlying terrain. |
| Additive |
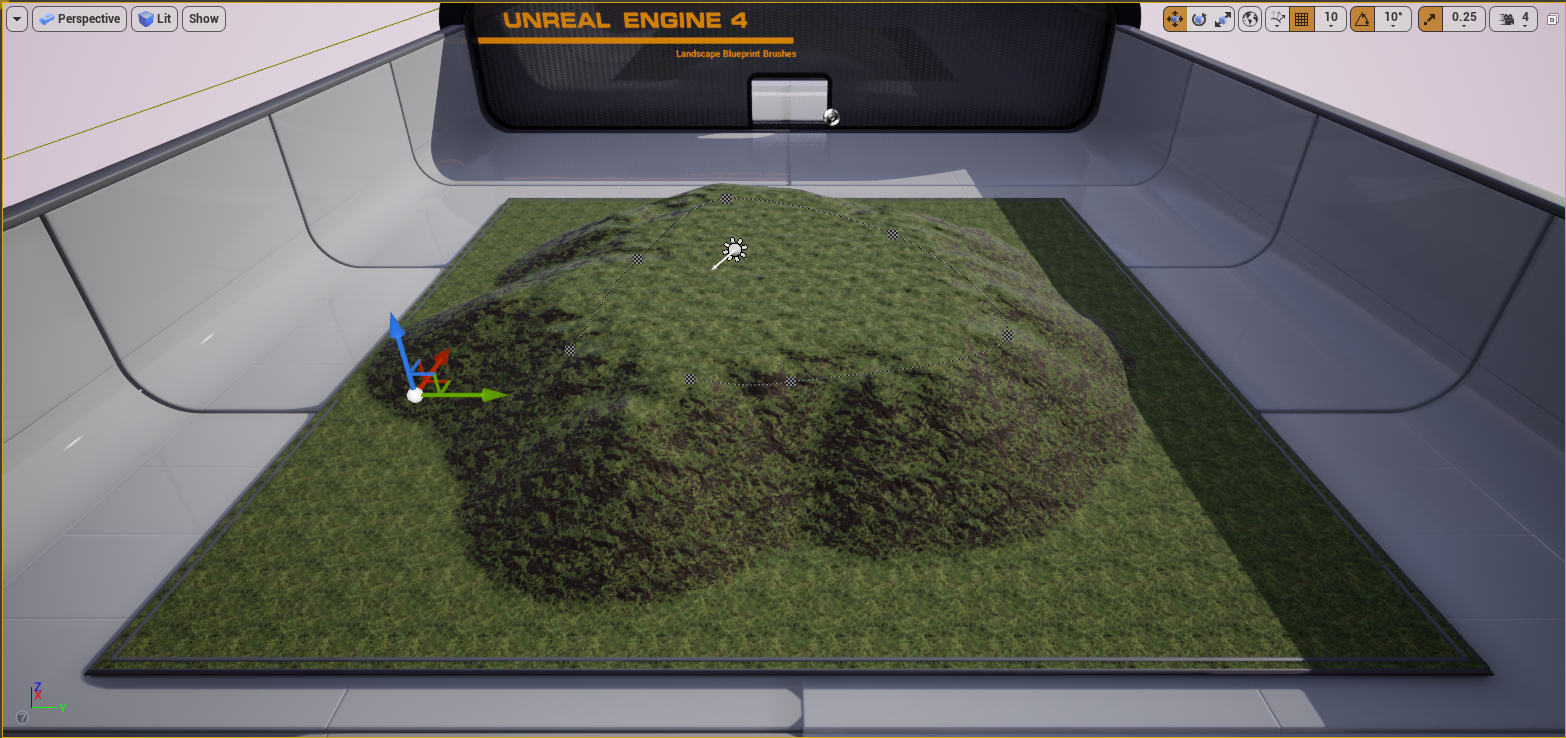
Shape Capping
The shape generated by a Landmass brush can either be capped or uncapped. If the shape is capped, it resembles a plateau with a flat top. An uncapped shape resembles a mountain or hill with a peak.
 |
 |
| Cap Shape enabled | Cap Shape disabled |
Falloff
Falloff determines the slope of the transition from the brush shape to the underlying terrain.
| Type | Description | |||||||||
|---|---|---|---|---|---|---|---|---|---|---|
| Angle | The falloff slope is determined by a specified angle. Larger falloff angles result in steeper slopes. For uncapped shapes, the falloff continues inside the shape as well to form a peak.
|
|||||||||
| Width | The falloff slope is determined by specifying a distance in Unreal Units. Smaller falloff distances result in steeper sloes.
|


Noise
Noise applies up to two octaves of curl noise to the generated landmass shape.
| Property | Description | |||||||||
|---|---|---|---|---|---|---|---|---|---|---|
| Curl [1/2] Strength | Sets the amplitude of the noise applied to the landmass shape.
|
|||||||||
| Curl [1/2] Tiling | Sets the frequency of the noise applied to the landmass shape.
|


CustomBrush_LandmassRiver Brush
The CustomBrush_LandmassRiver brush extrudes a Static Mesh along a user-defined spline and raises or lowers the terrain to match the extruded mesh. This brush is useful for laying out roads or rivers where the terrain automatically adjusts to match up.

CustomBrush_MaterialOnly Brush
The CustomBrush_MaterialOnly brush uses a Material to apply procedural noise to the whole terrain to form a base.
