Overview
Interfaces define a set of common behaviors or capabilities that can be implemented by different Actor classes. This method of communication is ideal when implementing the same type of functionality for different Actor classes.
An example of this would be when implementing a common activation behavior for several Actor classes in your project. These Actor classes could include a door, a window, a car, etc. Each Actor class is different and will perform different behavior when an Open Interface function is called.
In this example, an Interface is preferred to casting because you can use the same function call on all Actor classes, instead of casting to each individual one.
There are also performance benefits when Interfaces over casting, as loading an Actor that casts to another Actor will subsequently load that Actor to memory as well. If not treated carefully, this could result in a cascading loading effect where loading a single Actor results in several other Actors being loaded into memory as well.
This method requires each Actor to implement the interface in order to access its common functions. You also need a reference to the Actor so you can call the interface function using that reference. This communication method uses a one-to-one relationship between your working Actor and your target Actor.
Goals
In this Quick Start guide, you will learn how to use Interfaces by creating a simple interaction system to communicate with two different Actors.
Objectives
-
Create an Interface with an Interact function.
-
Create interactive lamp and door Actors and implement the interface.
-
Modify the ThirdPersonCharacter Blueprint to call the Interact interface function on nearby objects.
1 - Required Setup
-
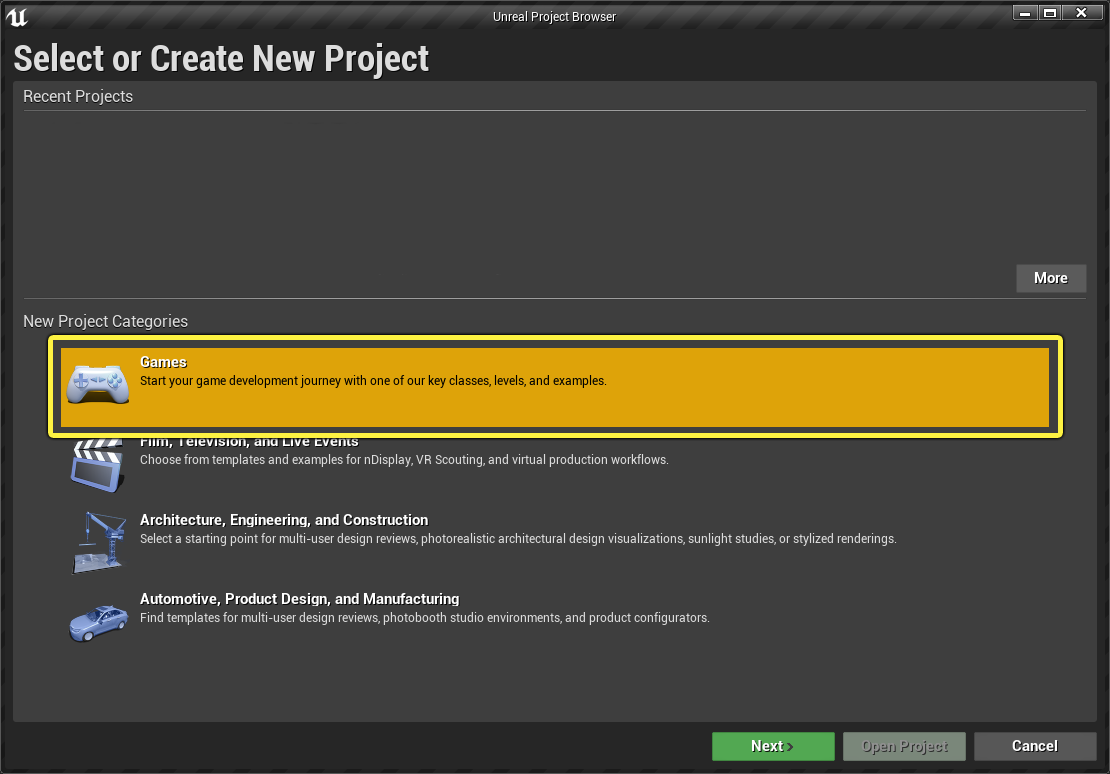
In the New Project Categories section of the menu, select Games and click Next.
-
Select the Third Person template and click Next.

-
Select the Blueprint and With Starter Content options and click Create Project.

Section Results
You have created a new Third Person project and are now ready to learn about Interfaces.
2 - Creating an Interface
-
Right-click inside the Content Browser and select Blueprints > Blueprint Interface. Name the interface BPI_Interact.
Using the prefix BPI_ is a common naming convention for Blueprint Interfaces.


-
Open BPI_Interact by double-clicking it in the Content Browser. Name your first function Interact under the Functions list.

-
Compile and Save the interface.
Section Results
In this section you created an Interface and added the function Interact. Any Actor that implements this interface will now be able to add this function.
3 - Creating an Interactive Lamp
-
Go to Starter Content > Blueprints in the Content Browser. Right-click Blueprint_CeilingLight and select Duplicate. Name this Blueprint BP_Lamp and move it to your game folder.


-
Open BP_Lamp by double-clicking it in the Content Browser. Inside the Event Graph right-click then search for and select Add Custom Event. Name the event ToggleLight.

-
Drag from the ToggleLight node then search for and select Flip Flop.

-
Drag the Point Light 1 component into the Event Graph to create a reference node. Drag from the Point Light 1 node then search for and select Set Visibility. Connect the A pin of the Flip Flop node to the Set Visibility node as shown below.

-
Copy the Point Light 1 and Set Visibility nodes and connect them to the B pin of the Flip Flop node. Set New Visibility to True.

-
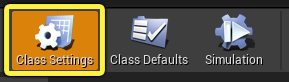
Click Class Settings from the Menu Bar and navigate to the Details panel.

-
Scroll down to the Interfaces section and click the Add dropdown then search for and select BPI_Interact. Compile and Save the Blueprint.

-
Go to the Interfaces section under the My Blueprint tab. Right-click the Interact interface function and select Implement event. You will see the Event Interact node appear in the Event Graph.


-
Drag from the Event Interact node then search for and select ToggleLight.

-
Compile and Save the Blueprint.
Section Results
In this section you duplicated the Ceiling Lamp Blueprint and added a custom event that toggles the light’s visibility. You also implemented the BPI_Interact interface and set up the Interact function to execute the ToggleLight event.
4 - Creating an Interactive Door
-
Right-click in the Content Browser and click Blueprint Class under the Create Basic Asset section.

-
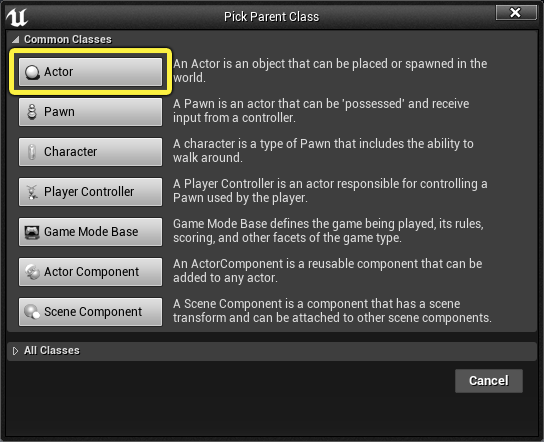
Select the Actor class as your Parent Class and name the Blueprint BP_Door.

-
Open BP_Door by double-clicking it in the Content Browser. Then in the Blueprint editor, go to the Components panel and click the Add Component dropdown. Search for and select Static Mesh and name the component Frame. This will add a Static Mesh component to the Blueprint.

-
Add another Static Mesh component and name it Door.
-
Select the Frame component and under the Details panel click the Static Mesh dropdown then search for and select SM_DoorFrame.

-
Repeat the step above for the Door component and add the SM_Door static mesh.
-
With the Door component selected, set the Y location to 45.0 as seen below. You should see the door aligned with the frame.


-
Right-click in the Event Graph then search for and select Add Custom Event. Name the event OpenDoor. Repeat the process and create another event called CloseDoor.

-
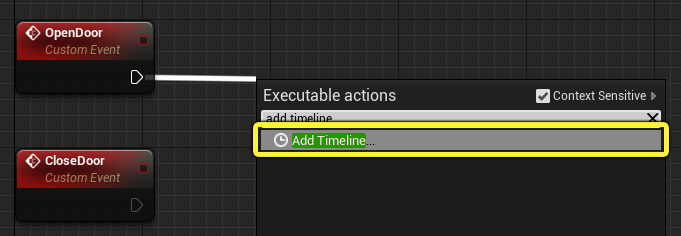
Drag from the OpenDoor event node then search for and select Add Timeline. Name the Timeline TM_Door.
-
Connect the CloseDoor event to the Reverse execution pin on TM_Door.

-
Double-click TM_Door to open it. Click the Add Float Curve button to add a Float Track and name it Alpha. Set the length to 1.00.

-
Right-click on the graph and select Add key to CurveFloat_1 to add a new point. Set the Time and Value to 0.0.


-
Repeat the steps above to add another point with Time and Value set to 1.0.
-
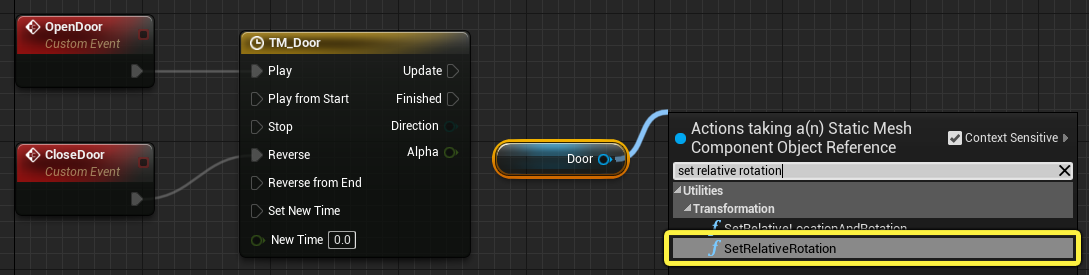
Go back to the Event Graph and drag the Door Static Mesh component into the Event Graph to create a node. Drag from the Door node then search for and select SetRelativeRotation.
-
Connect the Update pin from TM_Door to the SetRelativeRotation node. Right-click the New Rotation pin of the SetRelativeRotation node and select Split Struct Pin.

-
Right-click the Event Graph then search for and select Lerp Float. Connect the Return Value of the Lerp node to the Yaw pin of the SetRelativeRotation node. Connect the Alpha pin of TM_Door to the Alpha pin of the Lerp node. Lastly, set the value of B to 90.0 as shown below.

-
Drag from the Finished pin of TM_Door then search for and select Retriggerable Delay. Set the value of the node to 2.0.

-
Drag from the Retriggerable Delay node then search for and select CloseDoor.

-
Click Class Settings on the Menu Bar.
-
In the Interfaces section click the Add dropdown then search for and select BPI_Interact.

-
Go to the Interfaces section under the My Blueprint tab. Right-click the Interact interface function and select Implement event. You will see the Event Interact node appear in the Event Graph.

-
Drag from the Event Interact node then search for and select OpenDoor.

-
Compile and Save the Blueprint.
Section Results
In this section you created an interactive door Actor that will open its door when the Interact function of the BPI_Interact interface is called.
5 - Modifying the Player Blueprint
-
Select the ThirdPersonCharacter Blueprint in the Level. Go to the World Outliner and click Edit ThirdPersonCharacter to open the Blueprint editor.

-
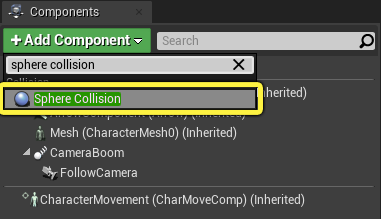
In the Blueprint editor, go to the Components panel and click the Add Component button. Search for and select Sphere Collision. This will add a Sphere Collision component to the Blueprint.
-
With the Sphere Collision component selected, go to the Details panel and set the Radius to 200.

-
Right-click the Sphere Collision component and select the event OnComponentBeginOverlap to add it to the Event Graph.

-
Drag from the On Component Begin Overlap node then search for and select Interact (Message). Make sure you select the function under the BPI Interact category.

-
Connect the Other Actor node from the On Component Begin Overlap event to the Target pin on the Interact function.

-
Compile and Save the Blueprint.
Section Results
In this section you added a sphere collision component to the ThirdPersonCharacter Blueprint to detect overlapping Actors. When an Actor overlaps with the sphere, the Blueprint calls the Interact function from the BPI_Interact interface on that Actor. If the Actor does not have the interface implemented the node will fail silently.
6 - Testing the Interaction System
-
Drag the BP_Door and the BP_Lamp Actors to the Level.

-
Press Play and approach each Actor to see them interact with the player.

Section Results
In this section you confirmed that the interaction system is working as intended by testing it with the interactive door and lamp Actors.
In this Quick Start guide you learned how each Actor can implement the same interface function, and how they can specify the functionality separately. You also learned why Interfaces are ideal for implementing similar functionality on a wide variety of Actors without the need for casting.
Next Steps
Now that you know how to use Interfaces, take a look at the other types of communication referenced in the Actor Communication documentation page.
Overview
Interfaces define a set of common behaviors or methods that can be implemented by different Actors. This communication type is especially useful when implementing the same type of functionality across different Actor class Blueprint.
As an example, you may choose to use an Interface when implementing a common Open behavior for several Blueprint classes in your project, such as for a door, a window, a car, and so on. In this example, each Actor is a different class and will exhibit a different response when the Open Interface is called.
Additionally, there are performance benefits to using Interfaces over Casting, as loading an Actor class Blueprint that casts to another Actor class Blueprint will subsequently load that Blueprint to memory as well. If not used with caution, this could result in a cascading loading effect where loading a single Blueprint results in several other Blueprints being loaded into memory as well.
This method requires each Actor class Blueprint to implement the interface in order to access those common functions.
Goals
In this Quick Start guide, you will learn how to use Interfaces by creating a simple interaction system to communicate with two Actor class Blueprints.
Objectives
-
Create an Interface with an Interact function.
-
Create an interactive lamp and door Actor that implement the interface.
-
Modify the BpCommunication Character class to call the Interact interface function on nearby objects.
1 - Required Setup
-
In the New Project Categories section of the menu, select Games and click Next.

-
Select the Third Person template and click Next.

-
Select a C++ project with the With Starter Content option enabled, then click Create Project.

Section Results
You have created a new Third Person project and are now ready to learn about Interfaces.
2 - Creating an Interface
-
From the C++ Class Wizard, create a new Unreal Interface class named InteractInterface.

-
In the class defaults of your IInteractInterface.h declare the following method.
public: UFUNCTION() virtual void OnInteract() = 0; -
Compile your code.
Finished Code
InteractionInterface.h
#pragma once
#include "CoreMinimal.h"
#include "UObject/Interface.h"
#include "InteractInterface.generated.h"
// This class does not need to be modified.
UINTERFACE(MinimalAPI)
class UInteractInterface : public UInterface
{
GENERATED_BODY()
};
/**
*
*/
class BPCOMMUNICATION_API IInteractInterface
{
GENERATED_BODY()
// Add interface functions to this class. This is the class that will be inherited to implement this interface.
public:
UFUNCTION()
virtual void OnInteract() = 0;
};
Section Results
In this section you created an Unreal Interface and added the function OnInteract. Any Actor class Blueprint that implements this interface will now be able to use this function.
2 - Creating an Interactive Ceiling Light Actor
-
From the C++ Class Wizzard, create a new Actor class named CeilingLight.
{:convert="false"} In the class defaults of **CeilingLight.h** declare the following class library. #include "InteractInterface.h" Then, implement the following code. UCLASS() class BPCOMMUNICATION_API ACeilingLight : public AActor, public IInteractInterface { GENERATED_BODY() public: virtual void OnInteract(); protected: UPROPERTY(EditAnywhere, BlueprintReadWrite) class UPointLightComponent* PointLightComp; UPROPERTY(EditAnywhere, BlueprintReadWrite) UStaticMeshComponent* StaticMeshComp; UPROPERTY(EditAnywhere, BlueprintReadWrite) float Brightness; UPROPERTY(EditAnywhere, BlueprintReadWrite) float SourceRadius; UPROPERTY(EditAnywhere, BlueprintReadWrite) FLinearColor Color; UPROPERTY(EditAnywhere, BlueprintReadWrite) bool bIsLightOn; UFUNCTION() void ToggleLight(); } -
Next, navigate to CeilingLight.cpp and declare the following Include library.
#include "Components/PointLightComponent.h" Then implement the following code. ACeilingLight::ACeilingLight() { // Set this actor to call Tick() every frame. You can turn this off to improve performance if you don't need it. PrimaryActorTick.bCanEverTick = true; RootComponent = CreateDefaultSubobject<URootComponent>(TEXT("RootComponent")); PointLightComp = CreateDefaultSubobject<UPointLightComponent>(TEXT("PointLightComp")); StaticMeshComp = CreateDefaultSubobject<UStaticMeshComponent>(TEXT("StaticMeshComp")); PointLightComp->AttachToComponent(RootComponent,FAttachmentTransformRules::KeepRelativeTransform); StaticMeshComp->AttachToComponent(RootComponent, FAttachmentTransformRules::KeepRelativeTransform); PointLightComp->SetWorldLocation(FVector(0, 0, -130)); Brightness = 1700.f; Color = FLinearColor(1.f, 0.77f, 0.46f); SourceRadius = 3.5f; PointLightComp->SetIntensity(Brightness); PointLightComp->SetLightColor(Color); PointLightComp->SetSourceRadius(SourceRadius); } void ACeilingLight::OnInteract() { ToggleLight(); } void ACeilingLight::ToggleLight() { if (bbIsLightOn) { PointLightComp->SetVisibility(false); bbIsLightOn = false; } else { PointLightComp->SetVisibility(true); bbIsLightOn = true; } } -
Compile your code.
-
From the C++ Classes folder, right-click your CeilingLight Actor, then from the C++ Class Actions dropdown menu, select Create Blueprint class based on CeilingLight. Name your Blueprint BP_CeilingLight.

-
From the BP_CeilingLight class defaults, navigate to the Components panel, then select the StaticMeshComp.

-
From the Details panel, navigate to the Static Mesh category, select the dropdown arrow next to the Static Mesh variable, then search and select for SM_Lamp_Ceiling.

Finished Code
CeilingLight.h
// Fill out your copyright notice in the Description page of Project Settings.
#pragma once
#include "CoreMinimal.h"
#include "GameFramework/Actor.h"
#include "InteractInterface.h"
#include "CeilingLight.generated.h"
UCLASS()
class BPCOMMUNICATION_API ACeilingLight : public AActor, public IInteractInterface
{
GENERATED_BODY()
public:
// Sets default values for this actor's properties
ACeilingLight();
virtual void OnInteract();
protected:
// Called when the game starts or when spawned
virtual void BeginPlay() override;
UPROPERTY(EditAnywhere, BlueprintReadWrite)
class UPointLightComponent* PointLightComp;
UPROPERTY(EditAnywhere, BlueprintReadWrite)
UStaticMeshComponent* StaticMeshComp;
UPROPERTY(EditAnywhere, BlueprintReadWrite)
float Brightness;
UPROPERTY(EditAnywhere, BlueprintReadWrite)
float SourceRadius;
UPROPERTY(EditAnywhere, BlueprintReadWrite)
FLinearColor Color;
UPROPERTY(EditAnywhere, BlueprintReadWrite)
bool bbIsLightOn;
public:
// Called every frame
virtual void Tick(float DeltaTime) override;
UFUNCTION()
void ToggleLight();
};
CeilingLight.cpp
//Copyright Epic Games, Inc. All Rights Reserved.
#include "CeilingLight.h"
#include "Components/PointLightComponent.h"
// Sets default values
ACeilingLight::ACeilingLight()
{
// Set this actor to call Tick() every frame. You can turn this off to improve performance if you don't need it.
PrimaryActorTick.bCanEverTick = true;
RootComponent = CreateDefaultSubobject<URootComponent>(TEXT("RootComponent"));
PointLightComp = CreateDefaultSubobject<UPointLightComponent>(TEXT("PointLightComp"));
StaticMeshComp = CreateDefaultSubobject<UStaticMeshComponent>(TEXT("StaticMeshComp"));
PointLightComp->AttachToComponent(RootComponent,FAttachmentTransformRules::KeepRelativeTransform);
StaticMeshComp->AttachToComponent(RootComponent, FAttachmentTransformRules::KeepRelativeTransform);
PointLightComp->SetWorldLocation(FVector(0, 0, -130));
Brightness = 1700.f;
Color = FLinearColor(1.f, 0.77f, 0.46f);
SourceRadius = 3.5f;
PointLightComp->SetIntensity(Brightness);
PointLightComp->SetLightColor(Color);
PointLightComp->SetSourceRadius(SourceRadius);
}
void ACeilingLight::OnInteract()
{
ToggleLight();
}
// Called when the game starts or when spawned
void ACeilingLight::BeginPlay()
{
Super::BeginPlay();
}
void ACeilingLight::ToggleLight()
{
if (bIsLightOn)
{
PointLightComp->SetVisibility(false);
bIsLightOn = false;
}
else
{
PointLightComp->SetVisibility(true);
bIsLightOn = true;
}
}
// Called every frame
void ACeilingLight::Tick(float DeltaTime)
{
Super::Tick(DeltaTime);
}
Section Results
In this section you created a Ceiling Light Actor class and added a custom function that toggles the light’s visibility. Additionally, you implemented the Interact interface to trigger the execution of the ToggleLight event.
4 - Creating an Interactive Door
-
From the C++ Class Wizard, create a new Actor class named DoorActor.
-
Navigate to your DoorActor.h file and declare the following include:
#include "Components/TimelineComponent.h" #include "InteractInterface.h" -
In your DoorActor class namespace, you will need to inherit from your Interact Interface.
UCLASS() class BPCOMMUNICATION_API ADoorActor : public AActor, public IInteractInterface -
Then declare the following class definitions.
// Variable to hold the Curve asset UPROPERTY(EditAnywhere) UCurveFloat* DoorTimelineFloatCurve; UFUNCTION() virtual void OnInteract(); protected: // Called when the game starts or when spawned virtual void BeginPlay() override; //MeshComponents to represent Door assets UPROPERTY(VisibleAnywhere, BlueprintReadWrite) UStaticMeshComponent* DoorFrame; UPROPERTY(VisibleAnywhere, BlueprintReadWrite) UStaticMeshComponent* Door; //TimelineComponent to animate Door meshes UPROPERTY(VisibleAnywhere, BlueprintReadWrite) UTimelineComponent* DoorTimelineComp; //Float Track Signature to handle our update track event FOnTimelineFloat UpdateFunctionFloat; //Function which updates our Door's relative location with the timeline graph UFUNCTION() void UpdateTimelineComp(float Output); -
Inside of DoorActor.cpp implement the following class definitions
ADoorActor::ADoorActor() { //Create our Default Components DoorFrame = CreateDefaultSubobject<UStaticMeshComponent>(TEXT("DoorFrameMesh")); Door = CreateDefaultSubobject<UStaticMeshComponent>(TEXT("DoorMesh")); DoorTimelineComp = CreateDefaultSubobject<UTimelineComponent>(TEXT("DoorTimelineComp")); //Setup our Attachments DoorFrame->SetupAttachment(RootComponent); Door->AttachToComponent(DoorFrame, FAttachmentTransformRules::KeepRelativeTransform); Door->SetRelativeLocation(FVector(0, 35, 0)); } void ADoorActor::OnInteract() { DoorTimelineComp->Play(); } // Called when the game starts or when spawned void ADoorActor::BeginPlay() { Super::BeginPlay(); //Binding our float track to our UpdateTimelineComp Function's output UpdateFunctionFloat.BindDynamic(this, &ADoorActor::UpdateTimelineComp); //If we have a float curve, bind its graph to our update function if (DoorTimelineFloatCurve) { DoorTimelineComp->AddInterpFloat(DoorTimelineFloatCurve, UpdateFunctionFloat); } } void ADoorActor::UpdateTimelineComp(float Output) { // Create and set our Door's new relative location based on the output from our Timeline Curve FRotator DoorNewRotation = FRotator(0.0f, Output, 0.f); Door->SetRelativeRotation(DoorNewRotation); } -
Compile your code.
-
From the Content Browser, select Add/Import > Miscellaneous > Curve.

-
Select CurveFloat and name your CurveFloat asset DoorCurveFloat
-
Double-click your DoorCurveFloat asset. Add two keys to your Float Curve and give one key the time-value (0,0), and the other key the time-value of (4,90).

-
Shift-click to select both your keys, and set them to Auto Cubic interpolation, then save your curve.

-
Save your DoorCurveFloat.
-
From the Content Browser, navigate to your C++ Classes folder and right-click your DoorActor class. Select Create Blueprint Class based on Door Actor and name your Blueprint Actor Bp_DoorActor.

-
Inside BP_DoorActor’s class defaults, find the Components tab, and select the DoorFrame Static Mesh component, navigate to the Details panel and change the Static Mesh to SM_DoorFrame.

-
Next, from the Components tab, select the DoorMesh component. Navigate to the Details panel and change the Static Mesh to SM_Door.

-
From the Details panel, select DoorCurveFloat from the Door Timeline Float Curve dropdown menu.

-
Compile and save your Blueprint.
Finished Code
DoorActor.h
#pragma once
#include "CoreMinimal.h"
#include "GameFramework/Actor.h"
#include "Components/TimelineComponent.h"
#include "InteractInterface.h"
#include "DoorActor.generated.h"
UCLASS()
class BPCOMMUNICATION_API ADoorActor : public AActor, public IInteractInterface
{
GENERATED_BODY()
public:
// Sets default values for this actor's properties
ADoorActor();
// Variable to hold the Curve asset
UPROPERTY(EditAnywhere)
UCurveFloat* DoorTimelineFloatCurve;
UFUNCTION()
virtual void OnInteract();
protected:
// Called when the game starts or when spawned
virtual void BeginPlay() override;
//MeshComponents to represent Door assets
UPROPERTY(VisibleAnywhere, BlueprintReadWrite)
UStaticMeshComponent* DoorFrame;
UPROPERTY(VisibleAnywhere, BlueprintReadWrite)
UStaticMeshComponent* Door;
//TimelineComponent to animate Door meshes
UPROPERTY(VisibleAnywhere, BlueprintReadWrite)
UTimelineComponent* DoorTimelineComp;
//Float Track Signature to handle our update track event
FOnTimelineFloat UpdateFunctionFloat;
//Function which updates our Door's relative location with the timeline graph
UFUNCTION()
void UpdateTimelineComp(float Output);
public:
// Called every frame
virtual void Tick(float DeltaTime) override;
};
DoorActor.cpp
#include "DoorActor.h"
// Sets default values
ADoorActor::ADoorActor()
{
// Set this actor to call Tick() every frame. You can turn this off to improve performance if you don't need it.
PrimaryActorTick.bCanEverTick = true;
//Create our Default Components
DoorFrame = CreateDefaultSubobject<UStaticMeshComponent>(TEXT("DoorFrameMesh"));
Door = CreateDefaultSubobject<UStaticMeshComponent>(TEXT("DoorMesh"));
DoorTimelineComp = CreateDefaultSubobject<UTimelineComponent>(TEXT("DoorTimelineComp"));
//Setup our Attachments
DoorFrame->SetupAttachment(RootComponent);
Door->AttachToComponent(DoorFrame, FAttachmentTransformRules::KeepRelativeTransform);
Door->SetRelativeLocation(FVector(0, 35, 0));
}
void ADoorActor::OnInteract()
{
DoorTimelineComp->Play();
}
// Called when the game starts or when spawned
void ADoorActor::BeginPlay()
{
Super::BeginPlay();
//Binding our float track to our UpdateTimelineComp Function's output
UpdateFunctionFloat.BindDynamic(this, &ADoorActor::UpdateTimelineComp);
//If we have a float curve, bind it's graph to our update function
if (DoorTimelineFloatCurve)
{
DoorTimelineComp->AddInterpFloat(DoorTimelineFloatCurve, UpdateFunctionFloat);
}
}
void ADoorActor::UpdateTimelineComp(float Output)
{
// Create and set our Door's new relative location based on the output from our Timeline Curve
FRotator DoorNewRotation = FRotator(0.0f, Output, 0.f);
Door->SetRelativeRotation(DoorNewRotation);
}
// Called every frame
void ADoorActor::Tick(float DeltaTime)
{
Super::Tick(DeltaTime);
}
Section Results
In this section you created an interactive Door Actor that opens when the OnInteract method of the Interact interface is called.
5 - Modifying the BPCommunicationCharacter class.
-
Open your BpCommunicationCharacter.h file and then declare the following in its class definitions.
protected: virtual void NotifyActorBeginOverlap(AActor* OtherActor); class USphereComponent* SphereComp; -
Navigate to your BpCommunicationCharacter.cpp file and declare the following class libraries.
#include "Components/SphereComponent.h" #include "InteractInterface.h" Then implement the following class methods. ABPCommunicationCharacter::ABPCommunicationCharacter() { SphereComp = CreateDefaultSubobject<USphereComponent>(TEXT("SphereComp")); SphereComp->AttachToComponent(GetMesh(), FAttachmentTransformRules::KeepRelativeTransform); SphereComp->SetSphereRadius(200); } void ABPCommunicationCharacter::NotifyActorBeginOverlap(AActor* OtherActor) { if (IInteractInterface* ActorCheck = Cast<IInteractInterface>(OtherActor)) { ActorCheck->OnInteract(); } } -
Compile your code.
Finished Code
BpCommunicationCharacter.h
// Copyright Epic Games, Inc. All Rights Reserved.
#pragma once
#include "CoreMinimal.h"
#include "GameFramework/Character.h"
#include "BPCommunicationCharacter.generated.h"
UCLASS(config=Game)
class ABPCommunicationCharacter : public ACharacter
{
GENERATED_BODY()
/** Camera boom positioning the camera behind the character */
UPROPERTY(VisibleAnywhere, BlueprintReadOnly, Category = Camera, meta = (AllowPrivateAccess = "true"))
class USpringArmComponent* CameraBoom;
/** Follow camera */
UPROPERTY(VisibleAnywhere, BlueprintReadOnly, Category = Camera, meta = (AllowPrivateAccess = "true"))
class UCameraComponent* FollowCamera;
public:
ABPCommunicationCharacter();
/** Base turn rate, in deg/sec. Other scaling may affect final turn rate. */
UPROPERTY(VisibleAnywhere, BlueprintReadOnly, Category=Camera)
float BaseTurnRate;
/** Base look up/down rate, in deg/sec. Other scaling may affect final rate. */
UPROPERTY(VisibleAnywhere, BlueprintReadOnly, Category=Camera)
float BaseLookUpRate;
protected:
virtual void NotifyActorBeginOverlap(AActor* OtherActor);
class USphereComponent* SphereComp;
/** Resets HMD orientation in VR. */
void OnResetVR();
/** Called for forwards/backward input */
void MoveForward(float Value);
/** Called for side to side input */
void MoveRight(float Value);
/**
* Called via input to turn at a given rate.
* @param Rate This is a normalized rate, i.e. 1.0 means 100% of desired turn rate
*/
void TurnAtRate(float Rate);
/**
* Called via input to turn look up/down at a given rate.
* @param Rate This is a normalized rate, i.e. 1.0 means 100% of desired turn rate
*/
void LookUpAtRate(float Rate);
/** Handler for when a touch input begins. */
void TouchStarted(ETouchIndex::Type FingerIndex, FVector Location);
/** Handler for when a touch input stops. */
void TouchStopped(ETouchIndex::Type FingerIndex, FVector Location);
protected:
// APawn interface
virtual void SetupPlayerInputComponent(class UInputComponent* PlayerInputComponent) override;
// End of APawn interface
public:
/** Returns CameraBoom subobject **/
FORCEINLINE class USpringArmComponent* GetCameraBoom() const { return CameraBoom; }
/** Returns FollowCamera subobject **/
FORCEINLINE class UCameraComponent* GetFollowCamera() const { return FollowCamera; }
};
BpCommunicationCharacter.cpp
// Copyright Epic Games, Inc. All Rights Reserved.
#include "BPCommunicationCharacter.h"
#include "HeadMountedDisplayFunctionLibrary.h"
#include "Camera/CameraComponent.h"
#include "Components/CapsuleComponent.h"
#include "Components/InputComponent.h"
#include "Components/SphereComponent.h"
#include "GameFramework/CharacterMovementComponent.h"
#include "GameFramework/Controller.h"
#include "InteractInterface.h"
#include "GameFramework/SpringArmComponent.h"
//////////////////////////////////////////////////////////////////////////
// ABPCommunicationCharacter
ABPCommunicationCharacter::ABPCommunicationCharacter()
{
// Set size for collision capsule
GetCapsuleComponent()->InitCapsuleSize(42.f, 96.0f);
// set our turn rates for input
BaseTurnRate = 45.f;
BaseLookUpRate = 45.f;
// Don't rotate when the controller rotates. Let that just affect the camera.
bUseControllerRotationPitch = false;
bUseControllerRotationYaw = false;
bUseControllerRotationRoll = false;
// Configure character movement
GetCharacterMovement()->bOrientRotationToMovement = true; // Character moves in the direction of input...
GetCharacterMovement()->RotationRate = FRotator(0.0f, 540.0f, 0.0f); // ...at this rotation rate
GetCharacterMovement()->JumpZVelocity = 600.f;
GetCharacterMovement()->AirControl = 0.2f;
// Create a camera boom (pulls in towards the player if there is a collision)
CameraBoom = CreateDefaultSubobject<USpringArmComponent>(TEXT("CameraBoom"));
CameraBoom->SetupAttachment(RootComponent);
CameraBoom->TargetArmLength = 300.0f; // The camera follows at this distance behind the character
CameraBoom->bUsePawnControlRotation = true; // Rotate the arm based on the controller
// Create a follow camera
FollowCamera = CreateDefaultSubobject<UCameraComponent>(TEXT("FollowCamera"));
FollowCamera->SetupAttachment(CameraBoom, USpringArmComponent::SocketName); // Attach the camera to the end of the boom and let the boom adjust to match the controller orientation
FollowCamera->bUsePawnControlRotation = false; // Camera does not rotate relative to arm
SphereComp = CreateDefaultSubobject<USphereComponent>(TEXT("SphereComp"));
SphereComp->AttachToComponent(GetMesh(), FAttachmentTransformRules::KeepRelativeTransform);
SphereComp->SetSphereRadius(200);
// Note: The skeletal mesh and anim blueprint references on the Mesh component (inherited from Character)
// are set in the derived blueprint asset named MyCharacter (to avoid direct content references in C++)
}
//////////////////////////////////////////////////////////////////////////
// Input
void ABPCommunicationCharacter::SetupPlayerInputComponent(class UInputComponent* PlayerInputComponent)
{
// Set up gameplay key bindings
check(PlayerInputComponent);
PlayerInputComponent->BindAction("Jump", IE_Pressed, this, &ACharacter::Jump);
PlayerInputComponent->BindAction("Jump", IE_Released, this, &ACharacter::StopJumping);
PlayerInputComponent->BindAxis("MoveForward", this, &ABPCommunicationCharacter::MoveForward);
PlayerInputComponent->BindAxis("MoveRight", this, &ABPCommunicationCharacter::MoveRight);
// We have 2 versions of the rotation bindings to handle different kinds of devices differently
// "turn" handles devices that provide an absolute delta, such as a mouse.
// "turnrate" is for devices that we choose to treat as a rate of change, such as an analog joystick
PlayerInputComponent->BindAxis("Turn", this, &APawn::AddControllerYawInput);
PlayerInputComponent->BindAxis("TurnRate", this, &ABPCommunicationCharacter::TurnAtRate);
PlayerInputComponent->BindAxis("LookUp", this, &APawn::AddControllerPitchInput);
PlayerInputComponent->BindAxis("LookUpRate", this, &ABPCommunicationCharacter::LookUpAtRate);
// handle touch devices
PlayerInputComponent->BindTouch(IE_Pressed, this, &ABPCommunicationCharacter::TouchStarted);
PlayerInputComponent->BindTouch(IE_Released, this, &ABPCommunicationCharacter::TouchStopped);
// VR headset functionality
PlayerInputComponent->BindAction("ResetVR", IE_Pressed, this, &ABPCommunicationCharacter::OnResetVR);
}
void ABPCommunicationCharacter::NotifyActorBeginOverlap(AActor* OtherActor)
{
if (IInteractInterface* ActorCheck = Cast<IInteractInterface>(OtherActor))
{
ActorCheck->OnInteract();
}
}
void ABPCommunicationCharacter::OnResetVR()
{
// If BPCommunication is added to a project via 'Add Feature' in the Unreal Editor the dependency on HeadMountedDisplay in BPCommunication.Build.cs is not automatically propagated
// and a linker error will result.
// You will need to either:
// Add "HeadMountedDisplay" to [YourProject].Build.cs PublicDependencyModuleNames in order to build successfully (appropriate if supporting VR).
// or:
// Comment or delete the call to ResetOrientationAndPosition below (appropriate if not supporting VR)
UHeadMountedDisplayFunctionLibrary::ResetOrientationAndPosition();
}
void ABPCommunicationCharacter::TouchStarted(ETouchIndex::Type FingerIndex, FVector Location)
{
Jump();
}
void ABPCommunicationCharacter::TouchStopped(ETouchIndex::Type FingerIndex, FVector Location)
{
StopJumping();
}
void ABPCommunicationCharacter::TurnAtRate(float Rate)
{
// calculate delta for this frame from the rate information
AddControllerYawInput(Rate * BaseTurnRate * GetWorld()->GetDeltaSeconds());
}
void ABPCommunicationCharacter::LookUpAtRate(float Rate)
{
// calculate delta for this frame from the rate information
AddControllerPitchInput(Rate * BaseLookUpRate * GetWorld()->GetDeltaSeconds());
}
void ABPCommunicationCharacter::MoveForward(float Value)
{
if ((Controller != nullptr) && (Value != 0.0f))
{
// find out which way is forward
const FRotator Rotation = Controller->GetControlRotation();
const FRotator YawRotation(0, Rotation.Yaw, 0);
// get forward vector
const FVector Direction = FRotationMatrix(YawRotation).GetUnitAxis(EAxis::X);
AddMovementInput(Direction, Value);
}
}
void ABPCommunicationCharacter::MoveRight(float Value)
{
if ( (Controller != nullptr) && (Value != 0.0f) )
{
// find out which way is right
const FRotator Rotation = Controller->GetControlRotation();
const FRotator YawRotation(0, Rotation.Yaw, 0);
// get right vector
const FVector Direction = FRotationMatrix(YawRotation).GetUnitAxis(EAxis::Y);
// add movement in that direction
AddMovementInput(Direction, Value);
}
}
Section Results
In this section you added a sphere component to the ThirdPersonCharacter class to detect overlapping Actors. When an actor overlaps with the sphere, the Character casts to the interact Interface and triggers the OnInteract function for the overlapped Actor.
6 - Testing the Interaction System
-
Drag an instance of your BP_DoorActor and the BP_CeilingLamp Blueprints into the Level viewport.

-
Click Play and approach each Blueprint to see them interact with the player.

Section Results
In this section you confirmed that the interaction system is working as intended by testing it with the interactive door and ceiling lamp Actor Blueprints.
In this Quick Start guide you learned how each Actor class Blueprint can implement the same Interface, and also specify their functionality separately. You also learned why Interfaces are ideal for implementing similar functionality on a wide variety of Blueprint classes without the need for casting.
Next Steps
Now that you know how to use Blueprint Interfaces, take a look at the other communication types referenced in the Actor Communication documentation page.