This page provides a beginner's overview of how to animate lights in Sequencer and is intended for those who are new to Cinematics and Unreal Engine.
Prerequisites
- You have read through the Sequencer Basics page and have already created and opened a Level Sequence in your level.
- Lights are in your level.
Adding a Light to Sequencer
Start by adding a light to your sequence. To do this, click Add Track (+) and select Actor to Sequencer > Add 'Light'. Any type of light Actor can be added as a track in Sequencer.
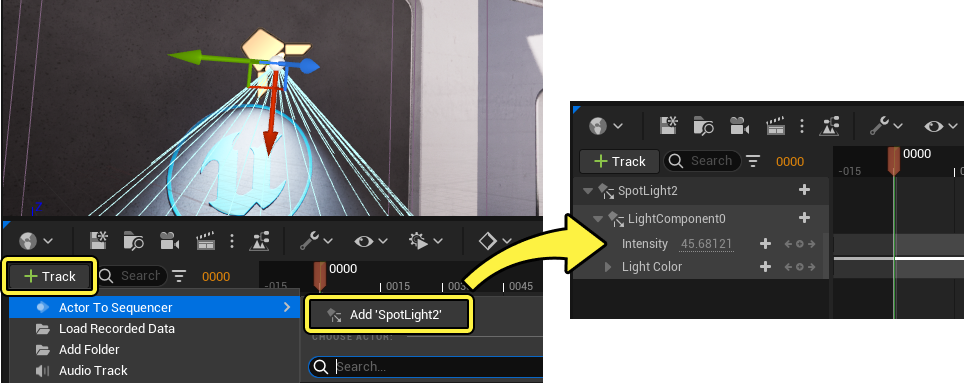
Whenever a light is added to Sequencer, it will automatically add some of its commonly used tracks to the sequence. In this example, Intensity and Light Color tracks were automatically added.
Animating Intensity
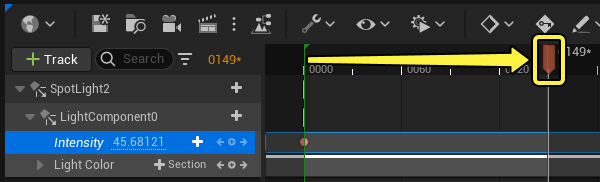
To animate a light's intensity, select the Intensity track and press Enter. This will set a keyframe with the current intensity value.

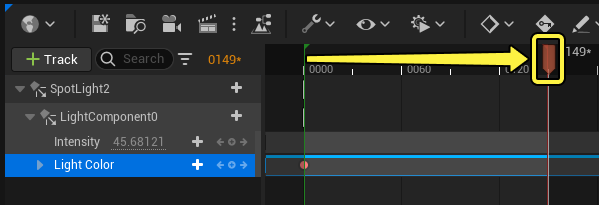
Next, move the playhead to a later point in the sequence by dragging it.
Finally, set a new intensity value by manipulating the value of the Intensity track. You can do this by either dragging it to change the value, or by selecting the textbox and typing the value directly. Either method will result in a new keyframe being created at the playhead. At this point you can drag the playhead along the sequence, or play the sequence to preview your animation.
Animating Color
To change a light's color, select the Light Color track and press Enter. This will set a keyframe at the current color value. Double-click the keyframe to open the color picker tool, then select a color value and click OK to confirm the change.
Next, move the playhead to a later point in the sequence by dragging it.
Set a new color keyframe by selecting the Light Color track and pressing Enter to create another keyframe. Double-click that keyframe and select a color from the color picker tool. At this point, you can play or scrub the sequence to preview your color animation.