
The ChunkDownloader patching solution for Unreal Engine requires you to distribute packaging files to a web server and to build a Manifest File. Manifest File is a text file containing a list of all of the files the user expects to download, as well as the expected file size for each one.
When the patching process starts, the Manifest File is the first thing, that ChunkDownloader will download to the user's device. ChunkDownloader uses information from the Manifest File to request and download each of the packaging files one-by-one. The expected file size enables the system to recognize how much progress is made for each file.
1. Required Setup
This guide uses the project from Setting Up the ChunkDownloader Plugin and Preparing Assets for Chunking.
As described in reference quides, you need:
-
Create C++ project based on a Blank template. Name this project PatchingDemo.
-
Enable ChunkDownloader plugin in the Plugins menu.
-
Enable Use Pak File and Generate Chunks in Project Settings > Project > Packaging.
-
Edit your project's
[ProjectName]Build.csfile in Visual Studio. -
Generate Visual Studio project files.
-
Build your project in Visual Studio.
-
Add to this project the Paragon assets for Boris, Crunch, and Khaimera.
-
Adjust Data Asset based on Primary Asset Label for each asset you added.
2. Building the Manifest File
To create a Manifest File, follow these steps:
-
Create a folder called PatchingDemoKey inside the base directory of your project. In this example, path of this folder is
PatchingDemo/PatchingDemoKey. -
Create a new file called BuildManifest-Windows.txt.

-
Open this file in a text editor. Add the first line with a
$NUM_ENTRIESfield and set its value equal to the number of packaging files you are tracking. For this example, it equals 9.BuildManifest-Windows.txt
$NUM_ENTRIES = 9 -
Add a new line with a
$BUILD_IDfield and set its value to PatchingDemoKey. This value should be match the folder name, where you place Manifest File.BuildManifest-Windows.txt
$BUILD_ID = PatchingDemoKey -
All next lines should have information about packaging files you need download. Each line describe each packaging file with the following information:
-
The filename.
-
The file size in bytes. To find this, right-click your packaging file and view its Properties.
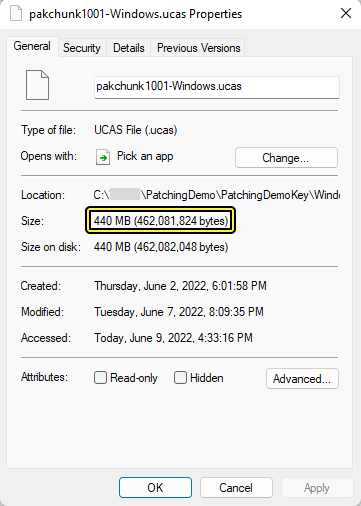
Make sure to use the File Size for the, not the Size on Disk.
-
The version. You can set this to any string.
-
The index. This should match the chunk index values you used for your Primary Asset Labels.
-
The file path, relative to where the Manifest File will be located.
Each field must be on the same line, separated by tabs, otherwise they will not be parsed correctly. For example, our line for pakchunk1001 reads as follows:
BuildManifest-Windows.txt
pakchunk1001-Windows.ucas 462081824 ver01 1001 /Windows/pakchunk1001-Windows.ucas -
-
Copy the packaging files from
/Windows/PatchingDemo/Content/Paks/into the PatchingDemoKey folder alongside the Manifest File, inside a subfolder called Windows.
You will need to repeat this process whenever you package your project or want to change what files are available to users. The final Manifest File for our example reads as follows:
BuildManifest-Windows.txt
$NUM_ENTRIES = 9
$BUILD_ID = PatchingDemoKey
pakchunk1001-Windows.ucas 462081824 ver01 1001 /Windows/pakchunk1001-Windows.ucas
pakchunk1002-Windows.ucas 928512432 ver01 1002 /Windows/pakchunk1002-Windows.ucas
pakchunk1003-Windows.ucas 944181856 ver01 1003 /Windows/pakchunk1003-Windows.ucas
pakchunk1001-Windows.utoc 426692 ver01 1001 /Windows/pakchunk1001-Windows.utoc
pakchunk1002-Windows.utoc 606278 ver01 1002 /Windows/pakchunk1002-Windows.utoc
pakchunk1003-Windows.utoc 581683 ver01 1003 /Windows/pakchunk1003-Windows.utoc
pakchunk1001-Windows.pak 339 ver01 1001 /Windows/pakchunk1001-Windows.pak
pakchunk1002-Windows.pak 339 ver01 1002 /Windows/pakchunk1002-Windows.pak
pakchunk1003-Windows.pak 339 ver01 1003 /Windows/pakchunk1003-Windows.pak
Files with chunk index 0 also located in the [Build_Folder]/Windows/PatchingDemo/Content/Paks. You don't need add information about them to the Manifest File and copy them to the PatchingDemoKey.
3. Hosting Files on a Local Test Server
Now that you have packaged your files, you need to host them on a server that your game can download them from, and you need to tell ChunkDownloader where to find the server. For demonstration purposes, this example shows you how to set up a simple local web site.
-
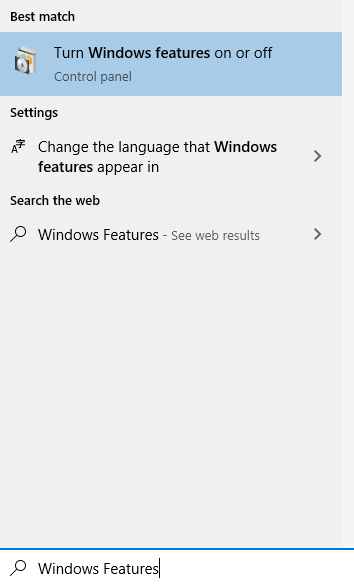
In Windows Explorer, open the Start Menu, search for Turn Windows Features on or off, and open it.
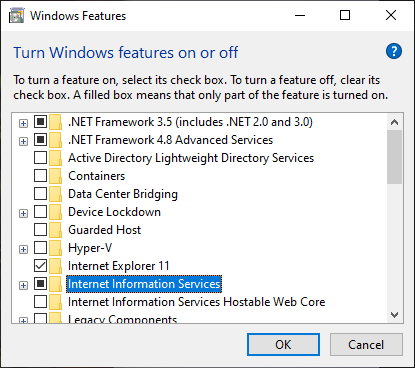
-
Inside the Windows Features menu, enable Internet Information Services and click OK.
-
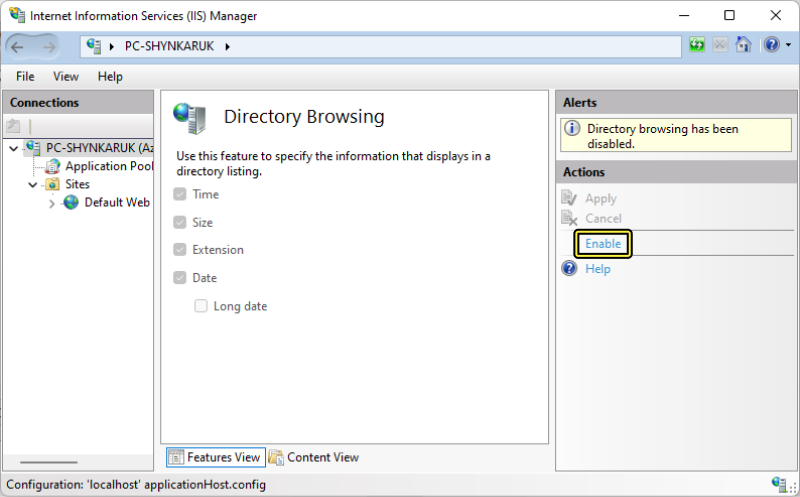
Open the Internet Information Services Manager (IIS Manager), then enable Directory Browsing.
-
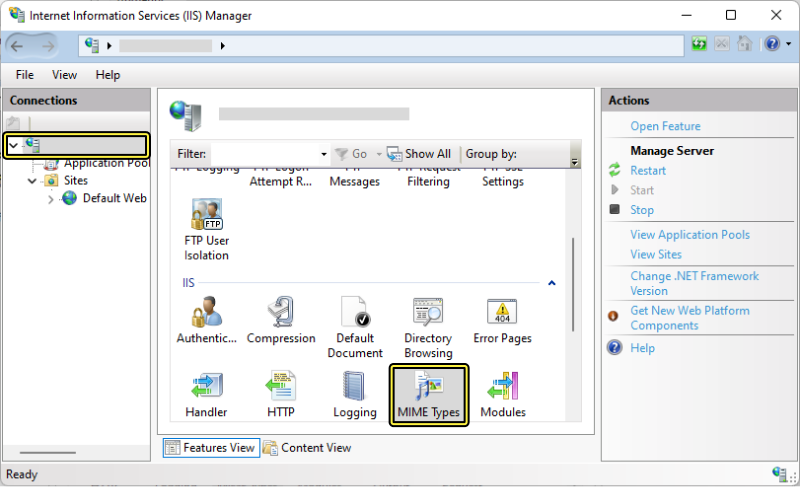
In the Connections menu on the left side of the window, click PC-[User].

-
In the PC-[User] menu, double-click MIME Types.
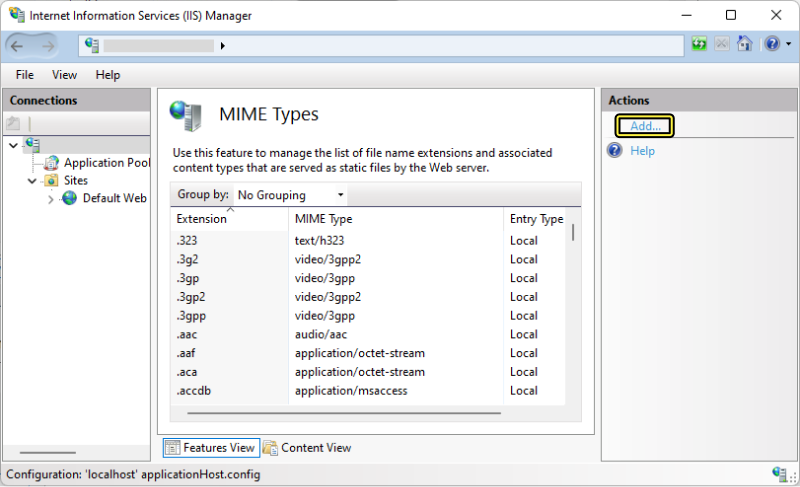
-
In the MIME Types menu, click Add.
-
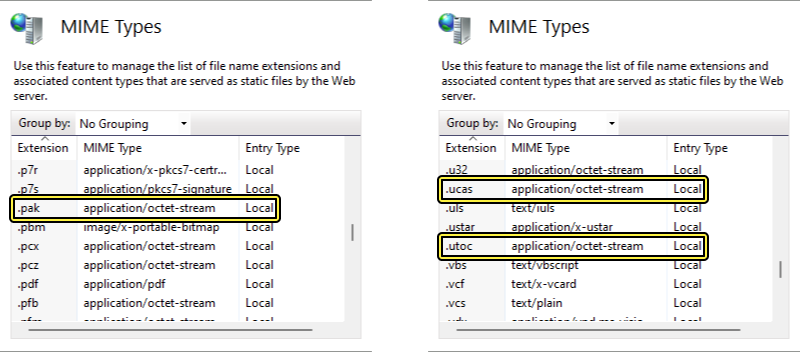
In the Add MIME Type window, set the File Name extension to
.pak, then set the MIME type toapplication/octet-stream. Do the same for.ucasand.utoc.
This will ensure that IIS simply downloads the file when requested.
-
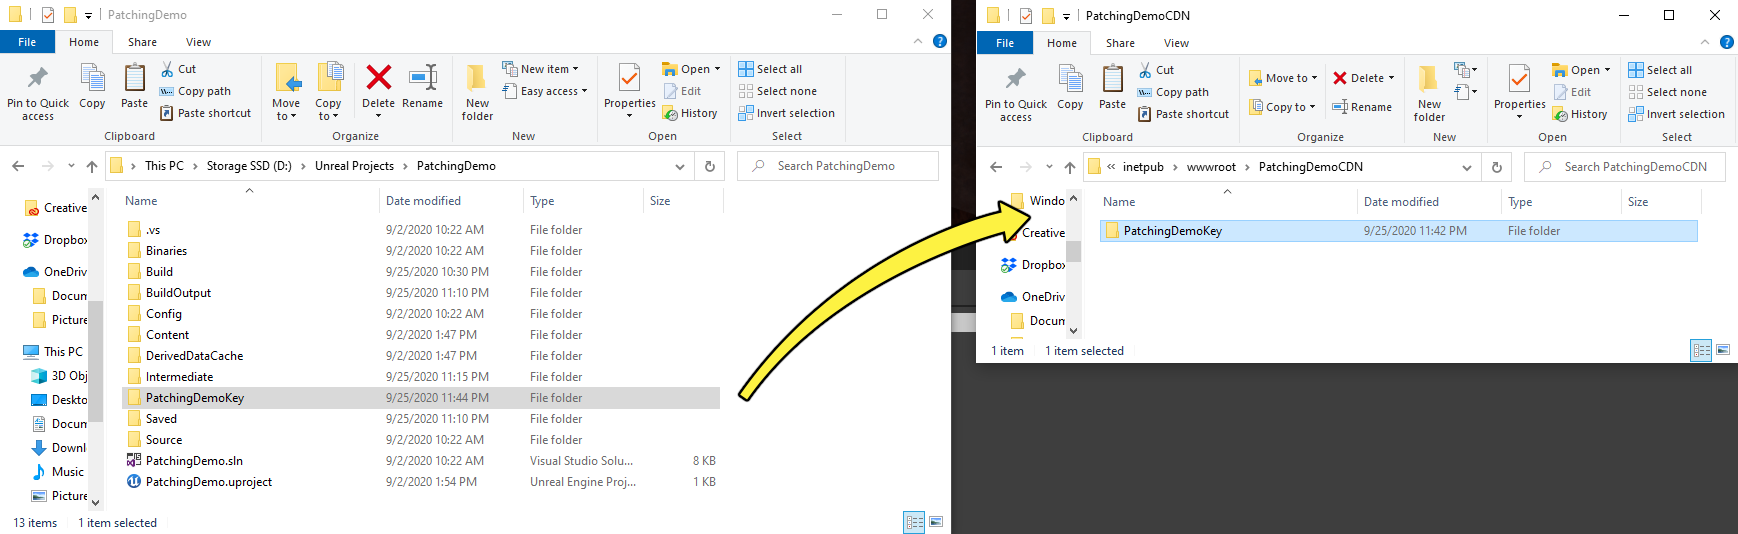
Navigate to the Default Web Site folder. By default this is
C:\inetpub\wwwroot. Create a folder called PatchingDemoCDN.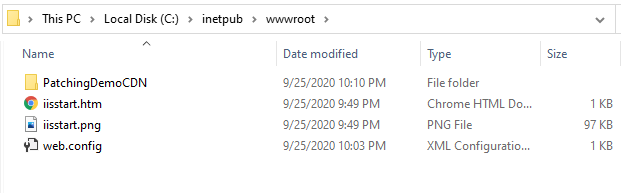
-
Copy the PatchingDemoKey folder into PatchingDemoCDN.
-
Open your project's
DefaultGame.inifile, then add the following information to define the CDN Base URL:DefaultGame.ini
[/Script/Plugins.ChunkDownloader PatchingDemoLive] +CdnBaseUrls=127.0.0.1/PatchingDemoCDNThis URL points ChunkDownloader to the website where the files are located. The PatchingDemoLive qualifier enables you to use different CDN deployment configurations depending on your target platform.
The URL used in this example only points to the local web site we set up in the earlier steps. If you are trying to connect to a server with a local area network or a remote CDN, you will require additional configuration and security.
Final Result
Now that you have your assets divided into packaging files and staged on a local web site, you can access them with your patching solution in Unreal Engine.