
As a part of the Automation System, the FBX Test Builder is a plugin that enables you to create your own tests for individual FBX files. The FBX Test Builder creates a Test Plan for a single FBX file that can be used to import or reimport and check against an array of expected results. The Test Plans that are created are stored in a JSON file which shares the same name as the FBX file that is being tested except without its extension.
The FBX Test Builder enables you to create your Test Plans that allow you to perform a selected operation on the FBX file and then check against an array of expected results to whether it passes or fails the completed tests.
Enabling the Plugin
Before you can start building your FBX automation tests, you will first need to enable the FBXAutomationTestBuilder plugin by going to Edit > Plugins > Testing.
Click for full size.
After enabling the plugin, you will need to restart Unreal Engine before you can access it.
Click for full size.
The FBX Test Builder can be accessed by using the file menu to select Window > Automation Tools > FBX Test Builder.
Click for full size.
Building a Test Plan
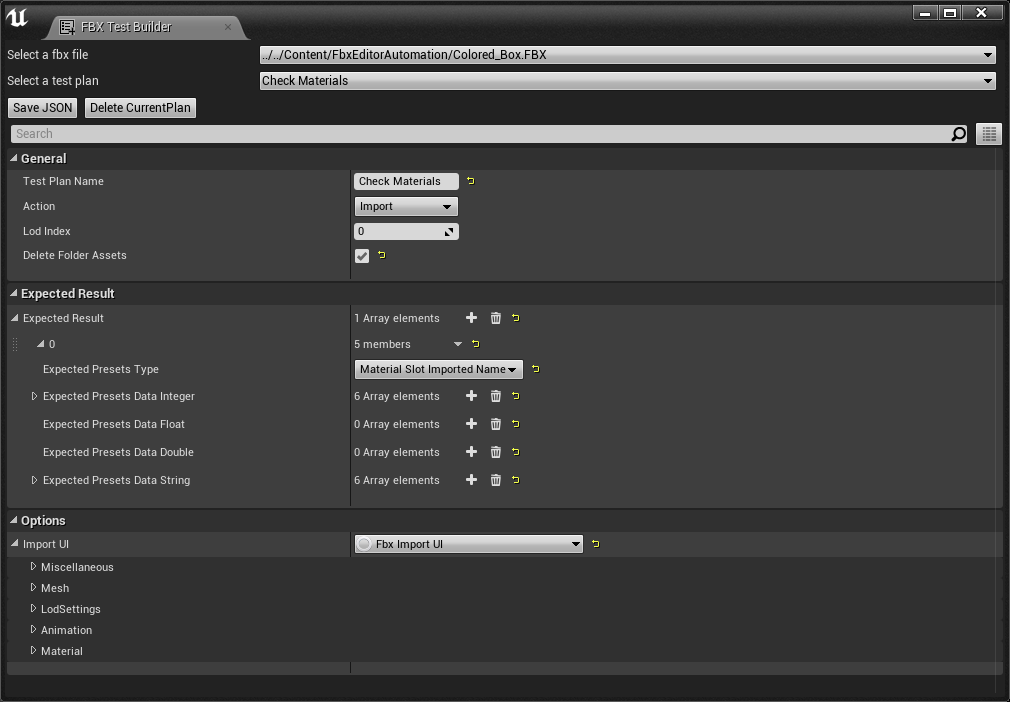
When you use the FBX Test Builder, it operates by using a selected Action (or operation) that will be performed and a series of Expected Results that determine whether the test that is performed passes or fails for the given FBX file. This set of actions and results is called a Test Plan.
Actions
For each Test Plan, there are five key Actions that can be performed and each Action has its criteria for it to be used to perform a test correctly. These Actions and their criteria are outlined below:

| Action | Steps |
|---|---|
| Import |
|
| Reimport |
|
| Add LOD (Level of Detail) |
|
| Reimport LOD (Level of Detail) |
|
| Import Reload |
|
Expected Results
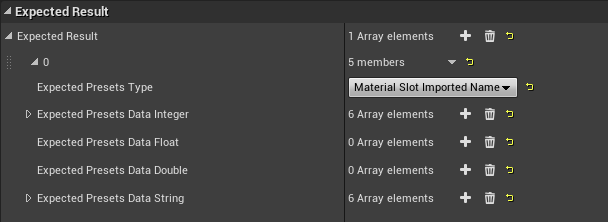
For each Test Plan, a list of Expected Results will be evaluated to determine if the test passes or fails.
| Settings | Description |
|---|---|
| Expected Presets Type | The predefined data that should be checked. See below for details. |
| Expected Presets Data Integer | Enter the expected integer value that should be checked for the specified FBX file. |
| Expected Presets Data Float | Enter the expected float value that should be checked for the specified FBX file. |
| Expected Presets Data Double | Enter the expected double value that should be checked for the specified FBX file. |
| Expected Presets Data String | Enter the expected string value that should be checked for the specified FBX file. |
Expected Presets Type
| Check Type | Description | Required Data Types |
|---|---|---|
| Error Number | Data should contain the number of error [int0]. | Integer |
| Warning Number | Data should contain the number of warning [int0]. | Integer |
| Created Static Mesh Number | Data should contain the number of Static Mesh created [int0]. | Integer |
| Created Skeletal Mesh Number | Data should contain the number of Skeletal Mesh created [int0]. | Integer |
| Materials Created Number | Data should contain the number of Material created [int0] under the target Content folder. | Integer |
| Material Slot Imported Name | Data should be the slot index [int0] and the expected original imported Material Slot Name [string0]. | Integer and String |
| Vertex Number | Data should be the total number of vertices for all LODs [int0]. | Integer |
| LOD Number | Data should be the expected number of LODs [int0.] | Integer |
| Vertex Number LOD | Data should be the LOD index [int0] and total number of vertices for LOD [int1]. | Two Integers |
| Mesh Materials Number | Data should contain the number of Materials indexed by the mesh [int0]. | Integer |
| Mesh LOD Section Number | Data should be the LOD index [int0] and the expected number of sections for a mesh [int1]. | Two Integers |
| Mesh LOD Section Vertex Number | Data should be the LOD index [int0], section index [int1], and the expected number of vertices [int2]. | Three Integers |
| Mesh LOD Section Triangle Number | Data should be the LOD index [int0], section index [int1], and the expected number of triangles [int2]. | Three Integers |
| Mesh LOD Section Material Name | Data should be the LOD index [int0], section index [int1], and the expected name of the Material [string0]. | Integer and String |
| Mesh LOD Section Material Index | Data should be the LOD index [int0], section index [int1], and the expected Material index of the Mesh's Materials [int2]. | Three Integers |
| Mesh LOD Section Material Imported Name | Data should be the LOD index [int0], section index [int1], and the expected original imported Material Slot Name [string0]. | Two Integers and a String |
| LOD UV Channel Number | Data should be the LOD index [int0] and the number of UV channels [int1] for the specified LOD. | Two Integers |
| Bone Number | Data should contain the number of bones created [int0]. | Integer |
| Bone Position | Data should contain the bone index [int0] and the position XYZ [float0, float1, and float2]. Optionally, you can pass a tolerance value [float3]. | Integer and four Floats |
| Animation Frame Number | Data should contain the number of frames [int0]. | Integer |
| Animation Length | Data should contain the animation length [float0]. | Float |
Setting up the Expected Result
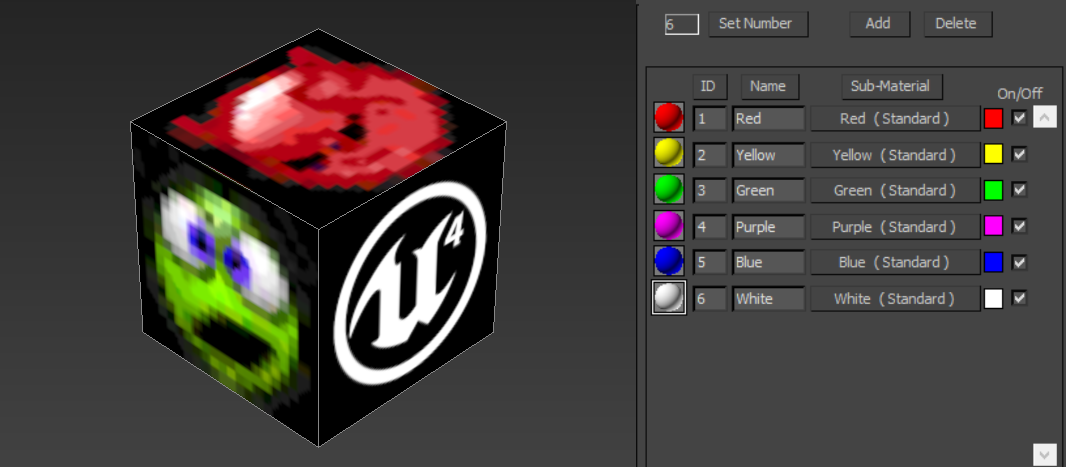
For setting up the Expected Result, an example FBX with a box mesh that contains six different materials and textures will be used as the test case.
-
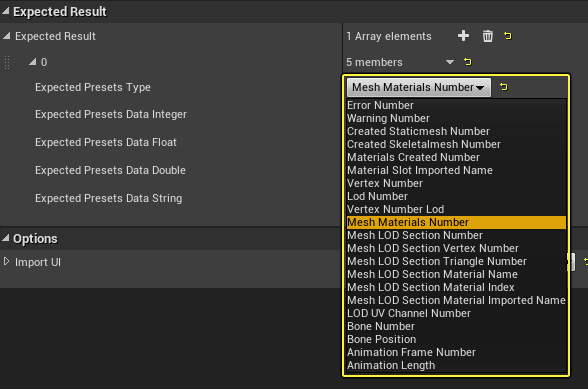
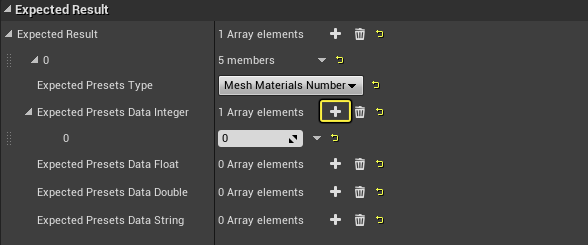
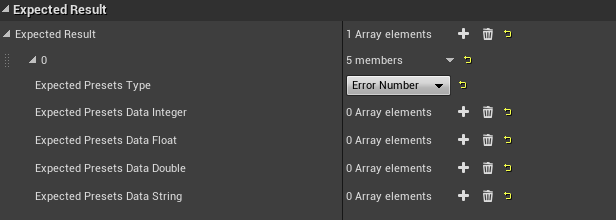
Click the Add (+) button to add an Expected Result and then choose a Expected Preset Type that you'd like to use to check.

-
Choose a Expected Presets Data type that corresponds to the Expected Presets Type you want to test. In this example, Mesh Materials Number type is selected to check the included FBX contains six materials when imported.
-
The Mesh Materials Number preset type only expects an integer (use the tooltip for the preset or the table above reference what data is required) that checks the number of Materials being imported. Click the Expected Presets Data Integer once to add an expected result check to the array.
-
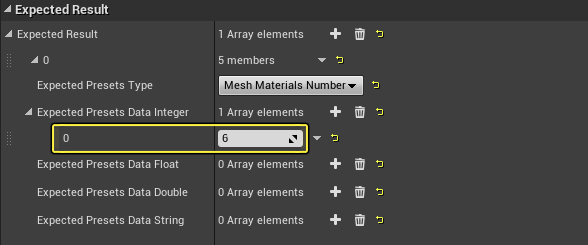
For array element 0, enter the number of Materials that should be imported with the FBX. In the case of this example, six Materials are expected.
-
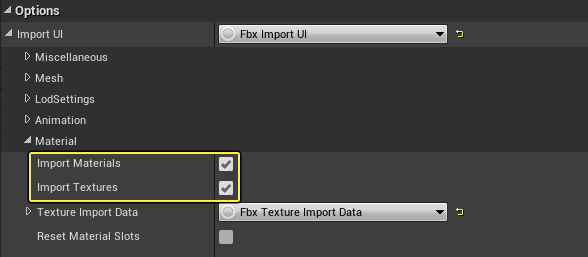
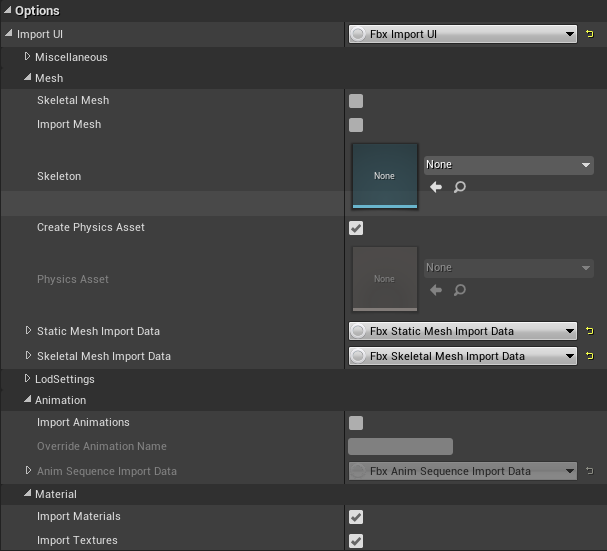
Make sure to setup the necessary Import Options so that everything that is required by the Expected Preset Type you selected is imported correctly. For example, the Box FBX will need to import the materials and textures from the FBX so the options for Import Materials and Import Textures should be enabled.
-
Click the Save JSON button and the Test Plan will be added to the Session Frontend Automation tab where you can find it under
Engine/Import/FBX/[NameOfTheFBX].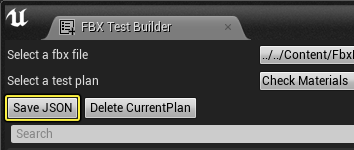
Click image for full view.
FBX Test Editor Session Frontend Automation Tab -
After running the test, the operation system will test if the Mesh Materials Number (6) of the specified LOD(0) match with the imported Asset.
Click image for full view.
If the test should fail, select the failed test in the Automation tab to see the reason why under the Automation Test Results panel.
Click image for full view.
The Message Log will also pop up to indicate whether the test was successful or failed and why it failed regardless of having the Session Frontend window open.
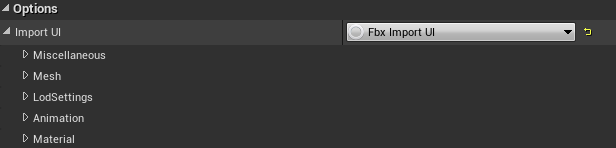
Import Options
After having set up the Expected Results Test Plan, you must also make sure that the actions you want to test are set to import/reimport correctly. For example, if you are testing an FBX that imports a set number of Materials, you would want to make sure that Import Materials is enabled. These options are the same ones that are available when importing your own assets into the Editor via the Content Browser.
For more information, see the FBX Import Options page.
Test Plan Creation Workflow
Follow the steps below to create your Test Plans for FBX testing:
-
Copy the FBX you want to test to the following location:
[Unreal Engine Root Directory]/Engine/Content/FBXEditorAutomation -
Any FBX placed in this folder location will automatically populate the Select an FBX file drop-down list.

-
Use the Select a Test Plane drop-down and choose Create new plan or select one that already exists to edit it.

-
Fill in the following sections:
General:
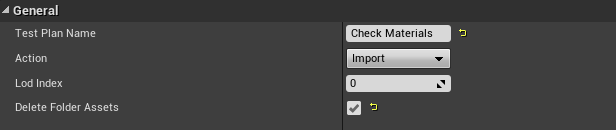
- Test Plan Name - Give a name to this test plan that you can use to select from the test plan list.
- Action - Select the type of operation that will be executed on the FBX file, such as import, reimport, add LOD, reimport LOD, or import reload.
- LOD Index - If using reimport LOD, enter the LOD index you want to reimport here.
- Delete Folder Assets - Whether to delete the imported asset at the end of the Test Plan.
Expected Results:
- Set an Expected Presets Type and fill in the necessary data types that are required to complete the test.
Import Options:
- Set the necessary Import Options required to successfully import this particular FBX for testing.
-
Click Save JSON button for your test plan to be saved and added to the available tests that will be run for this FBX file during automation testing.
