
Google has informed developers of a vulnerability in versions (earlier than M102) of WebRTC. Impacts, workarounds, and updates can be found here.
The Pixel Streaming Signaling and Web Server provides a sample player page that is already set up to stream in media from your Unreal Engine application and to send mouse, keyboard, and touch events back to the application. (For instructions, see Getting Started.) You can use this default player page as-is, if it meets your needs.
Recent changes to Pixel Streaming have moved the front end and web server elements of Pixel Streaming to an external repository. We refer to this as the Pixel Streaming Infrastructure.
There are a few ways to access the Pixel Streaming infrastructure.
- Directly access the github repository as found here: https://github.com/EpicGames/PixelStreamingInfrastructure
- Use
git clone --branch UE5.1 https://github.com/EpicGames/PixelStreamingInfrastructure.gitin your preferred terminal (make sure you have git installed). - Navigate to
\Engine\Plugins\Media\PixelStreaming\Resources\WebServersand run theget_ps_serverscommand (make sure to use the.batscript for Windows and.shscript for Linux accordingly). This will automatically pull the relevant branch of the Pixel Streaming infrastructure into that folder.
The git command mentioned above will pull the 5.1 branch of the infrastructure. If you need a different branch, please modify the git command accordingly.
For more information about the Pixel Streaming front end and webserver changes, see Pixel Streaming Infrastructure
However, with a little creativity and some knowledge of web technologies like JavaScript and HTML, you can take full control over the player page, creating your own custom UIs for interacting with your Unreal Engine content remotely. You can trigger and respond to gameplay events, issue console commands to control the Unreal Engine's behavior, and more.
We recommend using the default player page as a starting point for creating your own custom player page. You'll find this page at PixelStreamingInfrastructure\SignallingWebServer\Public\player.html under your Unreal Engine installation folder. Then, use the information on this page to learn how to extend your page and tie it in with your Project's gameplay logic.
Additionally, if you have cloned the Pixel Streaming Infrastructure repository and made upstream changes, you can fork the repo and make a pull request.
Default player page
Customized player with HTML5 UI
HTML Page Requirements
Your custom HTML player page must follow a few minimal requirements.
-
You must include the
/scripts/webRtcPlayer.jsfile. This file handles communication between the browser and the Unreal Engine application, receiving and showing the media stream from the server. Do not modify this JavaScript file unless absolutely necessary.<script type="text/javascript" src="scripts/webRtcPlayer.js"></script> -
We highly recommend that you also include the /scripts/app.js file as well. This file sets up event listeners that process the keyboard, mouse, and touch events. It also contains several functions and hooks that you can take advantage of in your player page, described in the sections below on this page. If you have some knowledge of JavaScript, you should feel free to dig into the code of this file and modify the default behavior to suit your needs. For example, if you want to disable keyboard inputs but leave mouse and touch events working, you will need to customize this file by finding and commenting out the code that handles keyboard events.
<script type="text/javascript" src="scripts/app.js"></script> -
The page must have a
divelement with the IDplayer. This element is replaced with the video frames streamed from the UE5 application.<div id="player"></div> -
You must call the
loadfunction provided by theapp.jsfile when your page loads. For example, you can do this by adding anonloadhandler to thebodytag:<body onload="load()">
Player File Location and URL
You have a few options for where you can place your custom HTML player page, and how client browsers can access it.
- You can make a folder called
custom_htmlinside the root folder of your Signaling and Web Server, and place your custom HTML player page inside this folder. It will then be accessible by appending its filename to the IP address or hostname of the computer running the Signaling and Web Server. For example, a file namedcustom_html/myplayerpage.htmlwould be accessible athttp://127.0.0.1/myplayerpage.html. - You can customize the
HomepageFileparameter for the Signaling and Web Server, and set the path to the filename of your custom HTML player page relative to the root folder of the Signaling and Web Server. It will then be accessible when you access the IP address or hostname of the computer running the Signaling and Web Server. For example, if you save a file toEngine/Source/Programs/PixelStreaming/WebServers/SignallingWebServer/myfolder/myplayerpage.html, and you set theHomepageFileparameter tomyfolder/myplayerpage.html, the page would be accessible without needing to provide a file name in the URL:http://127.0.0.1/. - You can also use the AdditionalRoutes parameter for the Signaling and Web Server to customize the mapping between URL paths and local folders on your computer.
For additional details on these parameters, see also the Pixel Streaming Reference.
Customizing Player Input Options
The app.js file offers some JavaScript configuration parameters that you can override in your custom player page to control the way the player widget responds to user interactions. The inputOptions object exposes the following properties:
| Property | Default | Description |
|---|---|---|
| controlScheme | ControlSchemeType.LockedMouse |
Determines whether or not the player widget captures and locks the mouse when the player interacts with the widget. Accepts the following values:
|
| suppressBrowserKeys | true | When this setting is enabled, the player widget will intercept function keys (F1 to F12) and the Tab key, and pass those keypress events through to the Unreal Engine application rather than allowing the browser to process them normally. This means, for example, that while this setting is active, pressing F5 will not refresh the player page in the browser. Instead, that event is passed through to the Unreal Engine application, and has its usual function of switching the view to visualize shader complexity. |
| fakeMouseWithTouches | false | When this option is enabled, and the user is viewing the stream on a device with a touch screen such as a smartphone or tablet, this setting causes single-finger touch events to be interpreted by the Unreal Engine application as mouse clicks and drag events. Enabling this setting can provide users on mobile devices with the ability to partially control your Unreal Engine application, even when the application's input controller does not specifically handle touch input events. |
You can set these values in your player page by including a code block like the following. Make sure that you run this code any time after you load the app.js file into the page, but before you call its load function.
<script>
inputOptions.controlScheme = ControlSchemeType.HoveringMouse;
inputOptions.fakeMouseWithTouches = true;
</script>
Disabling User Input
To disable user input entirely for one or more types of input device, you can override the following functions in the JavaScript environment for your player page with empty implementations:
- registerHoveringMouseEvents - Disables all input mouse events when the inputOptions.controlScheme is set to ControlSchemeType.HoveringMouse.
- registerLockedMouseEvents - Disables all input mouse events when the inputOptions.controlScheme is set to ControlSchemeType.LockedMouse.
- registerTouchEvents - Disables touch events on mobile devices and tablets.
- registerKeyboardEvents - Disables all keyboard events.
For example, you could include this block of JavaScript in your player HTML page to disable all inputs. As above, run this code any time after you load the app.js file into the page, but before you call its load function.
<script>
registerHoveringMouseEvents = function() {}
registerLockedMouseEvents = function() {}
registerTouchEvents = function() {}
registerKeyboardEvents = function() {}
</script>
To keep one or more types of inputs active, comment out or remove the line that corresponds to the type of input you want to keep.
Customizing the Player Widget Style
In your custom HTML player page, you should have defined the Pixel Streaming player widget: a div element with id="player". You can use standard HTML and CSS methods to add styling to this widget.
However, the widget may occasionally need to reinitialize its size. This typically occurs when the browser window is resized (if the widget is set to automatically fill the available space), or when the resolution of the input video stream is updated. When this happens, the style attribute of the player element is overwritten with new values, which can potentially overwrite values that you have set in your own HTML or JavaScript.
To avoid this, you can set your custom CSS values in a special global variable named styleAdditional. Whenever app.js needs to resize the player and clear its style, it will append the values you set in the styleAdditional variable to the end of the new style attributes it assigns to the player element. For example, the following value changes the mouse cursor to a hand when the user hovers the mouse over the player widget:
styleAdditional = 'cursor: grab; cursor: -moz-grab; cursor: -webkit-grab';
Accessing the Pixel Streaming Blueprint API
The Pixel Streaming Plugin that runs within the Unreal Engine exposes a Blueprint API that you can use in your gameplay logic to handle custom UI events sent by the player HTML page, and to emit events from the Unreal Engine to the player page.
To access this Blueprint API, add the PixelStreamingInputComponent to an Actor in your level. Your application's PlayerController is a safe choice. You can do this by clicking Add Component in the Blueprint menu and selecting the Pixel Streaming Input component from the dropdown.
Click image to enlarge.
Prior to UE 4.27, the PixelStreamingInput Component was automatically added when you loaded the Pixel Streaming plugin. This was problematic, and now requires users to add this to their project themselves, as seen above.
Communicating from the Player Page to UE5
The app.js file provides two JavaScript functions that you can call in your HTML player page to allow the user to send events and commands from the browser to the Unreal Engine application:
- You can use
emitCommandto send console commands back to Unreal Engine. For example,stat fpsto show the frame rate. See Using the emitCommand Function below. emitUIInteractionsends any arbitrary string or JavaScript object to the game. Use this function to send your own custom commands from your player UI, which you can respond to in your gameplay logic to produce any effect you need in your application. See Using the emitUIInteraction Function below.
Using the emitCommand Function
When you call the emitCommand function, you must pass it a JavaScript object. This object must contain a key that matches one of the following strings:
-
ConsoleCommand- Use this key to execute a console command on the remote Unreal Engine application. The value of this key should be a string that contains the command you want to run, along with any parameters it needs. For example:let descriptor = { ConsoleCommand: 'stat fps' } emitCommand(descriptor);
Due to the power of the Unreal Engine console commands, the emitCommand function can present a security risk. In order for this function to work, you also need to provide the -AllowPixelStreamingCommands parameter on the command line when you launch your Unreal Engine application or start it from the Unreal Editor using the Standalone Game option.
Using the emitUIInteraction Function
When you call the emitUIInteraction function, you can pass it a single string or JavaScript object. For example:
emitUIInteraction("MyCustomCommand");
or
let descriptor = {
LoadLevel: "/Game/Maps/Level_2"
PlayerCharacter: {
Name: "Shinbi"
Skin: "Dynasty"
}
}
emitUIInteraction(descriptor);
If you pass a JavaScript object, the emitUIInteraction function converts it to a JSON string internally. It then passes the resulting string back to the Pixel Streaming Plugin in your Unreal Engine application, which raises an event on the input controller. In your application's gameplay logic, you bind your own custom event to handle these inputs, using the Bind Event to OnPixelStreamingInputEvent node. For example:
Click to enlarge image.
You need to bind this event once, typically at the start of your game. Each time any player HTML page connected to an instance of your Unreal Engine application calls the emitUIInteractionfunction, your custom event is automatically invoked, regardless of the input passed to emitUIInteraction.
The custom event you assign (for example, the UI Interaction node in the image above) has an output named Descriptor, which you can use to retrieve the string that was sent to your Unreal Engine application by the emitUIInteraction function. You can use that value to determine how your gameplay code needs to respond each time emitUIInteraction is called.
For example, the following Blueprint tests to see whether the input given to emitUIInteraction contains the string "MyCustomCommand", and calls a custom function to handle the event:
Click to enlarge image.
If you originally passed a JavaScript object to emitUIInteraction, you can retrieve the value of any key from that JSON object using the Pixel Streaming > Get Json String Value node. For example, the following Blueprint tests for a key named LoadLevel. If that key is present, it calls a custom function to handle the event:
Click to enlarge image.
If you need to retrieve a nested key, use the dot notation common in JavaScript for your key. For example, PlayerCharacter.Name or PlayerCharacter.Skin.
Communicating from UE5 to the Player Page
You can make your Unreal Engine application emit custom events to all connected player HTML pages, which you can respond to in the player's JavaScript environment. This lets you change your web page UI in response to gameplay events.
To set this up:
- In your Unreal Engine application, any time you want to emit an event to the player page, use the Pixel Streaming > Send Pixel Streaming Response node. Specify a custom string argument to the node to indicate to the player page what event has happened.
Click to enlarge image.
-
In the JavaScript of your player page, you'll need to write a custom event handler function that will be invoked each time the page receives a response event from the Unreal Engine application. It will be passed the original string argument that was sent by the Send Pixel Streaming Response node. For example:
function myHandleResponseFunction(data) { console.warn("Response received!"); switch (data) { case "MyCustomEvent": ... // handle one type of event case "AnotherEvent": ... // handle another event } } -
Register your listener function by calling the
addResponseEventListenerfunction provided byapp.js. You pass this function a unique name for your event listener, and your function. For example:addResponseEventListener("handle_responses", myHandleResponseFunction); -
If you ever need to remove your event listener, call
removeResponseEventListenerand pass the same name. For example:removeResponseEventListener("handle_responses");
If you want to pass more complex data, you can format the string you pass to the Send Pixel Streaming Response node as JSON. For example:
Then, in your JavaScript event handler function, use JSON.parse(data) to decode the string back into a JavaScript object.
Timing Out Inactive Connections
In some kinds of Pixel Streaming deployments, you may want to automatically disconnect users who have been inactive for a certain period of time. For example, if you have a limited pool of Unreal Engine applications available, with access to those instances controlled by a matchmaking server, you may need to drop inactive older connections in order to make sure that you have application instances available to handle new incoming connection requests.
You can configure your Pixel Streaming player page to detect when a user appears to be away from keyboard (AFK)—that is, when the user has not interacted with the player widget within a customizable time interval. The AFK system warns the user:
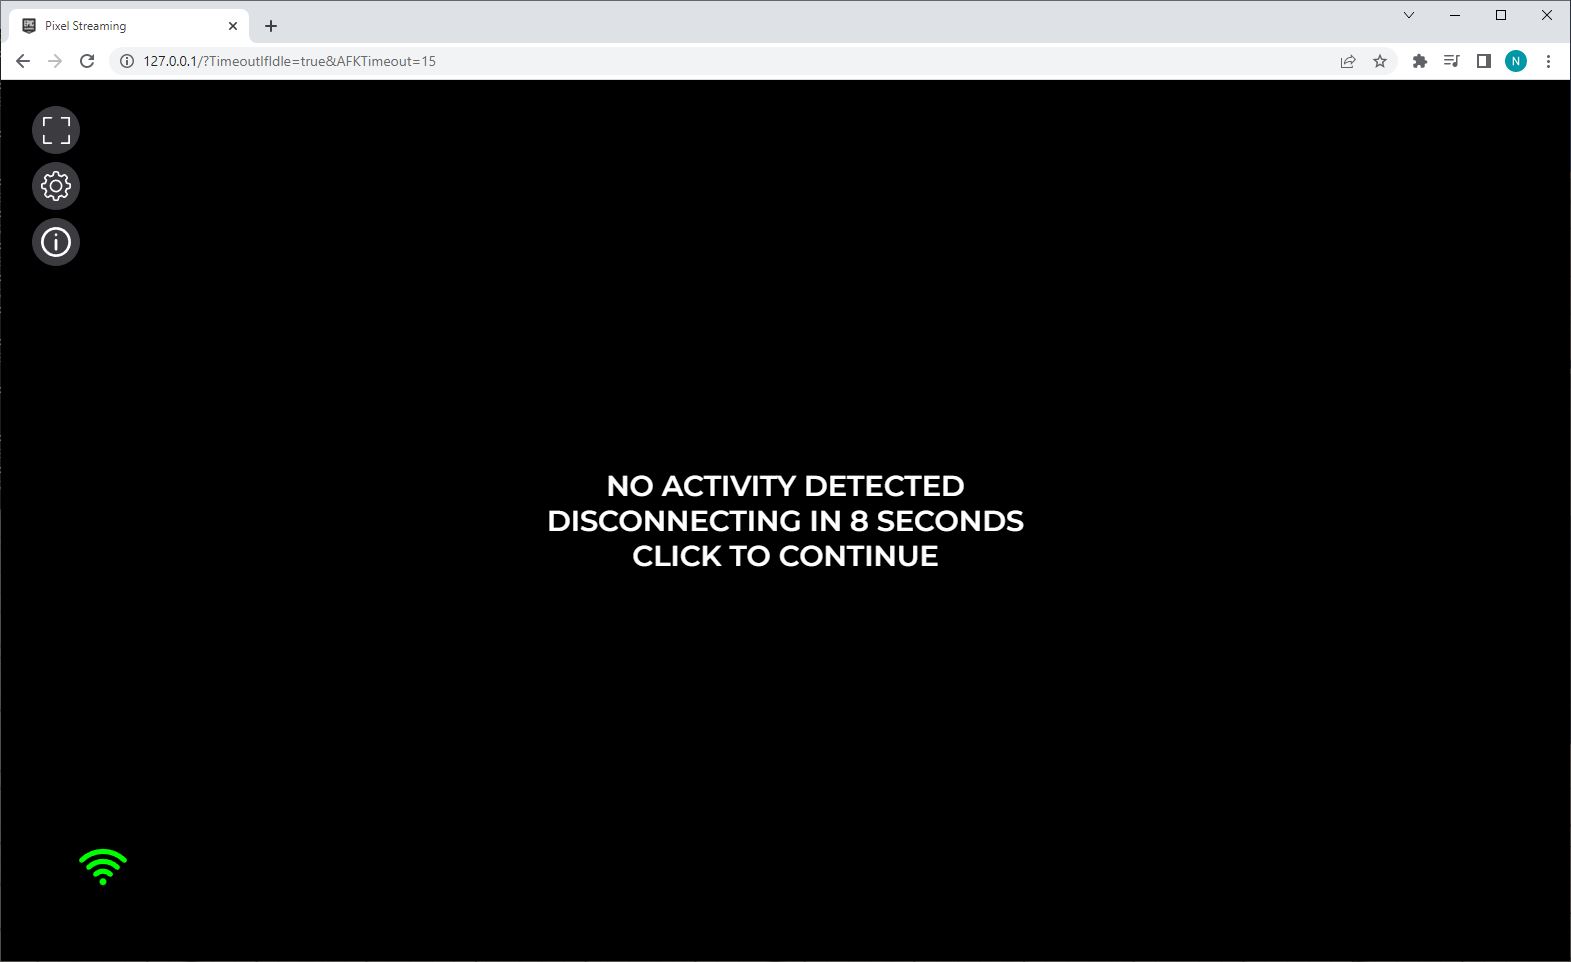
If the user continues not to respond, the AFK system ultimately disconnects their session.
Any user interaction with the player panel resets the AFK timer. This includes mouse moves and drags, mouse button presses, keyboard presses, touch events on mobile devices, and custom interactions you set up with the emitCommand and emitUIInteraction functions.
To use the AFK system, set the following three properties in the JavaScript of your player page. Do this after you load the app.js file, but before you call its load function.
| Property | Description |
|---|---|
afk.enabled |
Determines whether the AFK system should check for user interactions. The default is false; set this value to true to time out inactive connections. |
afk.warnTimeout |
Sets the maximum time interval, in seconds, that the user can remain away from keyboard before seeing a warning overlay in the player widget. The default is 120, or two minutes. |
afk.closeTimeout |
After the afk.warnTimeout interval has elapsed and the user sees a warning message about being disconnected, this variable sets the time interval, in seconds, before the user's connection is automatically disconnected unless they interact with the player widget. The default is 10. |
If you want to customize the content of the overlay, you can redefine the updateAfkOverlayText() function in your player page. In your implementation, set the afk.overlay.innerHTML property to the HTML that you want the player widget to display when users have been away longer than the AFK timeout value.