This page covers several ways in which you can collapse your Blueprint graphs into a single node, into a Function or into a Macro which can help clean up any large graphs you may have by consolidating them into a linked graph.
Collapsing Nodes
The easiest method of collapsing which is illustrated below is through Collapsing Nodes into a linked graph. These are primarily used for organization and keeping things nice and neat inside your Event Graph.
-
On the Graph of a Blueprint, locate the nodes that you want to collapse.

Here we have some nodes that reduce the player's energy after they jump.
-
Select all the nodes that you want to collapse by Left-clicking and dragging over the nodes.

You can also Control + Left-click to add/subtract nodes to your selection.
-
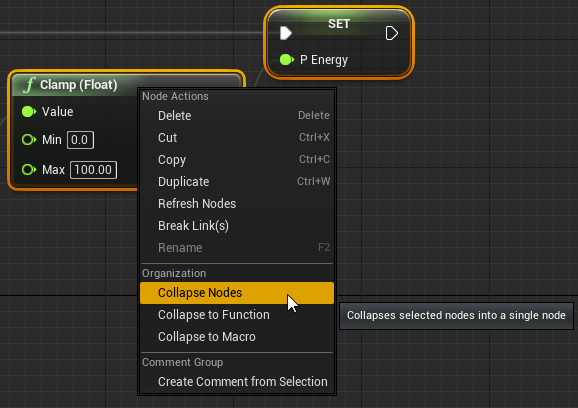
Once you have the nodes you wish to collapse, Right-click on any node in the selection and choose Collapse Nodes.
-
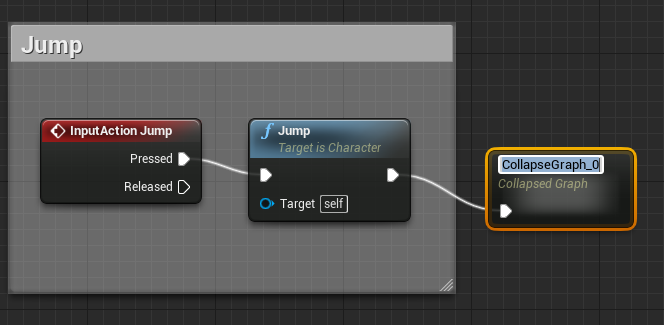
The nodes will be collapsed into a single Collapsed Graph node, which you can then assign a name.
-
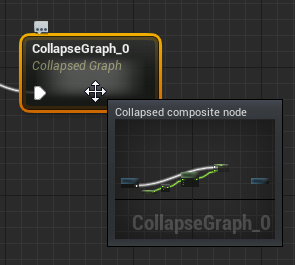
If you mouse over the Collapsed Graph node, you will see a preview window of the node network.
-
Double-clicking on the Collapsed Graph will open up a new graph with your selected nodes.

-
Inside the Collapsed Graph, you can add pins to the Inputs or Outputs nodes from the Details panel.
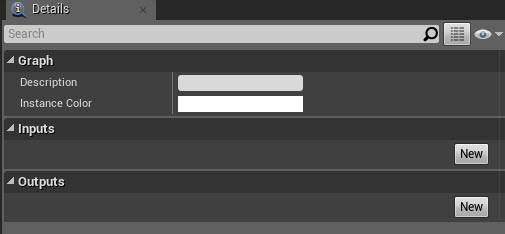
Execute is added by default when collapsing, here we have added two Execute Out Pins: OutOfEnergy and CanJump.
We also modified the graph to check if the player is out of energy before subtracting from the overall energy the player has.

And our Event Graph with the collapsed node would look something like below.

-
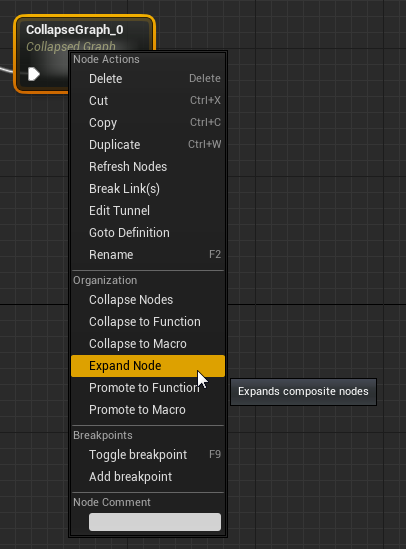
By Right-clicking on the collapsed node, you can select Expand Node to revert the nodes to their original state.
Collapsing to Function
Another method that can be used to collapse your nodes is to collapse them to a Function. The benefit of collapsing your nodes to a Function versus to a Collapsed Graph is that not only can you can call the Function in another area of script based on whatever parameters you wish to specify, but you can also call the Function from inside a different Blueprint (as long as you provide a reference to the Blueprint that contains the Function you wish to call).
Below are the steps you can take to collapse your nodes to a Function.
-
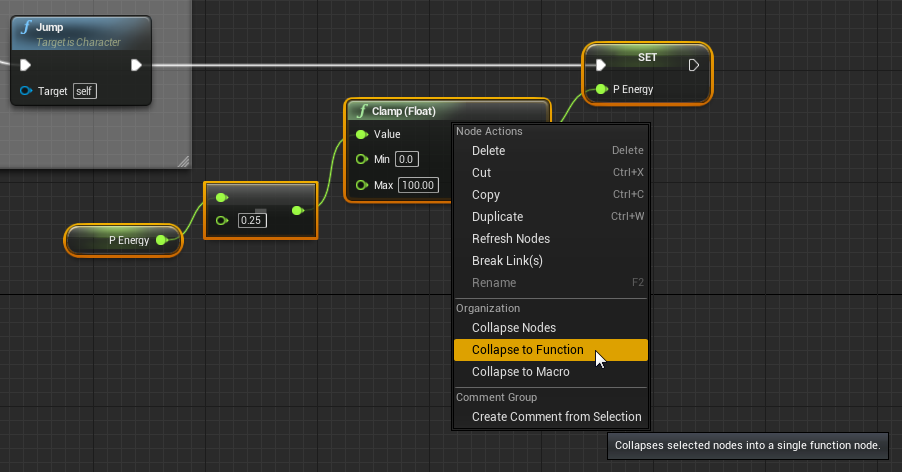
With the nodes you want to collapse selected, Right-click on a node and select Collapse to Function.
-
A new Function will be created, which you can re-name from the MyBlueprint window by pressing F2 on it.
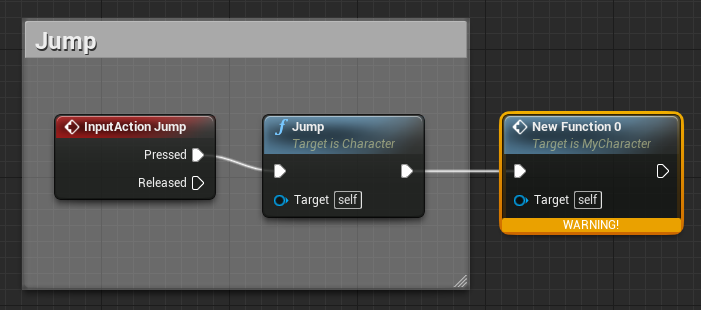
The WARNING! message will disappear when you compile your Blueprint.
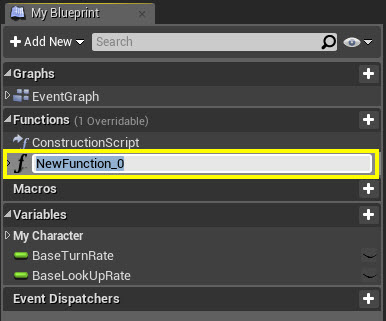
Here you can re-name your Function.
-
Double-clicking on the Function will open it up in a new graph window.

Similar to Collapsed Graphs, you can click on the Inputs or Outputs nodes and add pins to them via the Details panel.
-
You can call the Function by its name off any condition you wish to specify.

Here we are calling the Remove Energy Function whenever F is pressed.
-
You can revert this collapsing by Right-clicking on the Function and selecting the Expand Node option.
For more information about Using or Calling Functions, see the Functions documentation.
Collapsing to Macro
In addition to collapsing to a Collapsed Graph or Function, you can also collapse nodes to a Macro. The best way to think of a Macro is that it allows you to take several nodes that are connected and consolidate them into a single node that does everything you need it to do all in one. It is particularly useful for anything that you do frequently, like a complex math equation.
See below for steps on collapsing nodes to a Macro.
-
With the nodes you wish to collapse selected, Right-click on a node and select Collapse to Macro.

-
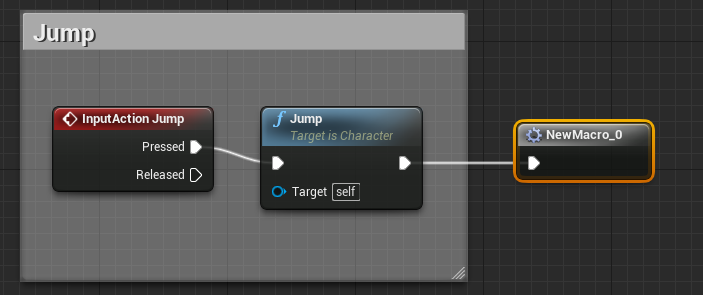
A new Macro node will be created, which you can re-name via the MyBlueprint window by pressing F2 on it.
-
You can open the Macro by Double-clicking on it.

As with the other method of collapsing nodes, you can add Input or Output pins as needed.
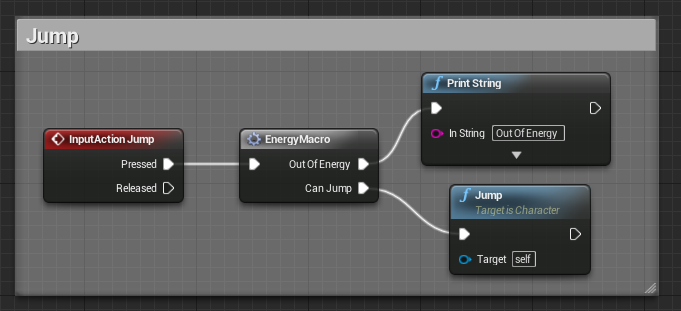
Here is our Event Graph which implements the Macro with the additional pins.
-
By Right-clicking on your Macro, you can select Expand Node to revert the collpasing of the nodes.
For more information about Macros, see the Macros documentation.