
The ability to add motion to your Materials is a vital skill, as it provides a way to recreate effects such as fire, water, or smoke. A very cheap and effective way to do this is to use the Panner Material Expression node. The Panner node generates UV coordinates that change over time, moving textures in either the U or V direction, or in a combination of both.
What is Animating UV Coordinates
Animating UV coordinates or UV panning means to move a texture's UV coordinates either horizontally (in the U direction), or vertically (in the V direction), to give the illusion that complex animation is taking place. In the following example, the T_Fire_Tiled_D texture from the Starter Content is panning in the U direction (horizontally), making the fire look like it is moving.
Panner Node Breakdown
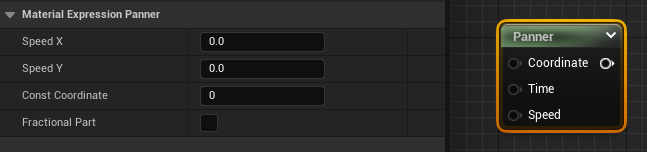
You can add a Panner Material Expression to the Material Graph by searching for Panner in the Palette or right-click context menu. You can also hold down the P key and left-click anywhere in the Material Graph to insert a Panner at the mouse pointer. The Panner Material Expression takes two inputs — Coordinates and Time.
| Property | Description |
|---|---|
| Coordinate | Takes in base UV texture coordinates which the expression can then modify. |
| Time | Takes in a value used to determine the current panning position. This is usually a Time expression to provide a constant panning effect, but you can use a Constant or Scalar Parameter as well to set a specific offset or to control the panning through Blueprints. |
| Property | Description |
|---|---|
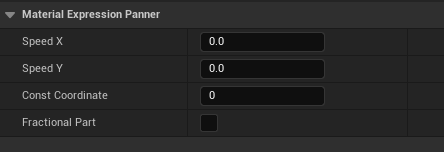
| Speed X | Speed to move the texture coordinates in the horizontal or X direction. |
| Speed Y | Speed to move the texture coordinates in the vertical or Y direction. |
| Const Coordinate | Only used if Coordinate is not hooked up. |
| Fractional Part | Output only the fractional part of the pan calculation for greater precision. Output is greater than or equal to 0 and less than 1. |
How to Animate UV Coordinates in your Material
Use the following steps to create a Material that uses UV panning to animate a texture.
This tutorial uses a texture found in the Unreal Engine Starter Content. If you did not include the Starter Content in your project, look at the Migrating content page for information about how to move content between projects. This way you can add the Starter Content to your project and not have to make a new one.
-
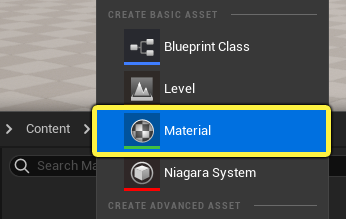
First create a new Material. Right-click in the Content Browser and select Material in the Create Basic Asset section of the context menu.
-
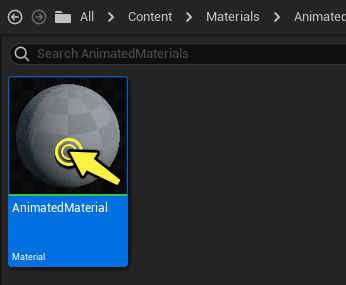
Double-click the Material thumbnail in the Content Browser to open it in the Material Editor.
-
In the Starter Content folder, search for T_Fire. Left-click and drag the texture T_Fire_Tiled_D texture directly into your Material Graph from the Content Browser.

-
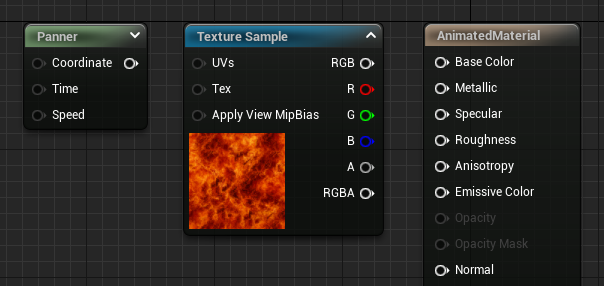
Add a Panner Material Expression to your graph. You can hold down the hotkey (P) and left-click in the Material Graph, or search for "panner" in the Palette. Your graph should look like this.
-
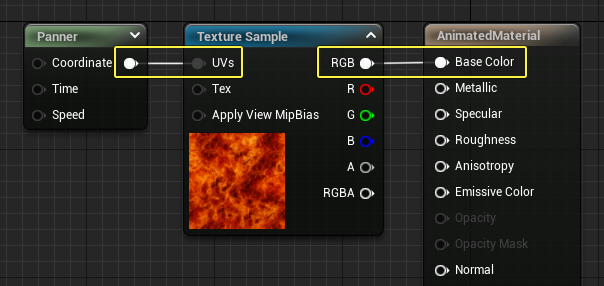
Connect the output of the Panner to the UVs input on the Texture Sample. Pass the RGB output of the texture into the Base Color input on the Main Material Node.
-
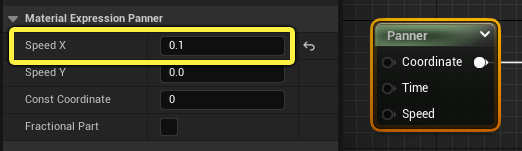
To make the texure pan, first select the Panner Material Expression and then in the Details panel, set the Speed X parameter to 0.1.
-
As soon as you change Speed X to 0.1, you should see the Fire Texture begin to move horizontally in the preview window.
-
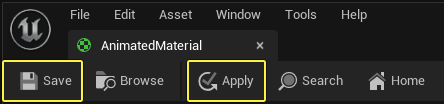
Compile and Save the Material so you can apply it to objects in your level.
Tips and Tricks
Using panning in combination with other Material Expressions is a great way to add extra control to how the panning works. In the example below, three Scalar Parameters were added to the Material to control texture Tiling, Speed X, and Speed Y. Because they are parameters, artists can override their values in Material Instances to customize the apearance of the Material.
You can also stack Panner Material Expressions to make the illusion of movement even more complex. Layering numerous texures and panning them at different speeds, or blending them through masks can produce sophisticated results, useful for smoke, water, and visual effects.
In this example, a copy of the all the original Material Expression nodes was created by first selecting all the Material Expression nodes and pressing CTRL + D on the keyboard. The scale, panning direction, and speed of the newly created nodes was changed to give an impression of layered motion. The new cluster of nodes was passed into Emissive Color instead of Base Color to give the Material more of a fiery appearance.
Conclusion
Animating UV coordinates is a great way to introduce motion into your Materials. It is also extremely useful for visual effects that require complex motion like smoke or fire. However keep in mind that animating UV coordinates works best on objects that have contiguous UV setups. Any gaps or seams in a mesh's UV coordinates will show up when the UV coordinates are animated.