The Texture Color mode paints color onto a mesh whereby the painting is written to a special texture called a Mesh Paint Texture. This texture is stored on the instance of the mesh being painted. This is similar to how the vertex color mode painting is stored on an extra vertex buffer on the instance of the mesh being painted. Painting color to a mesh paint texture instead of a mesh’s vertices has the advantage that the texture size can be chosen independently of the vertex density. This can be good if your meshes don’t need such a high resolution for painting, but may be limiting on some platforms with smaller frame budgets.
Nanite meshes don’t support Vertex Color painting per instance. The only option for them is to use Texture Color painting.
Required Setup for Mesh Texture Color Painting
There are several steps you must take to make certain your project and mesh are able to work with the Texture Color mode. You must:
- Enable Virtual Textures for the project.
- Use the Texture Color mode to add a mesh paint texture to a selected mesh instance.
- Set up a material to use the mesh paint texture.
- Set up the mesh UVs assignment for mesh painting.
Adding a Mesh Paint Texture to a Static Mesh
Follow these steps to add a Mesh Paint Texture to you static mesh:
- Use the Modes dropdown to engage Mesh Paint Mode in the level viewport.
- In the Mesh Paint panel, select the Texture Color tab.
-
In the Texture Color toolbar, click on the Add tool.
If the Add tool is grayed out, check that Virtual Textures have been enabled for your project.
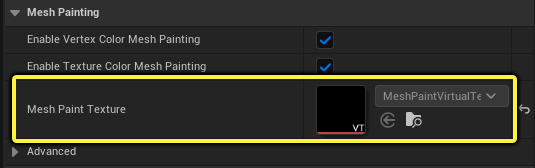
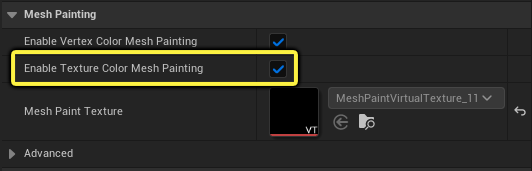
This creates a blank virtual texture asset which gets assigned to the Mesh Paint Texture. You can inspect this texture in the mesh component’s Details panel under the “Mesh Painting” category.
Mesh Paint Texture Material Expressions
Before you can use the mesh paint texture created and assigned to the mesh component, you’ll need to set up a material that can reference this texture object for painting.
You’ll need to use the MeshPaintTextureObject material expression with a Texture Sample node to pass in a reference of a mesh paint texture to this material. If a mesh paint texture exists for the mesh this material is assigned to, you will be able to paint on your mesh while using the Texture Color painting mode.
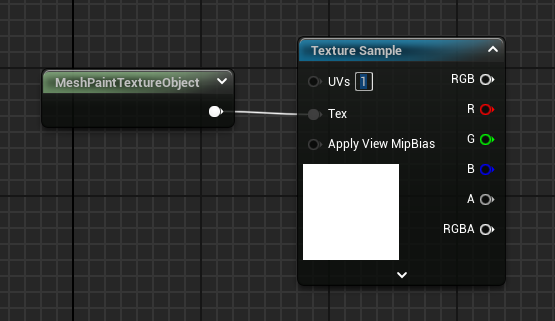
On the Texture Sample node, the Tex input takes in the MeshPaintTextureObject node, and the UVs must be set to the UV coordinates used by the static mesh for painting (See “Static Mesh UVs and Coordinates” below).
There may be times when you want to have multiple meshes share a material without it being exclusive to one using mesh texture painting. In these situations, you’ll want to use the MeshPaintTextureReplace material expression. It’s a “fallback” option used to switch inputs according to whether a valid mesh paint texture is available to sample.
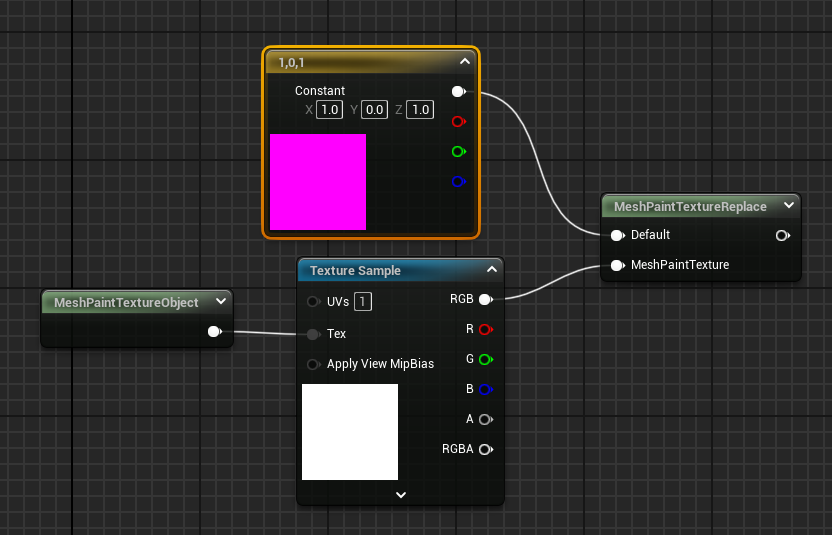
To use this node, the Default path is used when no valid mesh paint texture is available on the mesh this material is assigned to. This path can be a simple color or texture node or something with more complexity. The MeshPaintTexture path is used when there is a valid mesh paint texture available on the mesh this material is assigned to.
For a guide on setting up and using mesh paint textures, see Setting up a Material and Mesh for Texture Color Painting.
Static Mesh UVs and Coordinates
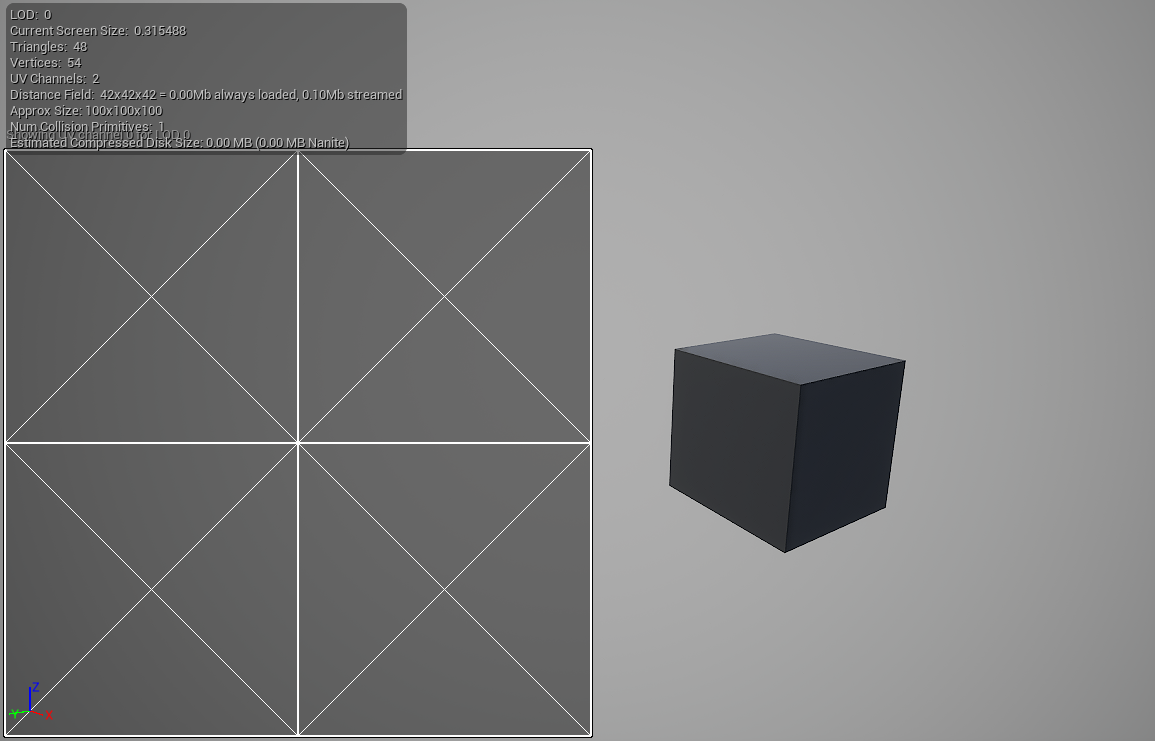
In order to effectively paint on a mesh with Texture Color mode, your mesh must have a suitable UV parameterization available. Ideally, this would mean that the UVs are all unique values across the mesh where they do not have overlapping charts, repeating or tiling UVs. Some meshes will already be set up like this, but some may not. In times where the UVs are not set up suitably for mesh painting, the mesh tool will still function but you can get unexpected results, like painting on one part of the mesh and having it also paint on other parts of the mesh.
Take for example this cube below. The one on the left has overlapping UVs where each face uses the entirety of the 0,1 UV space. The mesh on the right has unique UVs where none overlap, repeat, or tile.
 |
 |
| Static Mesh with Overlapping UV Charts | Static Mesh with Unique UV Charts |
If you were to look at each of these mesh’s UV charts and how they are laid out, you can see why this might happen.
 |
 |
| Static Mesh with Overlapping UV Charts | Static Mesh with Unique UV Charts |
While there is benefit to having UV coordinates that overlap for an applied material, this is not ideal for painting color data applied to the mesh itself. If your mesh needs a UV that flattens out all the UV charts with their own unique IDs, you can use the Generate Lightmap UV property in the Static Mesh Editor to create one for this mesh.
To learn more about setting up a UV channel with unique UV charts, see Setting up a Material and Mesh for Texture Color Painting.
Texture Color Painting on a Mesh
These are some settings you’ll want to keep in mind when starting to paint on your mesh using the Texture Color mode.
Setup Support Per Mesh and Per Instance
There are times when you want to prevent unwanted creation of mesh paint textures, so it’s useful to filter out some meshes or specific instances of meshes in a scene.
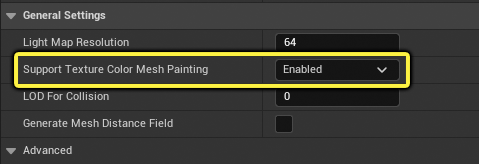
You can disable mesh texture painting per-mesh from the Static Mesh Editor by changing the Support Texture Color Mesh Painting setting under the “General Settings” category to one of the following options:
| Selection Option | Description |
|---|---|
| Default | The mesh uses the “Mesh paint default static mesh support” setting from the Engine – Rendering section of the Project Settings. |
| Enabled | The mesh is enabled for Texture Color painting. |
| Disabled | The mesh is disabled for Texture Color painting. |
Alternatively, you can disable painting on a static mesh component per-instance. Use the Details panel to uncheck the box next to Enable Texture Color Mesh Painting located under the “Mesh Painting” category.
When Texture Color painting on a mesh asset or mesh instance is disabled, this will not remove existing texture data. It only prevents the creation or modification of the mesh paint texture.
Mesh Paint Texture Resolution
Mesh paint textures have a default size heuristic when using Texture Color painting. But, you can explicitly set the size of the mesh paint texture to suit the needs of your project. This can be set on the mesh asset or overridden per-instance. By default, the Mesh Paint Texture Resolution is set to 0, which uses the default heuristic, and is based on the number of vertices in the (non-Nanite) LOD0 mesh. The mesh paint texture resolution is always rounded to the nearest power of two (if it is not one).
You can configure the default ratio of texels to vertices for the default heuristic with the project setting Mesh paint texels per vertex, which creates a mesh paint texture so that the:
Minimum number of texels = (Mesh paint texels per vertex) x (Number of vertices in LOD 0 mesh)
The texture size is the first power of two that has more texels than this.
To set a specific mesh paint texture resolution on a static mesh asset, enter a value for Mesh Paint Texture Resolution under the “General Settings” category.
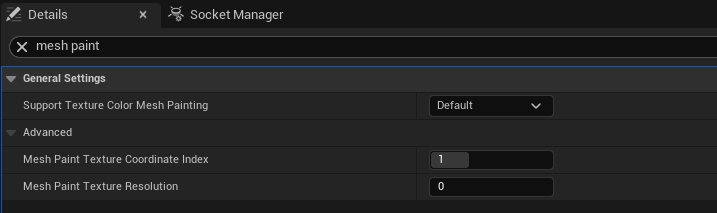
Alternatively, you can override the mesh paint texture resolution per-mesh instance by entering value for Override Mesh Paint Texture Resolution in the Details panel of the mesh.
Changing any of the settings affecting mesh paint texture resolution will not affect existing mesh paint textures. These settings are only applied to mesh paint textures created when using the Add tool on the selected mesh. But, you can apply these settings using the Fix tool to resize and keep your work.
Virtual Texture Mesh Paint Project Settings
Mesh paint texture assets are always virtual textures, and this must be enabled for the project. This allows them to be streamed on demand and to limit their memory usage using the virtual texture pool configuration in the project settings.
The Virtual Texture settings in the project settings include configurable mesh painting settings to fit the needs of your project. For example, the Mesh paint tile size is defined independently of the generic streaming virtual textures Tile Size. You would generally want smaller tile sizes for mesh painting since mesh paint textures often have low resolution.
The mesh paint textures all share the same texture format. By default, they use a compressed format which requires less GPU memory than an uncompressed format. If the lossy compression gives visual artifacts, you can disable compression by unchecking the box for Mesh paint use compressed textures.
The virtual texture project settings are located under Engine - Rendering in the “Virtual Texture” category.

To learn more about the other virtual texture mesh paint settings found in the project settings, see Mesh Paint Mode Tools and Settings.