
Overview
The Audio Modulation system provides control over common floating-point audio parameters from the Blueprint and Component systems. The system includes a better, more intuitive and dynamic subset of features for mixing audio sources, and for dynamically controlling and parameterizing audio properties than Unreal Engine had in prior versions.
In this guide, you will learn how to build a basic volume-based Control Bus structure for your game audio.
Goals
Use the Audio Modulation Plugin to build a basic volume-based Control Bus structure for your game audio.
Objectives
-
Create a collection of Control Buses and Control Bus Mix objects to apply volume mixing to sound assets .
-
Assign Control Buses to MetaSound Sources and Sound Classes.
-
Use the Mix Matrix Debugger to see the current values of the Control Bus.
-
Adjust a Control Bus from Blueprints.
1 - Required Setup
-
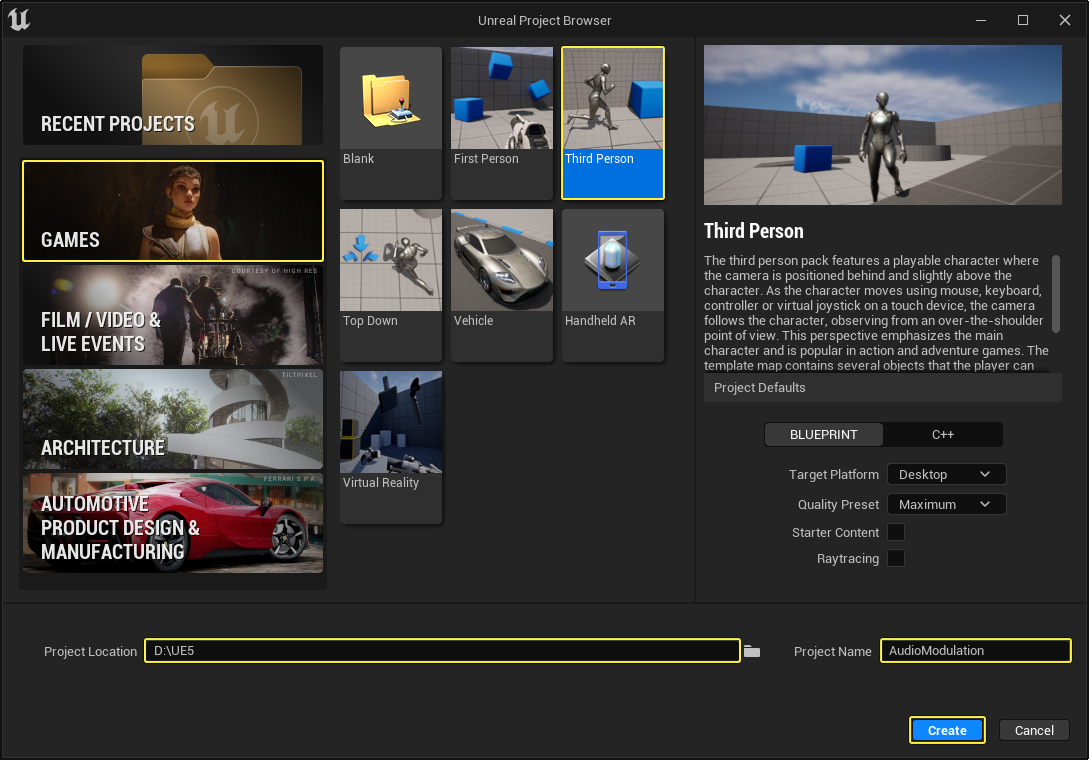
Create a new project and select the Games category and the Third Person template. Enter your project's location and name. Click Create.
-
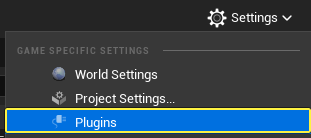
Click Settings > Plugins to open the Plugins window.
-
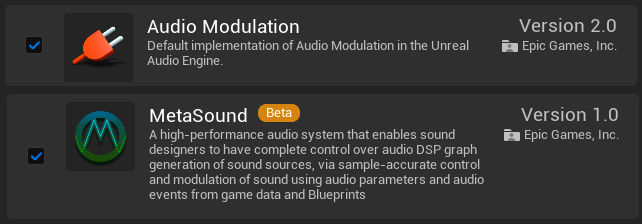
Search for and enable the Audio Modulation and MetaSound plugins. Restart Unreal Engine.
Section Results
In this section, you created a new project and enabled the Audio Modulation and MetaSound plugins. You are now ready to create the Control Buses.
2 - Create the Control Buses
-
In the Content Browser, right click and select Audio > Modulation > Control Bus. Name the asset
CB_Main.
-
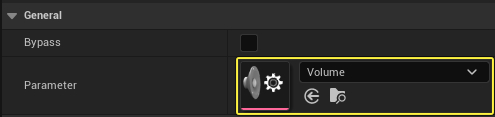
Open
CB_Mainand click the Parameter dropdown. Click the Gear icon and enable the Show Plugin Content checkbox. You may have to select Show Engine Content, as the Modulation plugin is an Engine plugin.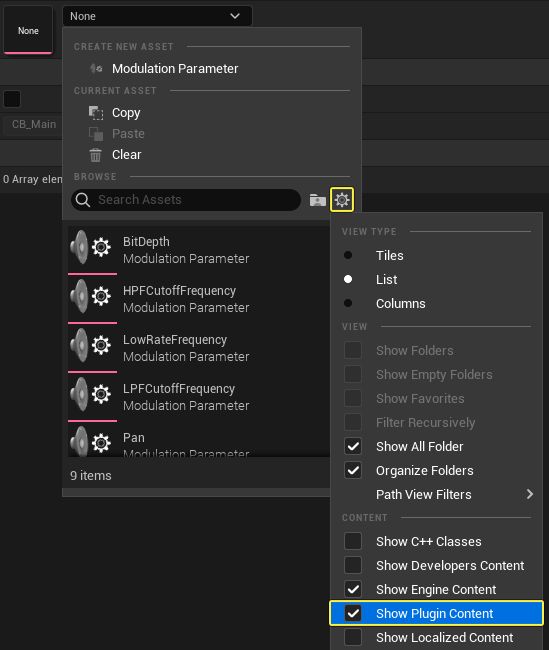
-
Search for and select the Volume parameter.
You can create a custom parameter by right clicking in the Content Browser and selecting Audio > Modulation > Modulation Parameter. Then, select the SoundModulationParameterVolume class from the list.
-
Create two folders in the Content Browser that will contain several Control Buses meant for designers and users. In the example below, the folders are named
Buses_DesignerandBuses_User.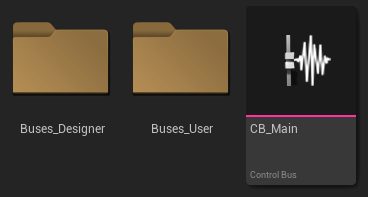
-
Right-click on
CB_Mainand select Duplicate. Name the new assetCB_Ambience.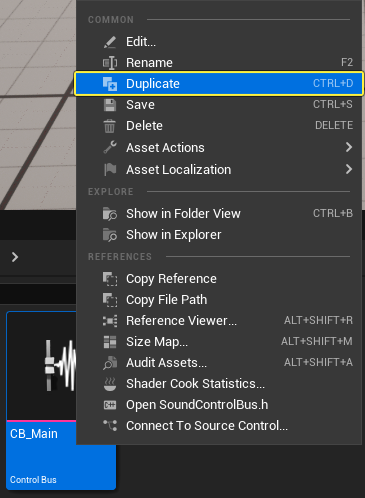
-
Repeat this process two more times and create
CB_FoleyandCB_Footsteps. Select all three assets and move them to theBuses_Designerfolder.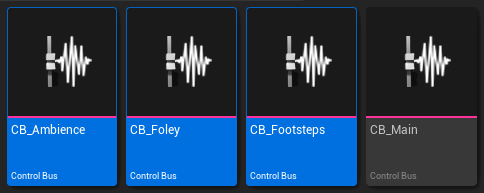
-
Repeat the previous step and create
CB_Dialogue,CB_Music, andCB_SFX. Move them to theBuses_Userfolder.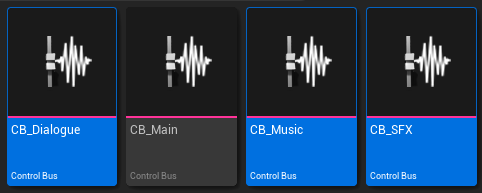
Section Results
In this section, you created the main Control Bus that will modulate the volume for all assigned audio in your project. In addition, you created several Control Buses meant for the user and designer. You are now ready to assign the main Control Bus to the Master sound class in your project.
3 - Assign the Control Buses to Sound Assets
-
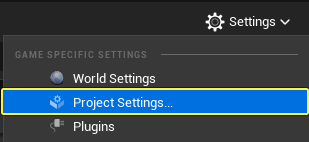
Click Settings > Project Settings to open the Project Settings.
-
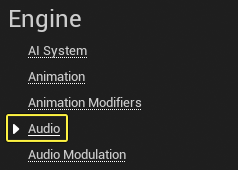
Scroll down to the Engine section and select the Audio category. Go to the Audio section and double click the Master Default Sound Class to open it.
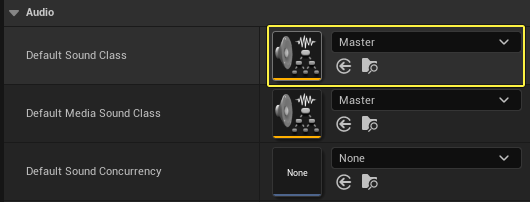
-
In the Details panel, go to the Modulation section and enable the Modulate checkbox next to Volume.
- Click + next to Volume Modulators and add
CB_Mainto Index[0].
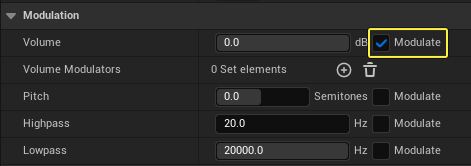
![Click + next to Volume Modulators and add CB_Main to Index[0]](audio-modulation-qs-16.png)
Add the
CB_MainControl Bus to any additional sound classes in your project, so all sounds are mixed using the same Control Bus. The Sound Class reference hierarchy is not observed by modulation and the mix structure. Each Sound Class must list all Control Buses that are to be applied to Sound Assets referencing said Sound Class. - Click + next to Volume Modulators and add
Section Results
In this section, you assigned the CB_Main Control Bus to the Master sound class. You are now ready to create a sample MetaSound to test the mix during gameplay.
4 - Create a Sample MetaSound
-
In the Content Browser, right-click and select Audio > MetaSound Source. Name the asset
MS_Sample.
-
Open
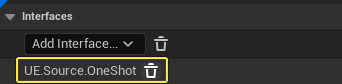
MS_Sampleby double-clicking it in the Content Browser.-
Go to the Interfaces panel on the left and click the remove icon next to UE.Source.OneShot to remove it.
-
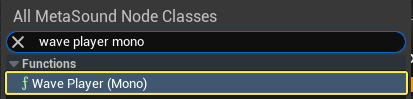
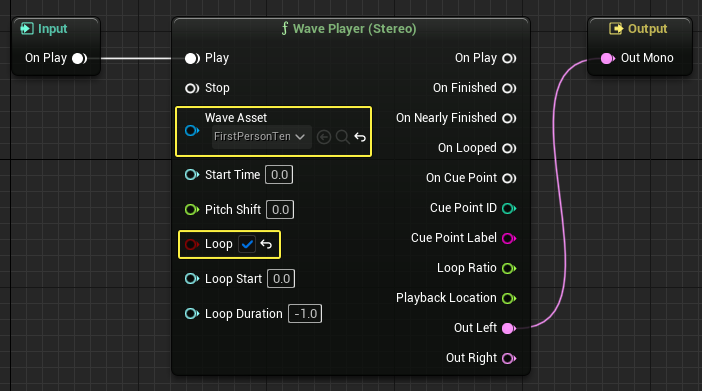
Right-click in the Event Graph and search for then select Wave Player (Mono).
-
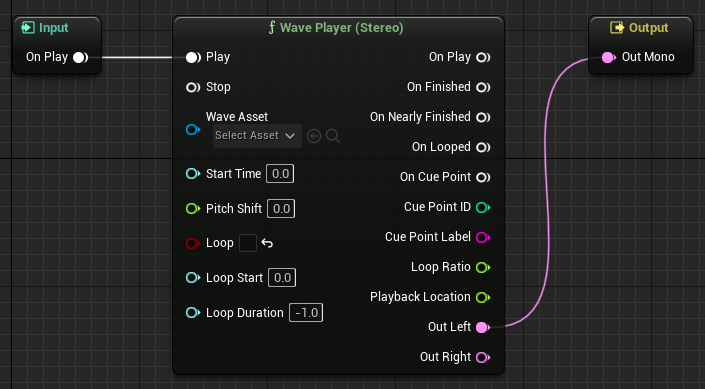
Connect the Input node to the Play pin of the Wave Player node.
-
Connect the Out Mono pin of the Wave Player node to the Output node.
-
-
Click the Wave Asset dropdown and select a sound asset. In this example, EndPlayInEditor was selected.
- Enable the Loop checkbox.
-
Click Source on the toolbar and scroll down to the Details panel.
-
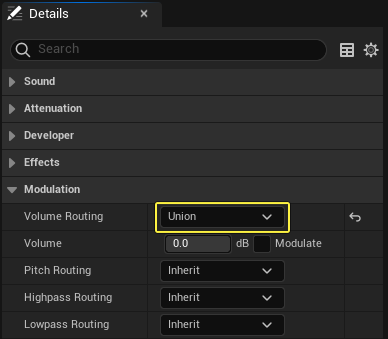
Expand the Modulation category.
-
Click the Volume Routing dropdown and select Union.
-
Enable the Modulate checkbox next to Volume.
-
Click + next to Volume Modulators and add
CB_SFXto Index[0].

![Click + next to Volume Modulators and add CB_SFX to Index[0]](audio-modulation-qs-24.png)
-
-
Drag
MS_Sampleto your level.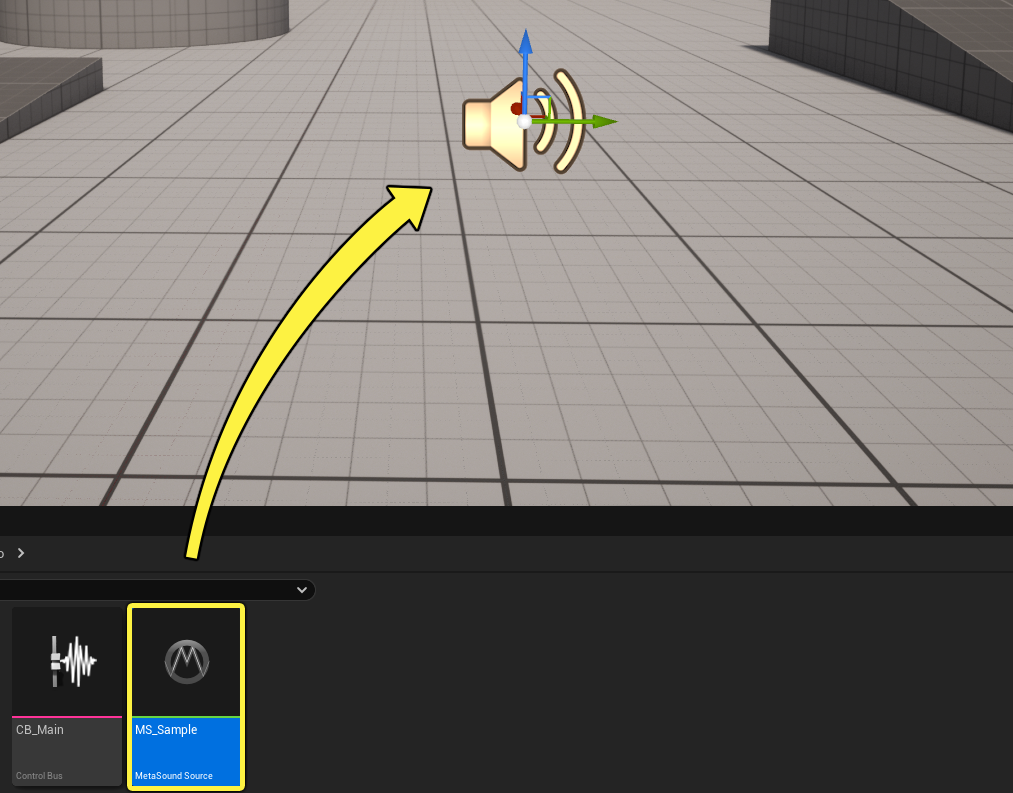
Section Results
In this section, you create a simple MetaSound that will play a sound asset continuously. You are now ready to apply the Control Bus Mix to the Control Buses.
5 - Apply a Mix
In this section, you will create a Control Bus Mix and apply it to all Control Buses in the Buses_User folder. You can follow these steps to create a Control Bus Mix for all Control Buses in the Buses_Designer folder as well. In addition, there is no strict rule as to what can be included in a mix.
Multiple mixes can be activated and applied to a single or group of Control Buses. However, only a single instance of a given mix can be active at a time.
-
In the Content Browser, right-click and select Audio > Modulation > Control Bus Mix. Name the asset
CM_User.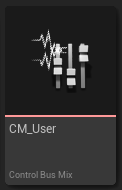
-
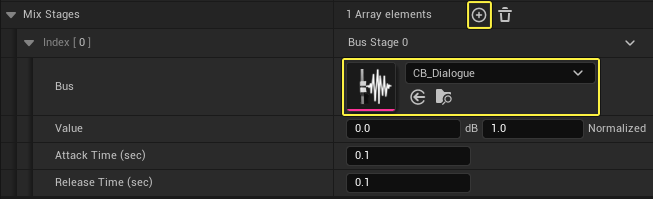
Open CM_User and go to the Mix Stages section.
-
Click + next to Mix Stages to add a new mix.
-
Click the Bus dropdown and select
CB_Dialogue.
-
-
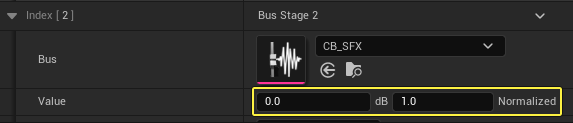
Repeat the previous step and add
CB_MusicandCB_SFXto the Mix Stages.
-
Press Play to enter runtime.
-
Press Shift-F1 to regain control of your mouse.
-
Go to
CM_Userand click Activate Mix. -
Change the value of
CB_SFXto see the changes applied in real time.

-
Section Results
In this section, you created and applied the CM_User Control Mix to the Control Buses in your project. You also activated the mix during gameplay and changed the volume of sounds using the CB_SFX Control Bus.
6 - Debug a Mix
-
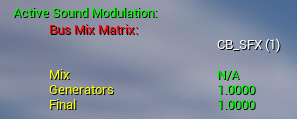
During gameplay, press ~ to open the console window.
- Enter the following command:
au.Debug.Modulation.Enable.Matrix 1to enable Sound Modulation debugging.
- Enter the following command:
-
You can filter the list of Control Buses and Control Mixes displayed by entering the commands:
au.Debug.Modulation.Filter.Buses [substring]andau.Debug.Modulation.Filter.Mixes [substring].
Section Results
In this section, you activated the Sound Modulation debugger and filtered the matrix to only show the CB_SFX Control Bus.
7 - Adjust Control Buses from Blueprints
In this section, you will activate a Control Mix from Blueprints at runtime.
-
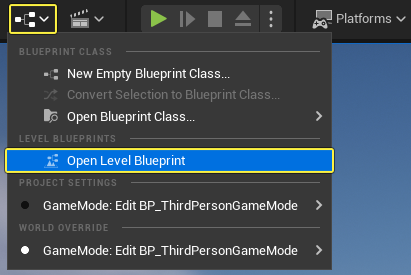
Click the Blueprint button in the Level Editor toolbar and select Open Level Blueprint.
-
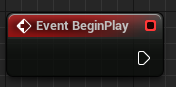
In the Event Graph, right-click and search for then select Event Begin Play.
-
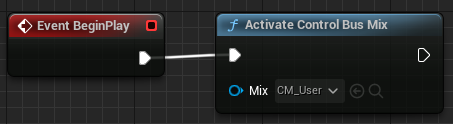
Drag from the Event Begin Play node and search for then select Activate Control Bus Mix.
- Click the Mix dropdown and select
CM_User.
- Click the Mix dropdown and select
-
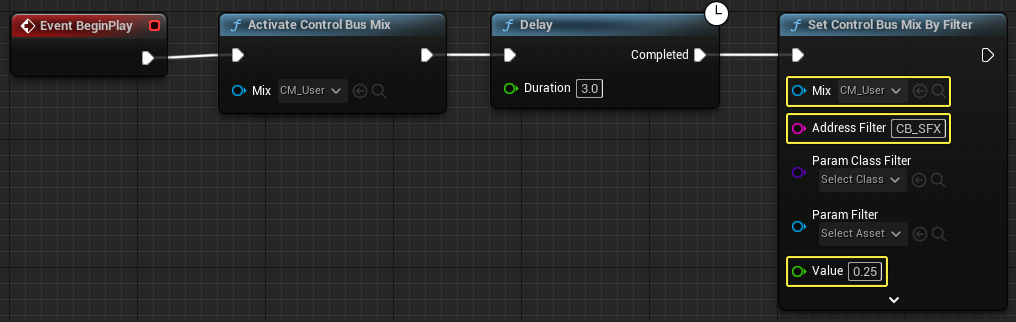
Drag from the Activate Control Bus Mix node and search for then select Delay.
- Set the Duration to 3.0.

-
Drag from the Delay node and search for then select Set Control Bus Mix By Filter.
-
Click the Mix dropdown and select
CM_User. -
Add
CB_SFXto the Address Filter. -
Enter a Value of 0.25.
-
-
Press Play and verify that the
CM_UserControl Bus is activated and the volume ofMS_Sampleis lowered after 3 seconds.
Section Results
In this section, you activated the CM_User Control Bus and changed the volume of audio using the CB_SFX Control Bus.