The Game Animation Sample Project is a project you can use to observe and learn about a modern, high-fidelity animation system in Unreal Engine. The system uses a suite of motion captured animations driven by animation features such as Motion Matching to deliver a high quality and responsive animation system for a human character’s traversal system. The system features coverage for common animation needs such as locomotion, scaling ledges, and vaulting. The project is broken up into several obstacle courses that you can navigate as several included characters.
The animation sample project is also built to be extensible, allowing you to import your own character to see how the animation system works with different characters, and even migrate the animation assets and systems into your own project to be used and built off of.
The Game Animation Sample Project is designed to be built upon as Engine and feature development continues, so it is recommended that you continue to follow updates with upcoming releases.
Installing the Project
To install the project, download the Game Animation Sample Project from the Unreal Engine Marketplace.
To open the project, locate the project in the Vault section of the Library panel in the Unreal Engine Launcher and select the Create Project button.
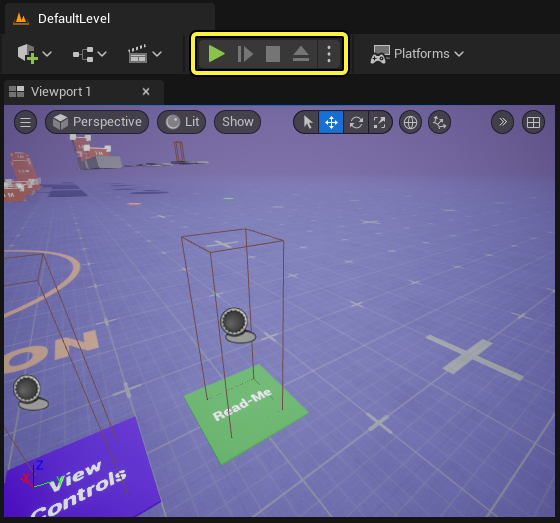
After creating and opening the project, you can use the Play In Editor (PIE) controls to run the project.
Read Me
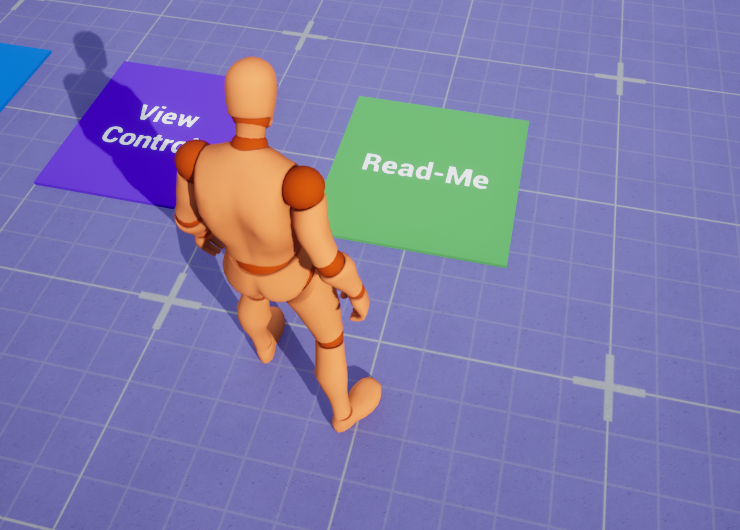
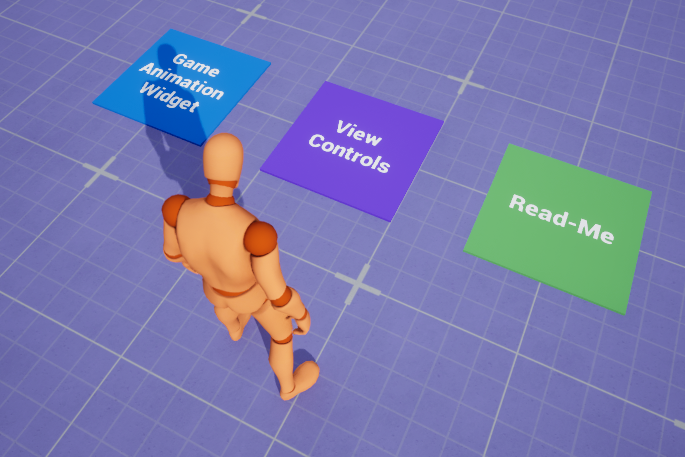
By stepping on the Read Me button in the DefualtLevel you can view an introduction dialogue to the project.
Here you can read a transcript of the Read Me file.
| Read Me |
|---|
The goal of this project is to showcase a comprehensive set of various gameplay animation features and assets for users to use, deconstruct, and learn from. For now the focus is mainly on animation features, rather than gameplay systems, so any gameplay functionality you find within this project (such as the traversal system) will be simple, serving only as an example of how animation systems can interact with gameplay systems. This first release is centered around our new Motion Matching toolset, showing how to set up basic third person character locomotion with best practices for using motion matching with a capsule driven movement model. We also demonstrate how Motion Matching can be used to select montages and entry frames for gameplay actions. We also are heavily relying on Choosers, a recently added feature which help us control motion matching by filtering down which databases can be selected from based on gameplay context. This project will continue to be updated and improved upon with each major engine release. Think of this as a living project that will grow over time with more animations, more features, and more ideas explored for a multitude of game types. This is just the beginning, so stay tuned, and we hope you have fun exploring the many things this project has to offer! |
Player Controls
By stepping on the View Controls button in the DefaultLevel you can reference a list of the player controls.
Here you can reference a list of the player controls for both keyboard and mouse, and gamepad inputs.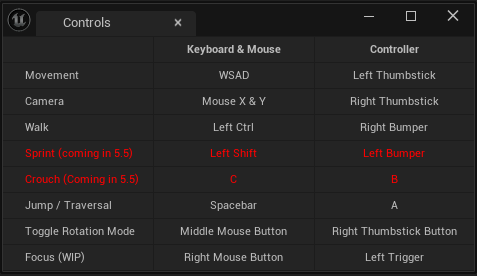
| Keyboard | Controller | Action |
|---|---|---|
| W, A, S, and D | Left Analog Stick | Moves the player character. |
| Mouse (X and Y) | Right Analog Stick | Rotates the Camera. |
| Left CTRL | Right Shoulder Button | Toggles the player’s run and walk states. |
| Space | Bottom Face Button | Causes the Character to Jump and navigate ledges and vaults in the obstacle courses. |
| Middle Mouse Button | Right Analog Stick Button | Toggles the characters rotation mode between a free rotation and a strafe. |
| Right Mouse Button | Left Trigger | Focus the camera, similar to an aim function in an action game. |
| Number Keys | When using the 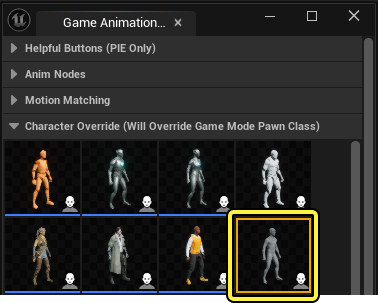
|
Game Animation Widget
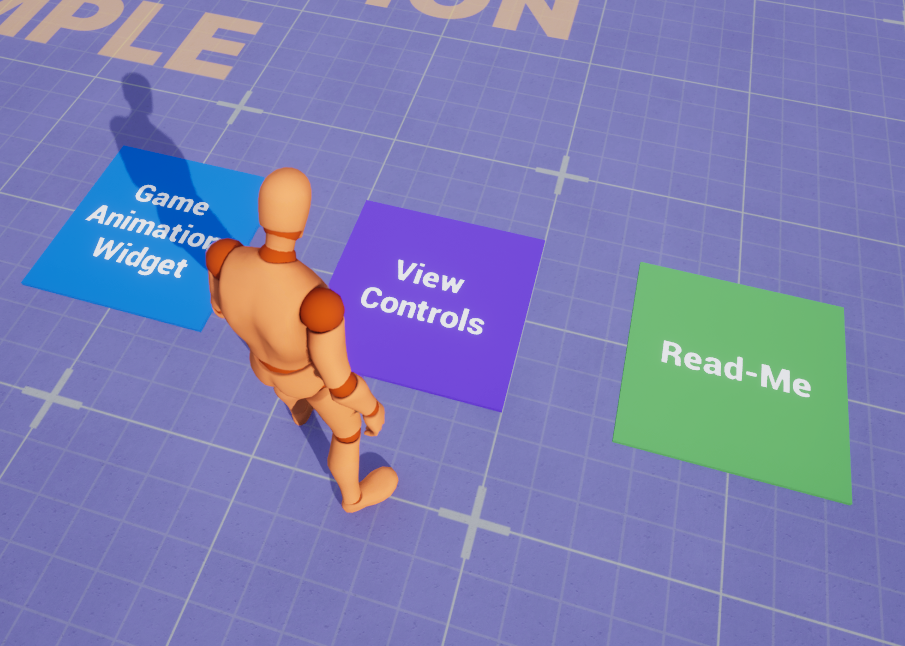
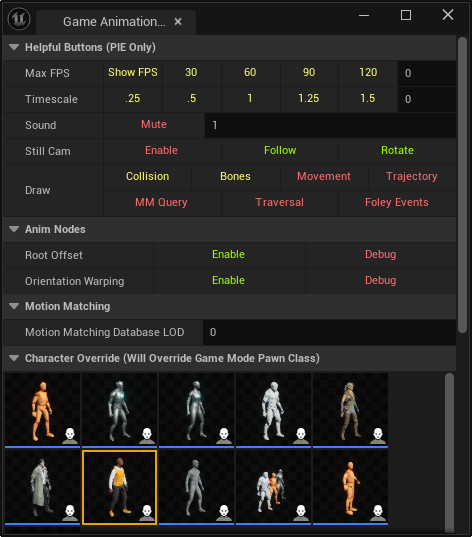
The Game Animation Widget is a panel of helpful tools and properties you can use to interface with the Animation Sample Project. You can open the Game Animation Widget by controlling the character in the viewport during a PIE and stepping on the Game Animation Widget button in the DefaultLevel.
After opening the Game Animation Widget, you can access the following properties and settings:
| Property | Description |
|---|---|
| Helpful Buttons (PIE Only) | The following options are used to change properties of the project when the game is playing in editor (PIE). |
| Max FPS | Here you can set the maximum number of frames the project will be rendered. You can also toggle the frame count in the viewport during PIE using the Show FPS button. By selecting one of the FPS options the game will cap the rendered framerate at the specific value so you can observe how the animations perform at different project framerates. Additionally you can set a custom frame rate using the property field on the right. |
| Timescale | Here you can set the timescale of the project, the default option of 1 will run the project at the intended speed. Selecting smaller options will slow the project down to make observing animation easier, while selecting larger values will increase the speed of the project so you can observe how the animation system performs during faster gameplay. |
| Sound | Here you can set the volume for the project's sounds using the property field on the right, or mute the audio entirely using the Mute button. |
| Still Cam | Here you can set the camera mode for the project during PIE. You can toggle the following buttons for different effects:
|
| Draw | Here you can toggle debug drawings in the viewport of the following player character components:
|
| Anim Nodes | In the following set of properties you can toggle different additive components to the base motion matching system, to observe how each of these additional features enhance the quality and coverage of the animation system. Each feature contains a button to enable or disable the feature, and a debug render to better observe how the feature is altering the final pose used at runtime. |
| Root Offset | Here you can toggle the experimental Offset Root Bone node in the ABP_SandboxCharacter Animation Blueprint. This node is intended to fix mesh deviations from the capsule during animation playback. When the node is enabled, the system will blend the mesh's position back toward the capsules center when the character stops moving. You can toggle this property to test its effects, and enable the Debug drawing to observe the meshes deviations from the capsule during gameplay. |
| Orientation Warping | Orientation Warping is an Animation Feature that warps character movement to meet specific goals and alignments. Orientation warping can assist in achieving your project’s desired animation coverage to fill in gaps where no animation data is present. You can use this property to toggle whether or not the Orientation Warping node is active in order to compare its effects. You can also enable the Debug option for a visual render of the Orientation Warpings influence on the character during runtime. For more information about Orientation Warping, see the Orientation Warping documentation. |
| Leg IK | Inverse Kinematics (IK) are ways of creating chains of bones that can react more naturally to the character’s environment. The Leg IK system creates more natural poses where the character is standing on uneven surfaces. You can use this property to toggle whether or not the Leg IK node in the ABP_SandboxCharacter Animation Blueprint is active at runtime. You can also use the Debug option to see the effects of the Leg IK node when the property is Enabled. |
| Motion Matching Database LOD | Here you can set the Level of Detail (LOD) of the Pose Search Database assets that the Motion Matching system will make animation selections from. Using the Motion Matching Database LOD property, you can observe how the animation data is scaled when using Pose Search Databases with more dense or sparse animation data. Scaling this value at runtime can improve your project’s performance in instances where less detailed animations meet your project’s animation fidelity goals. |
| Character Override | Here you can override the player character’s Blueprint to observe how different characters perform with the same Animation data set and logic. Selecting a different character will override the project’s Game Mode Pawn Class. |
| Controller | Here you can observe a debug render of the inputs you are feeding the game at runtime. As you feed an input to the game, the controller is updated with a highlighted buttons representing the input. |
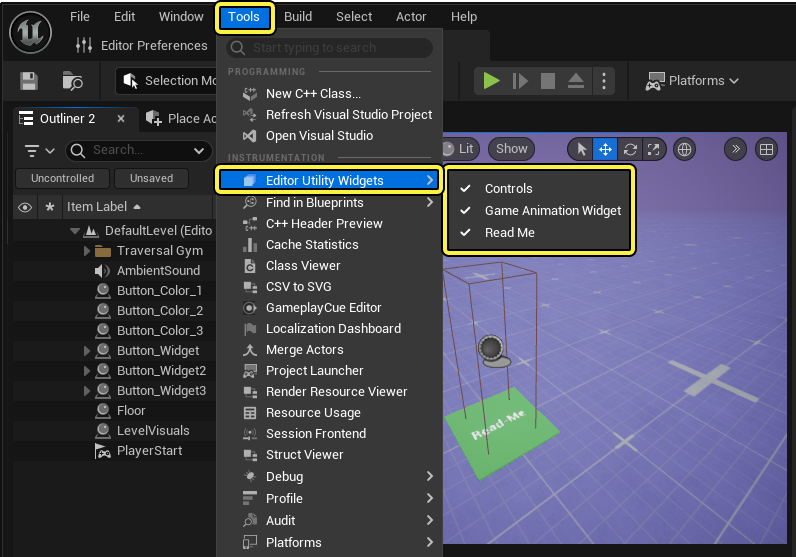
After opening the Read Me, View Controls, or the Game Animation Widget for the first time, you can reopen these windows by navigating in the Menu Bar to Tools > Editor Utility Widgets and selecting the window you would like to open.
Playing the Project
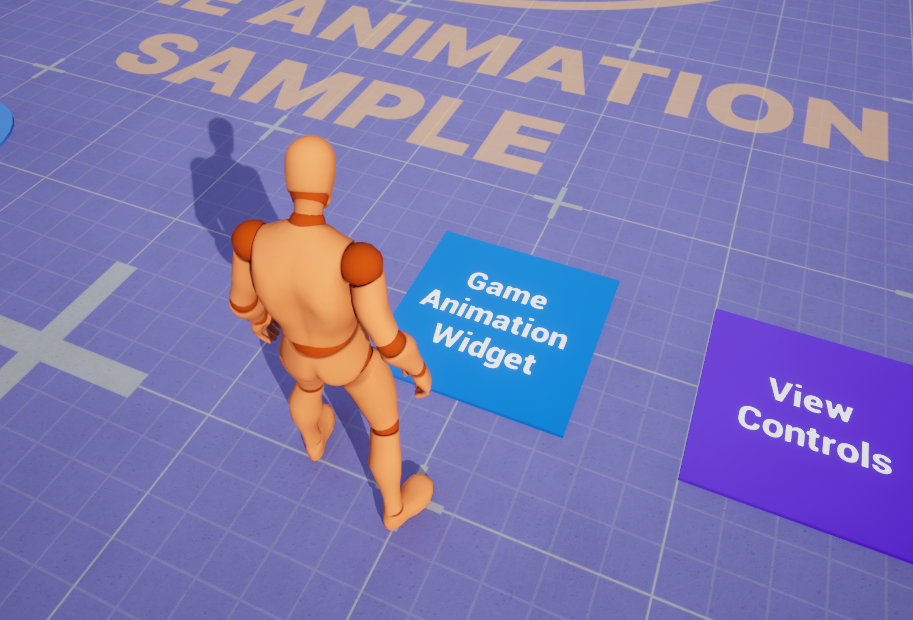
The project contains a level (DefaultLevel) that contains a series of obstacles that can be interacted with by vaulting, climbing, and dropping from. The DefaultLevel will be opened when opening the project for the first time. To get started interacting with the project in order to observe the animation system working, use the Play button in the PIE section of the Unreal Engine toolbar.
The project contains several prototype style walls, ledges, and platforms that you can navigate with keyboard and mouse, or gamepad inputs.
Try interacting with the different sizes of each obstacle in order to see the dynamic animation playback that scales to fit any of the interactions.
There are a few buttons within the level, located on the ground. These buttons have different effects, and can be activated by stepping on them with the character.
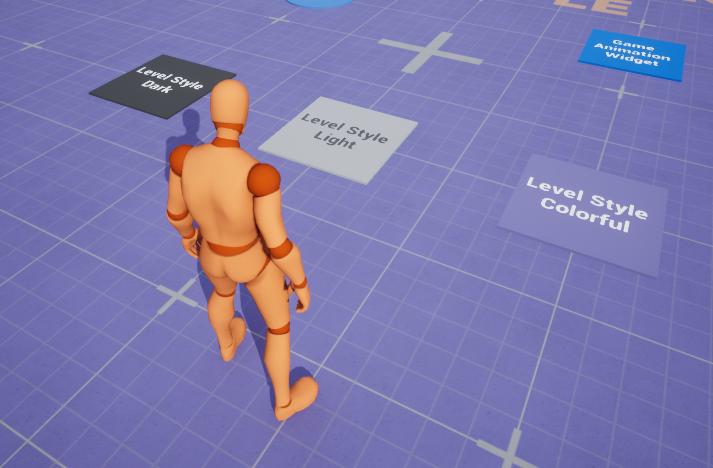
Level Color Scheme
The first group is near the player spawn point. These three buttons will cosmetically alter the look of the level.
Project Information and Settings
The next set of buttons will open project information and property settings.
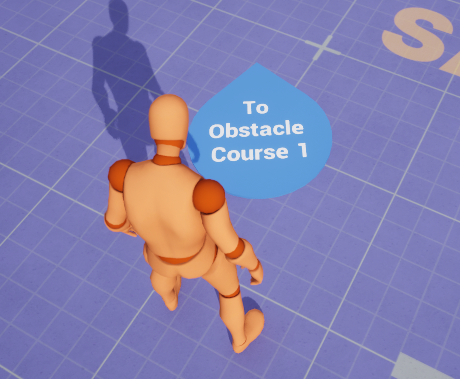
There is also a series of To Destination buttons that will teleport the player to specific sections of the obstacle course.
Importing Your Own Character
You can use the Animation Sample Project as a jumping off point to build a similar system in your own project. You can import your own character in the Animation Sample project to observe how the system performs with your Skeletal Mesh using the following steps.
Prerequisites
-
You have a Skeletal Mesh Character imported into the Game Animation Sample Project. For more information about importing Skeletal Mesh Characters, see the FBX コンテンツ パイプライン documentation.
-
You have created and set up an IK Rig asset for your imported Character. For more information about creating an IK Rig asset see the IK Rig documentation.
Implement Your Character
After importing your character and setting up an IK Rig asset. You can create an IK Rig Retargeter asset, to retarget the UEFN_Mannequin Skeletal Mesh character to your Skeletal Mesh character. For more information about creating an IK Retargeter asset, see the
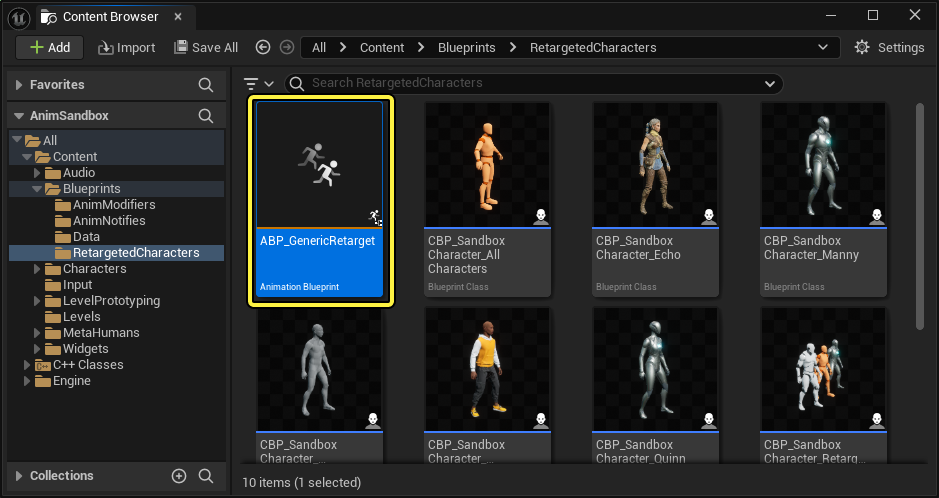
After setting up a IK Retargeter asset using the UEFN_Mannequin as the Source, and your character as the Target. Navigate in the Content Browser to Content > Blueprints > Retargeted Characters and open the ABP_GenericRetarget Animation Blueprint Asset.
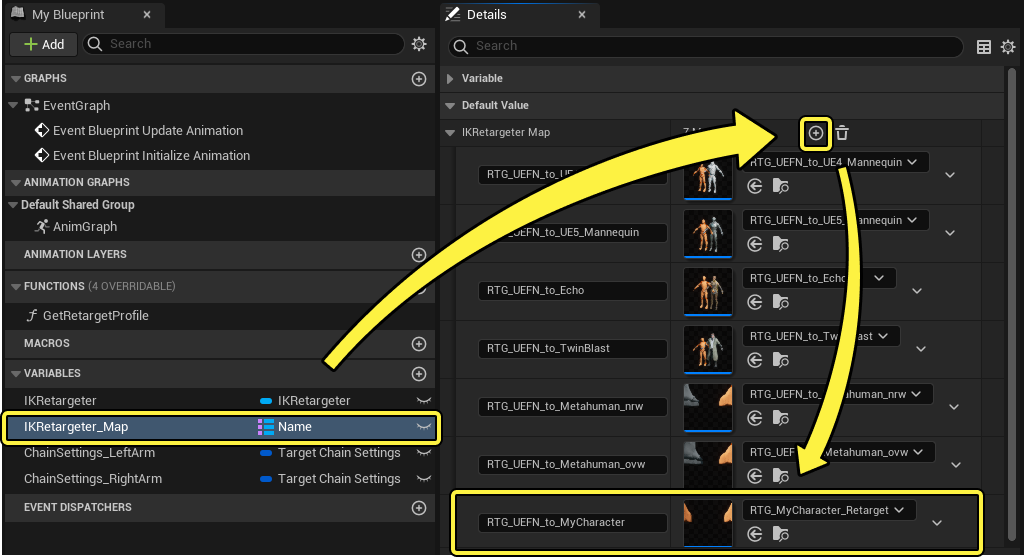
Select the IKRetargeter_Map variable in the My Blueprint Panel, and expand the Default Value array. Add a new element to the array using (+) Add, and in the new element property field, select your IK Retargeter asset. Then in the Name field of the array element input the following: RTG_UEFN_to_{your asset’s name}
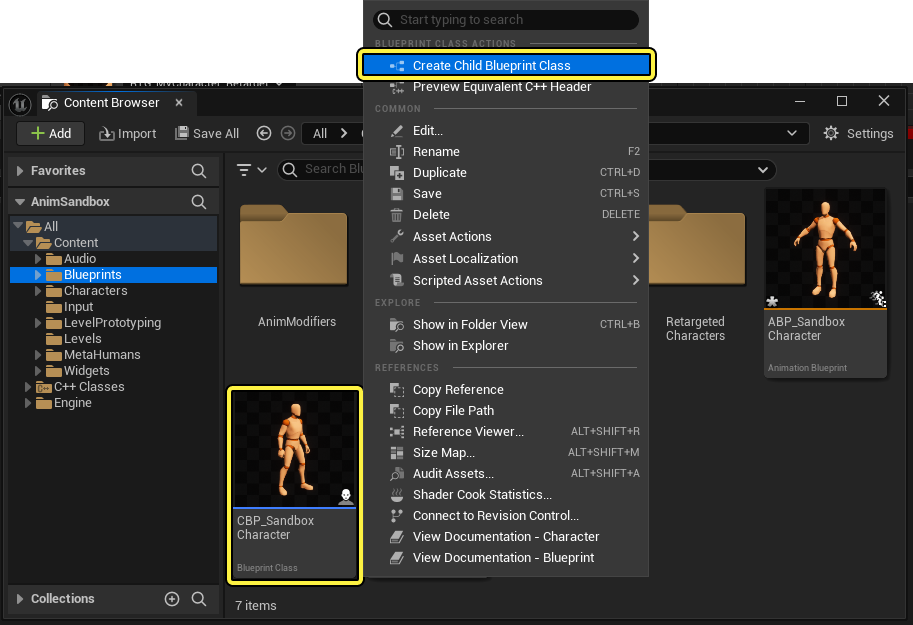
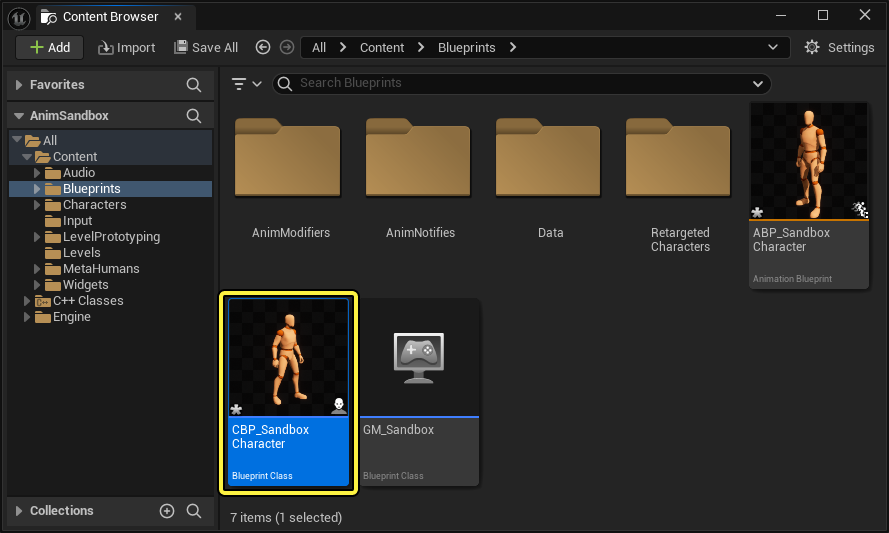
Next, navigate in the content browser to Content > Blueprints and create a new child blueprint of the CBP_Sandbox_Character Character Blueprint, by right-clicking the asset and selecting the Create Child Blueprint Class option. Rename the asset to CBP_Sandbox_{your character’s name}.
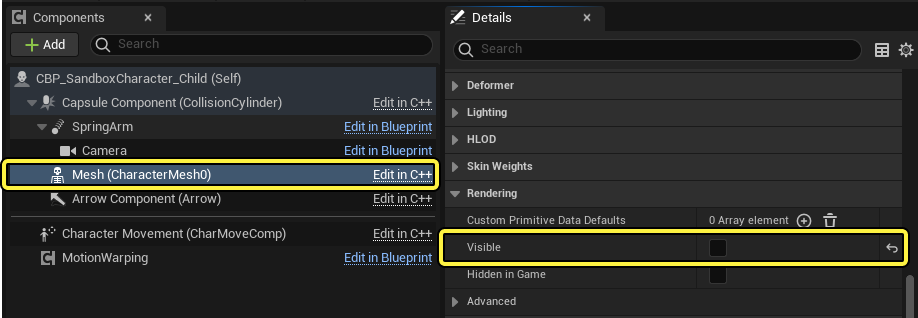
Select the Mesh (CharacterMesh) component in the Component panel and disable the Visible property in the Details panel.
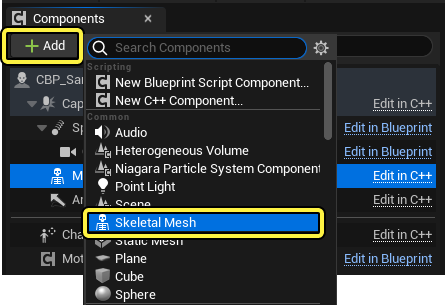
Then with the mesh component still selected use (+) Add to create a new Skeletal Mesh Component as a child component. You can name this child mesh component after your character.
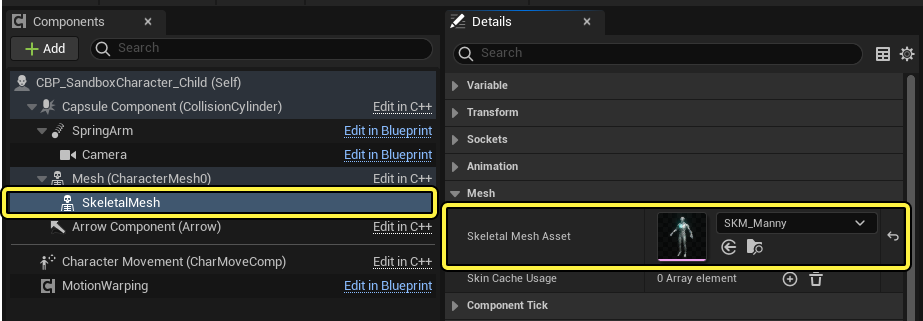
Select the new child mesh component, and set the Skeletal Mesh Asset property in the Details panel, to your character’s Skeletal Mesh.
You may need to adjust the character’s placement in the viewport using the transform tools.
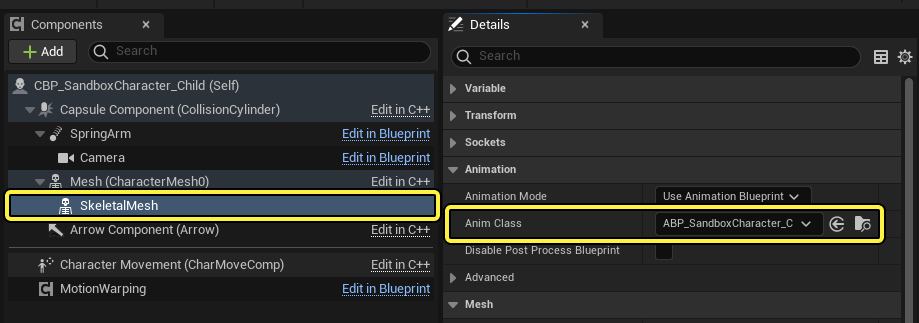
Select the new child mesh component, and set the Animation Blueprint to the ABP_SandboxCharacter using the drop-down menu.
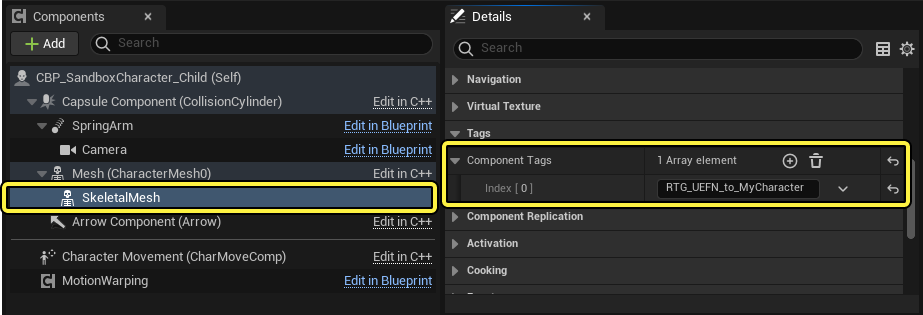
Then navigate to the Component Tag property and add a new array element using (+) Add. Then using the elements field, input the following: RTG_UEFN_to_{your asset’s name}
Add Your Character to the Game Animation Widget
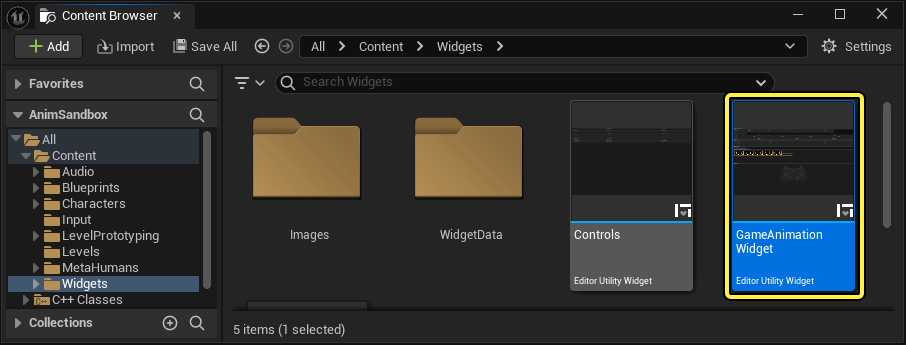
After setting up your character to work in the Game Animation Sample Project, you can add an instance of your character’s blueprint to the Game Animation Widget so your character can be selected and played in the project at runtime. To get started, navigate in the Content Browser to Content > Widgets, and open the Game Animation Widget asset.
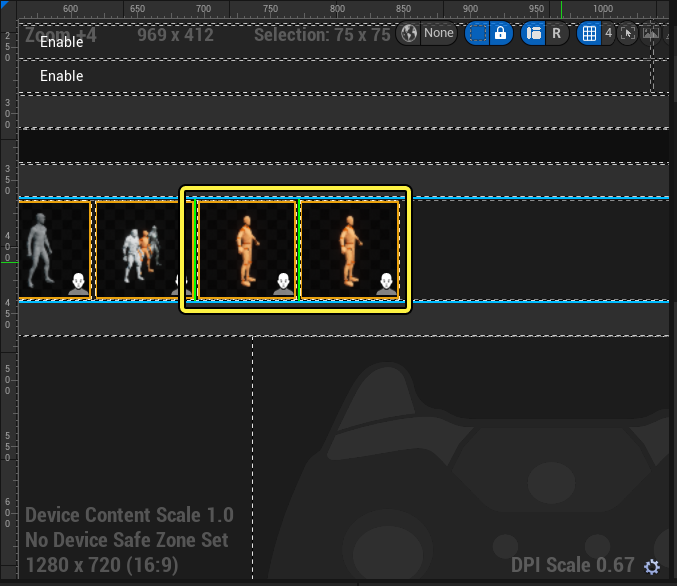
In the Widget Editor’s Designer panel, copy and paste one of the character icons to add a new button.
Then select the new icon in the Viewport, and open its Details panel. In the Object property, select your character’s Blueprint using the drop down menu.
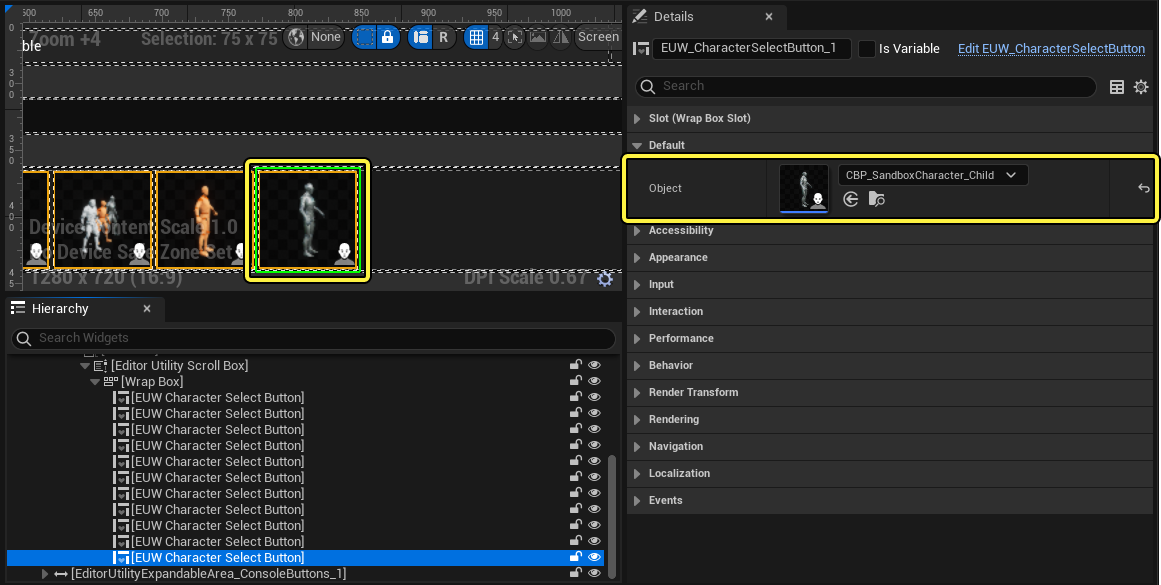
You can now access this button in the Game Animation Widget, when playing the project in the editor.
Importing a MetaHuman
MetaHuman characters require some additional steps to achieve accurate and high-quality results. For more information about importing a custom MetaHuman character into the Animation Sample Project, see the following documentation:
%samples-and-tutorials/engine-feature-examples/game-animation-sample/metahuman-game-animation-sample:topic%
Exporting Animations
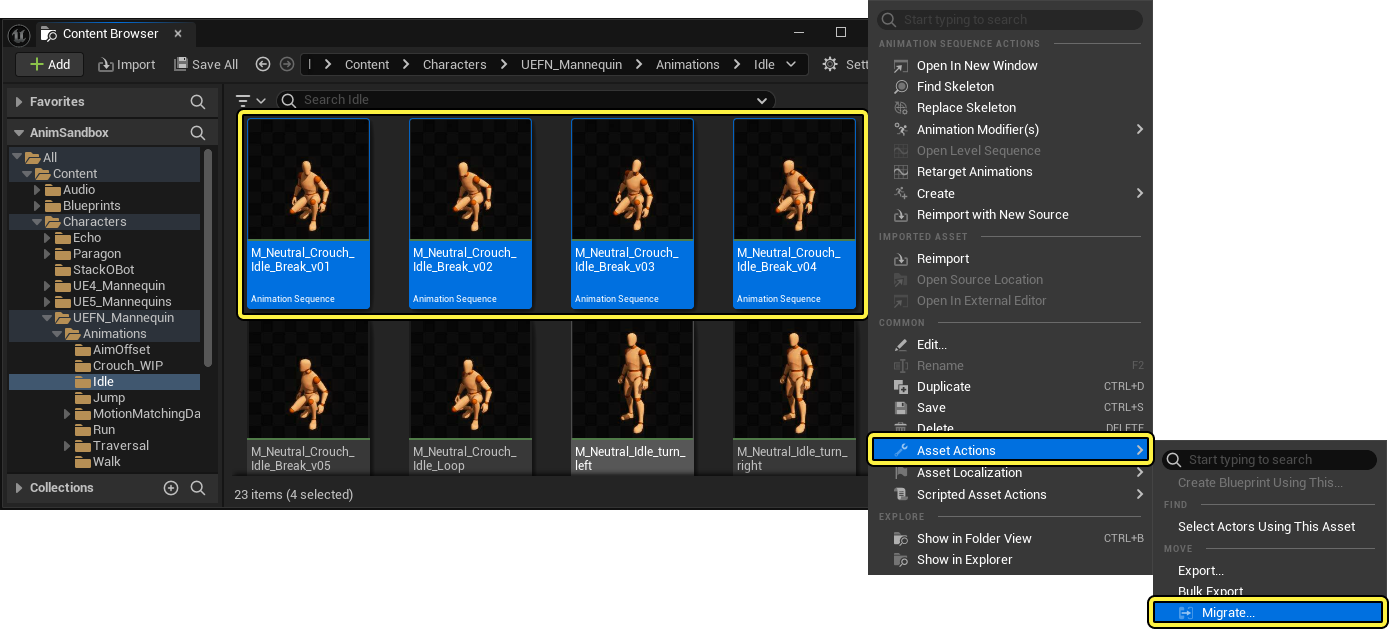
The Animation Sample project contains a robust suite of locomotion and climbing animation assets that you can use in your own project. Animation Sequence assets can be found in the following location, Content/Characters/UEFN_Mannequin/Animations and exported by selecting the desired assets and selecting the Migrate option in the right-click context menu. After selecting migrate you will be prompted to choose a project and select a saving location.
For more information about migrating assets between Unreal Engine projects, see the アセットを移行する documentation.
You can also use the Export option to save the Animation Sequence assets to your computer, outside of an Unreal Engine project.
Animation Blueprint
The primary Animation Blueprint that is used to drive the animation system for the player character can be accessed by navigating in the Content Browser to Content > Blueprints > ABP_SandboxCharacter. This blueprint is used to drive all of the selectable character meshes, and can be opened by double clicking the asset.
AnimGraph
The AnimGraph is the primary graph that controls the pose of the player character at runtime. This graph contains the Motion Matching node, as well as the supplementary animation nodes that are used to drive the characters animation. For more information about using the AnimGraph see the AnimGraph documentation, and for more information about debug and observation tools see the Animation Debugging documentation.
Motion Matching
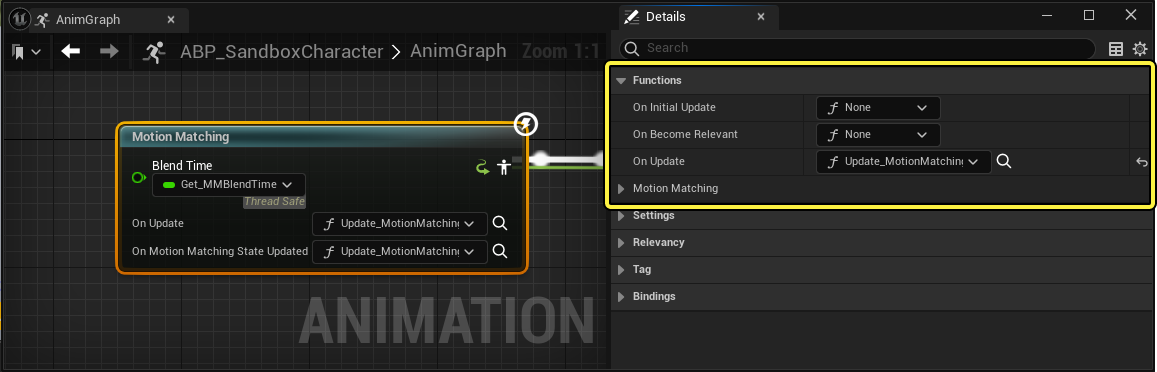
The animation system contained in the Animation Sample Project is built around Motion Matching, an animation system that queries a system, in this case the character’s movement model, to select animation poses from a database of animation assets to select the best pose to the character’s given position and momentum. The Motion Matching system uses the Motion Matching node in the character’s Animation Blueprint to select a pose at runtime.

The Motion Matching node uses an AnimNode Function to perform the requisite logic in order to make its selections. You can open the AnimNode function graph by selecting the node and using the eyeglass button adjacent to the Update Function labeled Update_MotionMatching in the details panel or on the node in the On Update field.
In the update function you can observe how first a Evaluate Chooser node is used to select the active Pose Search Database asset the Motion Matching node will use to select an animation pose from. This is to limit the data the Node must search in order to control the results the node can select, as well as improve the performance of the system.
You can access the Chooser Table asset by selecting the Evaluate chooser node, and double clicking the assigned asset in the Chooser Table property or by navigating to in the Content Browser to the following location Content/Characters/UEFN_Mannequin/Animations/MotionMatchingData/CHT_PoseSearchDatabases
After making the selection the Node also runs the Update_MotionMatchingPostSelection function to set the selected Pose Search Database asset as the active Database in the CurrentDatabase.
You can access the Pose Search Databases in the Content Browser by navigating to the following location:
Content/Characters/UEFN_Mannequin/Animations/MotionMatchingData/Databases
The node also uses a float variable input to set the blend time that will be used to transition between the previous pose and the selected animation pose.
Pose History Node
The Pose history node is the second Motion Matching related AnimGraph node that is critical for Motion Matching to function. This node contains a reference to the trajectory, or can optionally generate the trajectory itself, which is needed in order to match animation data against it, as well as a cache of previous pose data, which is also used by the Motion Matching query.
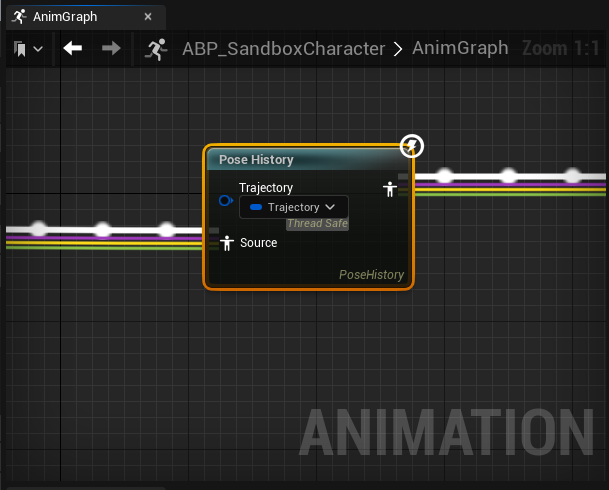
This node contains settings on how often poses are collected, how many previous poses can be stored, and a list of bones we want to sample from.
For more information about the Motion Matching and Pose History nodes, see the following documentation:
AnimGraph Comments
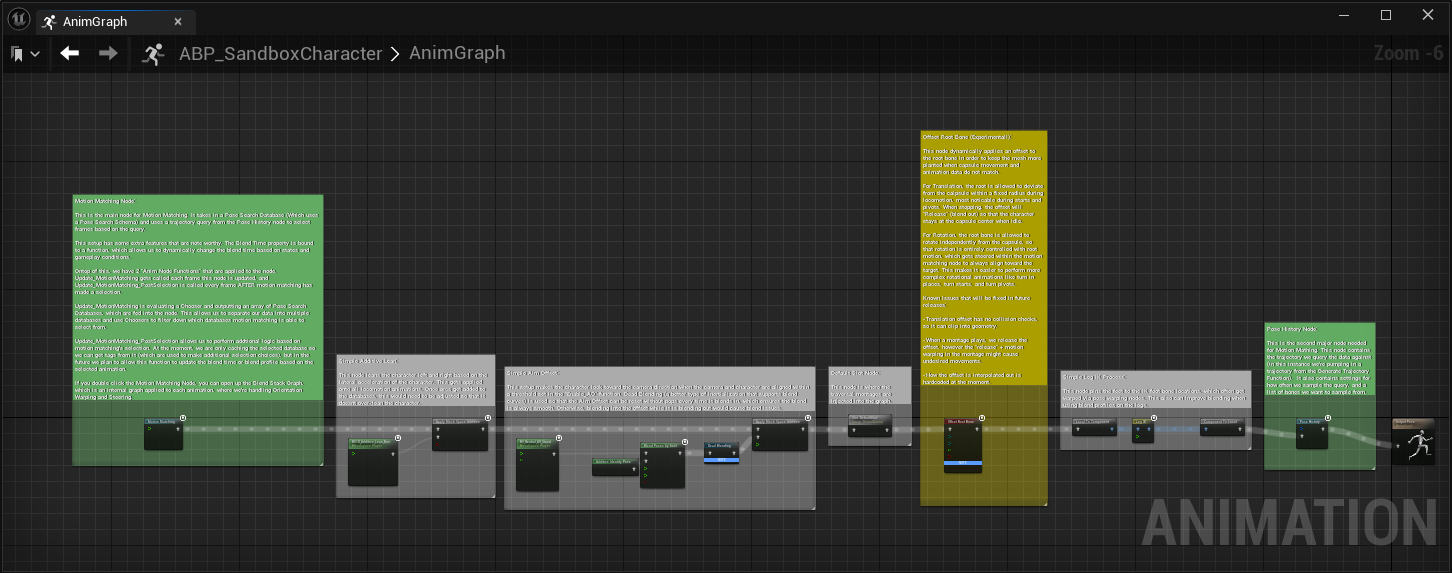
Here you can reference a transcription of the comments contained within the Animation Blueprint’s AnimGraph.
| Node | Comment |
|---|---|
| Motion Matching Node | Motion Matching Node: This is the main node for Motion Matching. It takes in a Pose Search Database (Which uses a Pose Search Schema) and uses a trajectory query from the Pose History node to select frames based on the query. This setup has some extra features that are noteworthy. The Blend Time property is bound to a function, which allows us to dynamically change the blend time based on states and gameplay conditions. On top of this, we have 2 "Anim Node Functions" that are applied to the node. Update_MotionMatching gets called each frame this node is updated, and Update_MotionMatching_PostSelection is called every frame AFTER motion matching has made a selection. Update_MotionMatching is evaluating a Chooser and outputting an array of Pose Search Databases, which are fed into the node. This allows us to separate our data into multiple databases and use Choosers to filter down which databases motion matching is able to select from. Update_MotionMatching_PostSelection allows us to perform additional logic based on motion matching's selection. At the moment, we are only caching the selected database so we can get tags from it (which are used to make additional selection choices), but in the future we plan to allow this function to update the blend time or blend profile based on the selected animation. If you double click the Motion Matching Node, you can open up the Blend Stack Graph, which is an internal graph applied to each animation, where we're handling Orientation Warping and Steering. |
| BlendSpace Node | Simple Additive Lean: This node leans the character left and right based on the lateral acceleration of the character. This gets applied onto all locomotion animations. Once arcs get added to the databases, this would need to be adjusted so that it doesn't over-lean the character. |
| Simple Aim Offset | Simple Aim Offset: This setup makes the character look toward the camera direction when the camera and character are aligned within a threshold set in the "Enable_AO" function. Dead Blending (a better type of inertialization that supports blend curves) is used so that the Aim Offset can be reset without pops every time it blends in, which ensures the blend is always smooth. Otherwise, blending into the offset while it is blending out would cause blend issues. |
| Default Slot Node | Default Slot Node: This node is where the traversal montages are injected into the graph. |
| Offset Root Bone Node | Offset Root Bone (Experimental!): This node dynamically applies an offset to the root bone in order to keep the mesh more planted when capsule movement and animation data do not match. For Translation, the root is allowed to deviate from the capsule within a fixed radius during locomotion, most noticeable during starts and pivots. When stopping, the offset will "Release" (blend out) so that the character stays at the capsule center when idle. For Rotation, the root bone is allowed to rotate independently from the capsule, so that rotation is entirely controlled with root motion, which gets steered within the motion matching node to always align toward the target. This makes it easier to perform more complex rotational animations like turn in places, turn starts, and turn pivots. Known Issues that will be fixed in future releases: -Translation offset has no collision checks, so it can clip into geometry. -When a montage plays, we release the offset, however the "release" + motion warping in the montage might cause undesired movements. -How the offset is interpolated out is hard-coded at the moment. |
| Leg IK Node | Simple Leg IK Process: This node pins the feet to the IK foot bone locations, which often get warped via pose warping nodes. This also can improve blending when using blend profiles on the legs. |
| Pose History Node | Pose History Node: This is the second major node needed for Motion Matching. This node contains the trajectory we query the data against (in this instance we're pumping in a trajectory from the Generate Trajectory Function). It also contains settings for how often we sample the query, and a list of bones we want to sample from. |
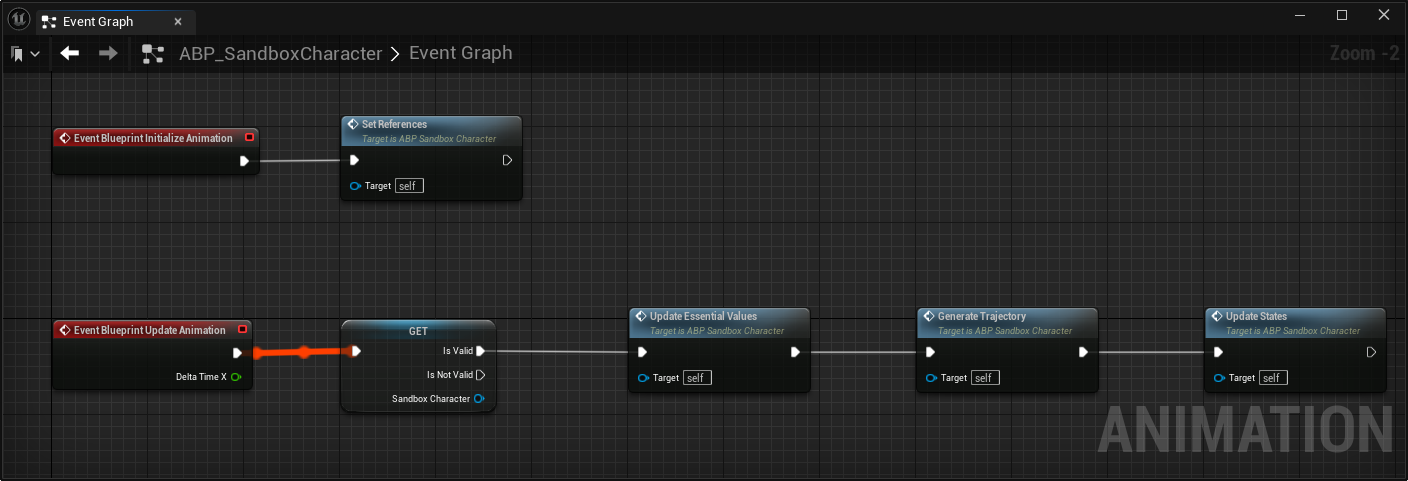
Animation Blueprint Event Graph
The ABP_SandboxCharacter blueprint uses the Event Graph to perform logic such as setting variables that the AnimGraph uses to generate the Animation Pose output.
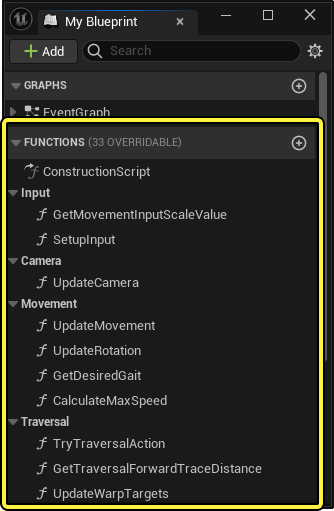
Animation Blueprint Functions
Here you can reference a list of the Functions contained within the player character’s animation blueprint:
| Function | Description |
|---|---|
SetReferences |
This function caches references to the CBP_SandboxCharacter blueprint and the Character Movement component for use across the Animation Blueprint. This also enables us to use Thread Safe Property Access calls. |
UpdateEssentialValues |
This function caches essential variable and gameplay data that is used across the project’s animation system such as the character’s transforms, movement speed and direction, as well as tags that categorize the gameplay state. |
GenerateTrajectory |
This function generates the character’s movement trajectory, which is the main component the Motion Matching system queries to match animation pose selections against. |
UpdateStates |
This function caches all of the important gameplay relevant states that the character is in as well as saves the last frame's value so that we can determine when the value has changed. It saves them into easy to read Enums for convenience, which are primarily used in the Motion Matching Chooser to filter out motion matching databases, so that only motions from the current gameplay state can be selected. |
IsMoving |
This function is used to set the Movement State Enum by looking at the character’s current and future velocities, which are determined by trajectory generation, to determine if the character is trying to move, will be moving in the future or trying to stop, or is stopped in the future. |
IsStarting |
This function is used to determine if the character is starting to move by checking if the future velocity is greater than the current velocity. If the current Database asset is a pivot database, this function will set the IsStarting variable to false. This prevents the Motion Matching system from interrupting a pivot, since the second half of a pivot is very similar to a start. |
IsPivoting |
This function is used to determine if the character is pivoting by checking if the character’s future trajectory is moving in a much different direction than the character’s current trajectory by checking if the change in direction is greater than a set threshold. The Rotation Modes have a different threshold, since 45 degree pivots work nicely during strafing, but are not necessary for Orient to Movement. |
ShouldTurnInPlace |
This function is used to determine if the character is turning in place by checking if the root bone rotation is different from the character’s capsule rotation. In this example project, if the rotation is greater than 50 degrees and the character is currently aiming, the character should be turned in place. We also allow turn in places to play if the character has just stopped, which gives us a "Stick Flick" behavior. Turn in place behavior during the aiming state is still WIP. Additional limits need to be applied to the steering or root offset node to prevent the character from lagging too far behind. |
JustLandedLight |
If the character has just landed and the land velocity was less than the heavy land speed threshold, play light land animations. |
JustLandedHeavy |
If the character has just landed and the land velocity was greater than the heavy land speed threshold, play heavy land animations. |
JustTraversed |
This function is used to select the tail end of traversal animations when blending back to locomotion. For example, if the MovingTraversal anim curve value is greater than 1, and the default slot is NOT active (slots are not active when blending out), the character must be blending out from a moving traversal action, therefore this function will return true, allowing for the Motion Matching system to select the end of traversal animation for a smother blend. |
ShouldSpinTransition |
If the root bone rotation and character’s capsule rotations are very different, this function will allow a spin transition animation to play. Spin transitions are locomotion animations that rotate the character while moving in a fixed world direction, and are useful when switching rotation modes. For example, if the character is running toward the camera using the Orient to Movement mode and then switching to strafe, this would require the character to spin 180 degrees very quickly. A spin transition animation would be an ideal transition for this gameplay scenario. Currently, we are using refacing starts in place of spin transitions. |
Get_OffsetRootRotationMode |
This function is used to determine the Offset Root Rotation mode. The mode is controlled using two Enums, which are set based on if we are currently playing a montage in the default slot. If there is a montage set in the default slot we do not want to maintain any rotational offset. The Release Enum essentially blends out any offset, after which it will be locked to the capsule rotation, just as it would be without a root offset node. The Accumulate Enum means the root will counter-rotate any changes to the capsule rotation, making it appear to rotate independently from the capsule, which allows root motion and steering to fully control its rotation. |
Get_OffsetRootTranslationMode |
This function is used to determine the Offset Root Translation mode. The mode is controlled by three Enums which are set based on a few character states. If we are currently playing a montage in the default slot, if we are in the air, or if we are not moving, we do not want to maintain any Translational offset. The Release Enum essentially blends out any offset, after which it will be locked to the capsule location, just as it would be without a root offset node. The Interpolate Enum means the root is allowed to deviate slightly from the capsule location based on root motion, but will always try to interpolate back toward center. This is helpful when the animation data and capsule movement are not perfectly matched, such as during starts, pivots, and other complex movements. |
Get_OffsetRootTranslationHalfLife |
This function controls the speed at which the Root Offset node can interpolate the root bone's translation. When stopped, we want to interpolate very quickly, so that the stop always ends at the capsule's center, but when moving, we allow for slightly smoother interpolation. |
Enable_AO |
This function enables the aim offset if the character is in strafe mode, and is currently aligned with the camera within a set threshold, but not when playing a montage in the default slot. |
Get_AOValue |
This function calculates the rotation difference between the character’s root bone and the camera’s control rotation. The difference is output to the aim offset blendspace. |
CalculateRelativeAccelerationAmount |
This function calculates the character’s Relative Acceleration Amount. This value represents the current amount of acceleration or deceleration relative to the actor rotation. It is normalized to a range of -1 to 1 so that -1 equals the Max Braking Deceleration, and 1 equals the Max Acceleration of the Character Movement Component. |
GetLeanAmount |
This function uses the character’s Relative Acceleration Amount (calculated from the CalculateRelativeAcceleractionAmount function) and scales its value by the current speed to determine how far the character should lean with the additive lean blendspace. |
Update_MotionMatching |
This Anim Node Function is called whenever the Motion Matching node is updated. It evaluates a Chooser asset which returns an array of Pose Search Database assets based on the current gameplay context. This allows us to perform higher level filtering, giving us more control over what animations the motion matching system is able to select from. For example, we only search from the walk databases when the character is walking (controlled via the player’s input), preventing motion matching from selecting runs when the character is trying to walk. |
Update_MotionMatching_PostSelection |
This function is called after the Motion Matching node has selected an animation. In this case, we cache the database the selected animation is in, in order to grab the tags in the EventGraph (due to a thread safety issue). For more information about how the system caches this data, see the CurrentDatabaseTags function. In the future, we plan to use this function to control additional things such as blend time and blend profiles based on the selected animation. |
Get_MMBlendTime |
This function is used to change the blend time of the Motion Matching node, based on the current and previous states. In the future, we plan to allow blend times to be more directly set from the chosen databases. |
Get_MMInterruptMode |
This function controls the Interrupt Mode of the Motion Matching node by determining whether the Motion Matching will force a blend into a new database if the selectable databases have changed, or if it will wait until it finds a match that costs less than the currently playing animation. By default, we do not interrupt, however, whenever a core state has changed, we know we want to start playing a new animation, therefore the system is built to force an interrupt. This prevents the Motion Matching system from sticking in the idle animation playback if the character has started moving, or staying in a cycle animation if the character wants to stop, which can happen based on the Continuing Pose Bias tuning. Essentially, this keeps Motion Matching responsive to changes in core states. |
Enable Steering |
This function determines if the character can be steered by checking if they are moving or in the air. This prevents idle animations from getting steered, which could cause sliding. |
GetDesiredFacing |
This function calculates a target for the steering Blendspace node’s rotation. This target is calculated using the future facing direction from the predicted trajectory. This allows the steering node to rotate toward a future direction, rather than always steering toward the current actor rotation, which could cause it to fall too far behind. |
Character Blueprint
The Character Blueprint is the primary blueprint for controlling the rest of the player character’s logic and functions.
The Character Blueprint contains the logic that controls the character’s movement and game play actions, as well as passing valuable data about what game state the character is in, such as when the character is jumping, landing or performing a traversal action, to the Animation Blueprint to make Pose Search Database selections.
For more information about how to set up inputs using Unreal Engine’s Enhanced Input system, see the Enhanced Input documentation.