The Color Grading panel is a dedicated interface for manipulating colors in your scenes. It uses actors that can perform color grading operations, such as Post Process Volumes and Color Correction Regions.
You can use this pane to configure color grading properties and settings directly, instead of through any individual actor’s Details panel. This should make the configuration more straightforward for artists.
Color Grading Panel Interface
You can open the Color Grading panel from the main menu of the editor by selecting Window > Color Grading. This panel opens at the bottom of the level viewport.
The Color Grading panel interface includes the following:
- Toolbar
- Object Mixer Panel
- Color Grading Properties
Toolbar
You can use the Toolbar to configure various different elements for your scene.
From the toolbar, you can perform the following actions:
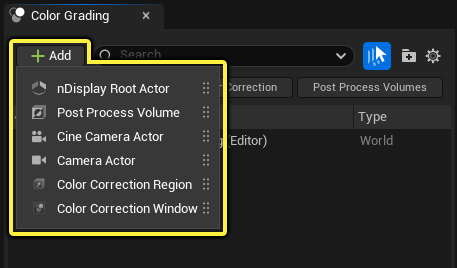
- Add color grading-capable actors to the scene.
- Filter and search for color grading-capable actors by name.
- Toggle sync selection between the Outliner and Object Mixer panel for actors.
- Add folders to organize actors in the Object Mixer.
- Add and Manage Collections for color grading-capable actors.
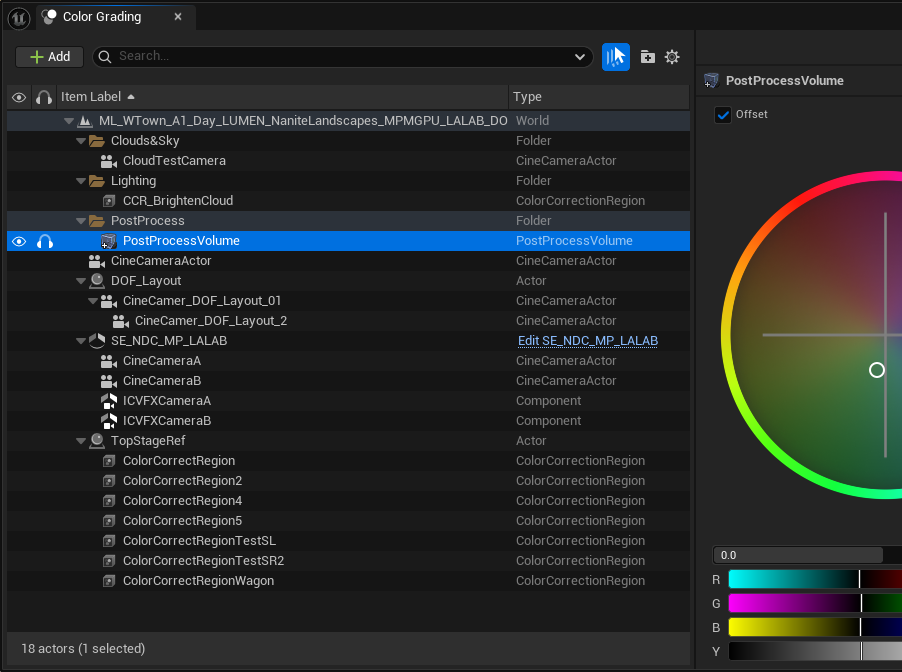
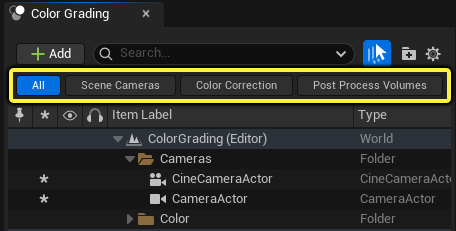
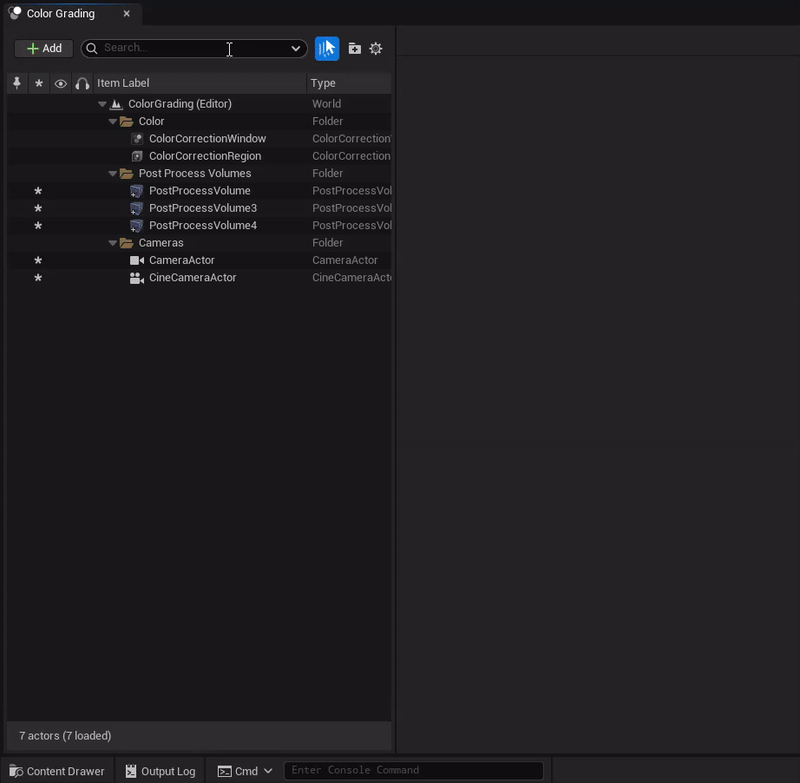
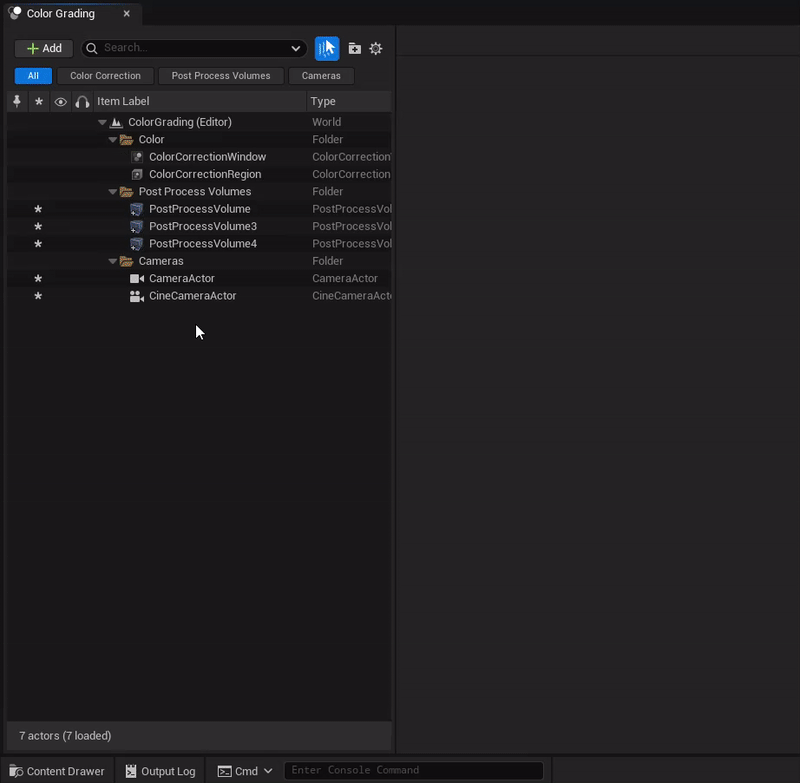
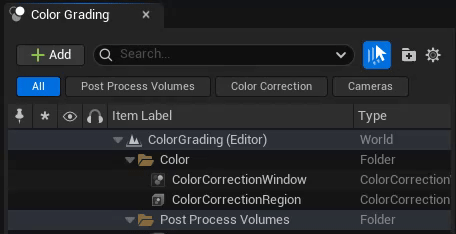
Object Mixer Panel
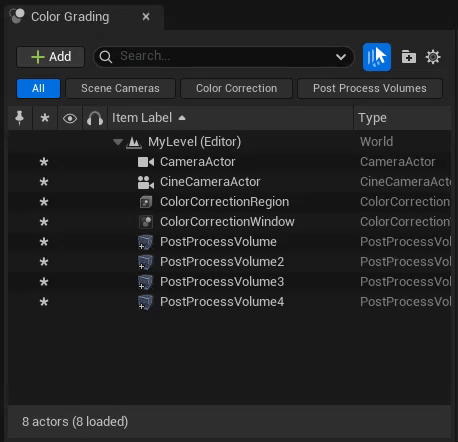
The Object Mixer lists all types of actors within the scene and levels that have color grading controls. Actors within this list can be parented and grouped within folders.The folders mirror how the actors are displayed in the Outliner list.
The following types of actors are supported in the Object Mixer list:
- Post Process Volume
- Cine Camera Actor
- Camera Actor
- nDisplay Root Actor
- Color Correction Region
- Color Correction Window
Some actor types only become available when their plugin is enabled for the project. For example, the nDisplay plugin must be enabled for the nDisplay Root Actor type to show up in the list. You can enable plugins from the editor’s main menu by selecting Edit > Plugins.
From this panel, you can view information and perform the following actions:
- The sorting columns can be arranged in ascending or descending order.
- Toggle actions for pinning, actor visibility, and isolating actors.
- Identify objects that have changes that are yet to be saved.
- Use the settings menu to show / hide list items.
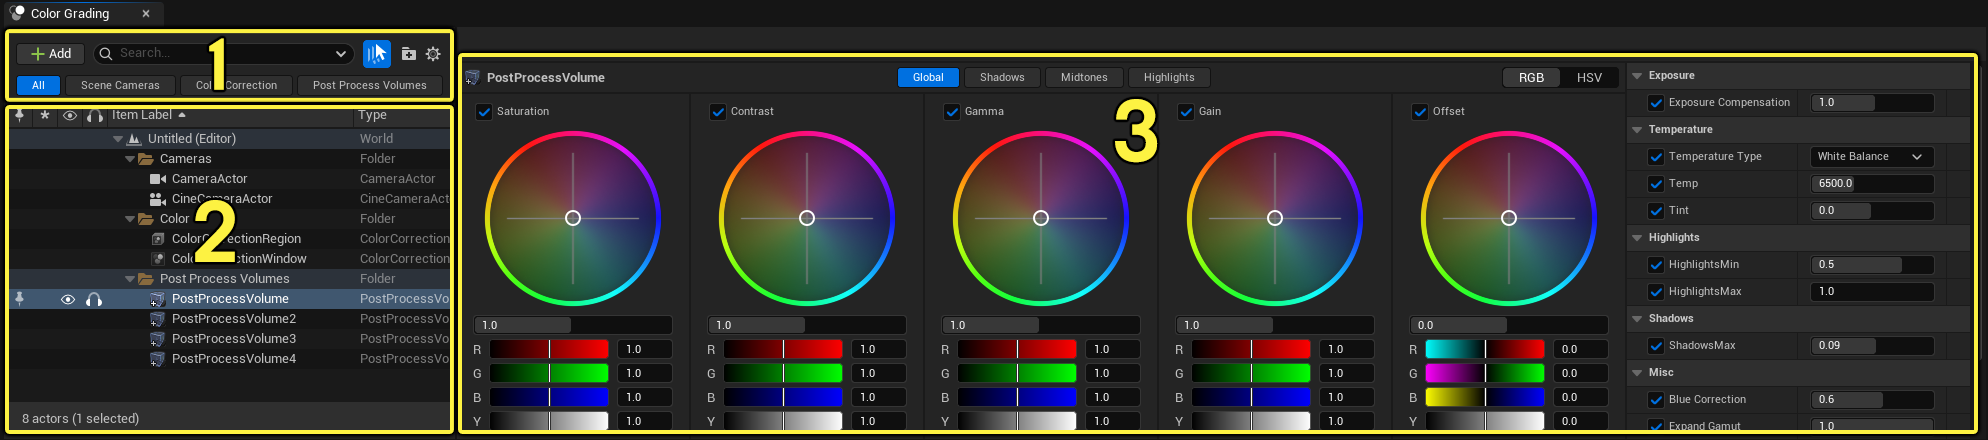
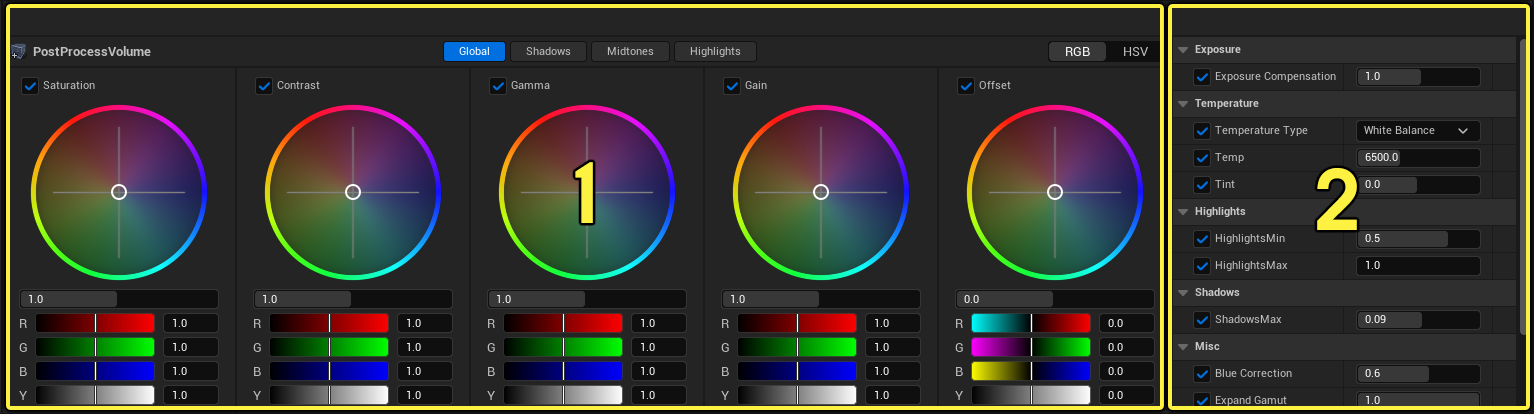
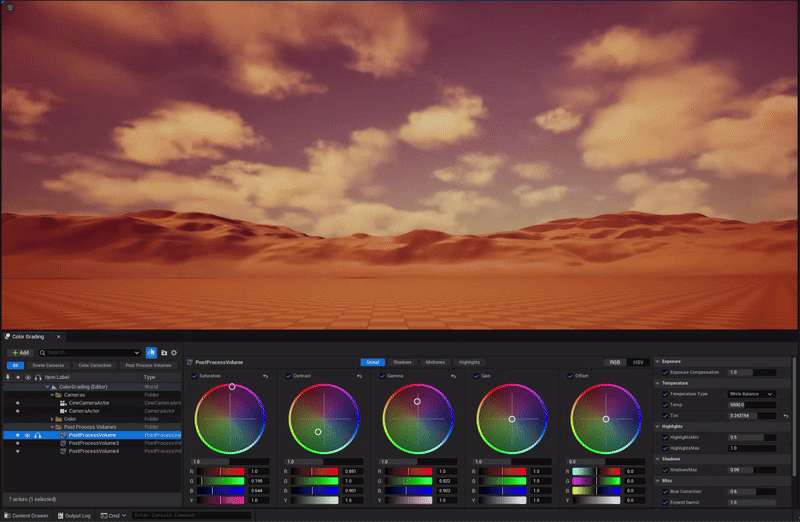
Color Grading Properties
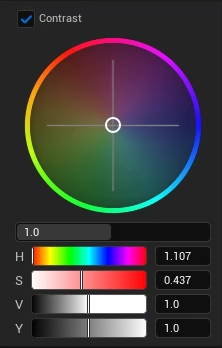
The primary portion of the Color Grading panel displays the tonal color grading properties and their color wheels with channel values. These settings are often found in the Details panel of any actor that you can perform color grading on. The color grading properties are shown when you select a supported color grading actor type in the Object Mixer panel or the Outliner.
| Color Grading Panel and additional properties. | Color Grading properties of a Post Process Volume found in the Details panel. |
Click images to view full size.
The interface can be broken into two parts:
- The Color Grading panel with tonal ranges, color wheels, and value sliders.
- Color grading property overrides.
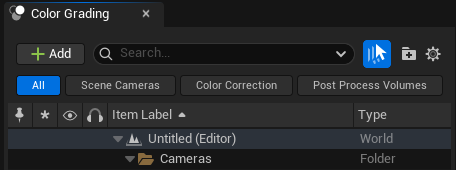
The color grading panel has the following properties:
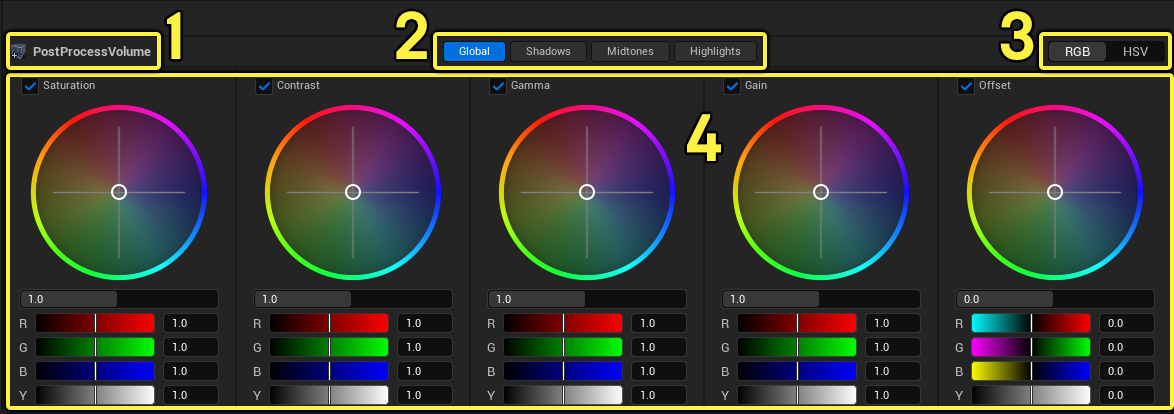
- Name of the currently selected actor that can be color graded.
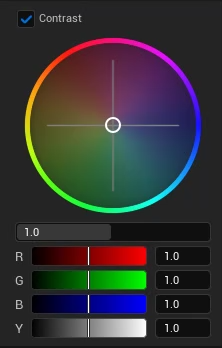
- A selection of Tonal Ranges with their own color grading properties for Saturation, Contrast, Gamma, Gain, and Offset.
- Color model selection to display color values in RGB (Red, Green, Blue) or HSV (Hue, Saturation, Value).
- Color wheels and their value sliders.
Each Tonal Range (2) for Global, Shadows, Midtones, and Highlights has their own Color Wheels (4) for Saturation, Contrast, Gamma, Gain, and Offset. Each of these color wheels has their own value sliders and is specific to their tonal range.
When you select a color model (3), the value sliders change to match the selection. You can see an example of this in the table below.
 |
 |
| RGB Color Model | HSV Color Model. |
To the right of the color wheel and sliders are the general property overrides panel that includes general color grading properties:
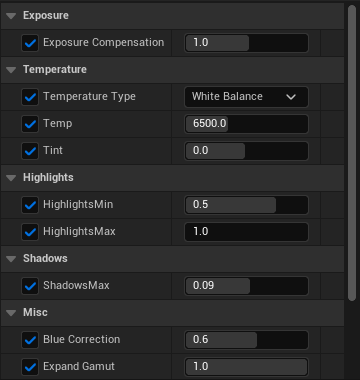
For more information on these settings and using color grading in your project, see Color Grading Settings.
Managing Color Grading Actors
The Color Grading panel is where you can manage and edit all eligible actors in your scene.
Filtering Color Grading Actors
Use the Search Filter at the top of the Object Mixer to filter actor types that support color grading.

For large scenes with many color grading-capable actors, you might be able to speed up your workflow by filtering them with search
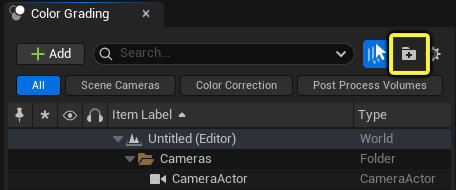
Add Color Grading-Capable Actors
You can use the Add (+) button to add color grading-capable actors to the scene from this panel.
Sync Selection
The Sync Selection toggle synchronizes selected actors in the Object Mixer panel with the level Outliner.
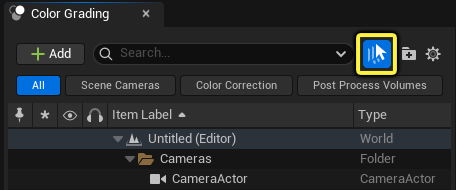
When enabled, the Color Grading panel and the Outliner act as one. This means that selected objects that have color grading properties are selected in both of these panels.
When disabled, each panel acts individually of the other by only selecting items within their own panel. Disabling sync selection is useful when you want to keep a color grading-capable actor selected in the Color Grading panel but also want to work within your scene to make other changes separately from color grading.
The Sync Selection toggle has accompanying functionality with the Alt + Click hotkey. When enabled, use this hotkey to only select items from the panel in which you are selecting an actor. When disabled, use this hotkey to sync selection in both panels.
Organizing the Hierarchy
The Object Mixer’s list of actors can be organized with folders, actor parenting, or both.
The Add Folder icon in the toolbar creates a new folder for the selected actor in the Object Mixer. This icon will not add empty folders to the Object Mixer panel.
You can parent actors in the list by dragging and dropping them onto one another. The Outliner mirrors any parent-child organization.
When a folder is left empty by moving or reparenting an actor, the folder is removed from the Object Mixer panel but not from the Outliner.
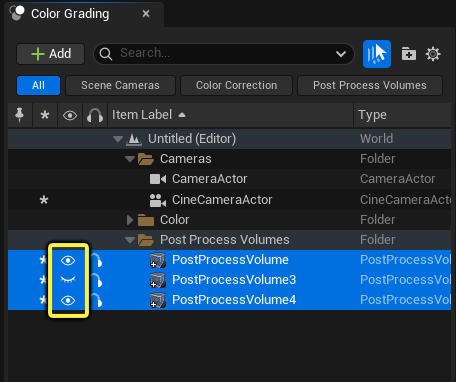
Actor Visibility
You can toggle the Visibility of any color grading-capable actors by clicking the Eye icon next to their listed name in the Object Mixer. This sets whether this actor is visible in the scene or is muted. An icon of an open eye indicates that the actor is visible, and an icon of a closed eye indicates that it is muted in the scene. You can use this workflow to inspect particular parts of your scene, without making actual changes to it.
Actor Isolation
You can toggle the Solo option for any color grading-capable actors by clicking the Headphones icon next to their listed name in the Object Mixer.
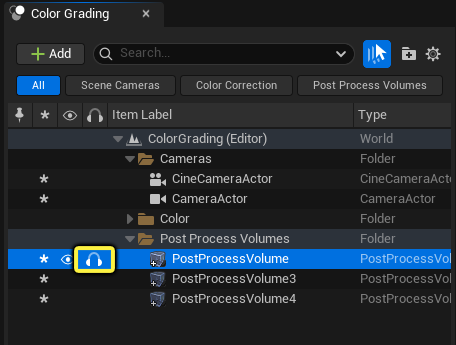
Toggling the Solo icon disables visibility of all other color grading actors in the Object Mixer, while leaving only the selected color grading actors visible. You can use this workflow to inspect particular actors on their own in your scene.
Settings Menu
The Settings menu contains configurable options for how actors are displayed in the Object Mixer panel. You can open this menu from the toolbar by clicking on the Gear icon.
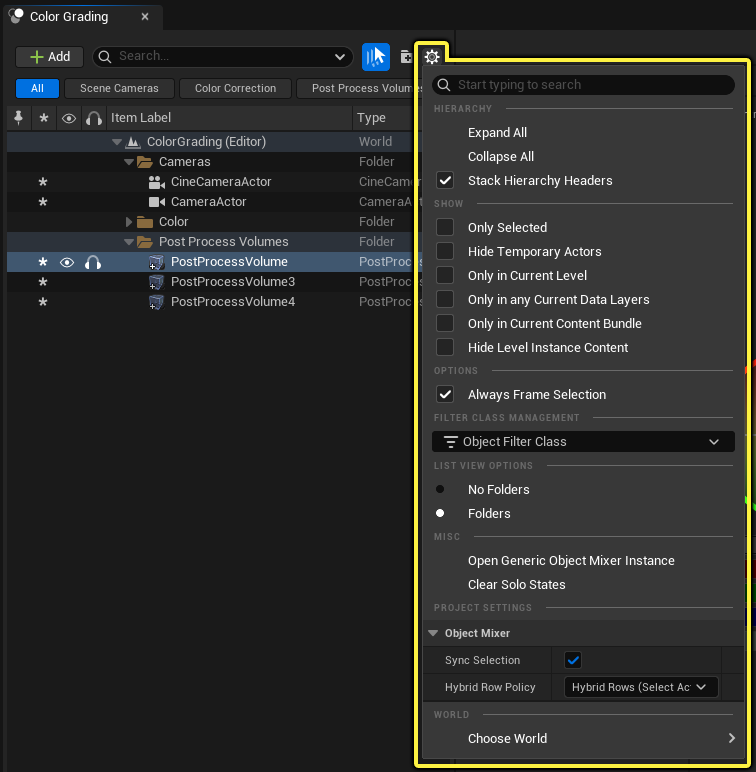
The primary features of this menu are:
- Settings to expand and collapse the Object Mixer hierarchy.
- Show / Hide options for actors in the Object Mixer panel.
- Whether to show folders in the Object Mixer panel.
- Selection options for different worlds (levels) to display only actors from those levels when using World Partition.
Working with Color Grading Collections
Collections serve as a way to organize your assets into groups of user-defined sets. In the Object Mixer panel, you can add similar or frequently edited actors to groups for quicker access to their properties. For editing purposes, you can group Actors in the Object Mixer into individual or multiple collections.
All color actors that are eligible for color-grading listed in the Object Mixer belong to a default collection called All. This collection category doesn’t appear until a custom one is created, and it cannot be edited or removed.
Creating a Color Grading Collection
To create a collection:
- Select one or more actors listed in the Object Mixer panel.
- Right-click the actors you want to create a collection for, and hover the mouse over Select or Add Collection in the context menu.
- In the text field, enter a name for this collection.
- Press Enter to create the collection.
Newly created collections appear below the search filter in the toolbar and just above the Object Mixer sorting columns. There is no limit to the number of collections you can create.
Viewing a Color Grading Collection
To view a collection, click on its name in the Collections area of the toolbar. When you select the collection, only the color grading-capable actors in the collection appear. The All collection restores all actors to the Object Mixer list.
Adding and Removing Actors from a Color Grading Collection
You can add and remove eligible actors to a collection using the right-click Context Menu.
- Select one or more actors listed in the Object Mixer panel.
- Right-click the actors, and hover the mouse over Select or Add Collection in the context menu.
-
In the list of collections, you can:
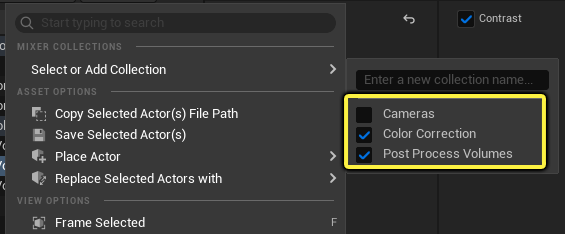
- Add an actor to a collection by placing a checkmark in the box next to the named collection.
- Remove an actor from a collection by unchecking the box next to a named collection.
Actors are not exclusive to a single collection and can be added from any number of collections.
Deleting, Duplicating, and Renaming a Color Grading Collection
In the toolbar where all the Collections are listed, right-click on any collection to open its context menu. The options to Delete, Duplicate, or Rename the collection appear.
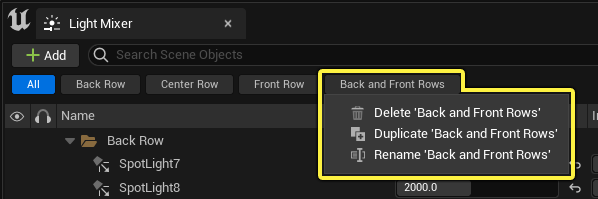
The All collection is the only one that cannot be deleted, duplicated, or renamed. Right-clicking it does not show any options.
Reordering Color Grading Collections
You can reorder any listed collection by left-clicking on it and dragging it to a new position within the collection row. The All collection cannot be moved.
nDisplay with Color Grading
There are additional color grading capabilities for nDisplay content when used with the Color Grading panel.
These options only become available when the nDisplay plugin is enabled for the project. You can enable it in the Plugins browser. Open it from the editor main menu under Edit > Plugins.
Alternatively, if you want to see a project already set up using nDisplay and ICVFX with the Color Grading panel, you can create an InCameraVFX template project from the project browser under the Film / Video & Live Events tab.
Per-Viewport and Per-Node Color Grading
You can apply color grading separately to both the Outer Viewports and the In-Camera VFX (ICVFX) Camera. Color grading is additively layered with per-viewport and per-node groupings with nDisplay.
When you select content that supports nDisplay in the Object Mixer, the color grading panel includes additional options in the top-left above the color wheels.
Per-Viewport Grouping
When you select the Display Cluster Root Actor (DCRA) in the Object Mixer panel, an additional option becomes available at the top of the color grading panel with the Entire Cluster button, checkbox, and dropdown viewport selection.
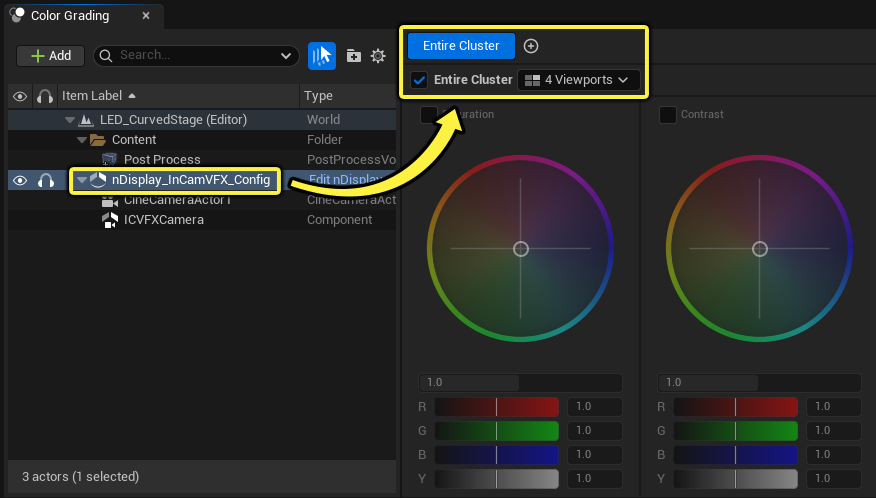
You can use the Add (+) icon to create a new per-viewport grouping. A Per-Viewport Settings category becomes available on the right side of the color grading panel.
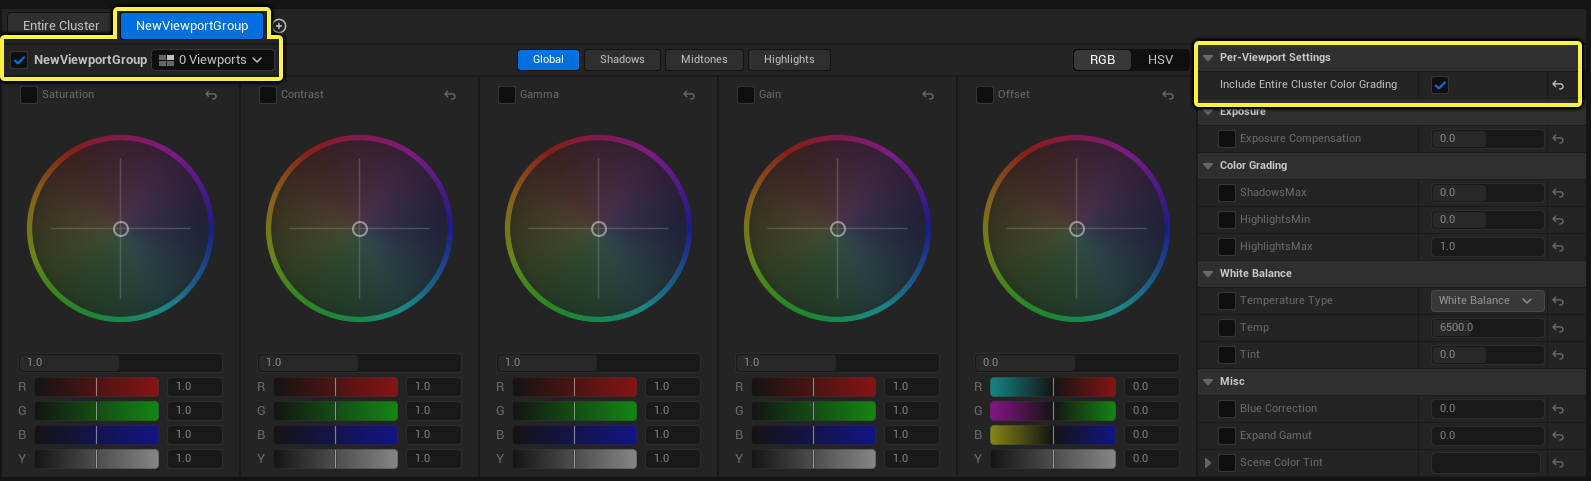
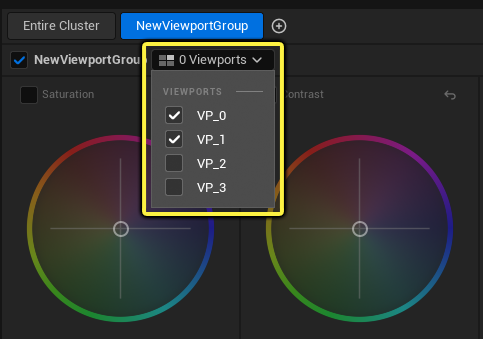
With the added per-viewport grouping, you can use the viewports dropdown to select from available viewports for this group to use. You can choose one or more viewports in the list by placing a check by their names.
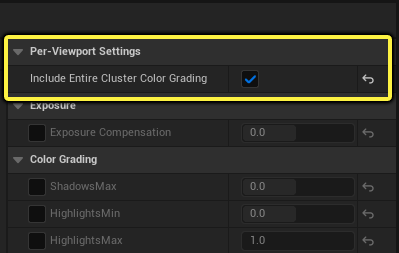
The properties panel on the right-side of the color grading panel now includes a Per-Viewport Settings category. You can opt in or out of including All Nodes properties from the Outer Viewports, since the ICVFX Camera displays on top of them at all times.
Per-Node Grouping
When you select an ICVFX Camera component in the Object Mixer panel, an additional option becomes available at the top of the color grading panel with the All Nodes Color Grading button, checkbox, and dropdown node selection.
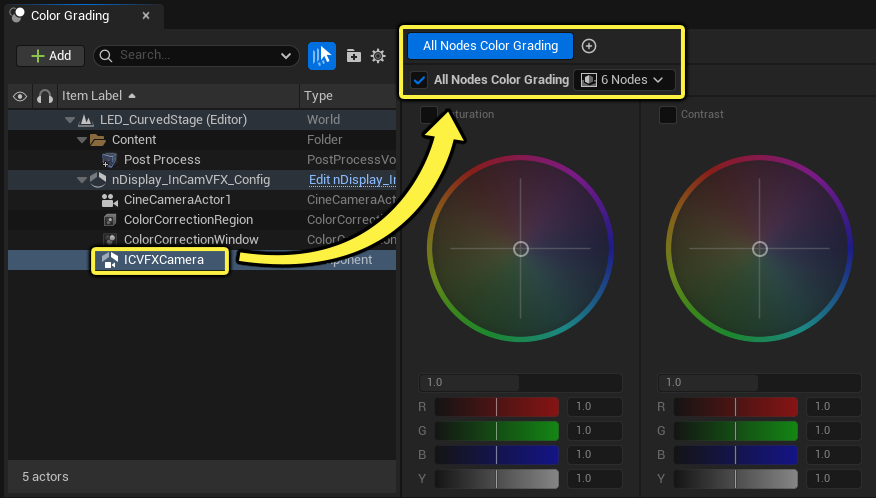
You can use the Add (+) icon to create a new per-node grouping and a Per-Node Settings category becomes available on the right side of the color grading panel.
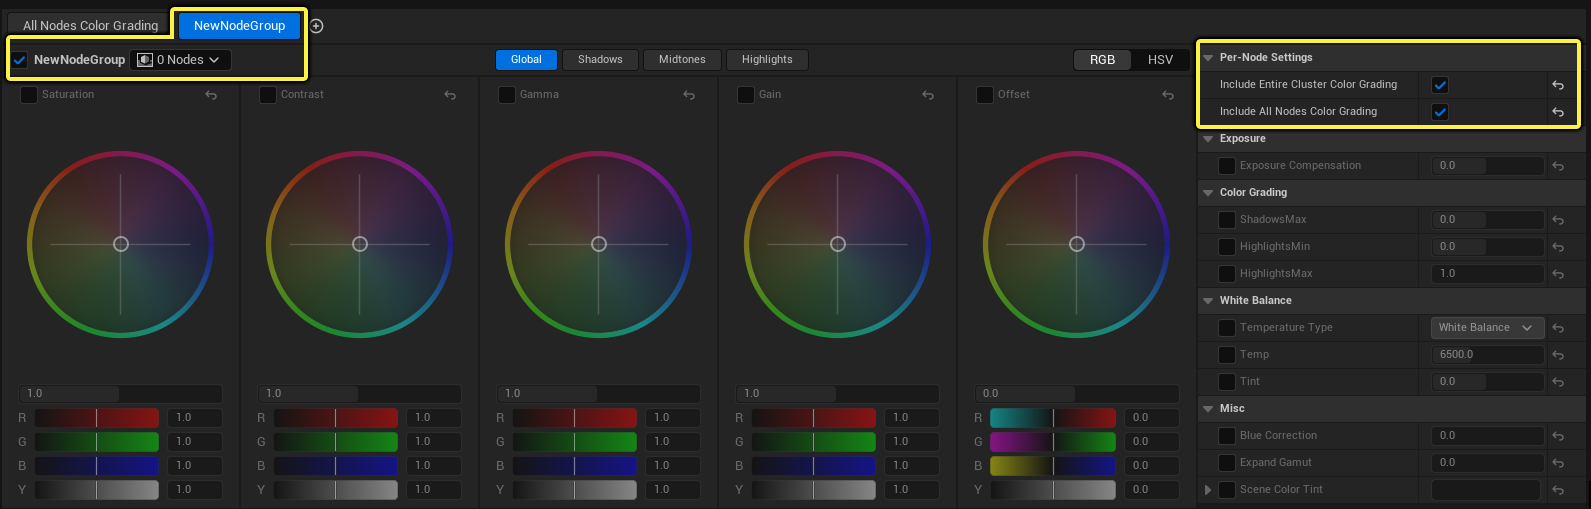
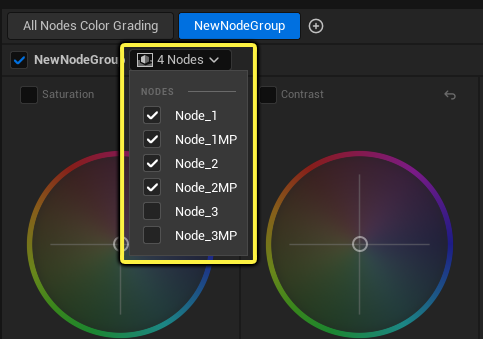
With the added per-node grouping, you can use the nodes dropdown to select from available nodes for this group to use. You can choose one or more nodes in the list by placing a check by their names.
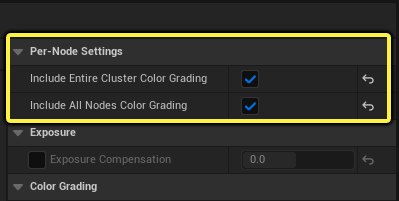
The properties panel on the right-side of the color grading panel now includes a Per-Node Settings category. You can opt in or out of including All Nodes properties.
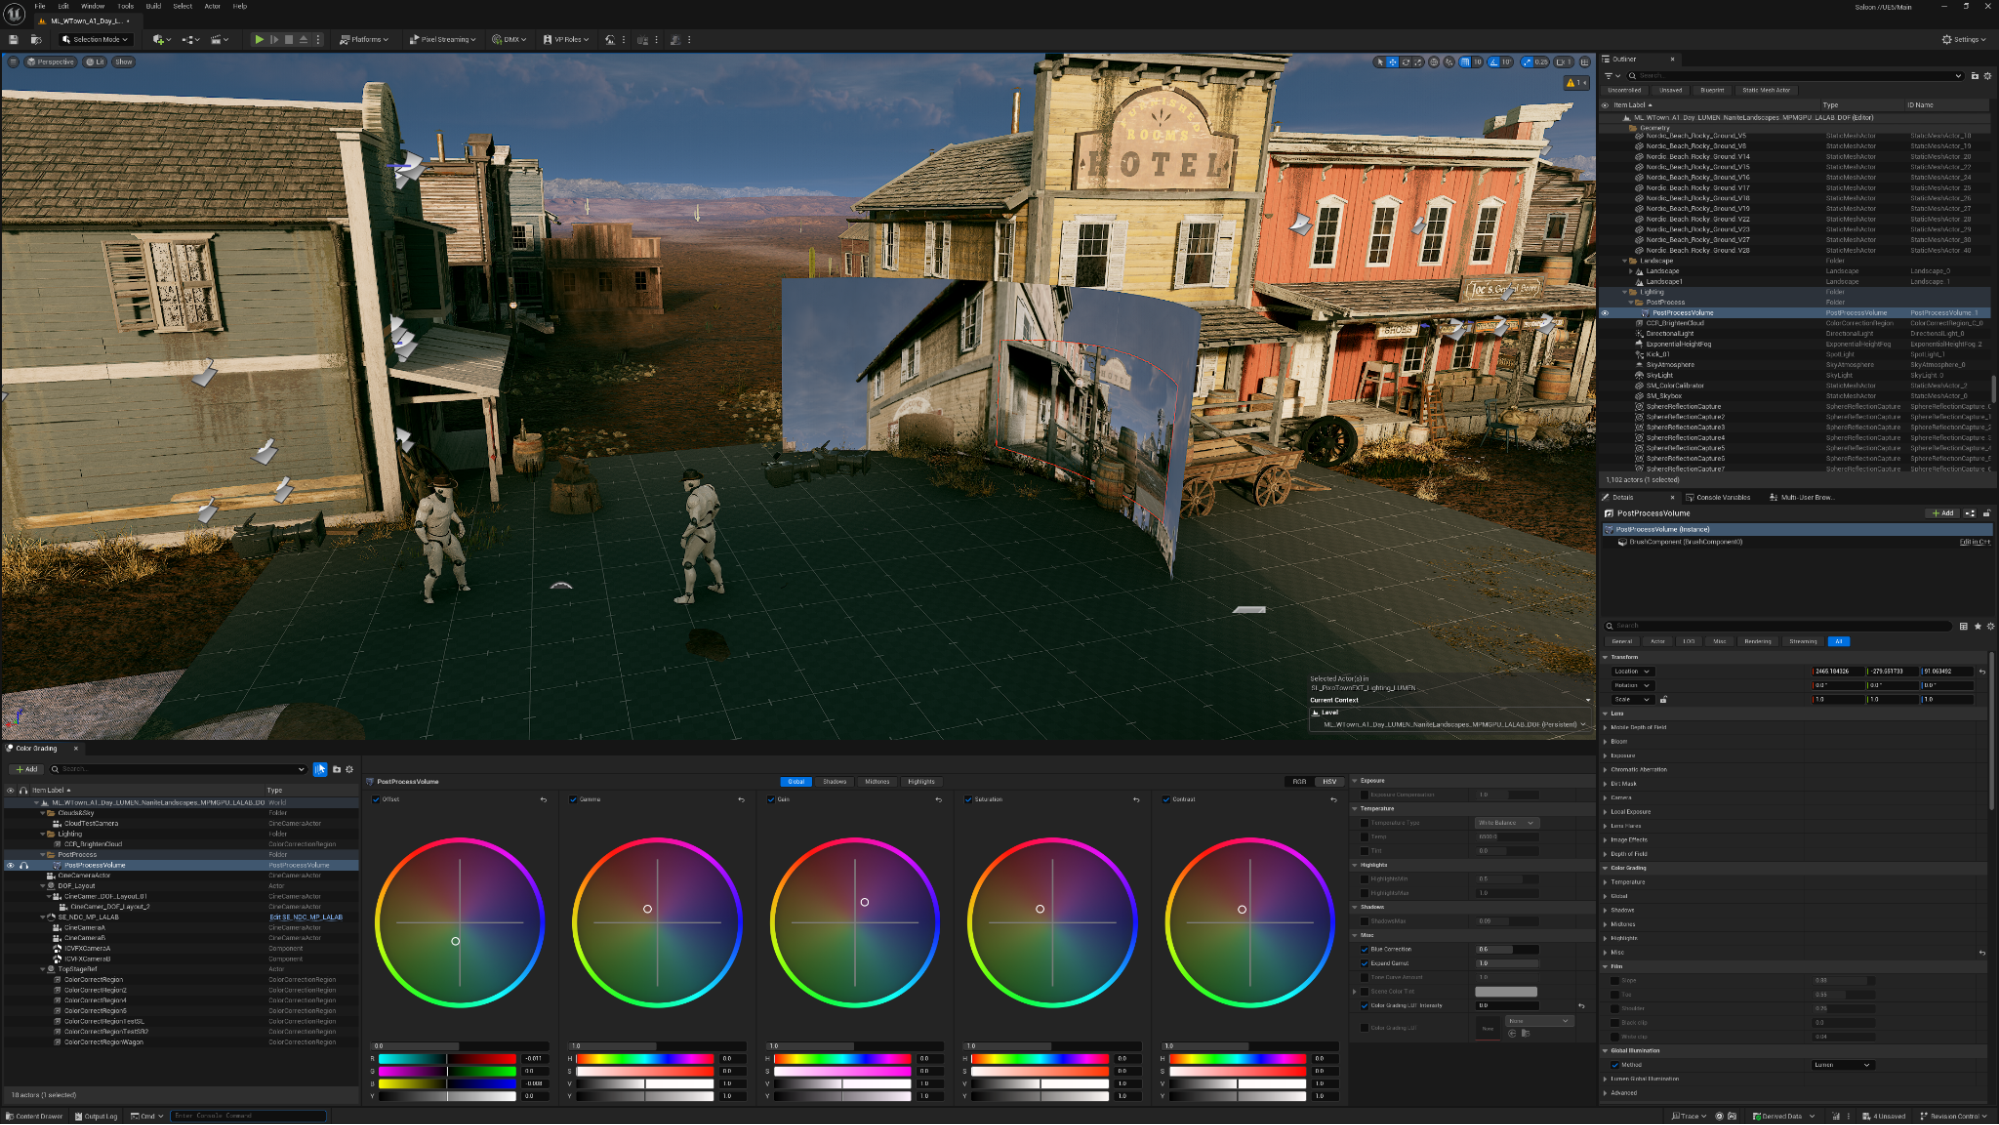
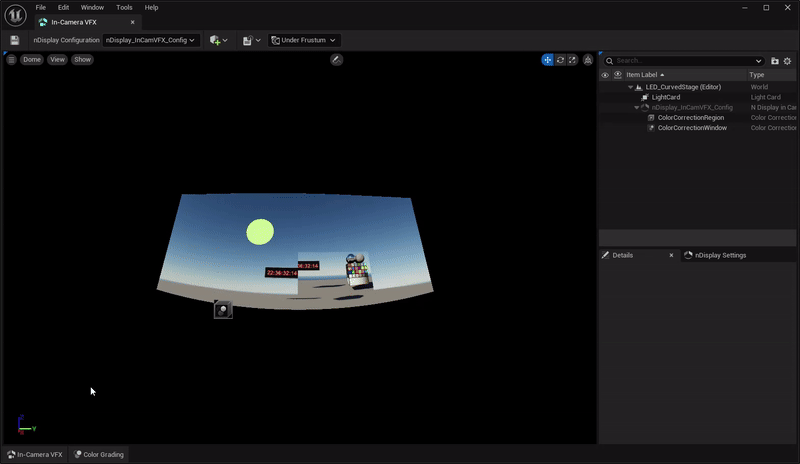
In-Camera VFX Editor
Since color grading is an integral part of the stage workflow for In-Camera VFX (ICVFX) virtual production, the color grading panel is present in the ICVFX Editor as a drawer that can be summoned and dismissed using the hotkey CTRL + Spacebar or by clicking the Color Grading tab at the bottom of the editor.
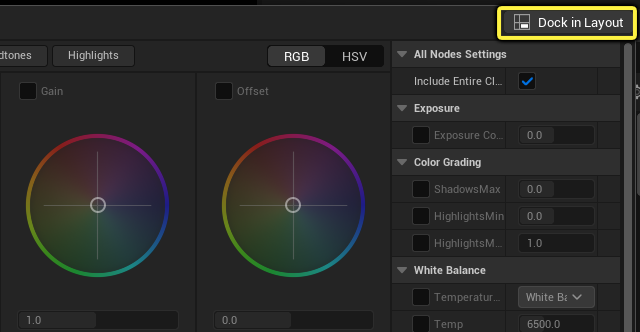
The color grading panel is a dockable panel in the ICVFX editor. You can click Dock in Layout in the top-right of the panel to have it automatically dock below the viewport.