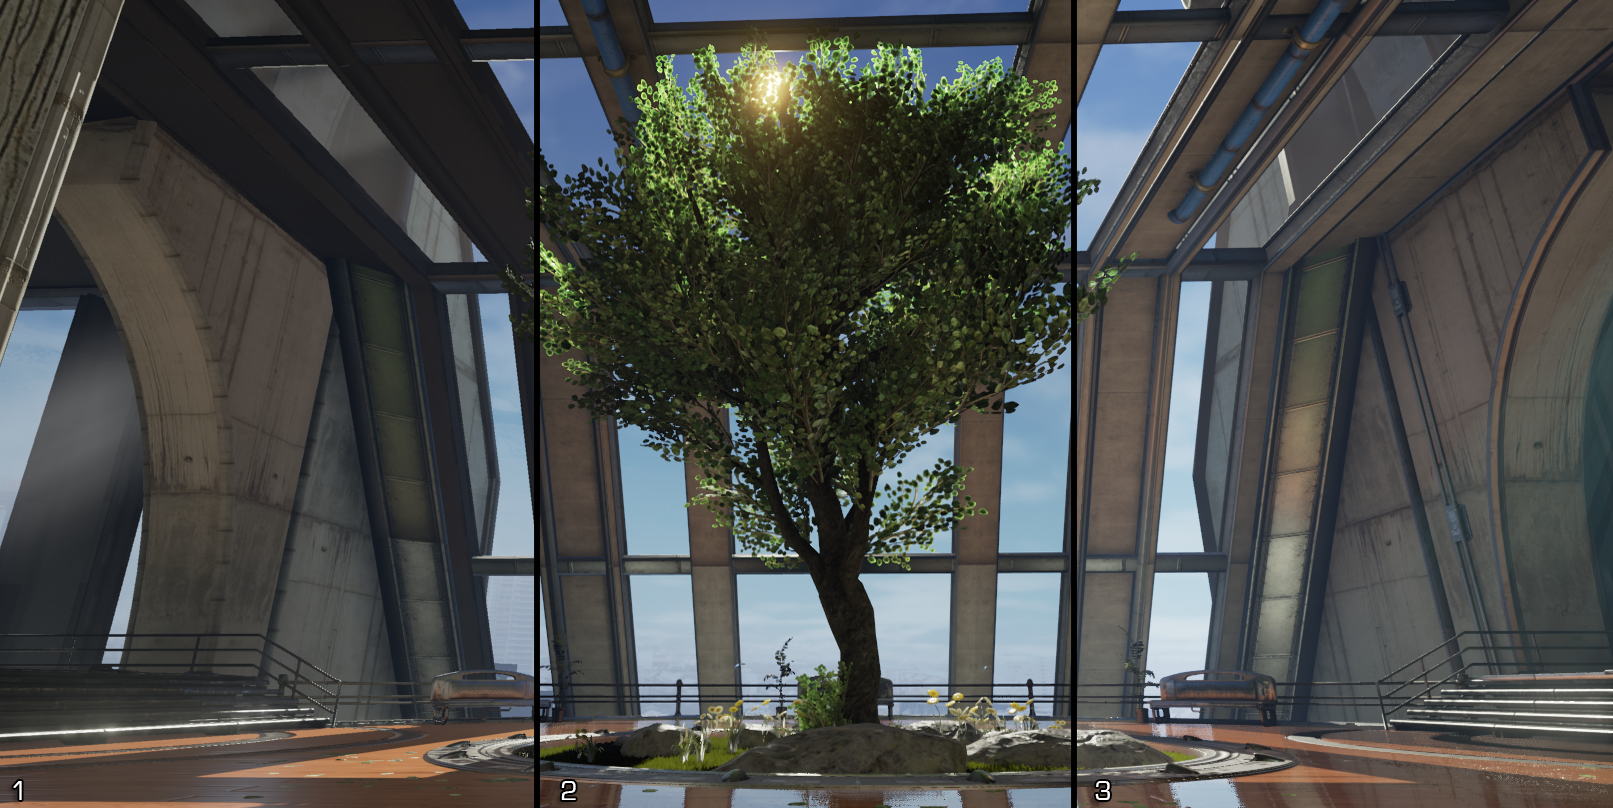
1:Mobile / HTML5 - Open GL ES2, 2:Shader Model 4.0 - DX10/ OpenGL 3.3+, 3:Shader Model 5.0 - DX11/ OpenGL 4.3+.
In Unreal Engine (UE), you can use the Mobile Previewer to preview what your scene will look like on different mobile devices directly in the Viewport. When enabling the different preview rendering levels, the Materials in your scene will be recompiled to best emulate the look and feature set of the renderer preview that you selected. The Mobile Previewer enables you to switch back and forth between rendering levels seamlessly, without having to restart the Editor.
Using the Mobile Previewer
The Mobile Previewer enables you to quickly change between different renderers for your current UE session so that you can get an idea of what your game will look like on the device(s) that you're targeting while allowing you to work in the UE. To learn how to change to a different renderer preview, follow these steps:
While you do not need to restart the UE for the new preview rendering level to take effect, the first time you change to a preview rendering level the UE will need to time to recompile the shaders. Subsequent changes to previously used rendering levels should be nearly instantaneous.
-
From the Main Toolbar, select the Settings button to expand the listed menu items. Under the Scalability section, hover over the Preview Rendering Level to expose the different rendering levels options you can select from.

-
Hover the mouse over the section rendering level you'd like to preview and click to select it.
You will see the Changing Preview Rendering Level progress bar pop-up. Wait for this to finish and recompile shaders.
The Preview Mode button appears next to the Sequencer button, the button shows the icon for the selected preview mode. Clicking it disables the Mobile Previewer.

-
Once a rendering level has been selected, the Materials in the viewport will automatically update to reflect the new rendering method using the Material Qualities enabled or disabled for that target platform. (See the Platform Material Quality Settings section of this page for more details on how to adjust these further.)
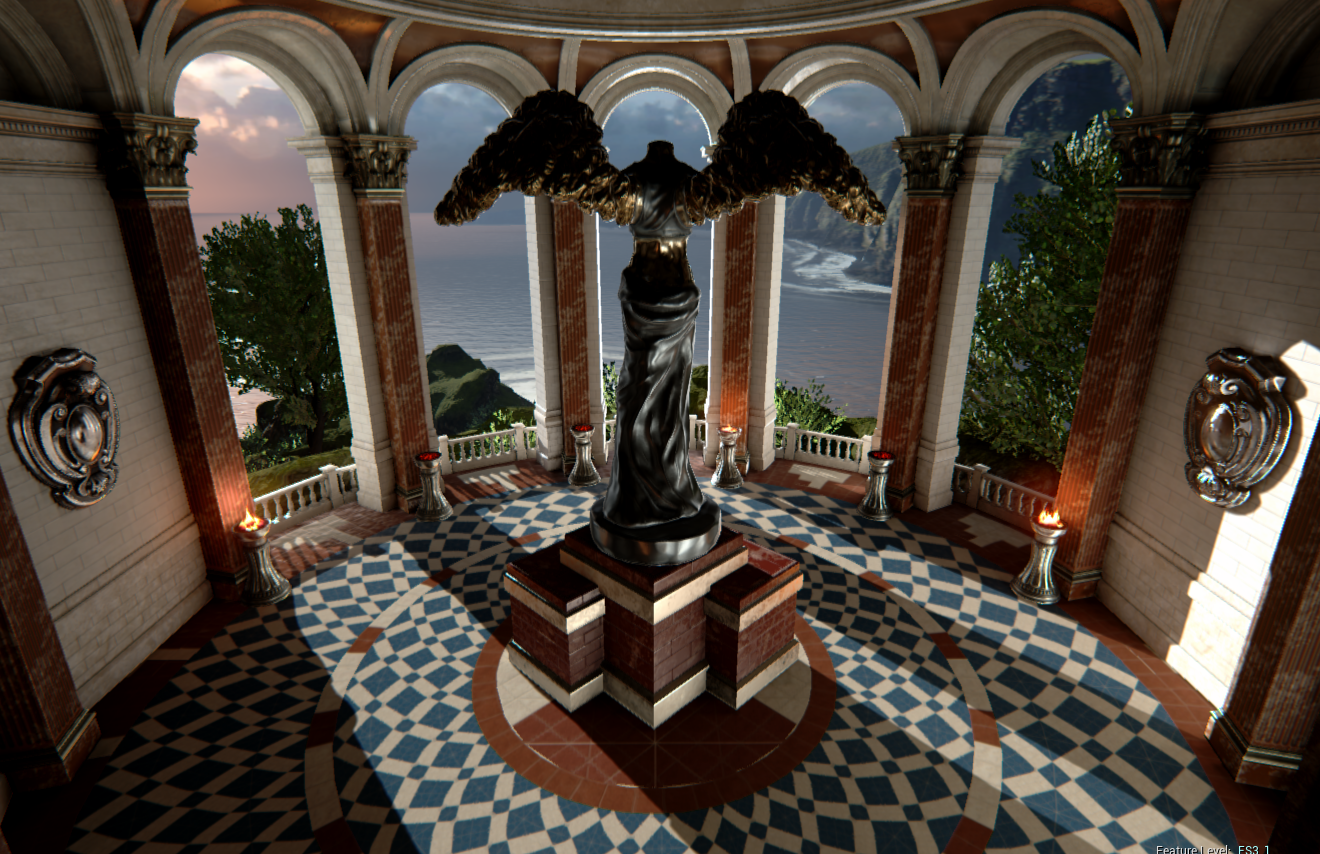
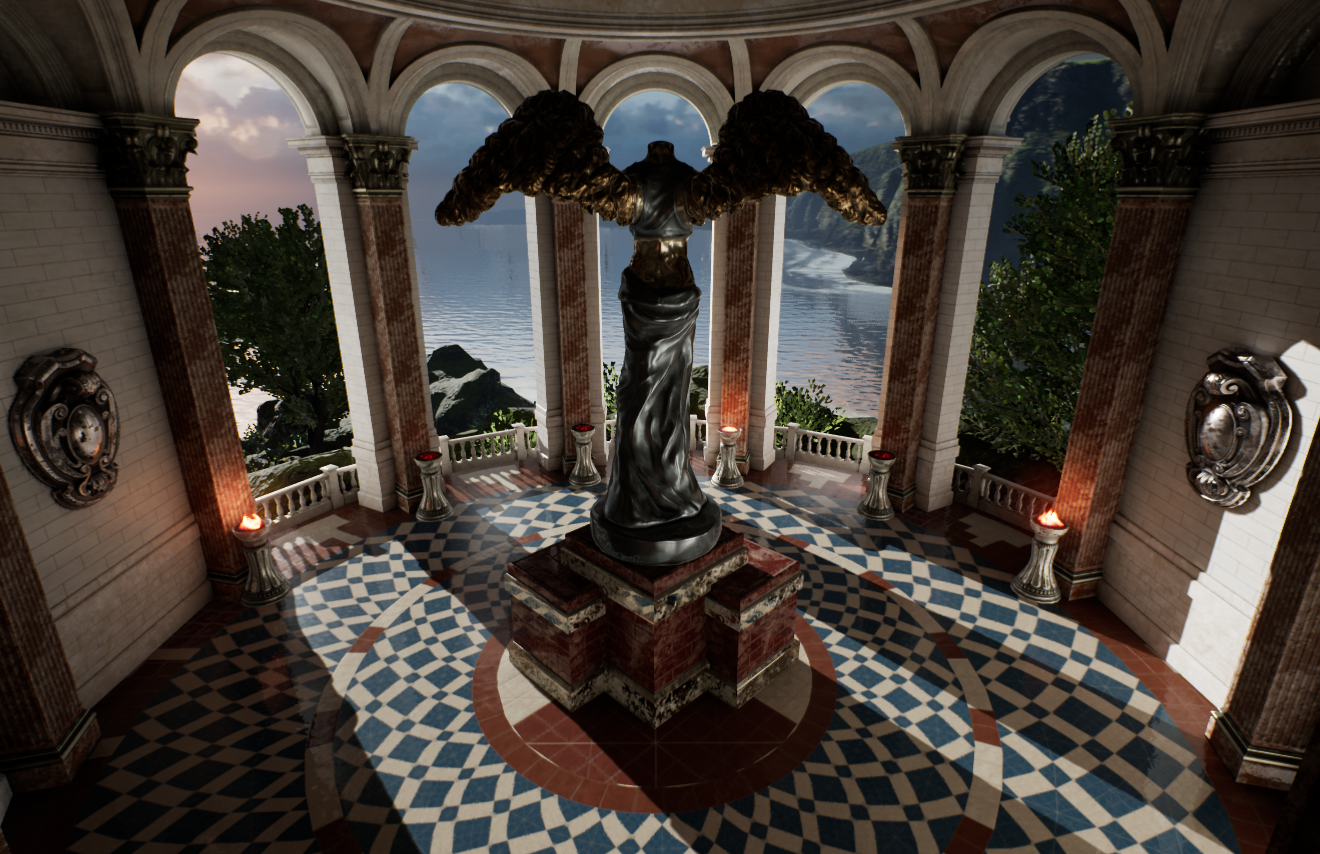
The Mobile Previewer is intended to match mobile devices as closely as possible but it may not always be indicative of what your project is going to look like on the target device. You should always make sure to fully test your project on your target device and only use the mobile previewer to see if your work is headed in the right direction.
Mobile Previewer in PIE
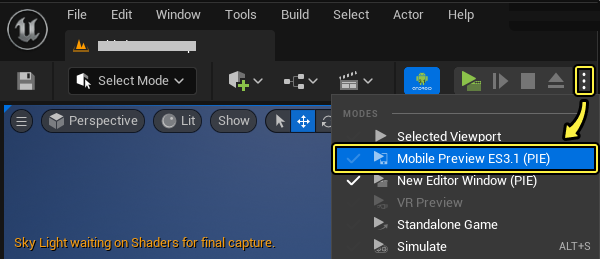
You can use the Mobile Preview ES3.1 (PIE) option to launch a standalone version of your UE mobile project that will use the same rendering path as if the project was run on a mobile device. This is a great way to preview the changes you are making without having to go through the entire cooking and deploying process. To launch your UE project in a Standalone game that uses the Mobile Preview, you will need to do the following:
-
From the Main Toolbar, click on the drop-down button of the Play panel to expose the Change Play Mode and Play Settings settings.

-
Select Mobile Preview ES3.1 (PIE) option and your project will then be launched in a new window that simulates what your project should look like on a mobile device.
Enabling Vulkan Mobile Preview
You can use the Vulkan Mobile Preview (PIE) option to launch a standalone version of your UE mobile project using the Vulkan render. This is a great way to preview the changes you are making without having to go through the entire cooking and deploying process. To launch your UE project in a Standalone game that uses the Vulkan Mobile Preview, you will need to do the following:
-
To enable the Vulkan Previewer you will need to first open up the Editor Preferences by going to the Main Toolbar and clicking on Edit and then select Editor Preferences.

-
In the Editor Preferences menu, locate the General heading and then click on the Experimental section.
Click for full image.
-
Locate the PIE section and then click on the Allow Vulkan Mobile Preview option to enable it.
Click for full image.
-
Close the Editor Preferences and then from the Main Toolbar, click on the drop-down button of the Play panel to expose the Change Play Mode and Play Settings settings.

-
Select the Vulkan Mobile Preview (PIE) option and your project will then be launched in a new window that simulates what your project should look like on a mobile device.

Platform Material Quality Settings
In the Project Settings under the Platforms category, you can select different platform Material Quality sections to enable or disable specific features for the target platform.
Click for full image.
For any of these changes to take effect, be sure to click the Update Preview Shaders button.

Preview Rendering Level Selections
When you select your Preview Rendering Level, you will have a few options to select from. Use the table below to select the option that best fits your target device.
| Device Target | Description |
|---|---|
| High-End Mobile / Metal | |
| Default High-End Mobile | This will emulate the default high-end mobile material quality settings without using any material quality overrides specified in the Project Settings. |
| Android GLES 3.1 | Provides a preview emulation of supported Android OpenGL ES3.1 quality settings. The Material Quality settings can be set in the Project Settings > Android Material Quality - ES31 section. |
| Android Vulkan | Provides a preview emulation of supported Android Vulkan quality settings. The Material Quality settings can be set in the Project Settings > Android Material Quality - Vulkan section. |
| iOS Metal | Provides a preview emulation of supported iOS Metal quality settings. The Material Quality settings can be set in the Project Settings > iOS Material Quality - Metal section. |
| Mobile / HTML5 | |
| Default Mobile / HTML5 | This will emulate the default mobile material quality settings without using any material quality overrides specified in the Project Settings. |
| Android | Provides a preview emulation of supported Android OpenGL ES2 quality settings. The Material Quality settings can be set in the Project Settings > Android Material Quality - ES2 section. |
Some of the available Preview Rendering Levels are not visible until you've enabled them as a target platform via the Project Settings, namely, Android OpenGLES 3.1 and Android Vulkan. iOS Metal defaults to on, however, it will also be removed as an available preview option if its target platform is disabled.
Mobile Device Preview Options
Due to the wide range of mobile phone bezel designs, it can be challenging to make sure that parts of your UI are not obscured by the mobile device's bevel. To help make sure your UI is not obscured by the device, you can use the Device Launch option to overlay different mobile phone bezel designs. To use this in your UE project, all you need to do is the following.
-
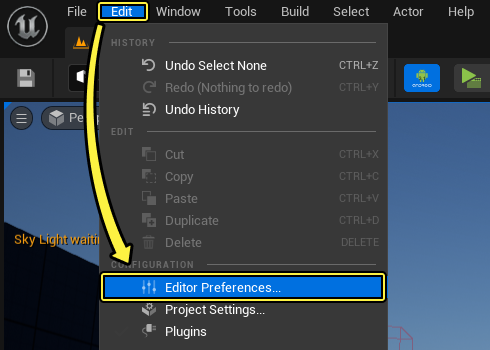
First, open up your Editor Preferences by going to the Main Toolbar and clicking on Edit and then select Editor Preferences.
-
In the Editor Preferences menu, locate the General heading and then click on the Experimental section.
Click for full image.
-
Locate the PIE section and then click on the Enable mobile PIE with preview device launch options to enable the bezel overlays. Close the Editor Preferences menu and restart UE for applying this settings.
Click for full image.
-
From the Main Toolbar, click on the drop-down button of the Play panel to expose the Change Play Mode and Play Settings settings.

-
From the displayed menu, go to Mobile Preview (PIE) > Android and then select the device you want to test against from the list.
Click for full image.
-
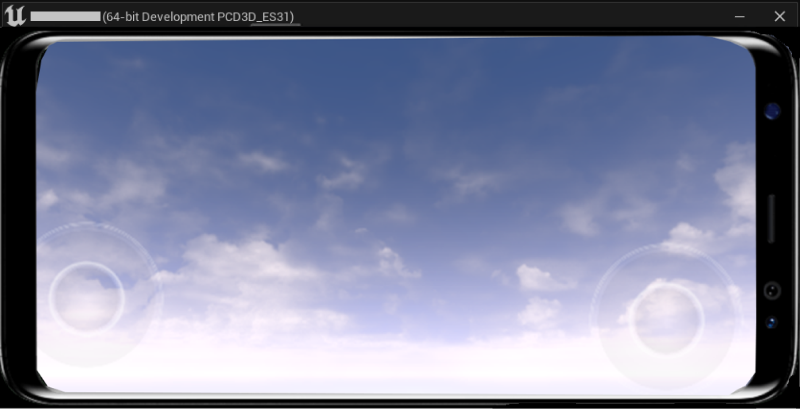
Now click the Launch button to launch your project. When your project loads it will be using the device preview like in the following image.
Copying a Physical Device's Configuration in the Previewer
In Unreal Engine (UE 5.5) and newer, you can save a JSon file containing the device profile and CVars used on a specific device, then load it in UE to use in the Mobile Previewer, providing a 1:1 match for all your project's graphics settings as they would appear on your device. This page provides a walkthrough for this process.
Prerequisites
To follow this guide, you need to set up your project for Android development, and you need to connect an Android device to your computer with development mode enabled. Refer to the Android Quickstart Guide for a walkthrough of all basic setup for an Android project, and refer to Setting Up Your Device for Development for a walkthrough of preparing your device and connecting it to UE.
Saving Device Data to JSon
To save your target device's data to a JSon file, follow these steps:
-
Click the Settings button in the upper-right corner of Unreal Editor, then navigate to Preview Platform and open the sub-menu for your preferred platform. This example uses Android.
-
Click Generate Platform JSon. Select the test device you want to generate a JSon file for.
Click image to enlarge.
-
In the dialog that appears, choose where you want to save your JSon file.
Loading JSon Device Data
To load your device's data in Unreal Editor's Mobile preview window, follow these steps:
-
Open Settings > Preview Platform, then open the sub-menu for your preferred platform. This example uses Android.
-
Select either Preview OpenGL or Preview Vulkan, then click Preview via JSon.
Make sure to choose the appropriate graphics API for your device from the Preview Platform > Android menu, otherwise you will not get an accurate preview.
-
A dialog appears prompting you to open a JSon file. Locate the JSon file you saved and open it.
Unreal Editor will load all applicable CVars from the device profile of your target device. When you use the Mobile Preview, it should be a 1:1 match with what you would see on the screen of your device.
Further Reading
For more information about Vulkan compatibility with Android devices, see the Vulkan Mobile Renderer page.
For more information about device profiles, see the following pages:
