
While making your Level in Unreal Engine, there may come a time when you want to attach something to your Static Mesh. You could parent an object to the Static Mesh in the World Outliner. However, you still have to position it in the exact place you want it on your mesh, which can get tedious. Sockets are attach points you can place on your Static Mesh. Once set up, you can connect objects to the Socket. This tutorial will show you how to create a Socket for your Static Mesh and use it for your Level.
Set Up
If you already have a project that you are working on, you can use that project to follow along. If you do not, start out by launching Unreal Engine and creating a new project with Starter Content enabled. For this guide the First Person Template is used, but you can use whichever template you would like. For more information on creating new projects in Unreal Engine, refer to Creating a New Project.
Once your project is open, find the Starter Content folder within the Content Browser. Next, navigate to the Props folder and find the Static Mesh named SM_DoorFrame.
If you are working on a project but didn't enable Starter Content, you can import the Assets from the Content Browser. Choose Add Feature or Content Pack from the Add dropdown menu. Refer to Content Browser Interface for more information.
Click image for full size.
Click image for full size.
Open SM_DoorFrame in the Static Mesh Editor by doing one of the following:
- Double-clicking the Asset.
- Right-clicking the Asset and selecting Edit from the context menu.
After, the door frame will appear in the Static Mesh Editor, as shown below.
Click image for full size.
Creating Your First Socket
With the Static Mesh opened in the Static Mesh Editor, you can create a socket to place a fire particle in the middle of the doorway.
To start, click the Window dropdown menu at the top of the Static Mesh Editor and select Socket Manager.
Click image for full size.
The Socket Manager window will appear next to the Details panel, as shown below. Once opened, click Create Socket (![]() ).
).
Click image for full size.
After clicking the button the Socket is created and you are prompted to rename it. In this example, Fire is used.
Click image for full size.
Looking at your Static Mesh in the Viewport, you can see a translation widget for the Socket. If not, make the Socket visible by clicking it in the Viewport or the Socket Manager panel.
Click image for full size.
Once you can see the Socket, you may notice the location is incorrect. By default, when you create a new Socket, it is located at the origin of the Static Mesh. In this case, the bottom center of the door frame.
You can use the translate widget in the Viewport to move the Socket manually to the desired location or change its relative location, rotation, and scale from within the Socket Manager panel. For this guide, you want the Socket in the middle of the doorway so the player will have to walk through fire as they go through the door.
Change the value of Z in its Relative Location from 0 to 115, as shown in the image below.
Click image for full size.
Attaching Objects to a Static Mesh
With a Socket placed on Static Mesh, you can begin to attach objects to your Static Mesh in your Level.
Click Save in the Toolbar inside the Static Mesh Editor and return to the Level Editor.
Find SM_DoorFrame inside your Content Browser and drag a copy into your Level. Next, go to the Particles folder inside the Starter Content folder and find the Asset named P_Fire.
Click image for full size.
Drag a copy of P_Fire into your Level as well. This particle effect will serve as the fire attached to SM_DoorFrame.
Once you dragged in an instance of P_Fire, right-click the particle inside the Viewport to open the context menu.
Click image for full size.
In the context menu, select Attach To. Inside the search box, type Door Frame and select SM_DoorFrame.
Click image for full size.
Once you select SM_DoorFrame, choose where you want to attach the object. The list consists of None and every Socket you created for your Static Mesh. Select Fire from the list.
Click image for full size.
In the Outliner, P_Fire is now a child of SM_DoorFrame, but you may notice the particle effect did not snap to the location of the Socket. For that to happen, you need to reset the transform location of the particle effect.
Click image for full size.
With P_Fire selected go to the Transform section of the Details panel. To the far right of the Location bar click the reset arrow (![]() ) to change the settings back to default.
) to change the settings back to default.
As a child of SM_DoorFrame, the particle effect's location is now relative to its parent. Therefore the transform values reset to 0,0,0 as it snaps to the Socket.
Click image for full size.
The particle effect is now attached to your Static Mesh.
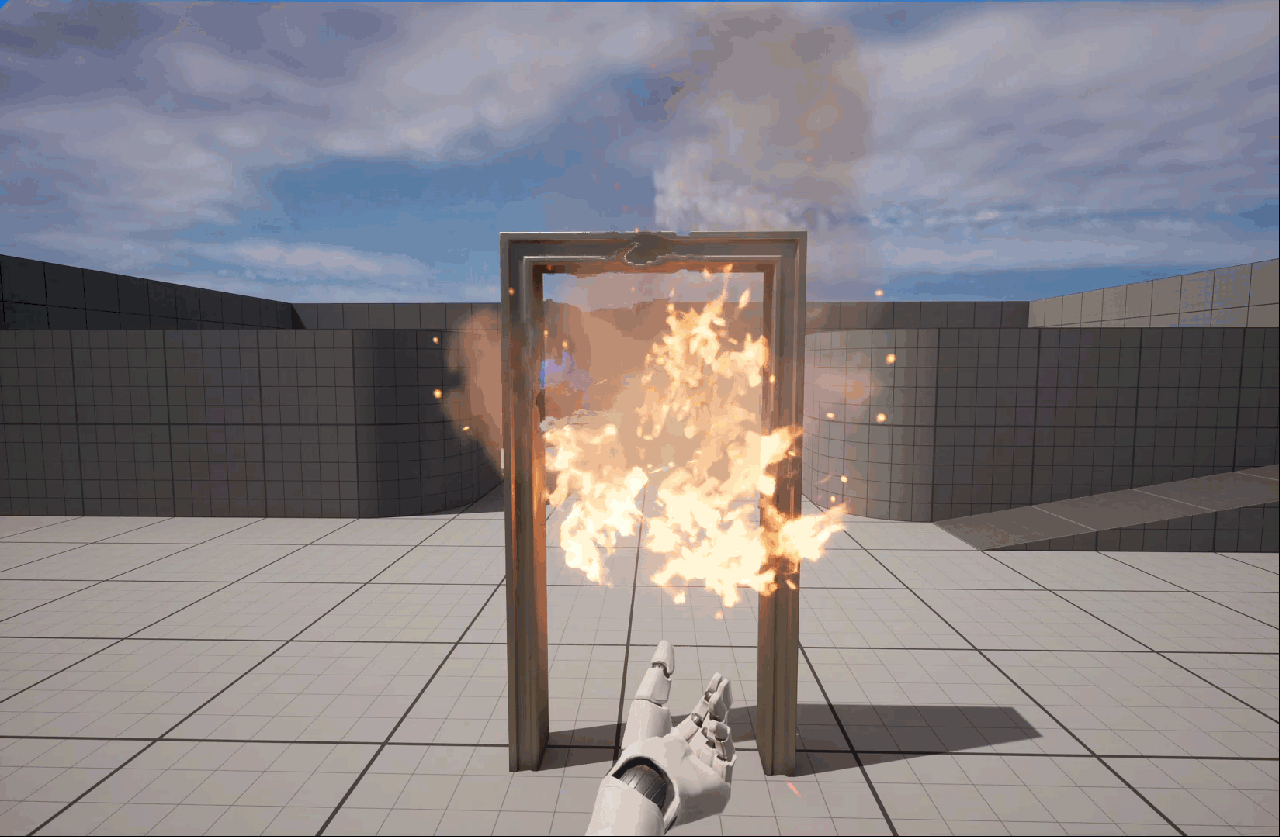
With the particle effect attached to the Static Mesh via its Socket, you can still move, rotate, and scale the particle effect separately from the Static Mesh. However, any transformations made to the Static Mesh also affect any objects attached.
Detaching
Detaching an object from a Static Mesh follows similar steps as attaching an object.
Right-click on the object you want to detach, and select Detach from the context menu. The object is no longer a child of the Static Mesh.
Click image for full size.
Creating a Doorway With a Solid Door
Now that you have used Sockets to create a fiery doorway, it is time to create something more practical.
In the Props folder within the Starter Content, find SM_DoorFrame and drag another copy of it into the Level. Next, find SM_Door, and drag it into the Level.
Click image for full size.
You could attach the door to the door frame using the Socket already created, but there is a problem. The Static Mesh SM_Door has an origin at the bottom corner, so attaching the door to the Fire Socket will leave the door floating in the air and bursting through the corner of the doorway. To fix this problem, you are going to make another Socket.
Creating a New Socket
Reopen SM_DoorFrame in the Static Mesh editor and add a new Socket in the Socket Manager panel. Name the Socket door, so later you know this is where you want to attach the door mesh.
You can manually move the Socket using the 3D widget, or you can move it by changing the relative location, rotation, and scale from within the Socket Manager panel. For this example, changing the Socket's relative location's value of Y to 42 places the Socket at the bottom corner of the door frame mesh.
Click image for full size.
If you do not see the sockets, highlight the Sockets Button so that sockets are visible.
Click image for full size.
Attaching the Door to the Frame
Now that you have a socket to attach the door to the frame, save your door frame mesh and return to the Level Editor.
Select the instance of the door mesh in your Level and right-click to bring up its context menu.
From within the context menu, select Attach and search for SM_DoorFrame.
Find the instance of the door frame you want to attach the door to and select it. When asked which Socket to connect to to, select Door.
Click image for full size.
By default, SM_Door will not have a collision set. If you play the Level now, the player can walk through the solid door, which is not very useful. Set a Simple Box Collison for the door inside the Static Mesh Editor. Refer to Setting Up Collisions with Static Mesh to learn how.
After setting the collision, use Blueprints for scripting a behavior for the door to open and close. Learn how with the Opening Doors guide.