The Datasmith importer can automatically bring in metadata about the objects it handles: information that you set up for those objects in your 3D design or CAD application. Metadata is most often used to store real-world information about the mechanical part or architectural element that the asset represents, such as the cost of the piece, the material it's made of, physical properties like its weight or insulation efficiency, or usage information like the maximum torque to apply to a part. You can also use metadata to store any other kind of information about an Asset that you might need for your Project.
Having this metadata available in the Unreal Editor and Unreal Engine can help you in two ways:
- In your asset pipeline: You can use metadata when you're importing Assets and setting up your Levels to help distinguish different kinds of Assets and Actors that need different processing. For example:
- You could use metadata during the Datasmith import process to identify certain kinds of Assets that you won't need in your final scene, so that you can skip importing them.
- After import, you could use it to identify Actors in your Level that you want to merge, join, or replace, or whose Materials you want to replace.
- At runtime in your game: You can use metadata at runtime to show users selected information about your Actors that comes from your source design tool. For example:
- If the objects in your Level have BIM data that contains information about their structural properties, you might want to visualize that information in your interactive experience when the player selects those objects in the scene.
- Or, if your project is a product configurator that allows the player to choose between different design options, you might want your gameplay logic to calculate and show a running total of the cost of the player's current choices based on the cost metadata assigned to the visible Assets.
This page describes how to get metadata into Unreal through the Datasmith import process, and how access it in your scripts both in the Editor and at runtime.
Metadata Sources
Datasmith currently imports metadata from the following design tools:
- Autodesk 3ds Max
- Autodesk Revit
- Dassault Systèmes Solidworks
- Trimble SketchUp Pro
- Maxon Cinema 4D
- IFC 2x3 files
- Graphisoft Archicad
- Autodesk Navisworks
- McNeel Rhinoceros (Rhino)
Datasmith currently only handles metadata on geometry, not other kinds of scene objects like lights or cameras.
Viewing Metadata in Unreal Editor
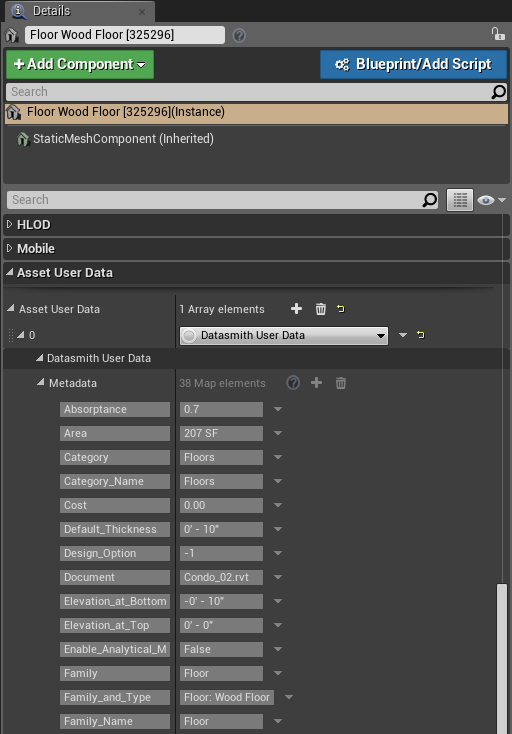
After the Datasmith import process is complete, you can view the metadata for any Static Mesh Actor in your Level in its Details panel, under the Asset User Data section:

Datasmith metadata is currently read-only in the Editor.
Accessing Metadata in Blueprint and Python
There are multiple different ways to access the metadata associated with your scene objects. Which one you should use depends on whether you need to access the metadata during the Datasmith import process, or after the import has finished.
All metadata keys and values are stored as strings in Unreal Engine, regardless of their original type in your design or CAD application. For example, if you set a metadata value in 3ds Max as a Boolean value like true or as a number like 312, they will be strings when you read them back in a script within Unreal. If you need the values to be Booleans or numbers, use a Blueprint conversion node like Utilities > String > String to Int or String to Float, or built-in Python string parsing functions like int() or float().
Accessing Metadata During Import
If you need to access your metadata during the Datasmith import process—for example, to identify certain meshes that you want to filter out before generating Unreal Assets for your scene—you can read the metadata from the Datasmith Scene. For background information on how to run a script during the input process, see Customizing the Datasmith Import Process.
You'll find the metadata attached to mesh actor elements in the Datasmith Scene.
The nodes you'll need are under Datasmith > Scene and Datasmith > Element.
To reach these nodes, you need to disable the Context Sensitive checkbox in the context menu, or find the nodes you need in the Palette.
| Node | Description |
|---|---|
| Get All Metadata | Retrieves an array of all metadata objects recorded for all objects in the Datasmith Scene. |
| Get All Objects and Values for Key | Retrieves a list of all objects in the Datasmith Scene that have a specified key. You'll also get a list of all values recorded for that key across all those objects. |
| Get Metadata for Object | Retrieves all metadata assigned to a specified object. |
| Get Metadata Value for Key | Retrieves the value of a specified key assigned to a specified object. |
| Get Metadata Keys and Values for Value | Retrieves all keys on a specified object whose value matches the String to Match input. |
For the nodes above that return a Datasmith Metadata Element object, you can get the keys and values from the metadata object by using Datasmith > Element > Get Properties, Get Property and Get Property Count:

Example usage
This example shows how you could use the values assigned to a metadata key to identify geometry that you know you won't need in your Project, and to remove it from your Datasmith Scene before creating Static Mesh Assets:
During the Datasmith import process, you can get to the metadata about your scene objects through the unreal.DatasmithSceneElement object. For details on the following functions, see the Python API Reference.
|
|
|
|
|
Example usage
This example shows how you could use the values assigned to a metadata key to identify geometry that you know you won't need in your Project, and to remove it from your Datasmith Scene before creating Static Mesh Assets:
key_name = "name"
remove_keyword = "Clutch"
meshes_to_skip = set([])
# Get all scene elements that have the "name" key.
objects_and_values = ds_scene_in_memory.get_all_objects_and_values_for_key(key_name, unreal.DatasmithMeshActorElement)
objects = objects_and_values[0]
values = objects_and_values[1]
# Iterate through them looking for ones whose value matches a keyword
for index, value in enumerate(values):
if remove_keyword in value:
print("removing actor named: " + value)
# Remove the mesh actor element from the scene, and put the mesh element in a list to remove later
mesh_actor = objects[index]
mesh = mesh_actor.get_mesh_element()
meshes_to_skip.add(mesh)
ds_scene_in_memory.remove_mesh_actor(mesh_actor)
# Remove all the meshes we don't need to import.
for mesh in meshes_to_skip:
mesh_name = mesh.get_element_name()
print("removing mesh named " + mesh_name)
ds_scene_in_memory.remove_mesh(mesh)
Accessing Metadata After Import
When the import process finalizes your Datasmith Scene into Unreal Assets and Actors, it also applies the metadata from each mesh element in the Datasmith Scene to all the Actors in the Level that represent instances of that Static Mesh Asset. You can then use Blueprint or Python to retrieve the metadata for any or all of the Static Mesh Actors in your Level.
The following nodes access metadata for one specific Actor. These have very little impact on performance, so you can use them anytime, even at runtime in your project. If you want to visualize the imported metadata for one or more selected objects in your scene—say, in a callout or a menu in your project's runtime UI—these are the nodes you'll want to use in your runtime Blueprint graphs.
You'll find them under the Datasmith User Data category.
| Node | Description |
|---|---|
| Get Datasmith User Data Value for Key | Retrieves the value of the metadata with the specified key assigned to the specified object. |
| Get Datasmith User Data Keys and Values for Value | Retrieves all keys on the specified object that have the value you specify in the String to Match input. Use this node if you know the value you're looking for, but not the name of the key. |
| Get Datasmith User Data | Retrieves a metadata object that contains all key-value pairs recorded for the Actor, so that you can iterate through them yourself. |
The following nodes, by contrast, access the metadata for all Static Mesh Actors in the current Level (or all that share a given class). Since your Level can potentially contain a large number of Actors, each with many properties, these functions may be expensive in CPU resources and could cause poor performance when used in runtime gameplay. Therefore, you can only use them in graphs that you create on Editor-only Blueprint classes.
You'll find these nodes under the Editor Scripting > Datasmith User Data category.
| Node | Description |
|---|---|
| Get All Objects and Values for Key | Retrieves a list of all Actors in the current Level that have a specified key in their Datasmith metadata. You'll also get a list of all values recorded for that key across all those objects. |
| Get All Datasmith User Data | Retrieves the full list of all metadata objects for all Actors in the current Level. |
The Get Datasmith User Data and Get All Datasmith User Data nodes above return Datasmith User Data Object References. This object has one variable you can access, called Metadata, which is a map of all the key-value pairs that make up the object's Datasmith metadata. To work with this kind of object, drag off the output pin and select Variables > Get Metadata:

This gives you the keys and values as a map. You can then use the utility nodes in the Utilities > Map category to work with the data. For example, this graph iterates through all the keys one by one, and retrieves the value associated with each key:
For more information about Blueprint Map nodes, see the Blueprint API Reference.
Example usage
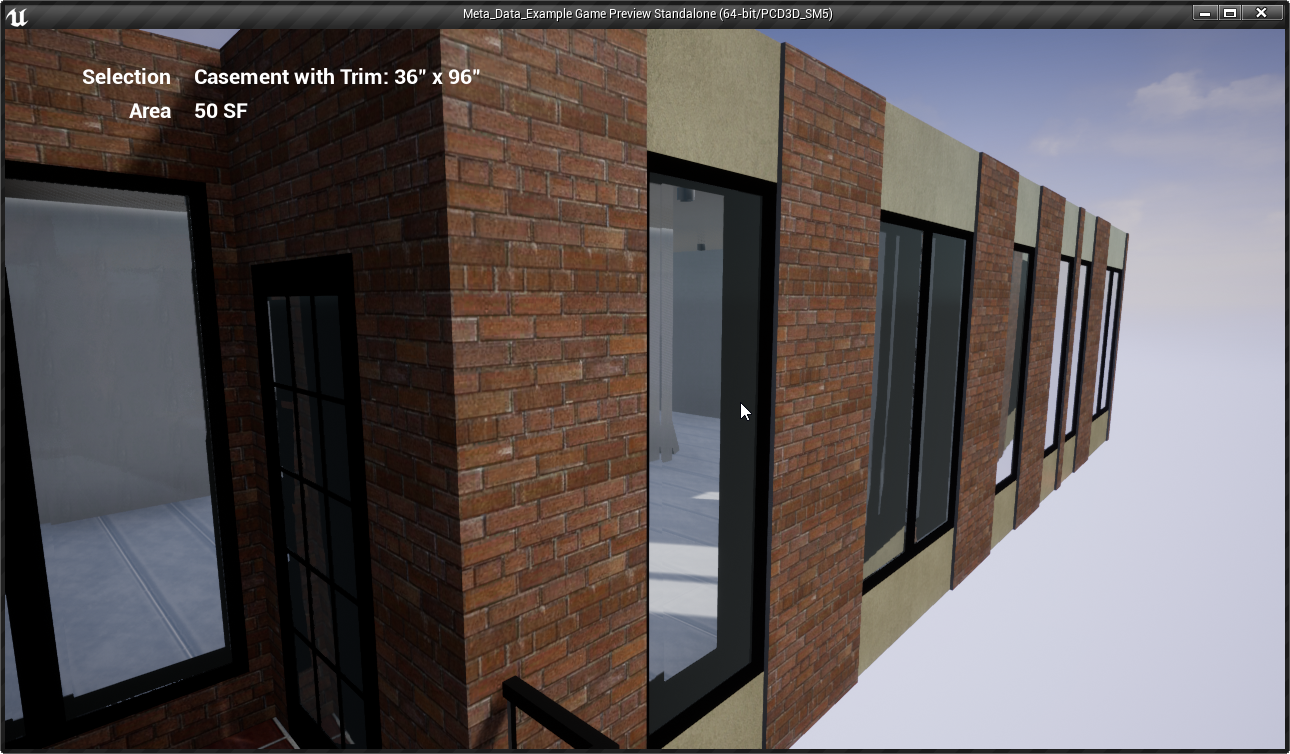
This section shows a simplified example of how you could visualize your asset metadata at runtime for an object that the player selects in the Level.

The text is written by a UMG widget that contains two text fields, each bound to a string variable. In the Blueprint graph for the widget, a custom action extracts two items of Datasmith metadata from an Actor that you pass in a custom event, and saves those items to the bound variables.

The following Level Blueprint shows an example of how to add a widget like this when play begins, and how to feed it with the Actor under the cursor every time the user presses a mouse button.
For more information about building user interfaces in UMG, see the UMG UI Designer Quick Start Guide and the surrounding sections.
After the Datasmith import process is done, you can access metadata for all Actors or selected Actors using the unreal.DatasmithContentLibrary class. For details on the following functions, see the Python API Reference.
|
|
|
|
|
Example usage
In Python scripts that you run inside the Unreal Editor, you can use Datasmith metadata after import to identify Static Mesh Actors in your Level that you want to apply certain special processing to.
import unreal
new_actor_name = "Exterior Walls"
metadata_key = "Type"
metadata_value = "Wall: Exterior"
meshes_to_join = set([])
# Iterate through the Actors in the current Level
all_actors = unreal.EditorLevelLibrary.get_all_level_actors()
for actor in all_actors:
# Retrieve the value of this Actor's Datasmith metadata for the key set above, if any
actor_value = unreal.DatasmithContentLibrary.get_datasmith_user_data_value_for_key(actor, metadata_key)
# If the key exists, and its value contains a keyword set above, add the Actor to a list
if actor_value and metadata_value in actor_value:
print("found a matching actor: " + actor_value)
meshes_to_join.add(actor)
# Join all Actors that were found above into a single Actor with many components
options = unreal.EditorScriptingJoinStaticMeshActorsOptions(destroy_source_actors=True, new_actor_label=new_actor_name, rename_components_from_source=True)
unreal.EditorLevelLibrary.join_static_mesh_actors(meshes_to_join, options)
print "Merged all actors!"
