
The USD Importer can use Control Rig to bake and directly manipulate skeletal animation from opened USD Stages. It can then save and maintain changes to the animation in the USD file. This guide walks you through this workflow and provides a reference for some of its configuration options.
Overview
When you bind a Control Rig to your SkelRoot prim in the USD Stage window, the USD Importer automatically performs the following processes:
- Adds a Control Rig track to Sequencer.
- Runs through the animation from start to finish, adding keyframes to the Control Rig for each frame of animation.
- Disables the skeletal animation section.
As a result, the Control Rig has one keyframe for each individual frame of animation, and it effectively assumes control of the animation. Any changes can then be saved out to the USD file, which preserves animation data between sessions. This reduces the amount of busywork needed to quickly edit animations in-engine.
For information about how to reduce the number of automatically generated keyframes from this process, refer to the section on Reducing Keyframes below.
1. Required Setup
To use the USD Importer, you need to enable the USD Importer plugin in the Edit > Plugins menu. Restart the editor after enabling the plugin.
Click to enlarge image.
This guide uses a new project created using the Third-Person template. This includes the Unreal Engine mannequin models and the CR_Mannequin_Body control rig. Both of these are available in the Content/Mannequins folder in the Content Browser.
This guide uses these assets to provide an example, but they are not necessary to follow these instructions. You can follow along with any Skeletal Mesh as long as you have already created a Control Rig for that mesh. For more information on using Control Rigs, refer to the Control Rig documentation.
2. Export a USD File
To take advantage of the USD Stage's functionality for setting up Control Rigs, you need to export a USD of the animation you want to edit.
-
Select an animation asset and a Control Rig that corresponds to that asset's skeletal mesh. This example uses the following assets from the third-person template:
- Animation asset: Content/Characters/Mannequins/Animations/Manny/MM_Walk_InPlace
- Control Rig: Content/Characters/Mannequins/Rigs/CR_Mannequin_Body
-
Right-click the animation in the Content Browser, then click Asset Actions > Export.
Click to enlarge image.
-
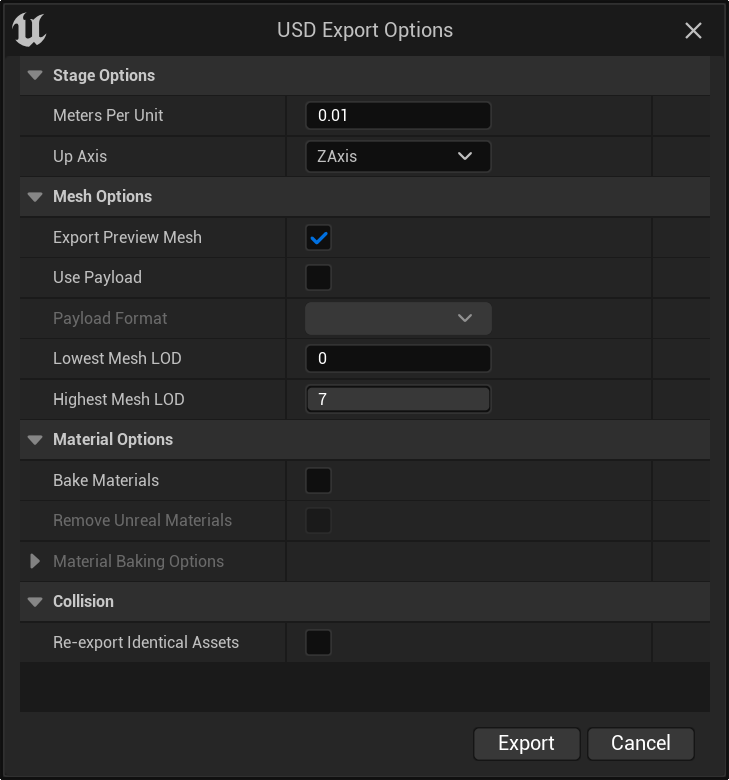
In the export dialog, select Universal Scene Description file (*.usda) as the file type, then click Save.
Click to enlarge image.
-
In the USD Export Options dialog, click Export.
3. Set Up Control Rig in the USD Stage
Now that you have a USD file for your animation, you can open it using the USD Stage editor and set it up with a Control Rig.
-
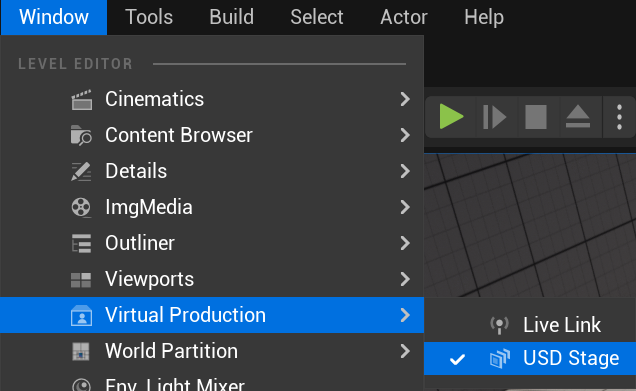
Click Window > Virtual Production > USD Stage to open the USD Stage editor.
-
In the USD Stage window, click File > Open, then select the
.usdafile for your animation and click Open in the open file dialog.Click to enlarge image.
The model appears at the world's origin.
-
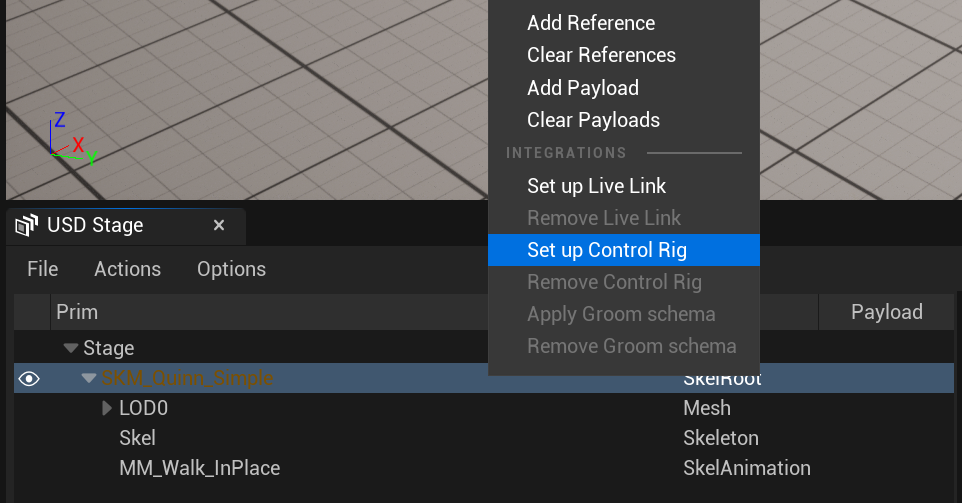
In the USD Stage window, right-click the root of the skeleton, then click Set Up Control Rig.
-
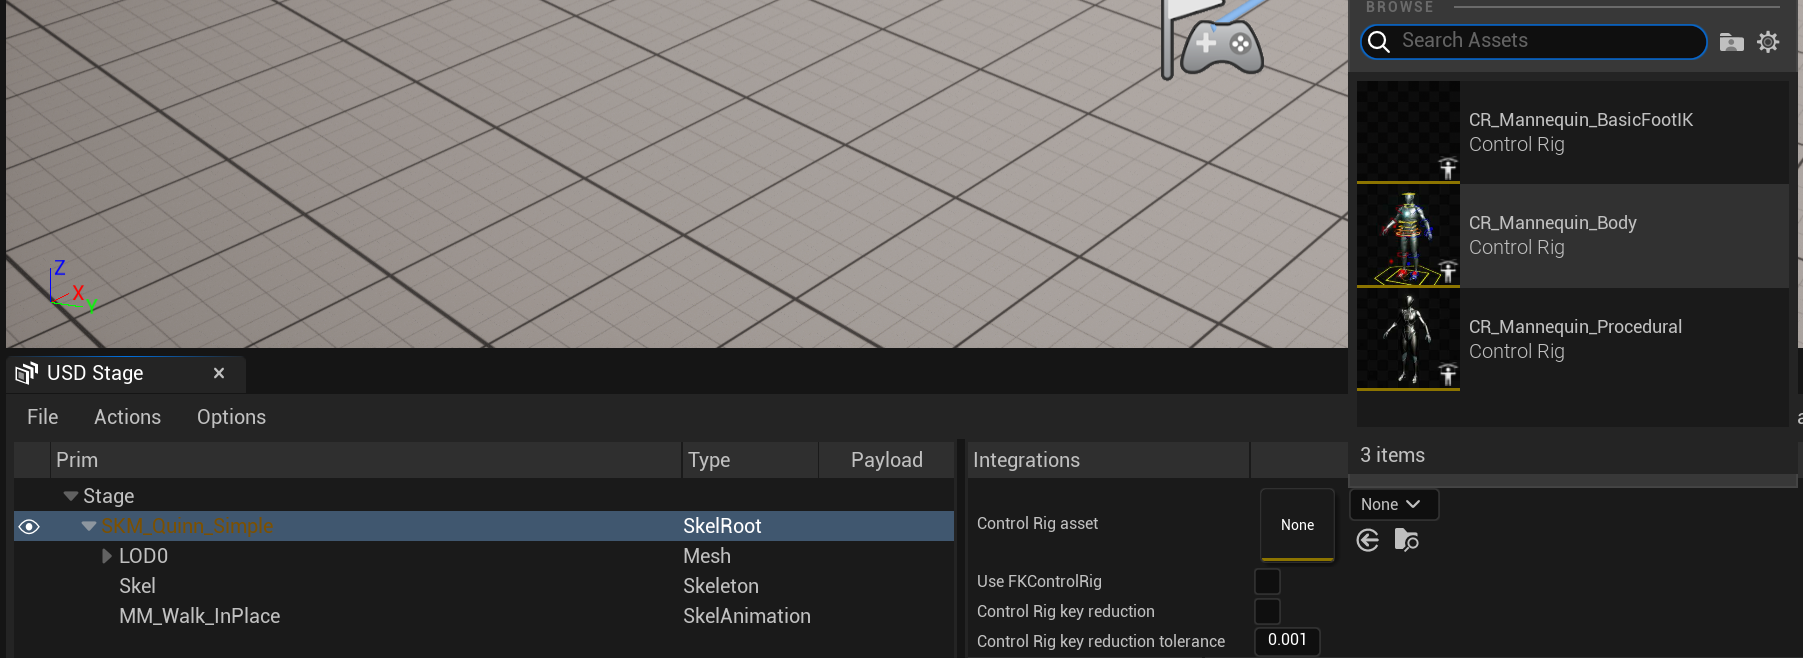
The Integrations panel appears to the right of the Stage hierarchy. Set the Control Rig asset to your skeletal mesh's Control Rig.
-
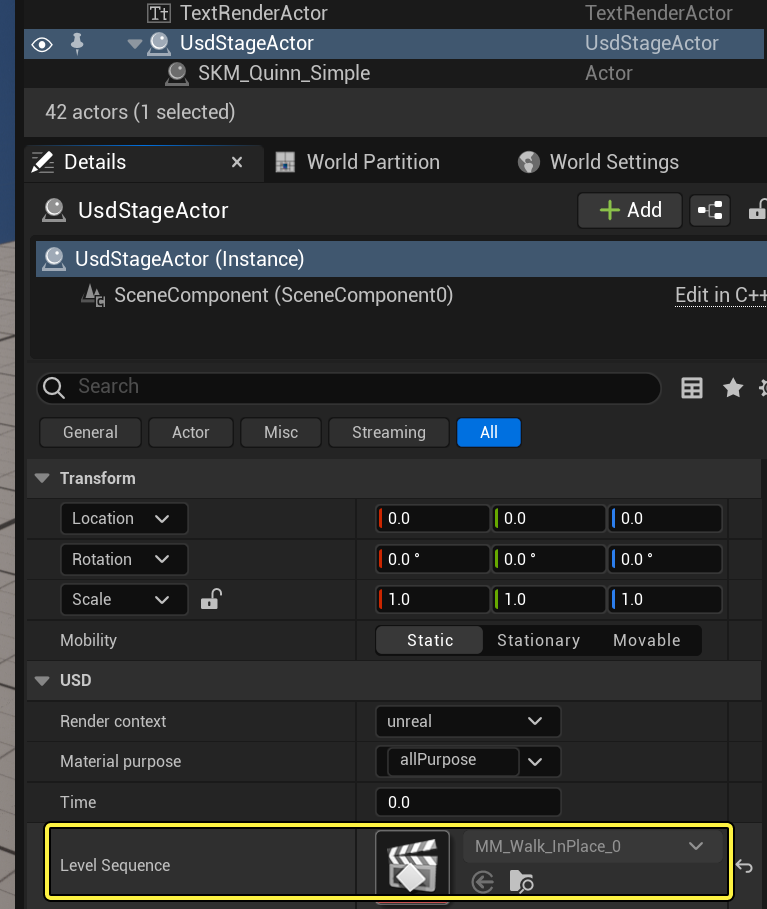
If you do not see the Sequencer window, click the USD Stage Actor in your world's Hierarchy, then double-click the Level Sequence in the Details panel.
-
Click the newly created Control Rig track in the Sequencer track list.
- In this example, the Control Rig is called
CR_Mannequin_Body.
Click to enlarge image.
- In this example, the Control Rig is called
Result
The controls for the rig appear on the mesh in the world. You can now use Sequencer and the Control Rig to edit the existing animation or create new ones from scratch. Any time the system detects a change, it writes it out to the USD Stage, which can then be saved to the file on disk.
Configuration
Setting up a SkelRoot prim for Control Rig will provide it with some attributes that can be configured as the following options on the USD Stage integrations panel.
Forward Kinematic Control Rig
The Use FKControlRig setting disables your selected Control Rig asset and instead uses a default forward kinematic rig that has one control for each bone. You can use this for skeletal meshes you do not already have a Control Rig for.
Reduce Keyframes
To reduce the number of auto-generated keyframes, enable the Control Rig key reduction setting in the Integrations panel. This removes keyframes similar to previous keyframes, relying on the system to tween the animation between the keyframes that remain. You can use the Control Rig key reduction tolerance setting to change the keyframe reduction sensitivity. The higher you make this value, the more aggressively it will reduce keyframes.
Click to enlarge image.