When attaching objects to Bones on your Skeletal Mesh, it may be necessary to offset this attachment. Instead of using math operations to estimate the offset transform, you can create Sockets. Sockets are dedicated attach points within the hierarchy of your Skeleton, which can be transformed relative to the Bone it is parented to. Once set up, you can attach your objects, weapons, and other actors to the Socket.
This document provides an overview of how to create and use Sockets.
Prerequisites
- Your project has a Skeletal Mesh.
Creating Sockets
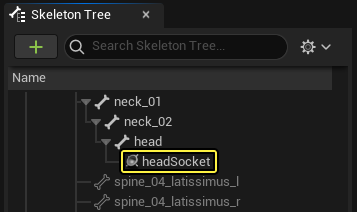
Sockets are created from the Skeleton Tree, which can be accessed from any of the main Animation Editors. Right-click on a Bone in the Skeleton Tree and select Add Socket.

Your new Socket will now be displayed in the Skeleton Tree, parented to the Bone that you selected previously.
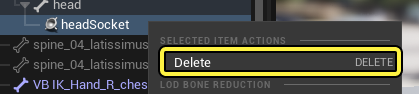
Sockets can be deleted by right-clicking on them and selecting Delete or by pressing Delete on your keyboard.
By default, when creating and manipulating Sockets, this will edit the Skeleton Asset of your Skeletal Mesh. Therefore, you must save it when making Socket changes.
Managing and Editing Sockets
Once you have created a Socket, you can interact with them in the following ways.
Socket Visibility
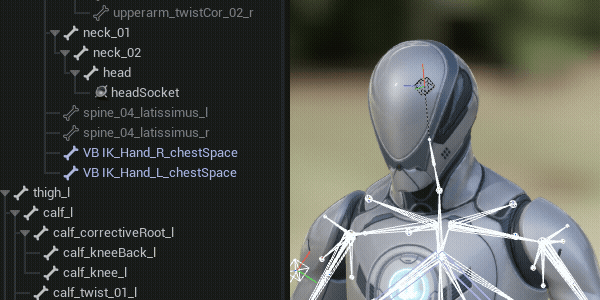
By default, Sockets are not visible in the Animation Editor Viewport, you can make them visible by navigating in the Viewport menu to Character > Bones, and enabling Sockets.

Selection and Movement
Sockets can be selected by either clicking them in the Skeleton Tree, or if made visible in the viewport, by clicking them in the Viewport. You can then move them by dragging on the transform manipulator in the Viewport. Sockets can be translated, rotated, and scaled.
Copy and Paste
Sockets can be copied and pasted in different ways depending on your requirements.
To copy a Socket, right-click on it in the Skeleton Tree and select Copy Selected Sockets, or press Ctrl+C.
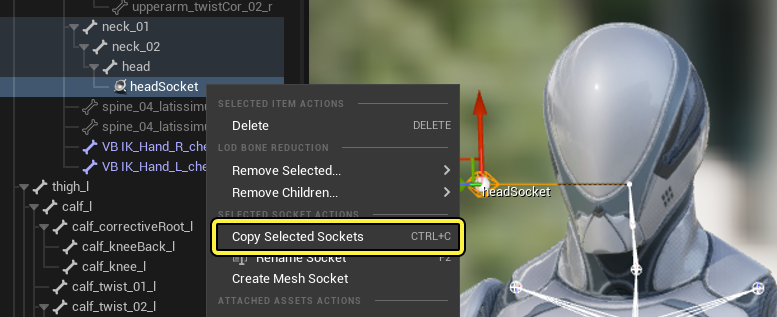
Next, you can choose to either:
-
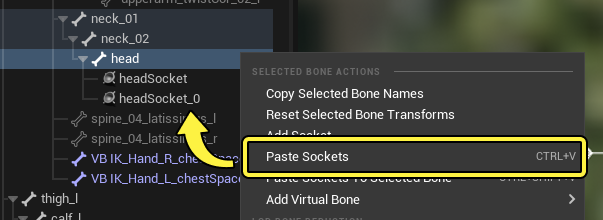
Paste the Socket to the same bone, which is done by right-clicking on any Bone in the Skeleton Tree and selecting Paste Sockets. This will essentially duplicate the Socket.
-
Paste the Socket to a different Bone, which is done by right-clicking a different Bone in the Skeleton Tree and selecting Paste Sockets To Selected Bone. This will paste a copy of that Socket with the same offset information, but parented to the new Bone.

Mesh Sockets
When sharing Skeletons between different Skeletal Meshes, it may be necessary to create Sockets that are exclusive for one of the Skeletal Meshes. This can be done by using Mesh Sockets, which will make a Socket exist on the Skeletal Mesh, instead of the Skeleton.
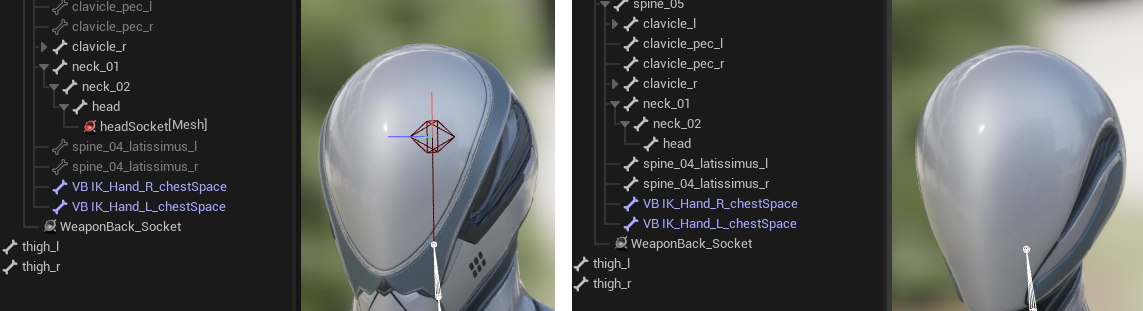
To make a Mesh Socket, right-click an existing Socket and select Create Mesh Socket. This will convert the Socket into a Mesh Socket. Ensure that you are currently using the Skeletal Mesh Editor for the Skeletal Mesh you want to create this for.

As with Sockets existing on the Skeleton Asset, Mesh Sockets will instead exist on the Skeletal Mesh, requiring you to save that asset if you create or modify Mesh Sockets.
Socket Details
Sockets contain the following properties in the Details panel when selected.
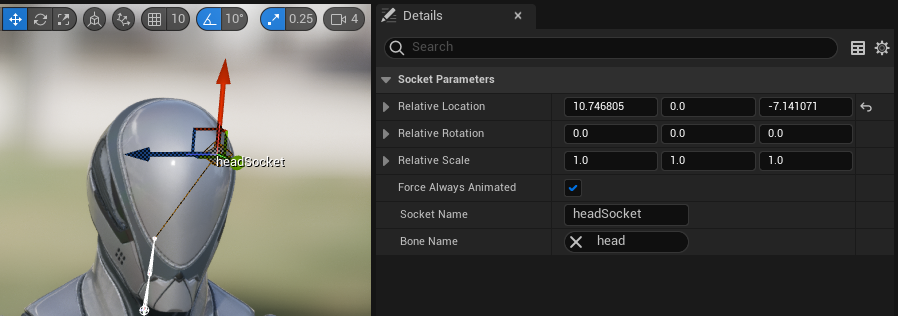
| Name | Description |
|---|---|
| Relative Location / Rotation / Scale | The current transform coordinates of the Socket in relative coordinates to its parent Bone in either location, rotation, or scale. |
| Force Always Animated | Enabling this will cause all parent bones of this Socket to always evaluate, regardless of if they are being removed due to the current LOD setting. |
| Socket Name | The name of this Socket. |
| Bone Name | The name of the Bone this Socket is attached to. Changing this value to a different Bone will re-parent the Socket. |
Attaching with Sockets
Once you have created and positioned your Socket, you can attach objects, effects, and other actors to it. The following kinds of attachments can be performed.
Basic Level Attachment
You can set up a basic attachment within a Level, where an object will be attached to a Socket by default. There are a few ways you can do this.
Drag and Drop
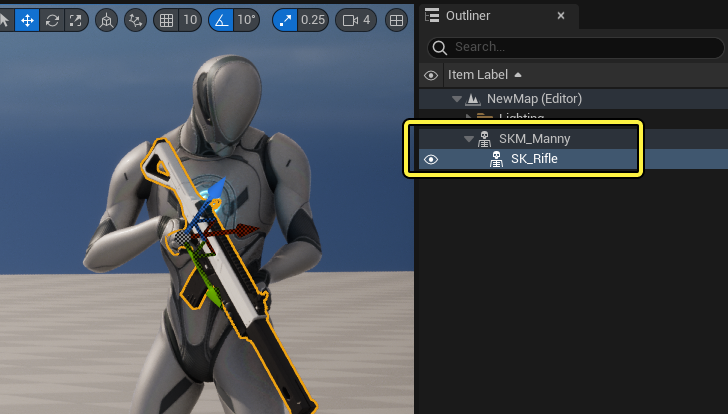
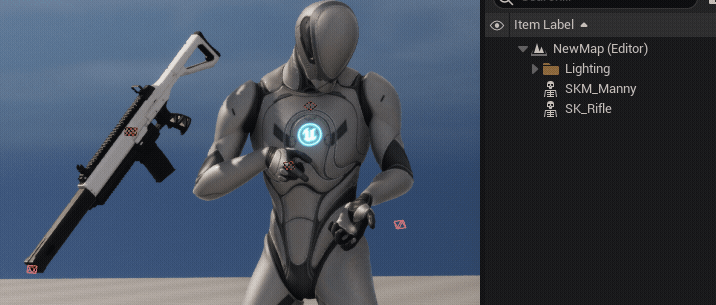
In the Level Outliner, drag the object onto your Skeletal Mesh Actor. A window will appear after where you can select any Bone or Socket to attach to. Select your Socket and the attachment process will complete.

When attaching in the Level, the object will retain its world transform from before, which can be useful if you are creating unique offsets for different objects. If you want the object to match the Socket's transform, then set the transform values of the object to default.

Context Menu
Right-click your object and select Attach To, then click on your Skeletal Mesh Actor. A window will appear after where you can select any Bone or Socket to attach to. Select your Socket and the attachment process will complete.

Socket Snapping
Click the Settings dropdown menu in the Level editor and select Enable Socket Snapping. This will make all Sockets visible in the viewport.

Next, you can quickly attach an object to any visible Socket by selecting the object first, then selecting a Socket.
Basic Blueprint Attachment
You can also set up a basic default attachment to a Skeletal Mesh Component in Blueprints.
First, parent the object to the Skeletal Mesh Component by dragging the object on the Skeletal Mesh in the Components panel.
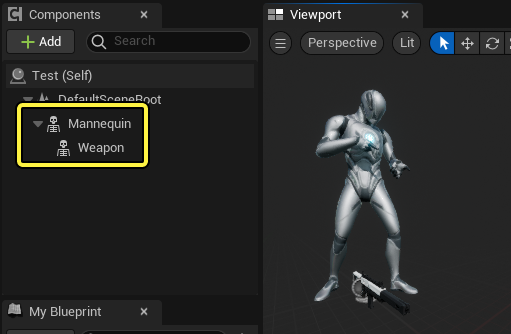
Next, select the child object, and in the Details panel locate the Parent Socket property. Click the search button and select the Socket to attach to.

Dynamic Attachment
In cases where you want to control when your object attaches and detaches to Sockets, you can use various Attach and Detach Blueprint functions.
For attaching, you can use the following functions:
- Attach Actor To Actor.
- Attach Actor To Component.
- Attach Component To Component.
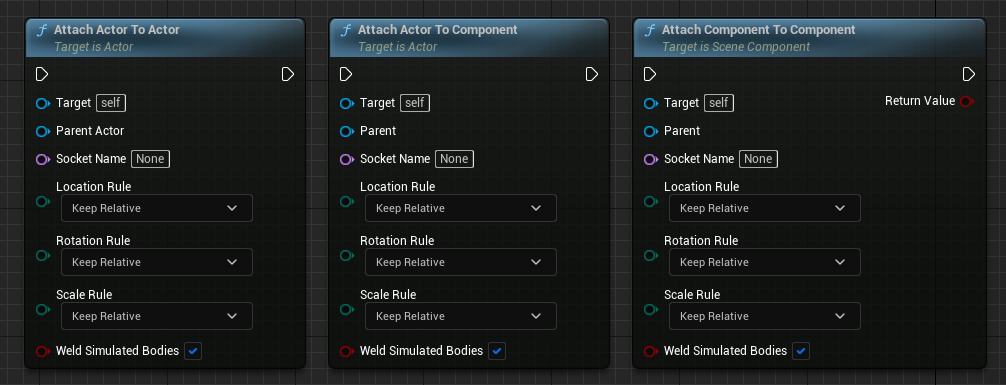
Attaching functions contain the following properties:
| Name | Description |
|---|---|
| Target | The child actor or component that is being attached. |
| Parent | The parent actor or component that the Target is being attached to. |
| Socket | The Socket to use when attaching |
| Location / Rotation / Scale Rule | Transform rules that control where the Target should end up after being attached. You can select from the following options:
|
| Weld Simulated Bodies | Whether or not to weld the Target to the Parent. |
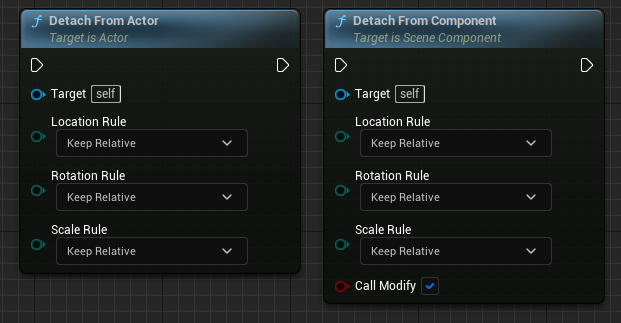
For detaching, you can use the following functions:
- Detach From Actor
- Detach From Component