
Follow the steps below for an example of Setting and Getting reference to an Actor.
For this example, we are using a new Blueprint Third Person Template with Starter Content enabled.
-
From the Place Actors panel in the Basic tab, drag a Box Trigger into your level.
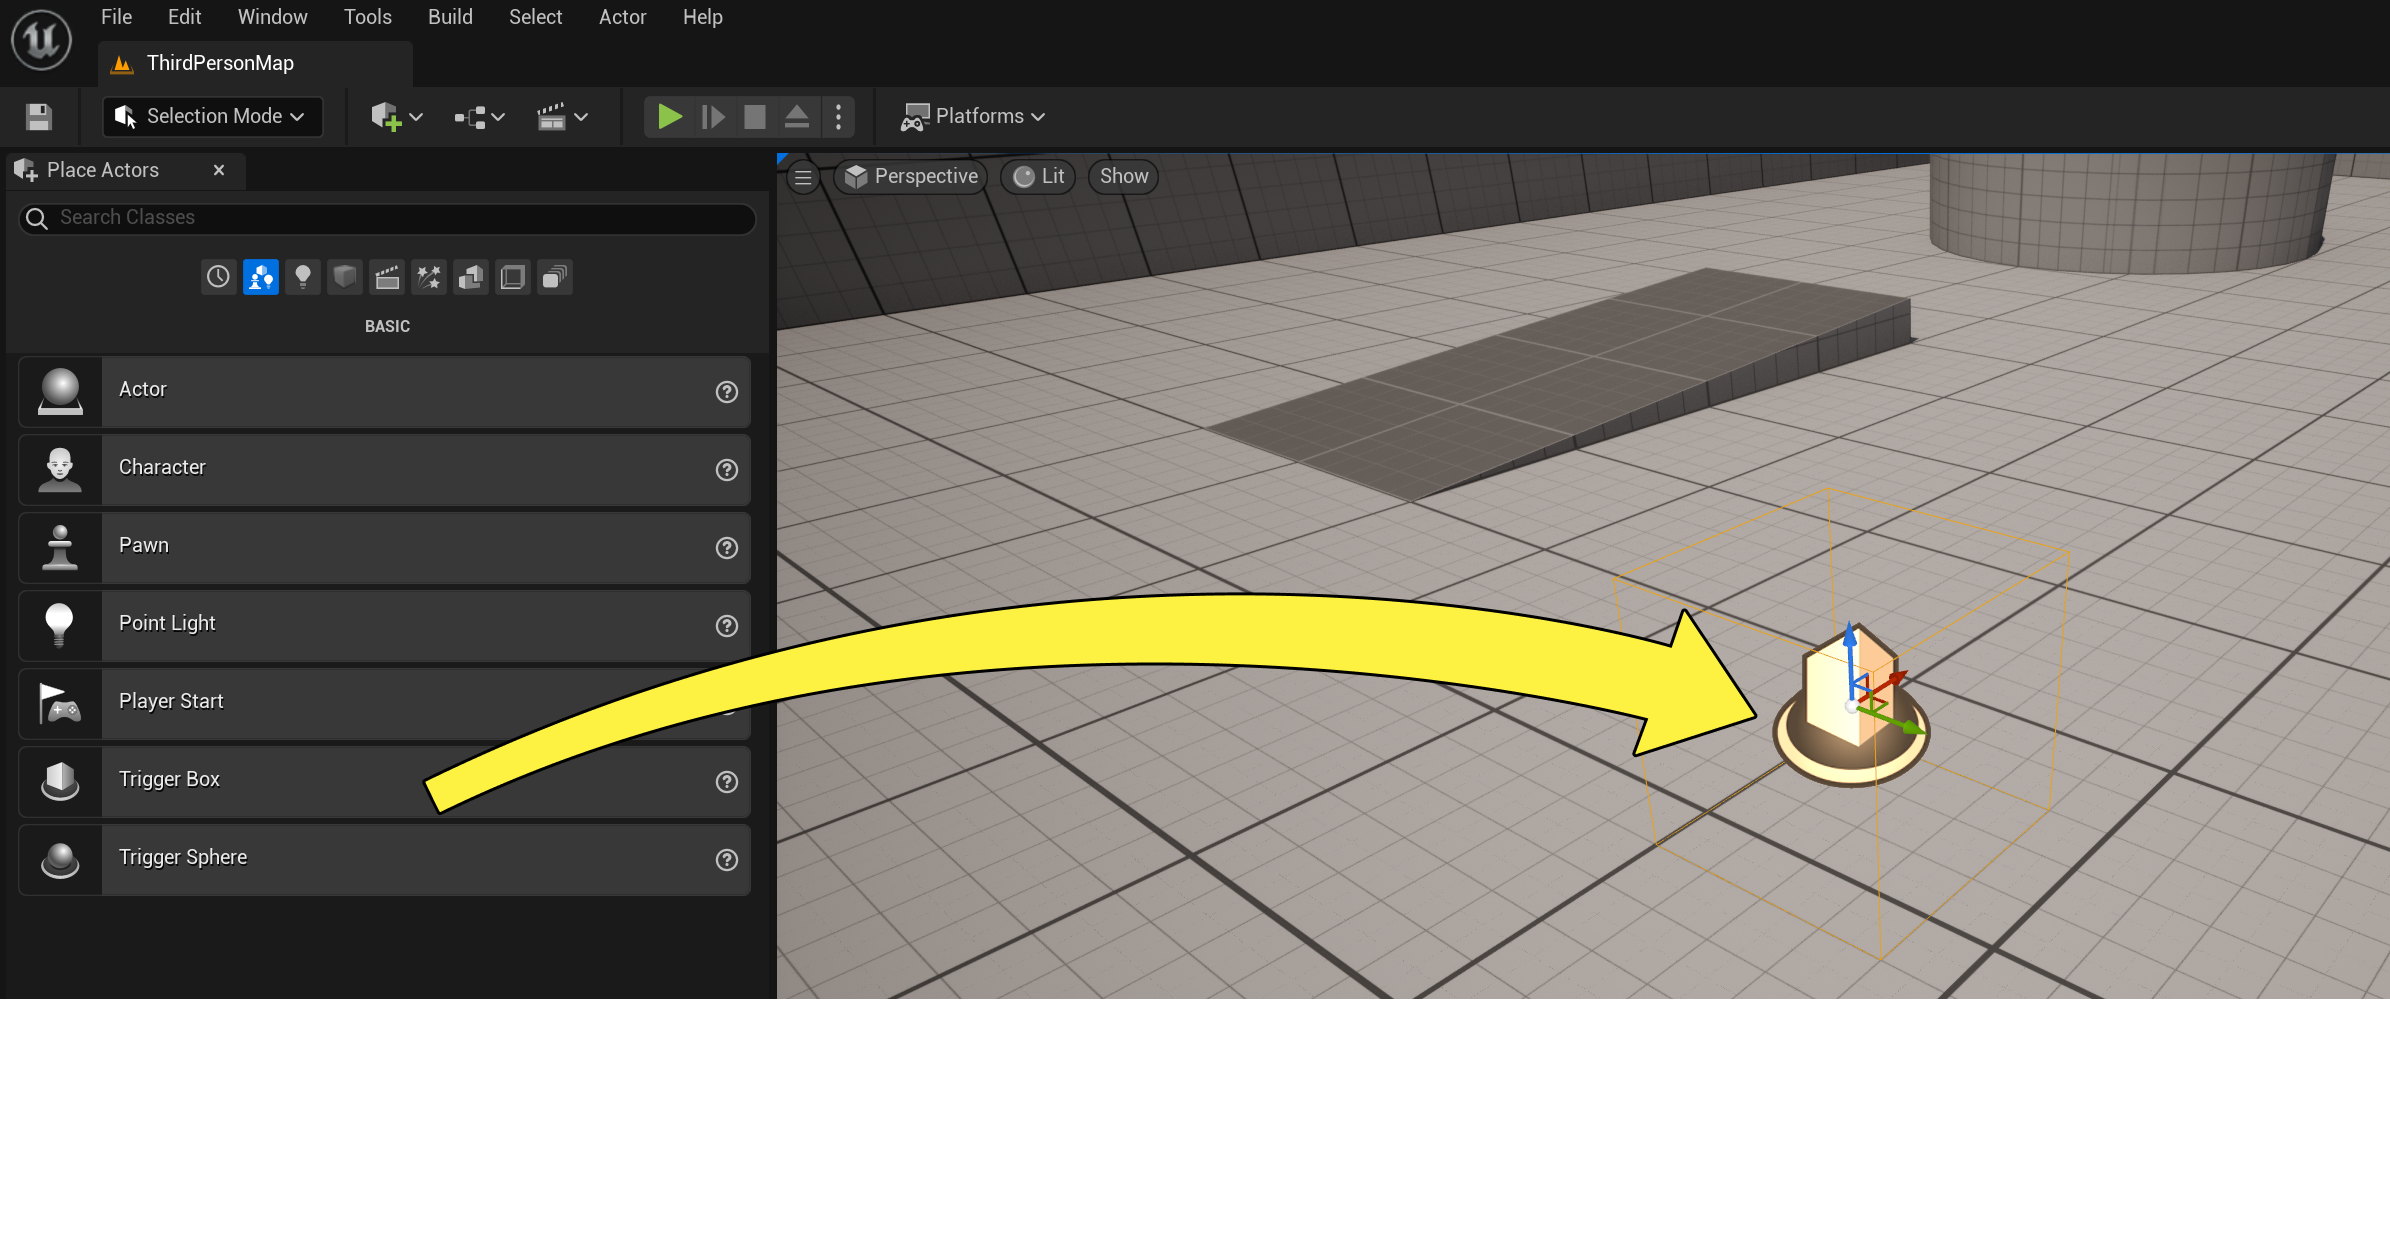
We are going to use this to trigger movement in another Actor in the level.
-
In the Details panel for the Box Trigger, select the Convert to Class Blueprint option.
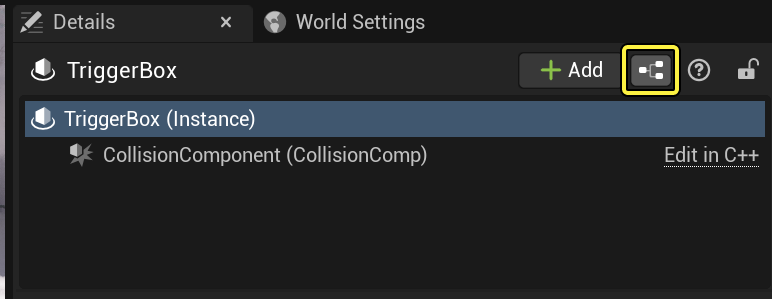
We are going to create a Blueprint out of this Actor and assign a variable within it which will store the reference Actor.
-
Give the Blueprint a name then select Create Blueprint (the Blueprint Editor will open).
-
In the Blueprint Editor, under My Blueprint, click the Add Variable button.

-
Click on the variable, then in the Details panel, click the Variable Type button and select Actor under Object Reference.
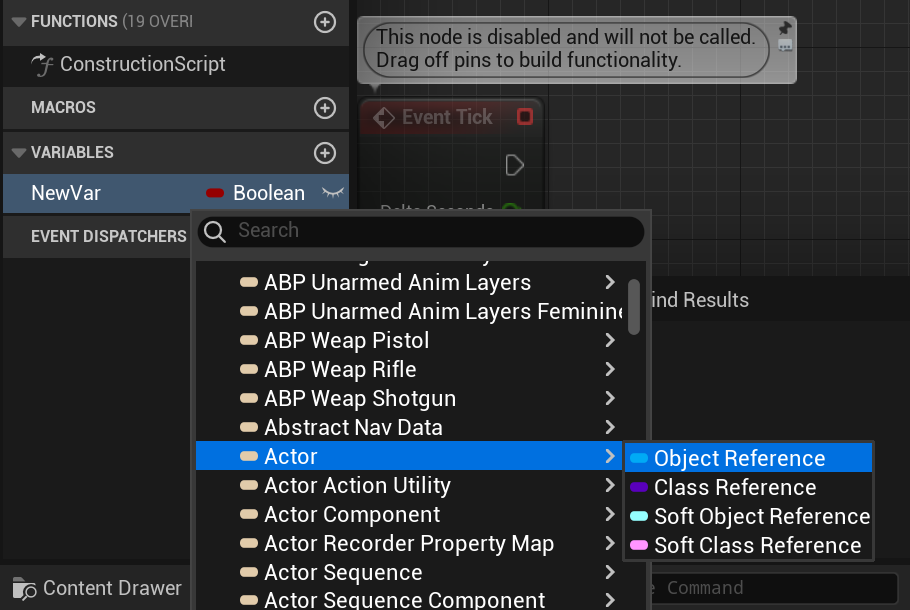
Here we are specifying that the reference is of the Actor type and is an Object in our level.
-
Name the variable TargetActor and click the Instance Editable checkbox.
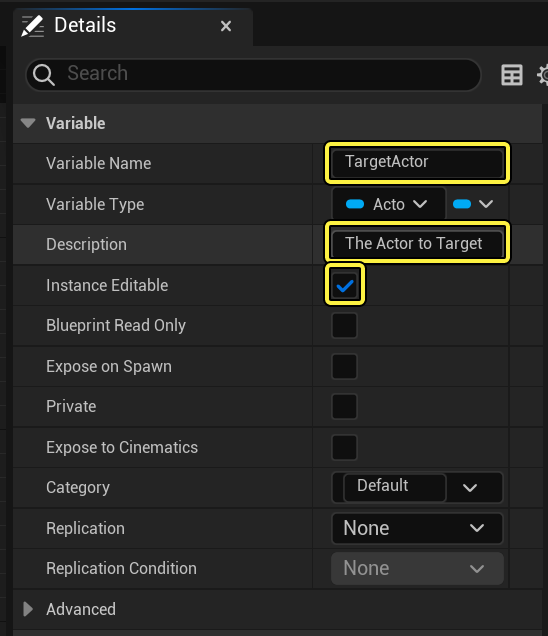
This indicates that the variable is set to Public which allows it to be accessed and set outside of this Blueprint via the Details panel in the Main Editor window. This is useful in situations where you want to modify the variable without having to go into the Blueprint to modify it.
-
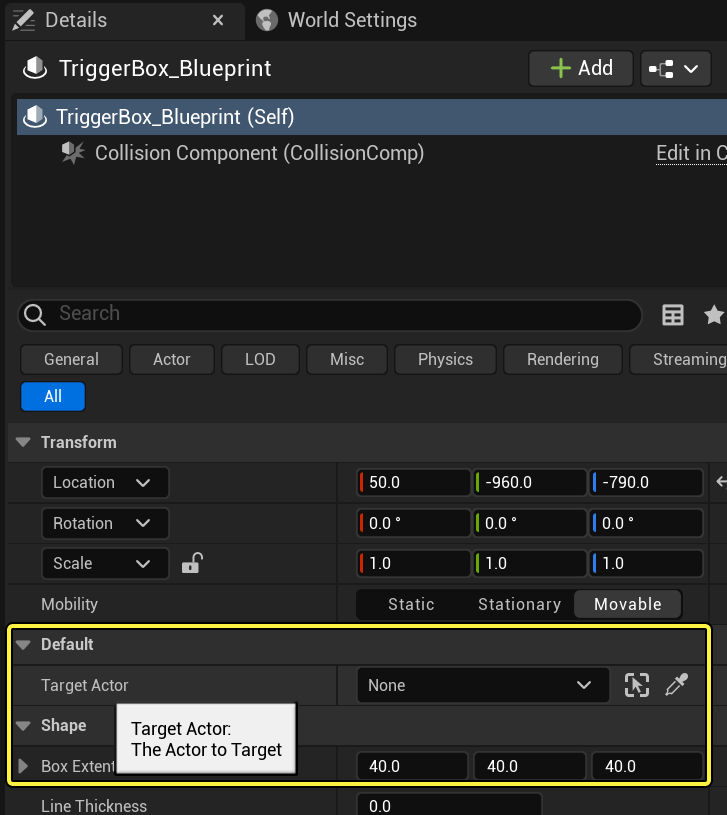
Enter text in the Tooltip field explaining what the variable does or is intended for. In this case, it reads "The Actor to Target."
-
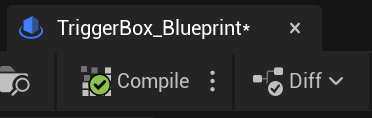
Click the Compile button in the upper left portion of the Blueprint Editor window.

It will change to a green check mark after compiling.
-
Minimize the Blueprint and return to the Main Editor window then select the Box Trigger Blueprint in your level.
-
In the Details panel for the window, you should see under Default the Target Actor variable and tooltip.
-
From the Content Browser, under Content/StarterContent/Shapes add three Shape_Cubes to the level.
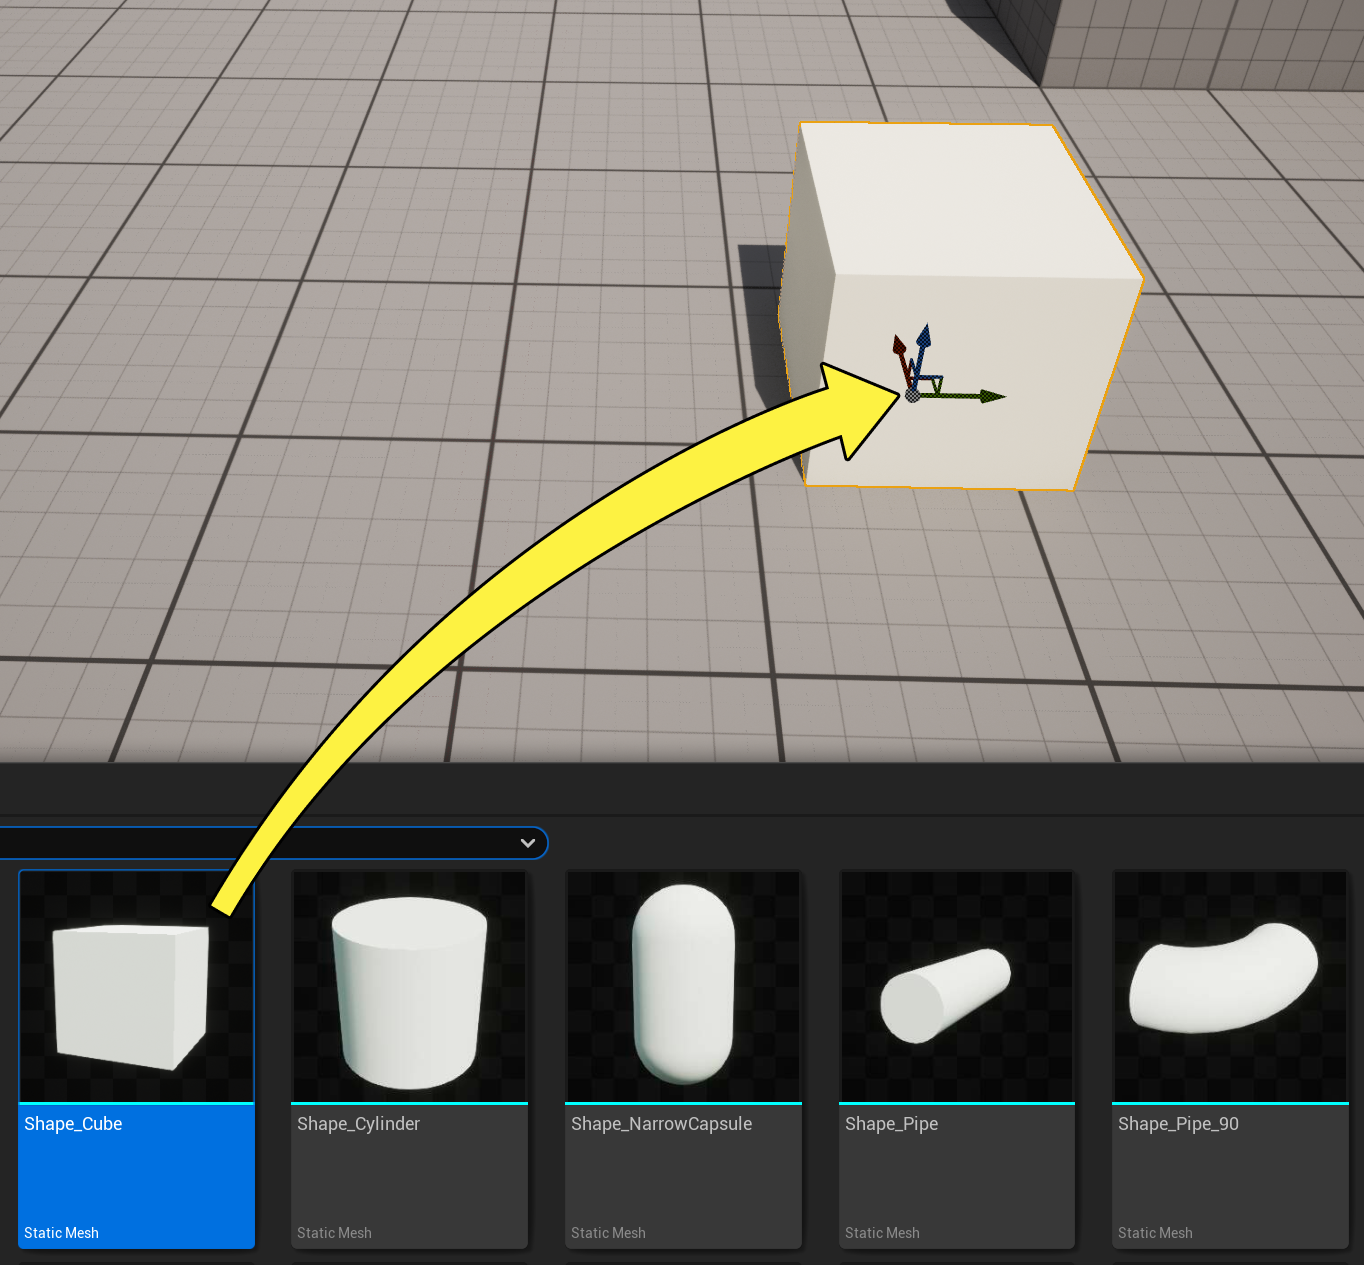
If you are using your own project, you can add any Actor, Static Mesh, or Blueprint to the level instead.
-
Whatever you add to the level, in the Details panel for each Actor, set their mobility to Moveable.
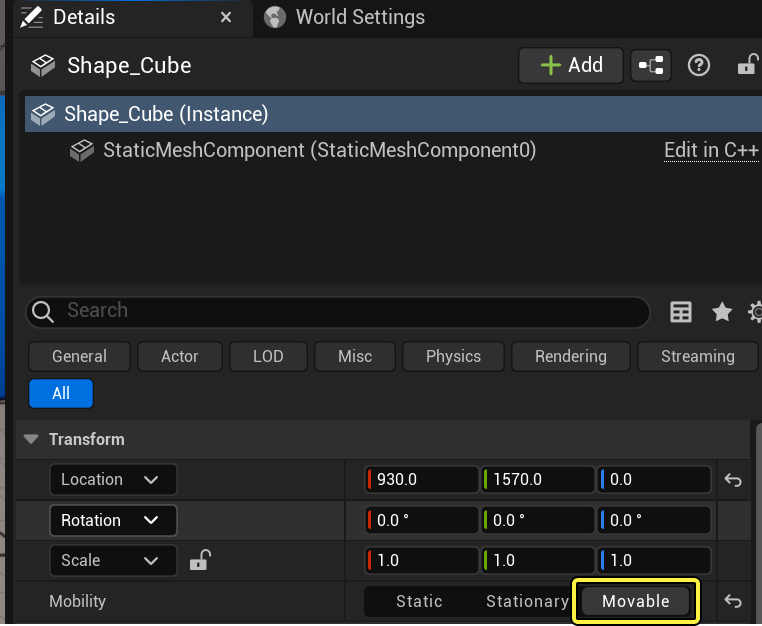
This will allow us to move them via Blueprint script.
-
Click on the Box Trigger Blueprint in the level.
-
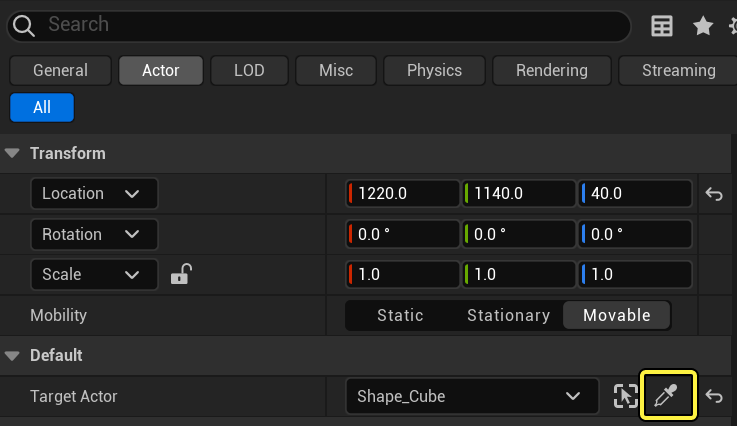
In the Details panel, click the None box under Target Actor and search for Shape (or the name of the Actor(s) added).
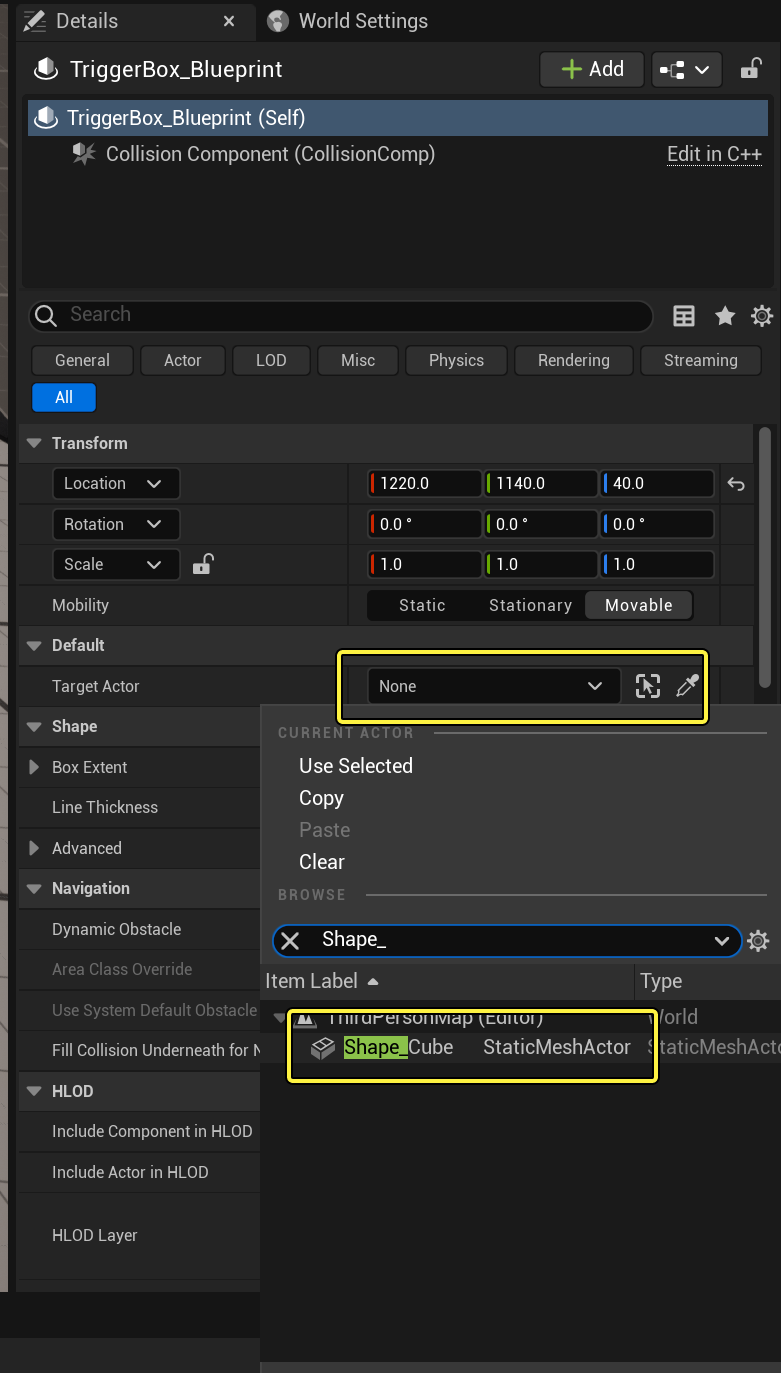
When clicking None all Actors currently in the level are displayed, however we are going to target one of the cubes we added.
-
Click the eye dropper icon next to the magnifying glass icon.

This will allow you to select an Actor from your level as the Target Actor by clicking on it in the viewport.
-
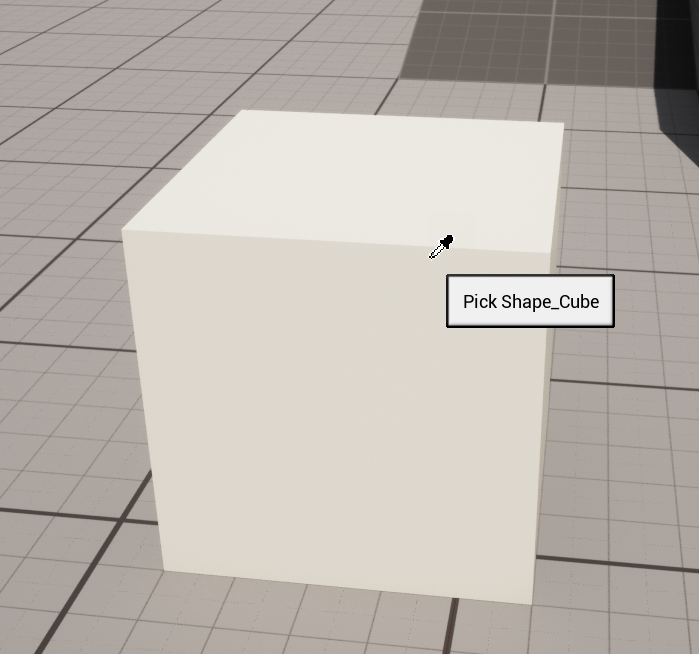
Move the eye dropper icon over one of the cubes (or other asset you have added) and click it to make it the Target Actor.
-
When you select an Actor, the Target Actor variable will update with the selected Actor in the Details panel.

Here we have Set reference to an Actor which will be our Target Actor.
-
Open the Box Trigger Blueprint, then in the MyBlueprint window, click the eye icon and enable Show Inherited Variables.
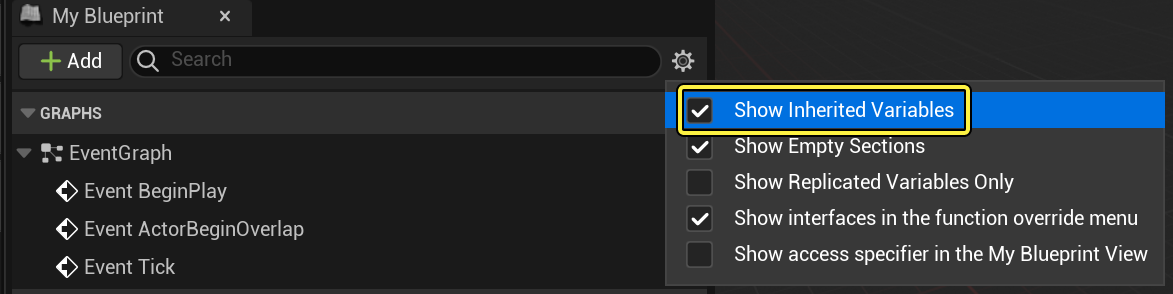
This will allow us to add events on the Components that were inherited when we first converted the Trigger Box to a Class Blueprint.
-
Under Trigger Base, Right-click on CollisionComponent and choose Add Event then Add OnComponentBeginOverlap.
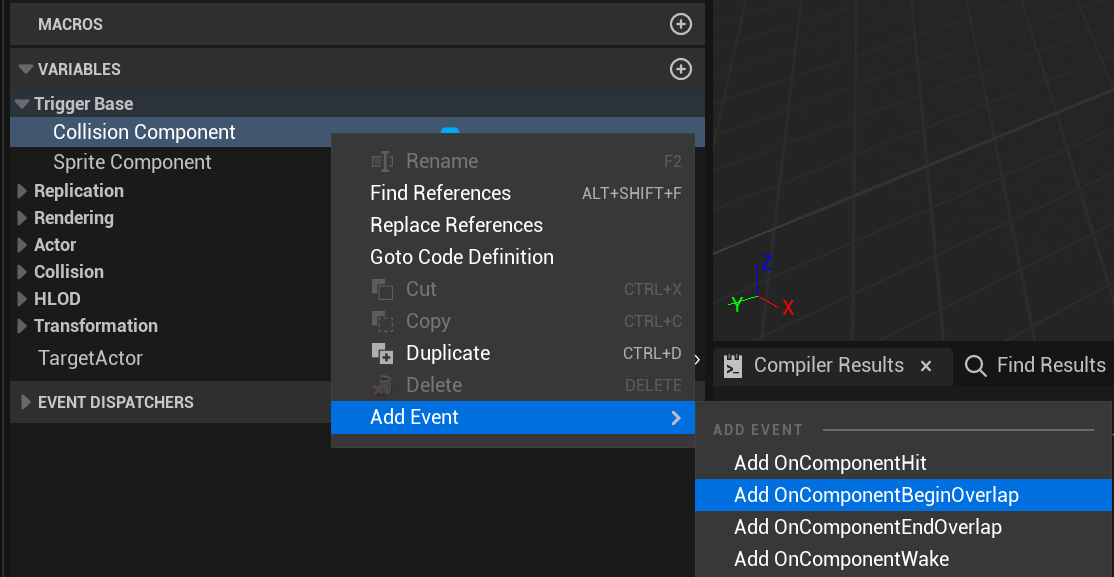
This will create a new Event node on the graph.
-
Hold Control and drag the TargetActor variable into the graph.
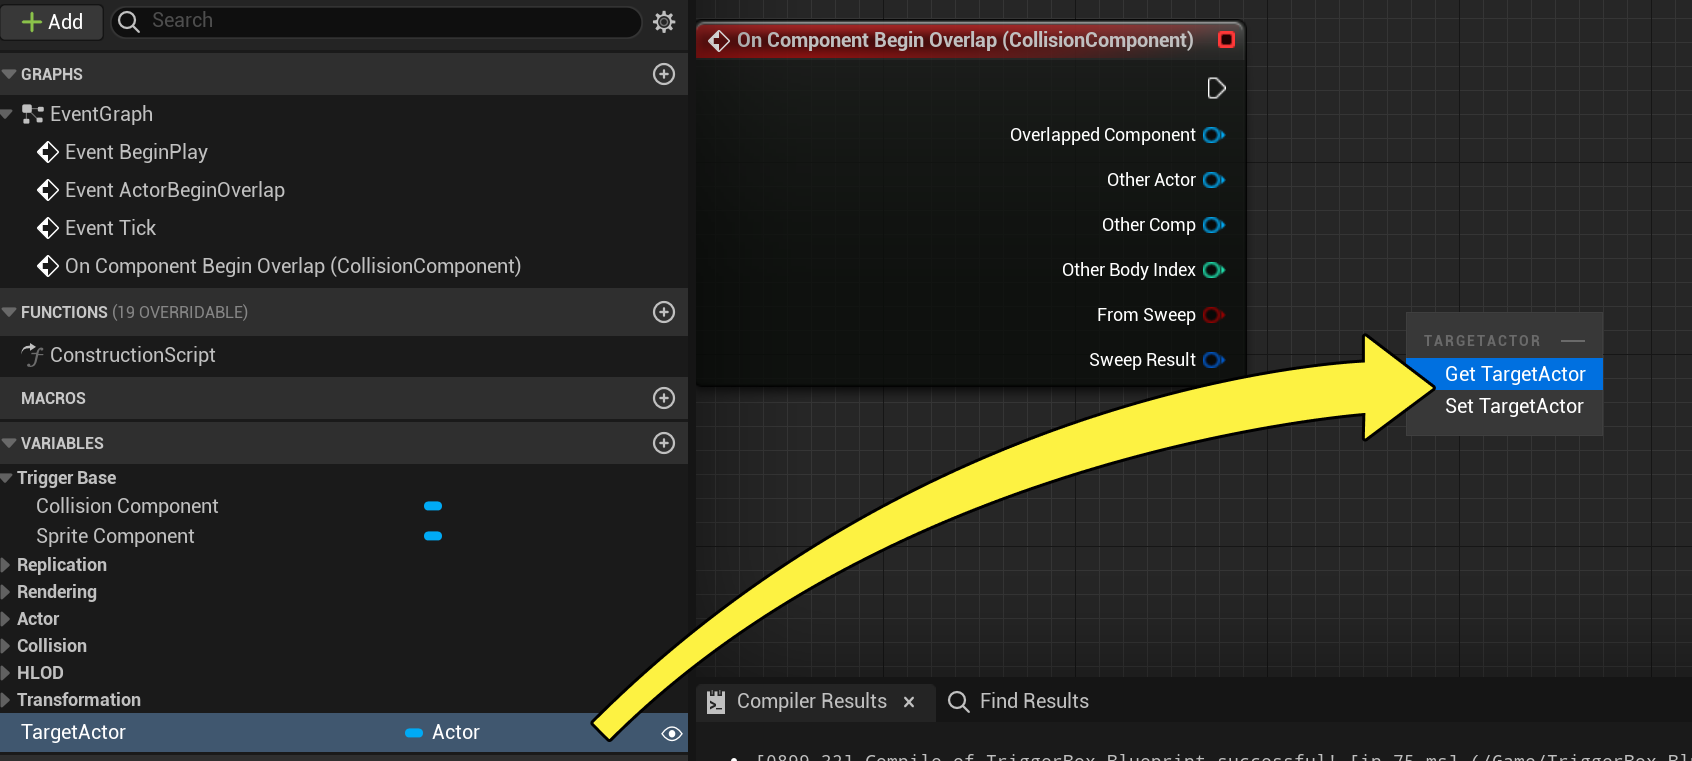
This creates a Get node which will get whatever is assigned to the variable which we have set to an Actor in our level.
-
Drag off the TargetActor node, search for and add an Add Actor Local Offset node.
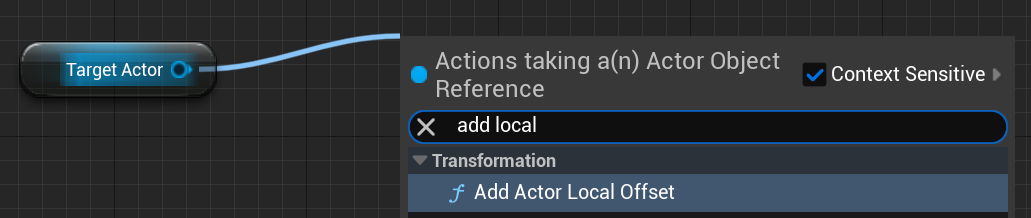
This will allow us to add to the current target's transform (allowing us to move it from its current position).
-
Connect the nodes as shown below and set the Z value on the Add Actor Local Offset node to 500.0.
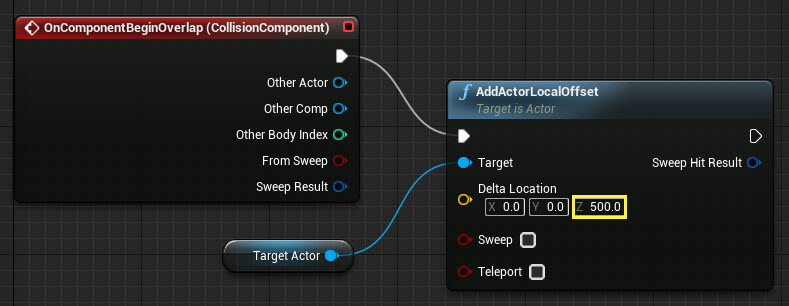
This will get the target's current location and move it up by 500 along the Z axis whenever the trigger box is overlapped.
-
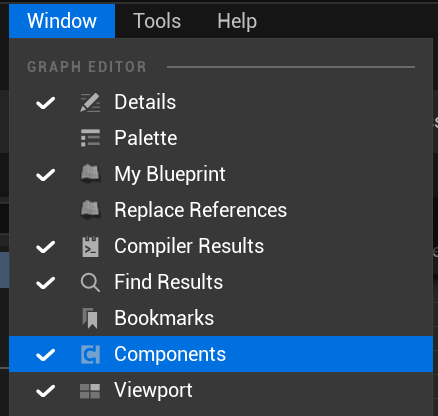
In the Components window, click TriggerBox_Blueprint so it is selected.
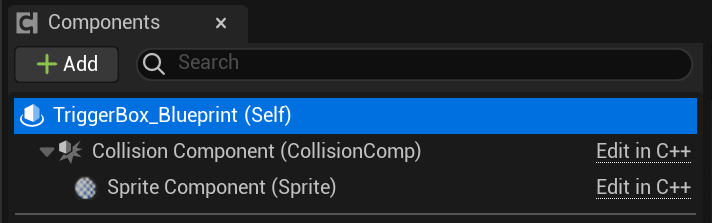
If you do not see the Components window, you can enable it from the Window menu option.
-
In the Details panel for the Trigger Box, under Rendering, un-check the Actor Hidden In Game option.
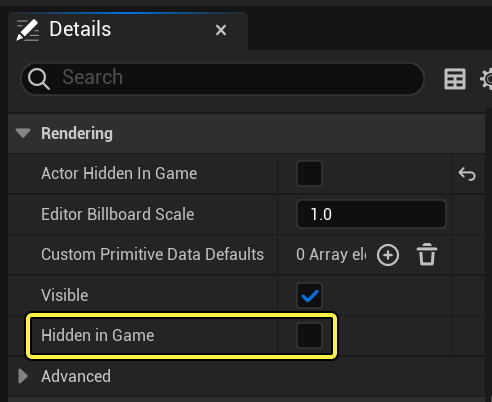
This will make the trigger box visible in-game so that you can see where it is to enter it with your player.
-
Click Compile and Save, then close the Blueprint.
-
From the Main Editor Window, click the Play icon to play in the editor.
When you enter the Trigger Box, your selected Actor should move up by 500 units. Each time you enter the Trigger Box, the box will move up by another 500 units. By establishing a reference, the variable knows which Actor to affect in the Trigger Box script. Try affecting a different Actor in the level using this script.
-
From the Main Editor window, inside the Level Viewport click the Box Trigger Blueprint.
-
In the Details panel for the Box Trigger, click the eye dropper icon next to Target Actor.
-
In the level viewport, click a different Actor than the one you used before.
-
Play in the editor again.
This time the new Actor selected should move up along the Z axis by 500 units each time you enter the Trigger Box. By using the Target Actor variable in our Box Trigger script, we are not locked into a specific Actor associated with the script and can modify it and change the Actor it affects without having to modify the Blueprint itself.
While this example illustrates how to move different objects around, instead of moving an object you could use this method to open doors when the player presses a button, turn on/off different lights, spawn items for the player to pick up or destroy or any number of other possibilities.
This is also one of multiple ways you can get reference to an Actor, for example if you wanted to get Reference to the Player Character which cannot be explicitly set via the Main Editor window, you would take a different approach (see the Related Links section below).