The Machine Learning (ML) Deformer is a framework in Unreal Engine that you can use to obtain high-fidelity mesh deformations for characters and objects at runtime. Using an Alembic file (.abc), containing a set of desired mesh deformation data, you can train one of Unreal Engine’s ML Deformer models to make an approximation to this high quality mesh deformation with high performance at runtime.
The ML Deformer training process relies on three inputs:
- A Skeletal Mesh asset.
- An Animation Sequence asset of your character posed in different positions covering a wide range of motion
- A Geometry Cache asset that contains the desired mesh deformations in those poses.
Using these three inputs, the ML Deformer framework outputs a trained ML Deformer asset which can be used in combination with the ML Deformer Component in a character's blueprint to select mesh deformations at runtime.
The ML Deformer Editor contains a suite of tools and settings that you can use to fine tune and test the training process to achieve high quality mesh deformations at runtime.
The following document is an overview of the ML Deformer Framework in Unreal Engine, including a reference material for the ML Deformer asset, the ML Deformer editor, and the ML Deformer Component. This document also includes infomation about the different ML Deformer models that are used to train the ML Deformer system, such as the Neural Morph model and Nearest Neighbor model.
Prerequisites
- The ML Deformer Framework is a Plugin and must be enabled prior to use. Navigate in the Unreal Engine menu to Edit > Plugins, locate ML Deformer Framework in the Animation section, and enable it. After enabling the plugin, you will need to restart the editor.

- You have a character model, containing a mesh and a skeleton, that can be used in both Unreal Engine and Autodesk Maya.
ML Deformer Setup Guide
To reference a comprehensive setup guide about using the ML Deformer framework to select high quality mesh deformations at runtime, see the Using the ML Deformer documentation.
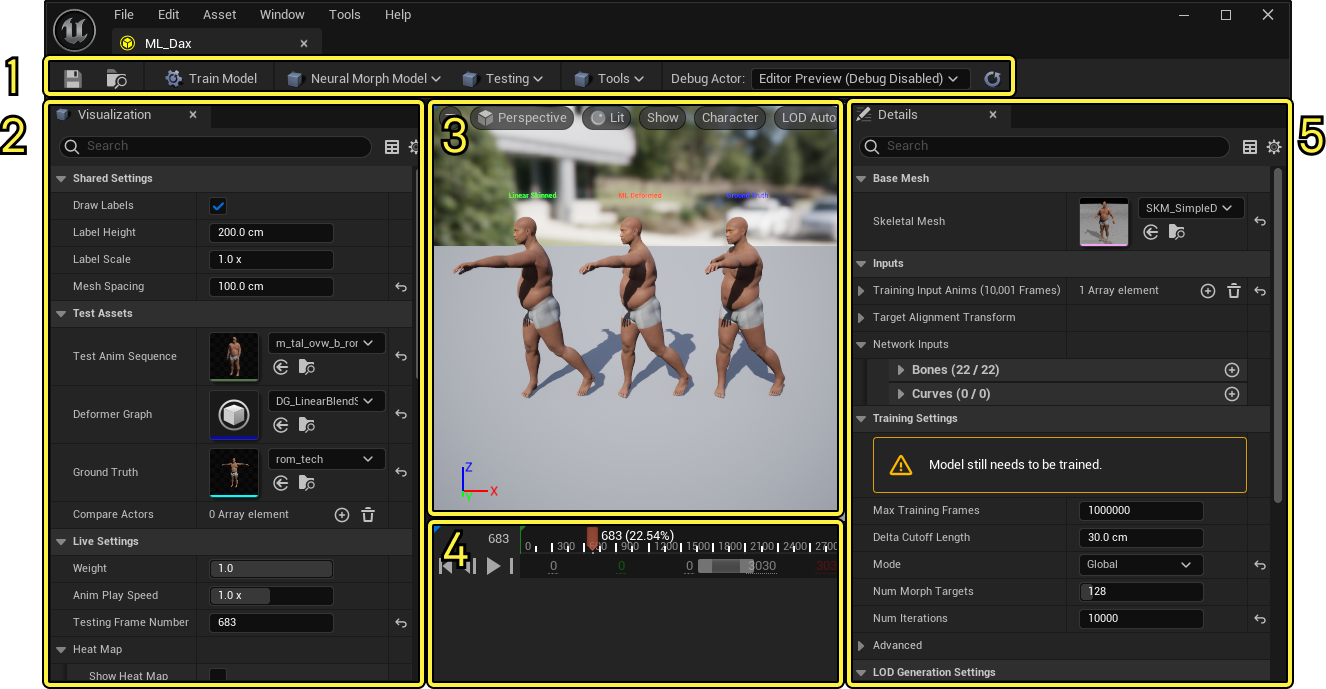
ML Deformer Editor
Here you can reference an overview of the ML Deformer Editor, and a breakdown of its panels and tools.
-
Visualization Panel, used to inspect data. Settings in this panel don’t impact the trained model and are purely to visualize and inspect.
-
Sequencer Timeline, used to control and scrub through training or test animation sequence playback.
-
Details Panel, which contains all training related settings for the ML Defromer.
Toolbar
Here you can reference a list of the ML Deformer Editor’s Toolbar, and a description of each tools function:
| Name | Tool | Description |
|---|---|---|
| Train Model |  |
When selected this button will begin training the model using the properties in the ML Deformer Editor’s Details panel, to generate Morph Targets of your character’s mesh deformations. This button will be disabled when training can not be performed, due to missing inputs or other errors. The exact errors will be reported in the UI as well. |
| Model Selection |  |
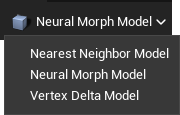
Here you can select the ML Deformer model you would like to use. You can select which model you would like to train the ML Deformer with from the available options in the drop down-menu. Changing the selected model will wipe your current session, so it is recommended to only change this right after creating a new ML Deformer asset. The ML Deformer models available depend on the model plugins you have enabled. Each model type has its own plugin. |
| Editor Mode | 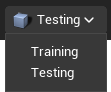 |
Here you can toggle the ML Deformer to either the Training mode or the Testing mode.
|
| Tools | 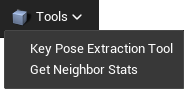 |
Here you can access the ML Deformer Editor’s Tools. Using the Drop Down Menu, select the tool to open each tool’s options where you can adjust its properties and run the operation. You can access the following tools using the Tools menu button: The tools contained in this menu are currently mostly applicable when working with the Nearest Neighbor ML Deformer model. For more information about the individual tools and a list of their properties and a description of their functionality, see their respective sections below. |
| Debug Actor | 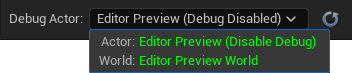 |
Here you can select what Actor you would like to debug. By selecting an actor using the drop-down menu, you can view the deformations on an actor in an active Play In Editor (PIE ) session. After selecting an actor and world, the Actor in the ML Deformer Editor’s viewport will show the same pose as in your PIE session. Only actors using the currently opened ML Deformer asset can be picked to debug. Projects often blend several animations together and do procedural modifications such as IK, debugging can be helpful, as you can test only with a single animation sequence in the ML Deformer editor when not debugging. You can refresh the list of available actors for debug using the Refresh button in the toolbar.  |
Key Pose Extraction Tool
When using the Nearest Neighbor ML Deformer model, you can use the Key Pose Extraction tool to extract key pose data from your characters training animation sequence, as well as generate geometry cache data. After making any property adjustments, use the Extract button at the bottom of the window to begin the operation.

Here you can reference a list of the Key Pose Extraction Tool’s properties and a description of their functionality:
| Property | Description |
|---|---|
| Nearest Neighbor Model Asset | View the MLDeformer asset used for clustering. |
| Section Index | Set the section of the trained data to be used in order to generate clustered poses. |
| Num Clusters | Set the number of pose clusters to be generated. |
| Extract Geometry Cache | When enabled, the Key Pose Extraction Tool will also extract geometry cache data. |
| Inputs | Set the data to extract key poses from the following options:
|
| Extracted Poses | Here you can assign the Animation Sequence asset to extract the pose clusters too. While you can overwrite an existing asset in your project, you can also use the New Poses button to create a new asset in order to save your extracted pose clusters. 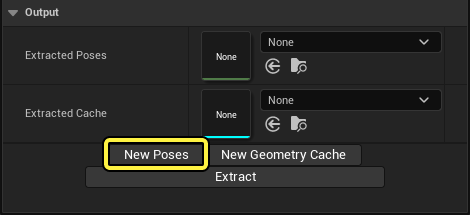 |
| Extracted Cache | When the Extract Geometry Cache property is enabled, here you can assign the asset to save your extracted geometry cache data to. While you can overwrite an existing asset in your project, you can also use the New Geometry Cache button to create a new asset in order to save your extracted geometry chase data. 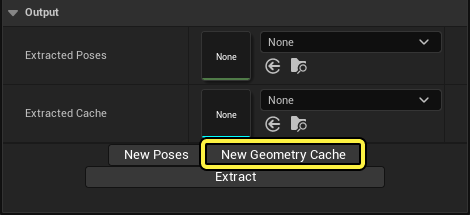 |
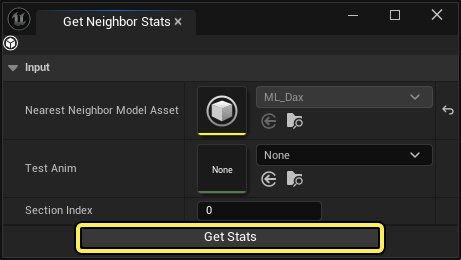
Get Neighbor Stats
You can use the Get Neighbor Stats to generate data on your character’s Nearest Neighbor trained ML Deformer asset. After making any property adjustments, use the Get Stats button at the bottom of the window to begin the operation.
Here you can reference a list of the Get Neighbor Stats tool’s properties and a description of their functionality:
| Property | Description |
|---|---|
| Nearest Neighbor Model Asset | View the MLDeformer asset used for computing the stats. |
| Test Anim | Here you can select the Animation Sequence asset you would like to generate neighbor stats for. You can select the asset from your project using the asset selection drop-down menu. |
| Section Index | Set the Section Index value for the section of the Animation Sequence asset you would like to sample. |
Visualization Panel
Here you can reference a list of the ML Deformer Editor’s Visualization panel properties and a description of their functionality:
| Property | Description |
|---|---|
| Draw Labels | When enabled, a label with the text Linear Skinned Mesh, or Animation Sequence (Green), ML Deformed Mesh (Red), Comparison Actor (Yellow) and Ground Truth Mesh, or Geometry Cache asset (Blue) will be rendered in the ML Deformer Editor’s Viewport. |
| Label Height | Set the height of the debug label drawing in centimeters (cm). |
| Label Scale | Set the scale of the debug label drawing. |
| Mesh Spacing | Set the spacing between meshes in the viewport, in Unreal Units. |
| Test Anim Sequence | Set the Animation Sequence asset that will be played on the Skeletal Mesh in the Viewport. Use this property to set an Animation Sequence other than your training Animation Sequence to see how the ML Deformer performs during playback. This property only affects the viewport mesh when the ML Deformer Editor is set to the Testing mode. |
| Deformer Graph | Set the Deformer Graph asset to use on the ML Deformer Editor’s deformed test actor. Deformer Graph assets define deformers in a graph based system and can do things such as performing skinning, morphing and recomputing normals at runtime. You can set the Deformer Graph asset you intend to use with your character at runtime here to observe the results. If you want to use a deformer graph in combination with this ML Deformer asset at runtime in your project, you will need to specify the deformer graph asset in the "Mesh Deformer" property of your Skeletal Mesh Component as well. Changing the deformer asset in the ML Deformer asset visualization settings does not automatically add it to your skeletal mesh components. When using the Neural Morph ML Deformer model, the model’s deltas are output using the Deformer Graph’s Morph Target node. For more information about the Deformer Graph and the Deformer Graph nodes, see the Deformer Graph documentation. |
| Ground Truth | Set the Geometry Cache asset that will be used to display the Ground Truth mesh of the Test Anim Sequence. It is important that your Test Anim Sequence and Ground Truth both have the same animation, frame count, and frame rate. |
| Compare Actors | Here you can add comparison actors to the ML Deformer Editor’s debug drawing in the Viewport. To add a comparison actor, use (+) Add, then select a ML Deformer asset from the asset selection drop down menu. By default the Name property will populate with the assigned ML Deformer asset’s name, but you can manually assign a name in the property’s field. |
| Weight | Set the scale factor of the mesh deformation deltas applied on the ML Deformed mesh in the Viewport. A value of  |
| Anim Play Speed | Set the playback speed of the Test Anim Sequence in the Viewport. Use a value of 1.0 to use the default playback speed of your animation. |
| Training Frame Number | Here you can manually set the frame number in the playback of the Training Anim Sequence. This value will automatically update when playing or scrubbing the animation in the sequence playback controls. This property is only accessible when the ML Deformer Editor’s Mode is set to Training. |
| Testing Frame Number | Here you can manually set the frame number in the playback of the Test Anim Sequence. This value will automatically update when playing or scrubbing the animation in the sequence playback controls. |
| Draw Deltas | When enabled, a debug view of the vertex delta values between the Linear Skinned Mesh and the Ground Truth mesh will be rendered in the viewport. This property is only accessible when the ML Deformer Editor’s Mode is set to Training. |
| XRay Deltas | When the Draw Deltas property is enabled, you can toggle whether the vertex delta debug drawing should also display the deltas that are normally occluded by the mesh or not. This property is only accessible when the ML Deformer Editor’s Mode is set to Training. |
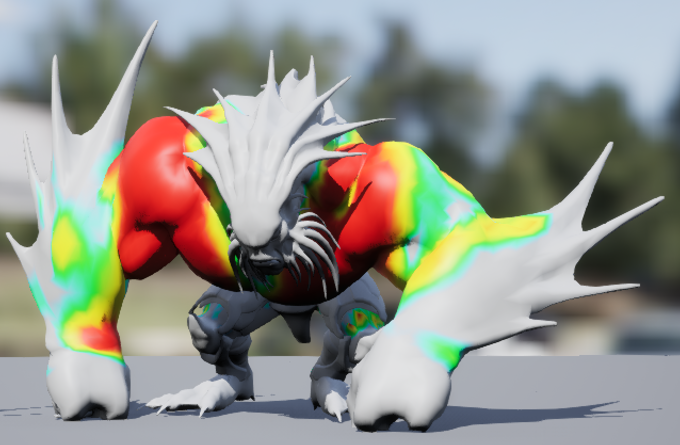
| Show Heat Map | When enabled, a heatmap showing the delta of change between the Linear Skinned Mesh and the ML Deformer corrected results will be rendered on the ML Deformed mesh in the Viewport. Cooler colors indicate small values, while warmer colors depict larger values. Grey indicates no values are present. 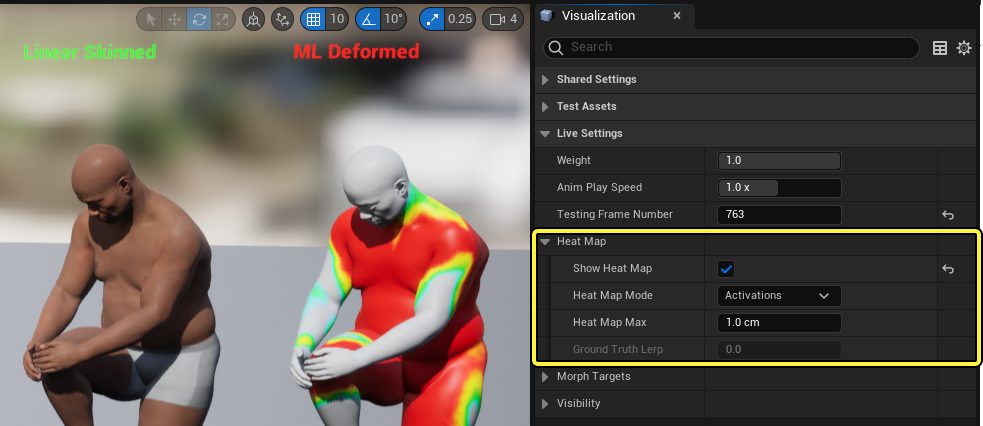 |
| Heat Map Mode | Here you can set the mode of the heat map, to observe different data. You can select the mode using the drop down menu, and can select the following modes:
|
| Heat Map Max | Here you can set the value, in centimeters, that will represent the warmest color of the heat map. This will be dependent on your project’s goals with using the ML Deformer and how much error or correction you intend to apply to your Skeletal Mesh character. For example, a value of 3.0 would result that red on the heat map would represent 3.0 cm or higher of correction being applied to the ML Deformed mesh when using the Activations Heat Map Mode. When using the Ground Truth Heat Map Mode, a value of 3.0 would result in red representing a 3cm or higher error between the Ground Truth mesh and the ML Deformed mesh. |
| Ground Truth Lerp | Set the lerp factor, or influence from the ML Deformed mesh or the Ground Truth mesh when using the Heat Map. For example, a value of 0.0 will completely favor the ML Deformed mesh, while a value of 1.0 will completely favor the Ground Truth mesh. Using a value in between you can set the Heat Map to factor in an influence of both. |
| Draw Morph Targets | After training your ML Deformer model, you can enable this property to see a debug drawing of the Skeletal Mesh’s Morph Targets in the Viewport. This property can be helpful to observe how sparse the generated Morph Targets are. This property can only be used after training your ML Deformer model, in the same editor session, directly after training or if you have opened an ML Deformer asset that has already been trained. |
| Morph Target Number | Here you can set the index value of the generated Morph Target that will be rendered in the Viewport. This property can only be used after training your ML Deformer model, in the same editor session, directly after training. |
| Num Active Morphs | Here you can reference the number of active generated Morph Targets for your character per ML Deformer LOD. |
| Highlight Debug Actors in PIE (Play in Editor) | When enabled, a debug drawing of the actor’s bounds will be rendered in the Viewport. Even when enabled, this debug drawing will only be rendered during an active PIE session. |
| Debug Bounds Color | When the Highlight Debug Actors in PIE property is enabled, here you can set the color of the debug drawing. |
| Draw Linear Skinned Actor | When enabled, the Linear Skinned mesh will be visible in the Viewport. |
| Draw ML Deformed Actor | When enabled, the ML Deformed mesh will be visible in the Viewport. |
| Draw Ground Truth Actor | When enabled, the Ground Truth mesh will be visible in the Viewport. |
| Draw ML Compare Actors | When enabled, all ML Compare meshes will be visible in the Viewport. This property is only accessible after adding and setting a ML Deformer asset in the Compare Actors property. |
| Mask Viz Mode | Here you can set the visualization mode for your meshes masks. Each bone, curve, bone group, and curve group has a specific mask area on the mesh. This mask defines areas where generated Morph Targets can be active. They can be used to filter out deformations in undesired areas. For example if you rotate the left arm, you don't want the right arm to deform. The mask for the left arm can be set up in a way that it only includes vertices around the area of the left arm to enforce this. You can select the Mask Viz Mode using the property’s drop-down menu. You can select from the following options:
|
| CPU Performance | Here you can reference the average, minimum, and maximum time spent in the ML Deformer component update on the CPU, measured over the last 100 frames, of your model in microseconds (µs). |
| Estimated Memory Usage | Here you can reference the Main System memory and GPU specific memory usage of your model in megabytes (mb). When using the Neural Morph Model, the Main System memory usage mostly contains the neural network. Properties such as the Num Neurons Per Layer, Num Hidden Layers, and Num Morph Targets will have an effect on this value. Setting the model’s Mode to Global will also use more system memory. The GPU memory is mostly used by the compressed Morph Targets the system generates. Properties such as the Num Morph Targets, Delta Zero Threshold, Compression Level, Num Iterations, and Max Number of LODs will have an effect on this value. |
| Estimated Asset Sizes | Here you can reference the estimated cooked and uncooked sizes of your model in megabytes (mb). The estimated uncooked size of your model will be much larger than your cooked model, as this estimation includes uncompressed vertex deltas. |
Details Panel
Here you can reference a list of the general ML Deformer Editor’s Details panel properties that appear across multiple ML Deformer Models and a description of their functionality The details panel contains settings that have an effect on the model at runtime. This includes inputs, training settings and compression settings.
| Property | Description |
|---|---|
| Skeletal Mesh | Set the linear skinned Skeletal Mesh asset for your character you are training. Any changes to this property will result in the model needing to be retrained. |
| Training Input Anims | Set a list of Training Inputs that will be used to train the selected ML Deformer Model. Each list should contain a pair of Animation Sequences containing mesh poses, and Geometry Cache assets that contain mesh deformation data. Both assets per pair should run at the same frame rate, and contain the same number of frames, with each frame of each asset containing the same pose. Each asset’s mesh should also contain the same number of vertices. It is possible to train the model with a geometry cache that contains only a portion of the Skeletal Mesh, for example, if you only want to train mesh deformations on the body and not the head. To create a new input index use the (+) Add. After creating an Input index, you can expand the settings for each index to access the following properties:
At least one index of Training Inputs is required to train the ML Deformer model. You can add additional training inputs to further improve your mesh deformation results when, for example, you notice a particular pose is not deforming properly. Additional data, containing targeted data around these poses can improve your results. Any changes to this property will result in the model needing to be retrained. |
| Target Alignment Transform | Here you can set a transform value to adjust the positioning of the Geometry Cache with the Skeletal Mesh. Use this property if you notice your Geometry Cache asset is not aligned with your Animation Sequence poses correctly. It is recommended to use this property to apply scale and rotation adjustments if your Geometry Cache mesh’s vertices are not overlapped with your Animation Sequence mesh’s vertices. The goal of the training process is to calculate the distance between each vertice on the meshes when deformations occur, so correctly aligned vertices are critical to good results. Keep in mind that the Mesh Spacing setting in the Visualization details panel still separates the Linear Skinned mesh and your Geometry Cache. Make sure the meshes overlap and have the same scale and orientation when Mesh Spacing is set to Any changes to this property will result in the model needing to be retrained. |
| Network Inputs | Here you can set the bones and curves that will be considered when training the ML Deformer Model. To add a bone or curve from your character’s Skeletal Mesh asset, use (+) Add and select either Add Bone or Add Curve to add a single bone or curve, or Add All Animated Bones or Add All Animated Curves to import all of your characters available animated bones or curves. It is good practice to first add all animated bones or curves, and then trim them down by for example removing helper bones. Added bones will be used to define the pose of the character. The model will relate the orientation of the bones during each pose to the corrective deformations the model will output. It is recommended to set as few bones as possible, while still capturing all of the necessary movement of your character to achieve the best results, for example you should exclude all helper bones. When using the Add All Animated Bones function, the Editor will automatically add all bones to the list that contain animation data. This process can add twists to bones that you will most likely want to remove afterwards. If you use the Neural Morph Model and have set the Mode to Local, then after adding bones to the list, you can right-click a selected bone and select the Edit Bone Mask option to open a window where you can edit if that bone should be included in the bone mask. By default, every vertex that is skinned to the bones inside the bone mask are included in the bone mask. After editing the bones in the bone mask you can right click within the list of bones and select the Reset All Bone Masks option, to set all bones masks to their default settings. Added curves can be used to influence the model using alpha values that can represent many things, such as weights, alphas, facial controls, or muscle activations. Using the Add All Animated Curves option will add all curves contained within the Animation Sequence asset that have value animated value changes. You can remove individual bones or curves from the list by selecting the item, right-clicking and selecting Delete Selected. You can also clear either the Bone List or the Curve List entirely by right-clicking the list and selecting the Clear List option. Any changes to this property will result in the model needing to be retrained. |
| Max Training Frames | Set the maximum number of frames from the assigned assets in the Input property to use when training the model. By reducing this number you can train the model using a smaller section of your training data. Samples taken will alternate between the input animations. It will take a sample of the first enabled one, then the next one, and so on, until we reach the maximum number of training frames or there are no frames left to sample. Any changes to this property will result in the model needing to be retrained. |
| Delta Cutoff Lengths | Set the maximum length of a delta value that will be considered during training. All delta values longer than the specified amount will be ignored and set to zero length. This property can be helpful to reduce issues caused by very long delta values. You can view a debug render of delta lengths in the Viewport by enabling the Visualization panel’s Draw Deltas property, when the ML Deformer Editor’s mode is set to Training. Any changes to this property will result in the model needing to be retrained. |
| Batch Size | Set the number of frames per batch when training the ML Deformer model. Higher values will use more GPU memory during training but can reduce how long the training process takes. Batch size can also influence the quality of your results. The iteration count in combination with batch size impacts quality. If you halve your batch size, you need double the number of iterations to get to the same quality. Any changes to this property will result in the model needing to be retrained. |
| Learning Rate | Set the initial step size in the optimization process during the ML Deformer model training. Larger values can deliver faster results during training, but may overlook critical data, delivering less optimal results. Lower values can deliver higher quality results, but could take an infinite amount of time to train. The goal is to find an optimal value that captures enough data during the training process without requiring incredibly long training times. It is recommended to start with larger values, and work down to achieve a loss level that is acceptable for your project's needs. Each ML Deformer Model will deliver different results, even with the same value, so it is recommended to approach each model differently. Any changes to this property will result in the model needing to be retrained. |
| Max Number of LODs | Set the maximum number of Skeletal Mesh LOD levels should be used to generate ML Deformer LODs. A value of The ML Deformer will only generate ML Deformer LODs for available Skeletal Mesh LODs, so if the value of this property is |
ML Deformer Models
The ML Deformer Framework relies on a trained ML Deformer Model to drive skinned mesh deformation selections at runtime. Each model has strengths for specific use cases.
Nearest Neighbor Model
The Nearest Neighbor Model is designed to work best for the deformations of complex meshes and objects such as clothing. This model is still considered in an experimental stage of development so we advise that you do not use it in productions that rely on its functionality and stability.

Reference
Here you can reference a list of the Nearest Neighbor Model’s specific properties and a description of their functionality:
| Property | Description |
|---|---|
| Import Dim | Set the network input dimensions. |
| Hidden Layers Dim | Set the dimensions of hidden layers in the network. To set a hidden layer, use (+) Add, then set the value of the index to the layer’s value you want to hide. This property cannot be left empty. |
| Output Dim | Set the network output dimensions. |
| Num Epochs | Set the maximum number of cycles iterated through the training set. |
| Early Stop Epochs | Set the number of epochs to stop training if there is no improvement in accuracy. |
| Include Normals | When enabled, the model will include normals in the Morph Targets during the training process. Enabling this property can achieve higher performance results than recomputing the normals, at the potential cost of lower quality mesh deformation results and higher memory cost for the stored Morph Target. |
| Delta Zero Threshold | Here you can set a value that will determine the cutoff for the Morph Target delta values. Delta values smaller than or equal to this threshold will be ignored and set to Setting a functional value for this property will have one of the most significant effects on the runtime performance and memory of your project when using ML Deformer assets. |
| Compression Level | Set the generated Morph Target’s compression level. Higher values will apply more compression, but could result in visual artifacts on the mesh. Lower values will apply less compression, resulting in high quality results, but will require more memory usage. It is recommended to use values between It is good practice to first adequately set the Delta Zero Threshold property for your project, before tweaking the Compression Level property. |
| Mask Channel | Set the channel data that represents the delta mask multipliers. You can use this property to break down and distribute influences on the ML Deformer in specific areas, such as targeting high motion joint seams, such as a character's neck or shoulders. The painted vertex color values will be used like weight multipliers on the ML Deformer deltas applied to that vertex. You can select a Mask Channel using the property’s drop-down menu. You can select from the following channels:
This property can be useful to target the training process on specific areas of your mesh you want to improve mesh deformations with unique settings, rather than training the entire mesh using the same settings. |
| Invert Mask Channel | When the Mask Channel property is set to use a specific Vertex Color Mask channel, you can enable this property to invert the influence. For example, if you paint an area of the mesh using the Red Vertex Color Mask, then set the Mask Channel to use the Vertex Color Red, and enable this property, the painted region would not move. |
| Use Dual Quaternion Deltas | When enabled the ML Deformer model will use dual quaternion delta values. By default the model will use LBS delta values. |
| Decay Factors | Set the ratio of the previous frame’s deltas added into the current frame’s deltas. A larger value will result in wrinkles in the mesh to stick together longer. |
| Nearest Neighbor Offset Weight | Set the weight multiplied to the nearest neighbor deltas. A value of 0.0 will result in completely removing the nearest neighbor delta, while a value of 1.0 will weigh the nearest neighbor delta fully. |
| Use RBF | When enabled, the ML Deformer will use a radial basis function to blend multiple nearest neighbors to produce a smoother result. |
| RBFSigma | When the Use RBF property is enabled, set the range, in points, of the nearest neighbors to blend. Larger values will result in a smoother result, but may cause your project’s performance to decrease. |
| Sections | Here you can add sections to break down the Nearest Neighbor Model’s training process for individual mesh components of your character. Each section contains a set of vertices in the original Skeletal Mesh. The nearest neighbor search is then performed on each section separately. For example, if a character asset has both a shirt and pants mesh, you can define each mesh as a separate section in order to perform the nearest neighbor training on each mesh individually. You can add a section index using (+) Add, then expand the section properties to access the following settings:
|
| Network State | Here you can reference the status of the Network State. |
| Network Architecture | Here you can reference the status of the Network Architecture. |
| Morph Target State | Here you can reference the status of the Morph Target State. |
| Inference State | Here you can reference the status of the Inference State. |
| Use File Cache (Advanced) | When enabled, the ML Deformer will cache intermediate results on your computer’s hard drive. Failing to manually clear caches could cause unexpected results. |
| File Cache Directory | Set the file path with which to save the intermediate cache results on your computer’s hard drive. To refresh the list of saved data, use the Refresh button at the bottom of this property section. |
| Cached Deltas | Here you can reference the saved intermediate cache deltas. You can clear this data using the Delete button. |
| Cached PCA | Here you can reference the saved intermediate cache PCA (Principal Component Analysis) data. You can clear this data using the Delete button. |
| Cached Network | Here you can reference the saved intermediate cache network data. You can clear this data using the Delete button. |
| Use Input Multipliers | When enabled, the ML Deformer will use input multipliers. This property is useful for debugging bad network inputs. |
| Input Multipliers | When the Use Input Multipliers property is enabled, you can set input multipliers to apply. To create a new input multiplier, use (+) Add, then set the modifiers values. |
Neural Morph Model
The Neural Morph Model is a general application ML Deformer model that is designed best for the deformations of character models, such as the calculations of skin and muscle movement in conjunction with limb and larger body motion.

Property Reference
Here you can reference a list of the Neural Morph Model’s specific properties, and a description of their functionality:
| Property | Description |
|---|---|
| Mode | Set the mode in which the ML Deformer’s neural network will operate in. You can select from the following options:
This mode is optimized to learn deformations around individual joints, and requires the least amount of training data. This mode also produces more sparse Morph Targets which reduces the memory usage, and can be processed faster on the GPU. You will also see faster CPU performance using the Local mode, as evaluations of bones are broken up into smaller parts rather than evaluating the entire skeleton at once. This option should be used by default unless you encounter difficulty reconstructing the training data. Each bone or curve will create a set of morph targets in this model. The total number of morph targets generated will be:
The
This mode learns deformation from coordinated movement of multiple joints, but requires more training data. This mode acts similar to the Local mode, but acts like all bones are in one big bone group. This works best with randomized poses as training data. Any changes to this property will result in the model needing to be retrained. |
| Num Morph Targets | This value represents how many Morph Targets will be generated for your mesh during the training data. Higher values will produce higher quality results but will require more memory and performance. It is recommended that you aim to set this value to the lowest possible value while still retaining the quality of your deformations. When the Mode is set to Local, this value represents the number of Morph Targets that will be generated for each bone, curve, bone group, and curve group. When using the local mode, it is recommended to input the lowest values possible while still retaining your expected quality. It is recommended that this value be somewhere between When the Mode is set to Global, this value represents the total number of Morph Targets that will be generated for your Mesh. It is recommended that this value be set between Any changes to this property will result in the model needing to be retrained. |
| Num Iterations | Set the number of iterations to train the model for. For testing purposes and in-development projects smaller values, such as When you observe that the loss does not continue to reduce, more iterations will likely not continue to improve results. Any changes to this property will result in the model needing to be retrained. |
| Num Hidden Layers | Set the number of hidden layers that the neural network model will have. Higher values will reduce your project's performance, but can work with more complex mesh deformations. When using the Local Mode, a value of Any changes to this property will result in the model needing to be retrained. |
| Num Neurons Per Layer | Set the number of units per neuron per hidden layer. Higher numbers will reduce performance but will allow for more complex mesh deformations. Any changes to this property will result in the model needing to be retrained. |
| Regularization Factor | Set the Regularization Factor of the training data which helps with generalizing the model. Higher values can also lead to sparser morph targets, which can reduce GPU memory usage and improve GPU performance. The default value of this property is This property and its effects are dependent on the scale of the model. Any changes to this property will result in the model needing to be retrained. |
| Smoothing Loss Beta | Set the beta parameter in the smooth L1 loss function. This property smoothes the results of the generated deformations and is dependent on the scale of the mesh. The lower the value the, the less smoothing is applied. For a normal sized character mesh, a value of If the error is above or equal to this beta value, it will use the L1 loss function instead. Any changes to this property will result in the model needing to be retrained. |
| Enable Bone Masks | When the Mode property is set to Local, enabling this property will allow for the use of per bone and bone group masks by generating an influence mask per bone based on skinning information. This will enforce deformations localized to the area around the joint. Enabling this property increases localized joint deformation quality and can reduce the GPU memory usage, and improvesGPU performance. Any changes to this property will result in the model needing to be retrained. |
| Clamp Morph Weights | When enabled, the generated Morph Target weights will be clamped to the range that is visible during training. This property can improve deformation results when the character is posed in a manner that was not seen during training, and does not have a close approximate reference pose in the training data, by preventing weird deformations by forcing the Morph Target weights to stay within the range of values seen during training. |
| Include Normals | When enabled, the model will include normals in the Morph Targets during the training process. Enabling this property can achieve higher performance results than recomputing the normals, at the potential cost of lower quality mesh deformation results and higher memory cost for the stored Morph Target. |
| Delta Zero Threshold | Here you can set a value that will determine the cutoff for the Morph Target delta values. Delta values smaller than or equal to this threshold will be ignored and set to Setting a functional value for this property will have one of the most significant effects on the runtime performance and memory of your project when using ML Deformer assets. |
| Compression Level | Set the generated Morph Target’s compression level. Higher values will apply more compression, but could result in visual artifacts on the mesh. Lower values will apply less compression, resulting in high quality results, but will require more memory usage. It is recommended to use values between It is good practice to first adequately set the Delta Zero Threshold property for your project, before tweaking the Compression Level property. |
| Mask Channel | Set the channel data that represents the delta mask multipliers. You can use this property to break down and distribute influences on the ML Deformer in specific areas, such as targeting high motion joint seams, such as a character's neck or shoulders. The painted vertex color values will be used like weight multipliers on the ML Deformer deltas applied to that vertex. You can select a Mask Channel using the property’s drop-down menu. You can select from the following channels:
This property can be useful to target the training process on specific areas of your mesh you want to improve mesh deformations with unique settings, rather than training the entire mesh using the same settings. |
| Invert Mask Channel | When the Mask Channel property is set to use a specific Vertex Color Mask channel, you can enable this property to invert the influence. For example, if you paint an area of the mesh using the Red Vertex Color Mask, then set the Mask Channel to use the Vertex Color Red, and enable this property, the painted region would not move. |
Vertex Delta
The Vertex Delta Model is an example of a purely GPU based deformer. It is a simplified implementation of the Neural Morph Model in global mode, but running fully on the GPU. It does not use engine morph targets, but therefore also doesn’t use compression and other optimizations, which make it slower and more memory intensive. It should not be used during production and only be used as a reference for models that run their neural networks on the GPU.
Note: The Vertex Delta ML Deformer Model is a GPU based example model that should not be used in production. Using the Neural Morph Model with the Mode property set to Global will achieve similar more stable results in production.

Debugging the ML Deformer
Here you can reference information about debugging and troubleshooting ML Deformer results and performance in Unreal Engine.
Debugging An Actor
After training you can test the model by playing animation sequences on the character. This allows you to test how the deformations look on poses that might be slightly different from the training data.
The ML Deformer can produce poor results when the specified inputs are very different from the values that are used during training. This is why it is so important that your training data covers a wide range of poses.
In a real project, poses are typically blended using multiple sources rather than a single animation being played back. On top of pose blending you may be using procedural modifications and do things like inverse kinematics (IK). Therefore, testing with a single animation might not always work well, unless you captured some game output.
Using the Actor Debugging tools in the ML Deformer editor, you can view your ML Deformer results on your project's full animation system. By connecting to a live Play in Editor (PIE) session, and picking a character that has an ML Deformer component that uses the same ML Deformer asset as you have currently opened, the ML Deformer Editor will copy the pose of the character inside the PIE session and apply the deformations inside the ML Deformer Editor’s Viewport.
To begin debugging a PIE Actor in the ML Deformer Editor, open the ML Deformer asset that the character you’d like to debug is using by double clicking it in the Content Browser. Then start your PIE session by clicking the Play button in the PIE Controls.
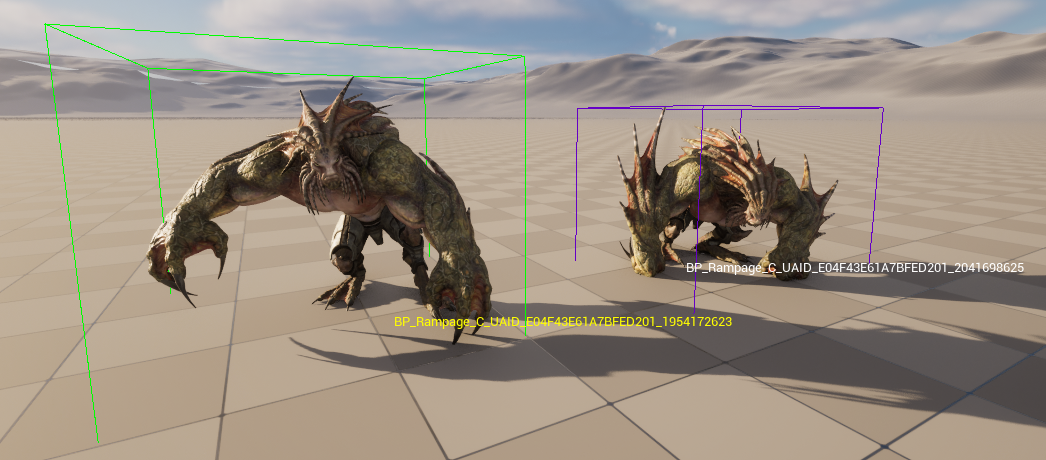
After your session has started, click on your ML Deformer Editor tab. Then, inside the PIE viewport you should see all debuggable actors rendered with a bounding box around it. By default this bounding box is purple and displays the name of the Actor in white.
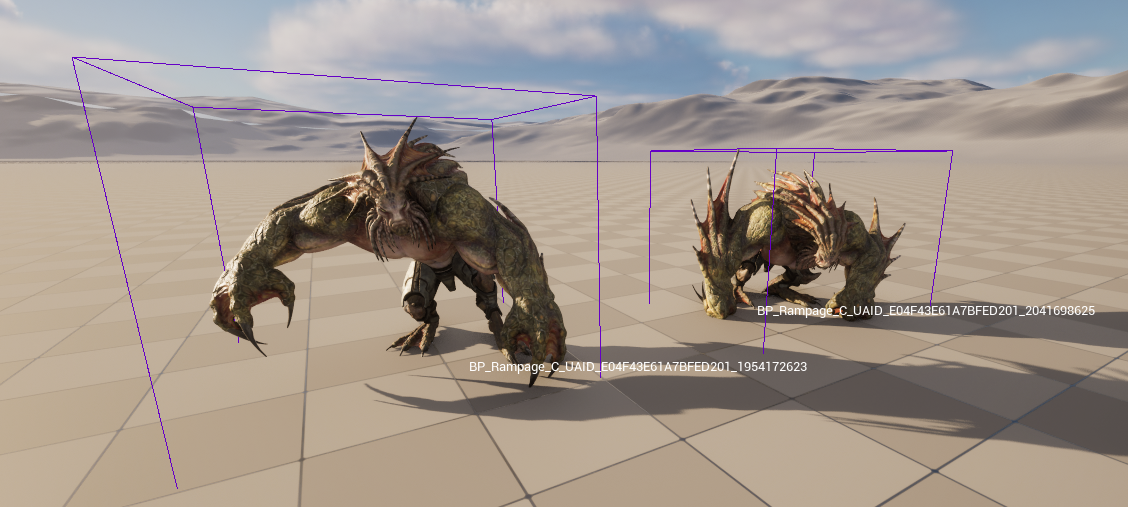
Now, inside the ML Deformer asset editor, use the Debug Actor tool drop-down menu in the Toolbar to select the Actor combo. This will show the list of actors that use this ML Deformer asset. If your actor isn’t in that list, use the Refresh button on the right, next to the drop-down menu. Then pick the actor you’d like to debug. Alternatively, you can press the F8 key to refresh the list. The selected actor will be highlighted in your project’s Level Viewport, with a green box and a yellow name by default.

You can now debug the results of your ML Deformer using your character’s full animations system during PIE using the properties in the Visualization panel, such as heatmaps.
Only the Activations heat map mode will work as we have no live ground truth inside the game.
To end the debugging session, stop your PIE session, or select Disable Debugging in the ML Deformer Debug Actor tool using the drop-down menu.
Unreal Insights
You can inspect the performance of your ML Deformer asset using Unreal Insights, using the Morph Target item in the GPU section of a recorded session. To view and debug CPU performance, use the MLDeformerComponent section of the CPU profiler. You can use the Morph Targets section in the GPU information to see the GPU performance.
Troubleshooting
Here you can access information about troubleshooting results and performance issues that you may encounter when using the ML Deformer in Unreal Engine.
Neural Morph Model
| Issue | Potential Solutions |
|---|---|
| Deformation results are not ideal: |
|
| Runtime memory or performance is not ideal: | If your GPU performance is low, try reducing the number of Morph Targets. It is recommended to have a total number of generated Morph Targets, for the whole character, between When using the Local mode, the Num Morph Targets value is per bone / curve / group you have set.
|
More Information
Here you can reference additional ML Deformer resources, such as the Sample Content project and developer talks to learn more about using the ML Deformer in Unreal Engine.
ML Deformer Set Up Guide
To read about how to set up the ML Deformer using the Neural Morph Model, including a walkthrough on how to generate the the Alembic File of randomized poses and geometry deformation data in Autodesk Maya, see the following how to guide:
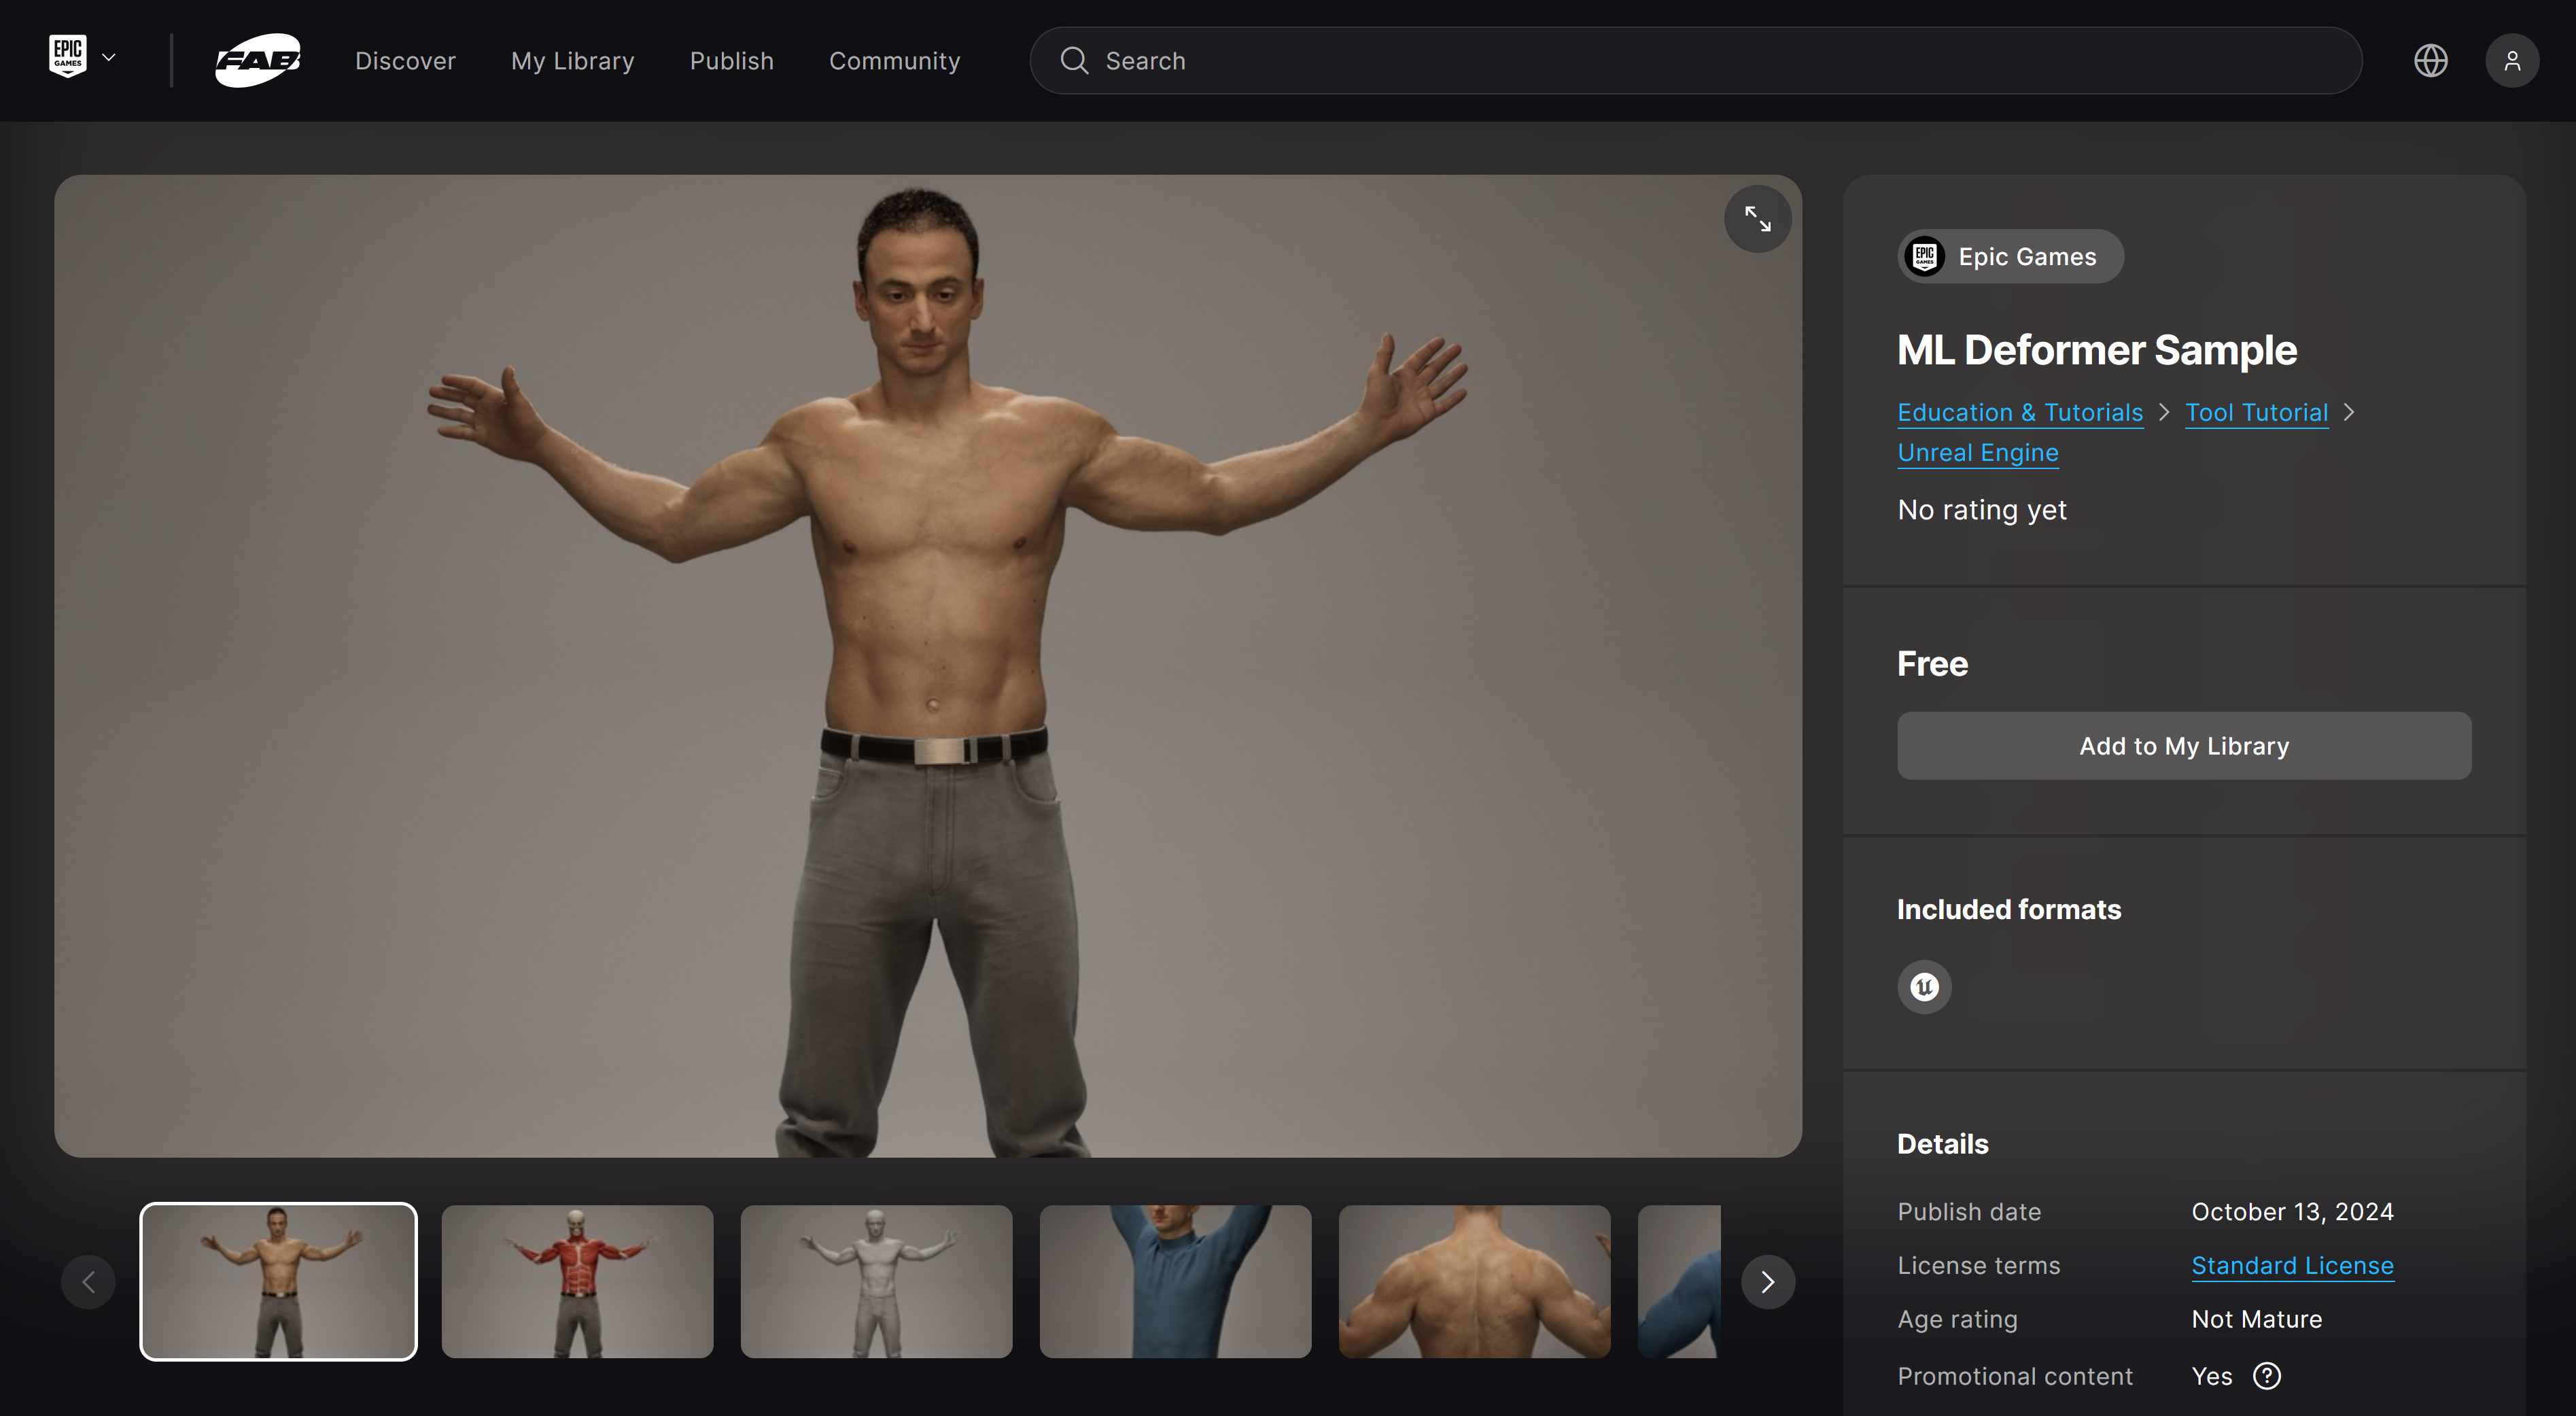
ML Deformer Sample Content
Additionally, you can download the Machine Learning (ML) Deformer Sample Project that features a showcase of full body character mesh deformations using the ML Deformer system. The sample project includes an interactive cinematic of a Control Rig driven animated character, that you can observe and compare linear skinned mesh playback against ML Deformer generated deformations. Additionally, you can manipulate the character using alternative animations, Control Rig edits, toggle clothing and skin visibility, and observe the effect of different ML Deformer Models in order to observe changes to the mesh and learn more about the ML Deformer system and capabilities.
You can download the ML Deformer sample project from Fab.
Game Developers Conference ML Deformer Demo
To learn more about the ML Deformer system and see a live demo, showcasing the capabilities and functionality of the ML Deformer, see the State of Unreal | GDC 2023 talk.