Blend Spaces are special assets which can be sampled in AnimGraphs that allow for blending of animations based on the values of two inputs. Simple blending between two animations based on a single input can be performed using one of the standard Blend Nodes available in Animation Blueprints. Blend Spaces provide a means of doing more complex blending between multiple animations based on multiple values (currently limited to two).
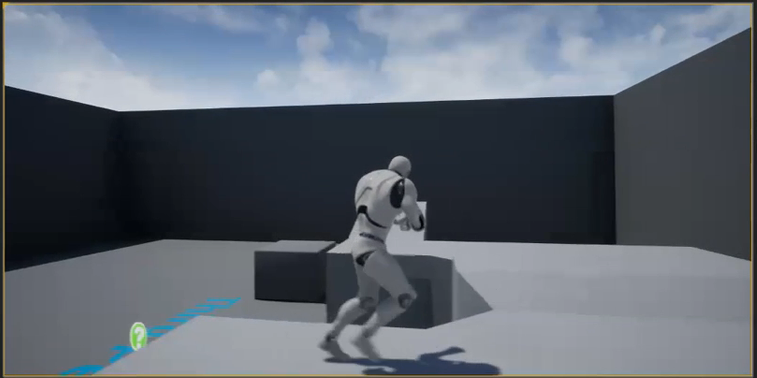
In this How-to, we use a Blend Space to blend between walking and jogging animations based on the character's movement speed and movement direction.
Steps
For this guide, we are using the Blueprint Third Person Template project and have added the Animation Starter Pack to the project.
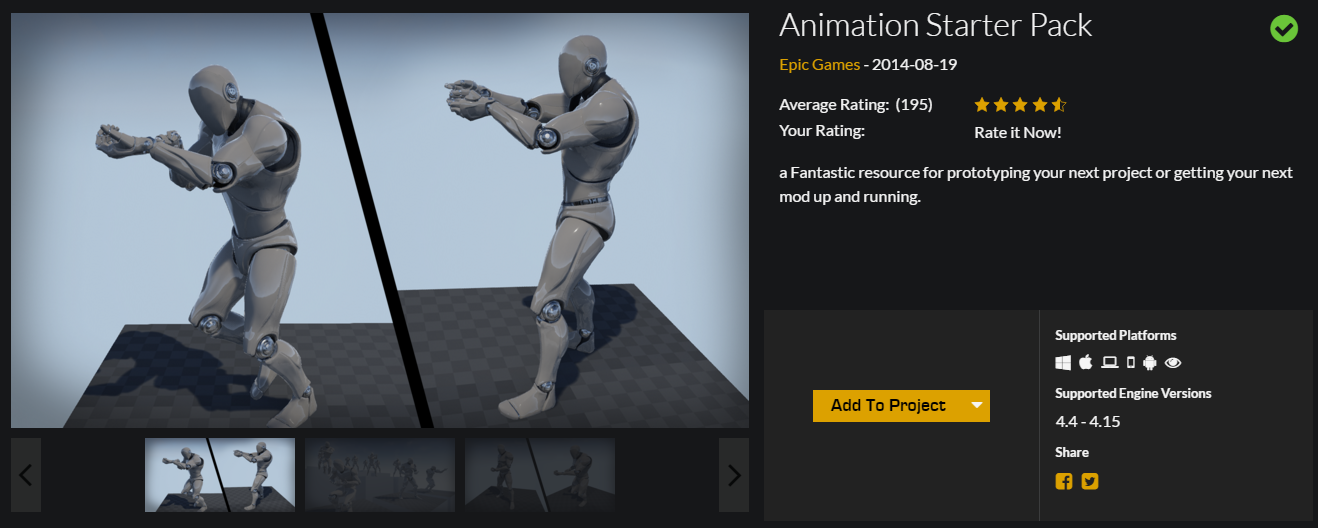
You can download the Animation Starter pack for free through the Marketplace from the Epic Launcher.
-
In your project in the Content/ThirdPersonBP/Blueprints folder, open the ThirdPersonGameMode and set the Default Pawn Class to Ue4ASP_Character.
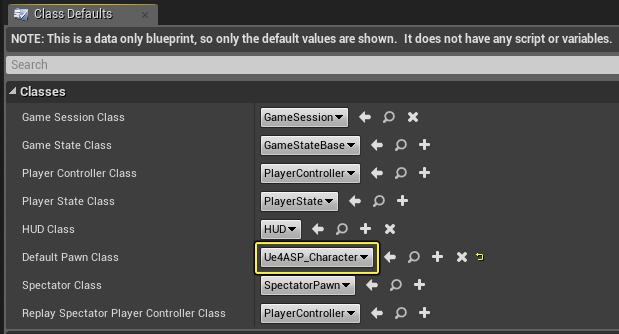
This will allow us to use the playable character that was created along with the Animation Starter Pack project.
-
In the Level, select the ThirdPersonCharacter and delete it from the level.
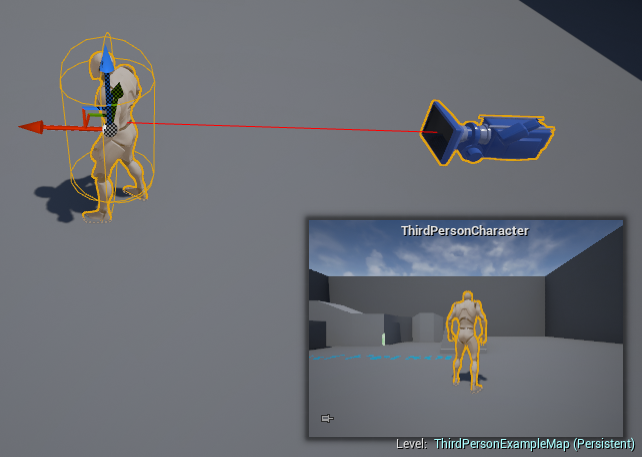
We need to delete this character from the level in order to spawn in as the character from the previous step.
-
In the Content/AnimStarterPack/UE4_Mannequin/Mesh folder, right-click on the UE4_Mannequin and under Create, select Blend Space and give it a name.
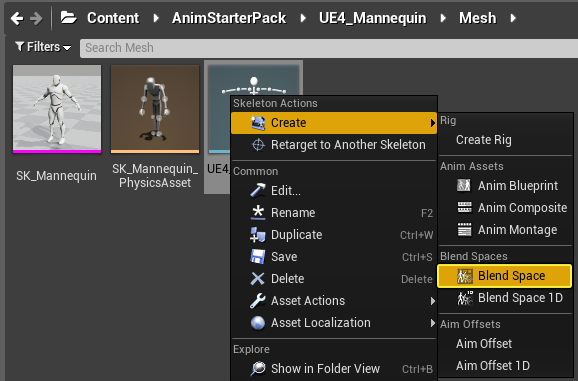
Blend Space assets need a Skeleton asset to reference, here we are using a shortcut to create a Blend Space from this Skeleton asset which we called MyBlendSpace.
-
Inside the Blend Space, in the Asset Details panel under Axis Settings, add the following values:
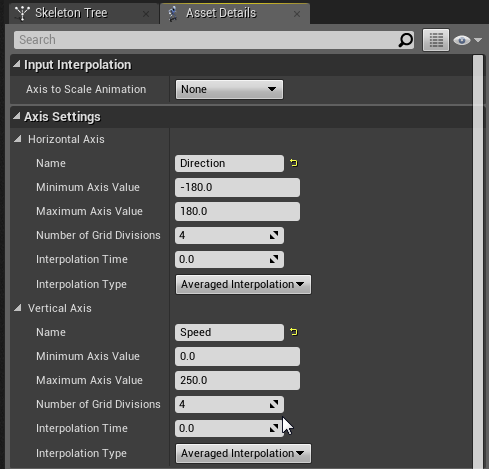
The Horizontal Axis will determine the Direction we are moving in degrees:
Horizontal Axis Settings Value Name Direction Minimum Axis Value -180 Maximum Axis Value 180 Number of Grid Divisions 4 Interpolation Time 0 Interpolation Type Averaged Interpolation The Vertical Axis will determine the Speed in which our character is moving:
Vertical Axis Settings Value Name Speed Minimum Axis Value 0 Maximum Axis Value 250 Number of Grid Divisions 4 Interpolation Time 0 Interpolation Type Averaged Interpolation -
In the Asset Browser, drag the Walk_Fwd_Rifle_Ironsights animation to the center-bottom position on the grid.
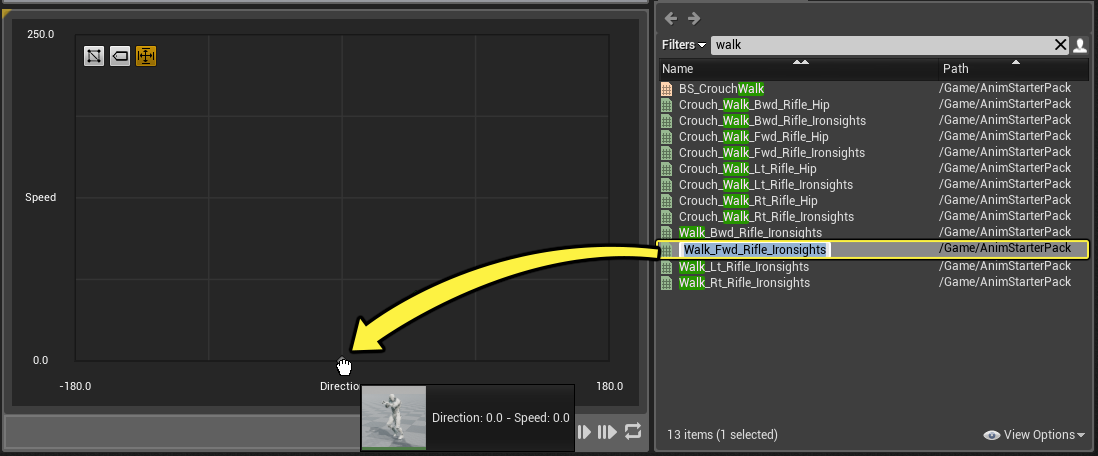
This will be are starting position when we enter this Blend Space.
-
Drag the Walk_Lt_Rifle_Ironsights animation to location 1 and Walk_Rt_Rifle_Ironsights animation to location 2 below.
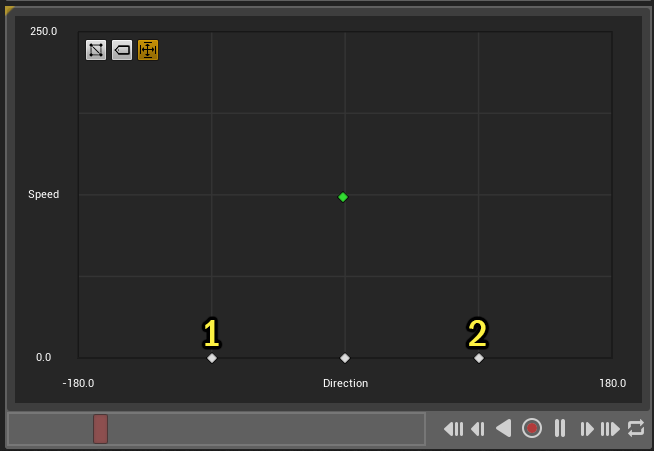
Here we place the animations to use when moving left or right.
-
Drag the Walk_Bwd_Rifle_Ironsights animation to locations 1 and 2 below.
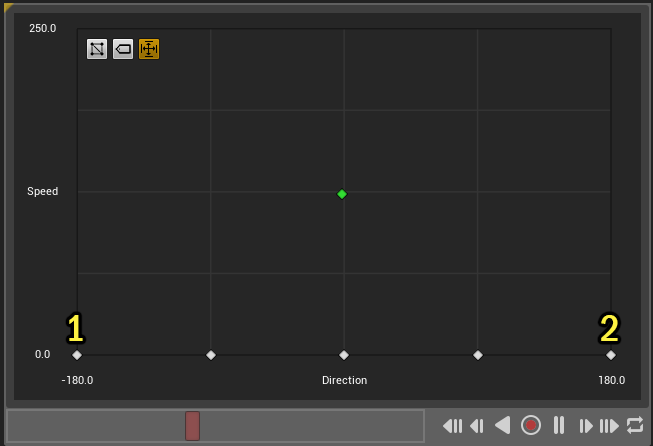
Here we place the animation to use when moving backward.
-
From the Asset Browser, drag the Jog_Fwd_Rifle animation to the top-center position on the grid.
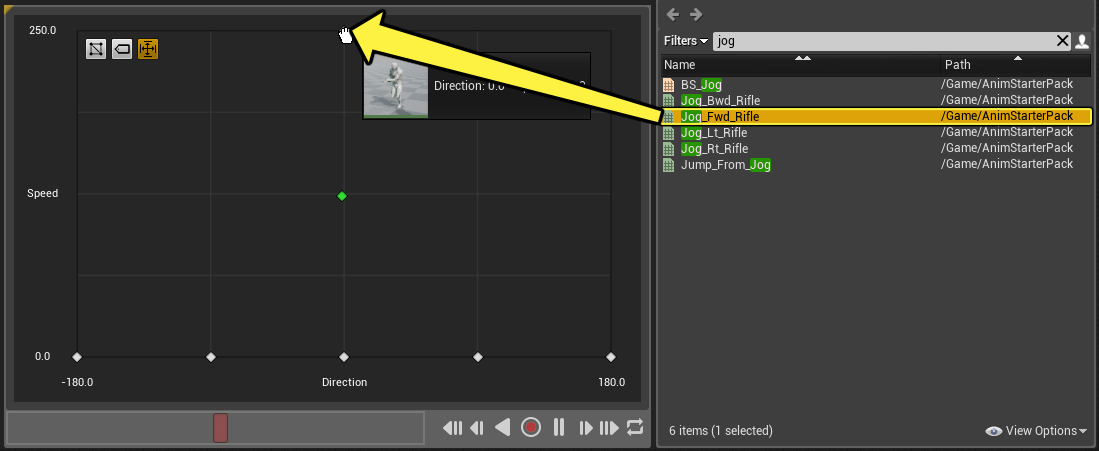
This allows us to use a different animation when our speed is at max 250 and we are not moving left or right, we are jogging forward.
-
Drag the Jog_Lt_Rifle animation to location 1 and Jog_Rt_Rifle animation to location 2 below.
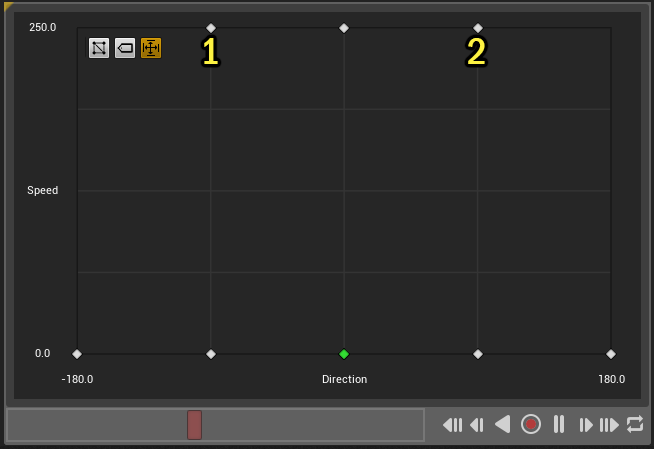
-
Drag the Jog_Bwd_Rifle animation to locations 1 and 2 below.
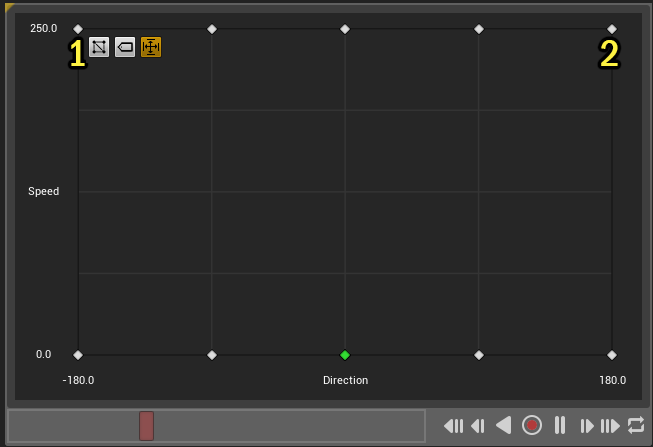
-
In the Content/AnimStarterPack folder, open the UE4ASP_HeroTPP_AnimBlueprint then in the My Blueprint panel, Double-click the Locomotion graph.
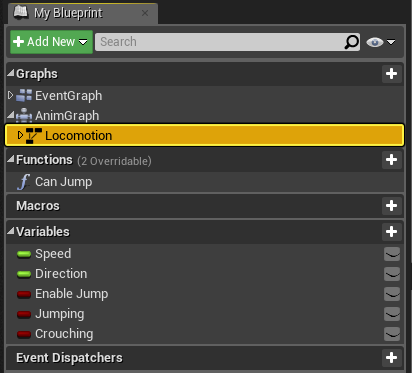
-
Double-click the Jog State to open its graph.
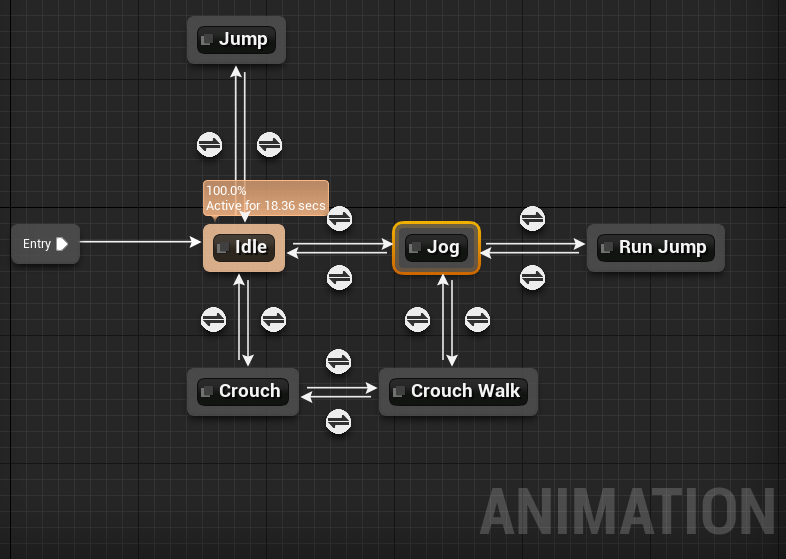
This State Machine already has a Jog State and in it, a Blend Space for different Jogging motions.
-
From the Asset Browser, drag the MyBlendSpace asset into the graph and replace the BS_Jog Blend Space as shown below.
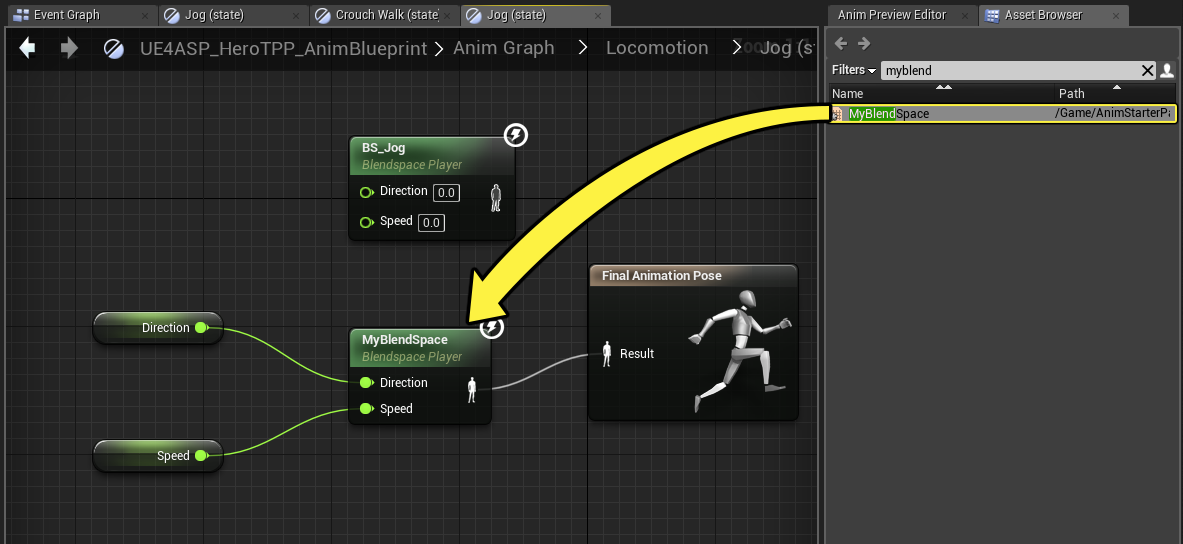
The default Blend Space does not include Walking states which our Blend Space does, so let's replace it with ours!
-
In the Content/AnimStarterPack folder, open the Ue4ASP_Character.
-
Locate the section marked Crouch in the graph and delete it to remove the warning error.
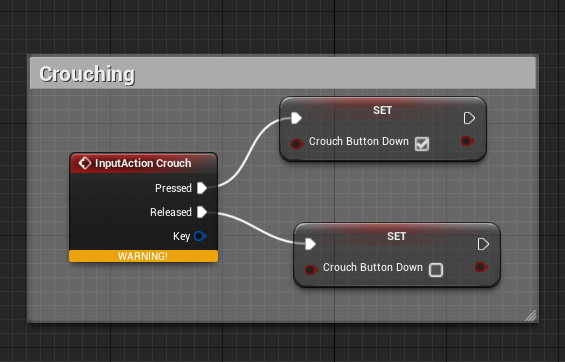
By default, the Animation Starter Pack has bindings created for crouch which our project does not. For this example, we will remove the ability to crouch walk.
-
Right-click in the graph and add a Left Shift Key Event, then drag the CharacterMovement into the graph from the Components tab.
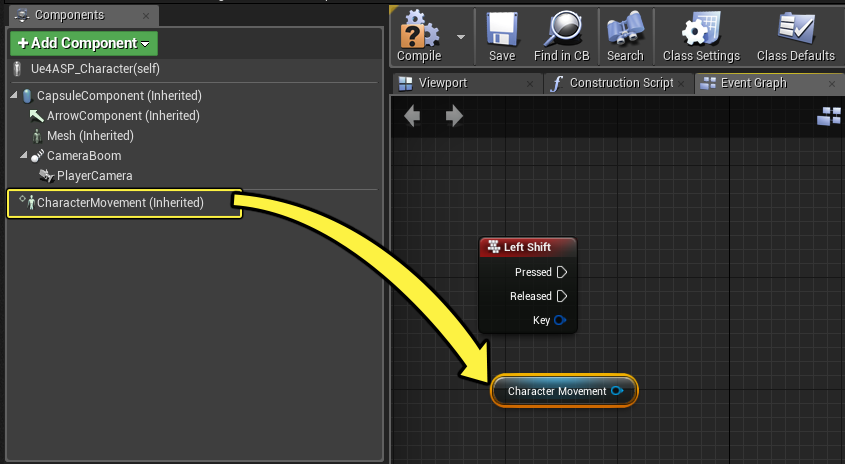
When we press and hold the Left Shift button, that will toggle us from walking into a jog.
-
Drag off the CharacterMovement node and Set Max Walk Speed for Pressed and Released with the values 250 and 100 respectively.
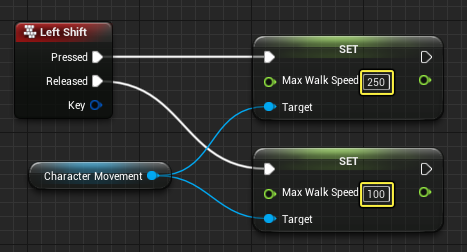
We are changing our movement speed based on if Left Shift is held and will alter our character's movement speed in-game.
-
Click the CharacterMovement component, then in the Details panel set the Max Walk Speed to 100.

We need to update our character's default movement speed so they start out walking.
-
Click the CapsuleComponent in the Components tab and in the Details panel, check the Hidden in Game option.
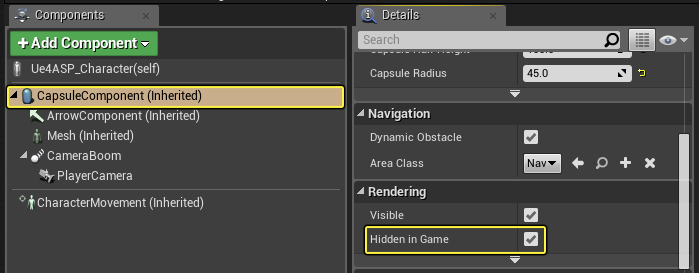
This will turn off the collision capsule debug display in-game.
-
Click Compile then click the Play in editor button from the Toolbar.
End Result
When playing in the Editor, using WASD to move around, the character will now walk by default and blend between walking animations when changing directions. While standing, pressing and holding Left Shift while using WASD will cause the character to blend from the walk/aim animation to a lowered/aim jog animation, essentially creating a sprint for the character.
