Every object in the real world has some degree of shininess to it. In some cases this shininess (or reflectivity) is obvious, as with mirrors, chrome, or glass. Other times it is more subtle, as with painted wood, or smooth but unpolished stone / concrete.
In Unreal Engine, you can simulate the shininess of objects using the Metallic, Specular, and Roughness Material inputs. This tutorial demonstrates a few common ways to introduce shininess in your Materials.
Shininess
When light strikes a surface in the real world, some of it is absorbed, some of it is scattered, and some is directly reflected. Scattered light is referred to as a diffuse reflection. When you see an object in the world that does not appear reflective, like a tree trunk, you are mostly seeing scattered or diffuse light. Light that is directly reflected is known as specular reflection. When you see your image reflected on a chrome faucet, or in a puddle of water, you are seeing specular reflections.
Shininess in Unreal Engine is not a technical term, but an aesthetic one. In this tutorial shininess is referring to the ability of a surface to produce coherent, mirror-like reflections. The exact properties of these reflections are defined by the Metallic, Specular, and Roughness inputs.
Roughness & Shininess
Roughness plays a major role in determining the shininess of a Material. The Roughness input takes a value from 0 to 1.
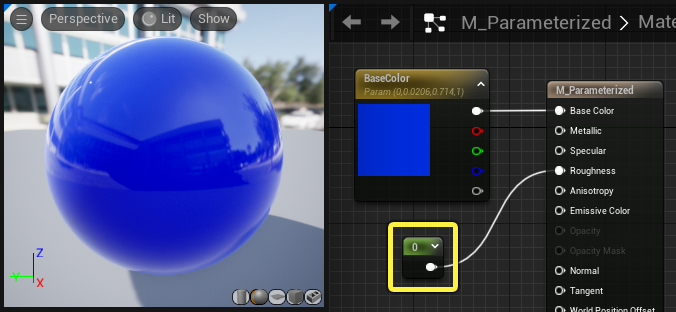
- The lower the Roughness value, the more mirror-like the Material will appear. When Roughness is 0, the Material behaves like a perfect mirror.
- The higher the Roughness value, the less shiny a surface will appear. When Roughness is 1, the Material appears fully diffuse.
Below is a demonstration of how Roughness can affect the shininess of a Material. In this case, the sphere is in an empty environment so the highlight seen on the model is a direct reflection of the light source.

The sphere on the far left has a Roughness value of 0, and the light source is reflected as a sharp, precise highlight. As the Roughness value is increased from 0 to 1, the highlight becomes blurrier and the sphere appears less shiny.
Metallic & Shininess
The apparent shininess of Metallic objects is also determined by the Roughness value. Low Roughness values produce a shiny Metallic Material and high Roughness values produce a Material that appears less shiny. The key difference between a metal and non-metal Material is in the way the color of the specular reflection is calculated.
- When the Metallic value is 0, specular highlights reflect the color of the environment and light sources.
- When the Metallic value is 1, specular highlights are tinted by the Base Color of the Material.
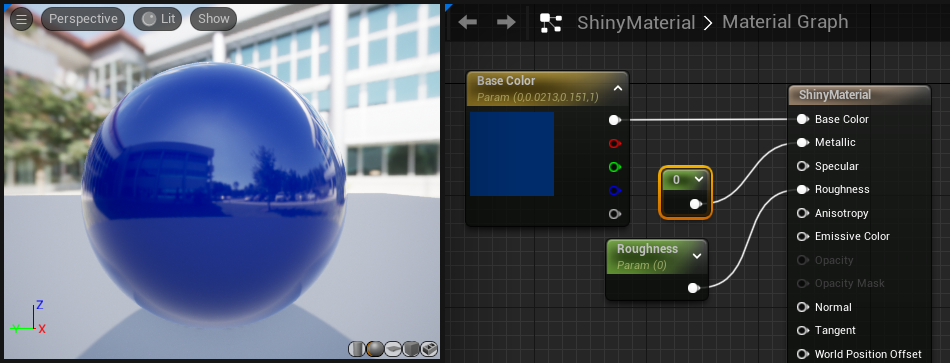
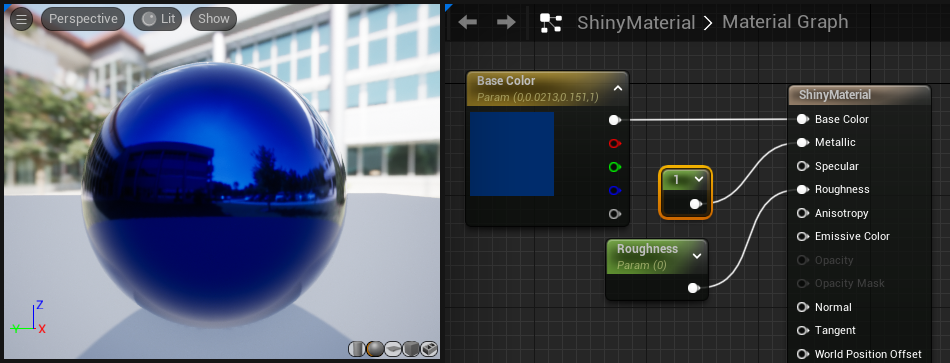
Note how the color of the reflections is influenced by the Base Color when the Metallic value changes from 0 to 1.
The example below shows how the Roughness value affects a metallic Material. This Material has a Metallic value of 1, which stays constant through all the images. There is also a solid blue color passed into the Base Color input to show how Base Color influences the color of reflections on a metallic Material.

Roughness values from 0 to 1 on a metallic Material.
On the far left, the sphere has a Roughness value of 0 and appears fully mirror-like. As the Roughness value increases from 0 to 1 the sphere appears less shiny. Note how the Base Color of the Material influences the color of the reflections.
Specular & Shininess
In 99 percent of cases, you will not need to adjust the Specular input. The default value of 0.5 is suitable (and accurate) for most Materials.
The Specular input can also have an effect on the shininess of a Material. Pushing the Specular value closer to 1 will make the reflections or specular highlights of a Material appear brighter and stronger. Lowering that value closer to 0 will weaken the specular reflections until they are almost invisible.
Here is an example showing how the intensity of the reflections and specular highlight are affected as the Specular value is changed from 0 to 1.

Roughness affects the shininess of a Material regardless of the Specular value. Even when the Specular value is set to 1, the specular highlight will still be blurred to invisibility when the Roughness value is 1. Adjusting the Specular value will have no effect on the Material if Metallic is enabled.
The default specular value of 0.5 accurately reproduces the measured specularity of the vast majority of real-world objects. Therefore, you should not need to modify the Specular value for most of the Materials you make. You can of course increase or decrease the specular value as an artistic choice, but straying too far from 0.5 can make the Material less physically plausible.
Using Shininess in Materials
Use the following steps to create a shiny Material.
This tutorial uses textures from the Unreal Engine Starter Content. If you did not include the Starter Content in your project, read the Migrating content page for information about how to move content between projects. This way you can add the Starter Content to your current project.
-
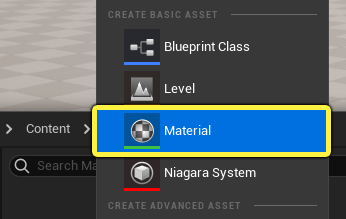
Right-click in the Content Browser and choose Material from the Create Basic Asset section in the context menu.
-
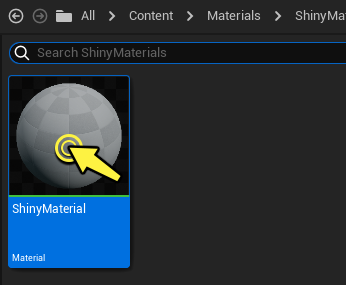
Name the Material ShinyMaterial and then double-click the thumbnail to open it in the Material Editor.
-
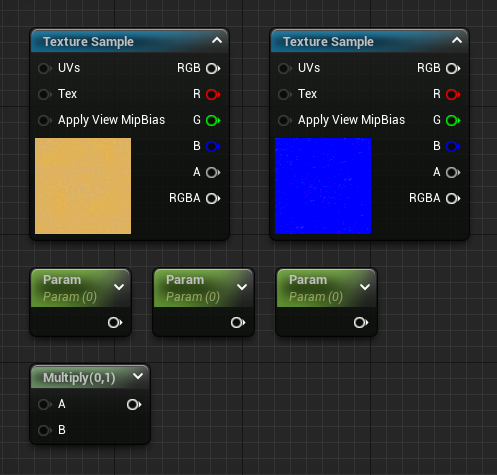
With the Material open, add the following Textures and Material Expression Nodes to the Material Graph. You can find the textures in the StarterContent > Textures folder in the Content Browser.
- Texture Sample: T_Metal_Gold_D x 1
- Texture Sample: T_Metal_Gold_N x 1
- Scalar Parameter x 3
- Multiply x 1
-
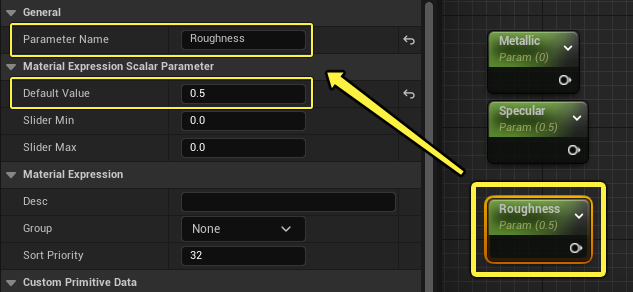
Each Scalar Parameter needs a unique name and default value. Select each Scalar Paramater, then rename them and set their Default Value in the Details Panel as shown below.
- Metallic: Default Value 0
- Specular: Default Value 0.5
- Roughness: Default Value 0.5
-
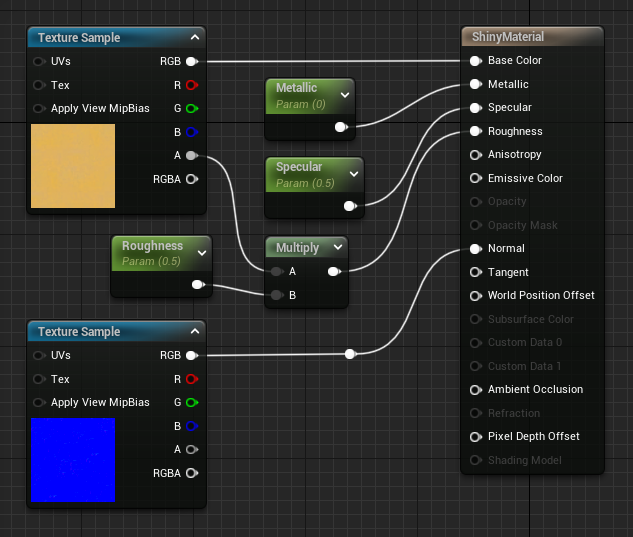
Connect all of the Material Expression nodes to their corresponding inputs on the Main Material Node. When completed, the Material Graph should look something like this:
-
Click the Apply and Save buttons in the toolbar to compile the Material and then close the Material Editor.

-
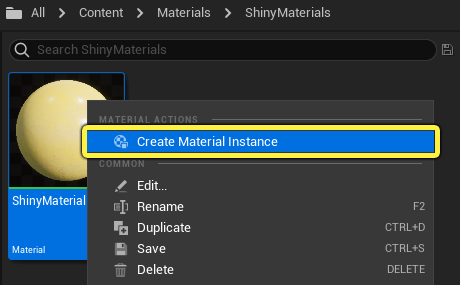
Find the ShinyMaterial asset in the Content Browser, right-click it and select the Create Material Instance option from the context menu.
-
Double-click the Material Instance in the Content Browser to open it in the Material Instance Editor. In the Instance Editor, enable all three Global Scalar Parameter Values by checking the box next to each parameter name.
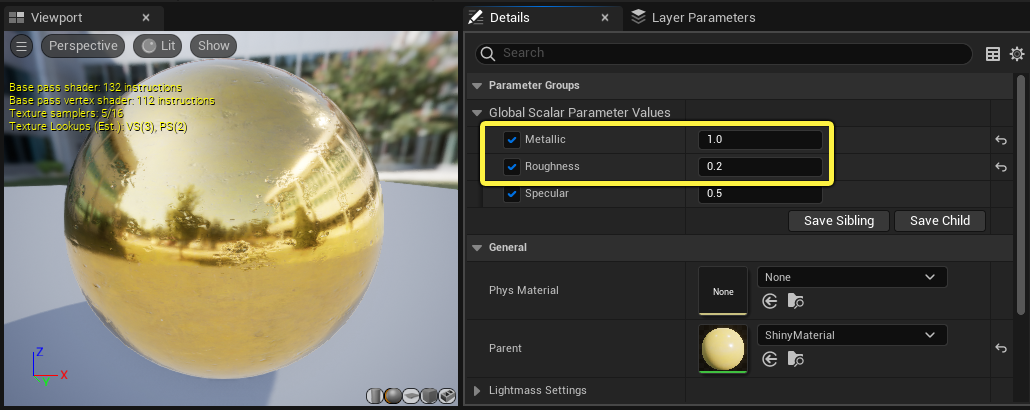
With the Scalar Parameter Values enabled, you can change the values and immediately see your changes in the preview viewport. For example, if you set Metallic to 1 and then set Roughness to 0.2, you will get a very shiny metal that looks like gold, with some surface imperfections from the normal map.
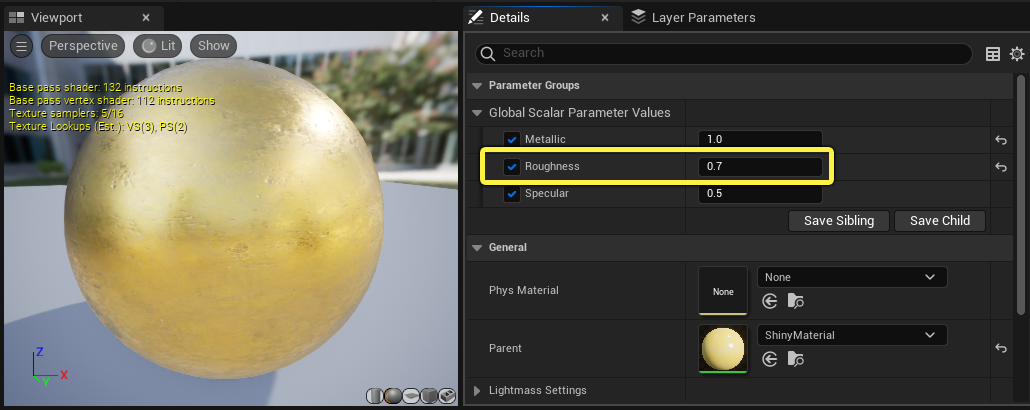
If you increase the Roughness value to 0.7 you can see that the reflection becomes blurred and the surface loses some luster, but the reflections do not disappear completely.
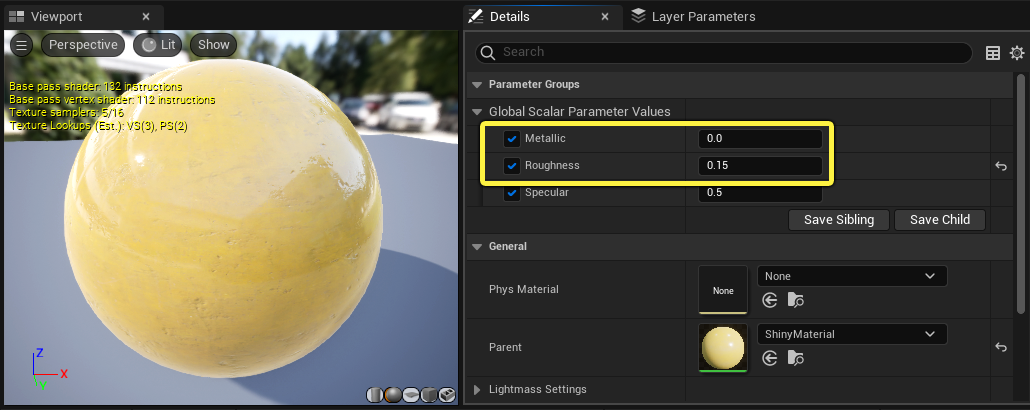
Finally, if you set Metallic to 0 and Roughness to 0.15 the surface stops resembling a metal and looks more like scuffed plastic or paint.
Conclusion
When you configure the Roughness value for your Materials remember that most objects have some degree of shininess. Even surfaces that you wouldn't normally think of as reflective tend to show some kind of specular highlight when hit by a strong enough light source.
Most of the time you should avoid using 0 or 1 for your Roughness value, and instead use a value that falls somewhere between the two extremes. Texture masks are often used to add variation and noise to the Roughness value. This produces surfaces that are not uniformely shiny or dull, but some interesting combination of both. Read about texture masking here.
Remember to consider the performance cost of reflective Materials, and be mindful when using a lot of Metallic surfaces in close proximity. Materials can have a high performance cost when Metallic objects reflect one another, or reflect one another's reflections.
