
Consolidating Assets refers to the action of combining multiple Assets into a single Asset. For example, if you have many Materials that are identical, these contribute to project size even though their content is the same.
You can use the Replace References tool in Unreal Engine to:
-
Consolidate all references that point to these duplicate Assets to point to a single Asset.
-
Delete all other duplicate Assets.
Improper use of the Replace References tools can lead to the wrong Assets being deleted. Since deleted Assets cannot be recovered, always exercise caution when using this tool.
How Asset Consolidation Works
The consolidation process happens in three stages.
First, for any valid objects to be consolidated, the Replace References tool attempts to replace all references of those objects with references to the "object to be consolidated to" within objects or Assets that are already loaded and in memory. What this means is that, if you have a map or Asset already open that is referring to one of the objects to be consolidated, the tool will attempt to update it immediately.
Next, the tool attempts to delete the objects to be consolidated directly (this can fail; for additional information, refer to the Warnings and Limitations section on this page).
Finally, if the deletion was successful, the tool leaves behind object redirectors in the place of the deleted objects. These will redirect unloaded Assets with references to the deleted objects to the object you consolidated them to.
Before Using the Replace References Tool
The Replace References tool can sometimes fail to consolidate an otherwise valid Asset if some of its references couldn't be cleared or if the Asset can't be deleted. This is a critical failure that results in a partial consolidation, in which some uses of an Asset are consolidated and others aren't. If this happens, you should not save any of the affected Assets. Close all sub-editors, restart Unreal Engine, and then restart the consolidation process.
Before running the Replace References tool, you should close all sub-editors, such as the Blueprint Editor or the Static Mesh Editor, that use any of the Assets that are about to be consolidated.
Always make sure to select Assets that are compatible. To prevent accidental data corruption and data loss, the Replace References tool can only consolidate Assets that share the same class or type. The only exceptions are Materials and Textures. This means that, for example, a Material can be consolidated to a Decal Material, even though they aren't strictly the same type, but it can't be consolidated to a Static Mesh.
The Replace References tool should not be used as an alternative method for replacing Actors.
If the Asset to consolidate to references one of the Assets to consolidate, the referenced Asset will not be consolidated.
Using the Replace References Tool
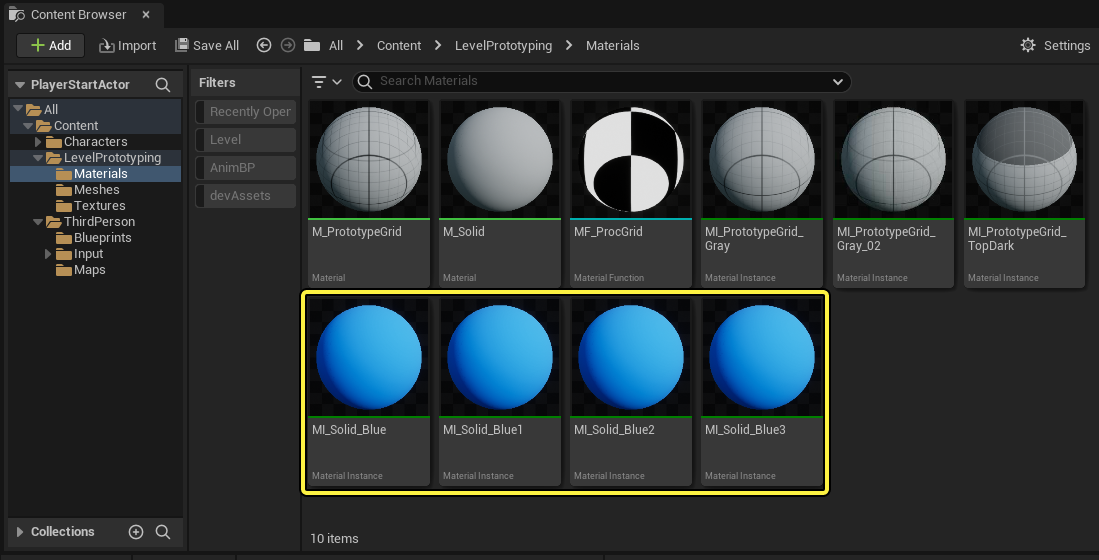
This example shows how to consolidate multiple Materials into a single one. In the screenshot below, there are four instances of the MI_Solid_Blue Material with identical contents.
To consolidate these Material Assets and make sure nothing breaks in your Unreal Engine project, follow these steps:
-
In the Content Browser, select the Assets to consolidate. Refer to the Selecting Actors page if you need additional help completing this step.
If the duplicate Assets are in different folders, disable the Show Folders option from the Content Browser's Settings menu so you can see and select all duplicate Assets at the same time.
-
Right-click the Assets you selected. Then, from the content menu, select Asset Actions > Replace References.
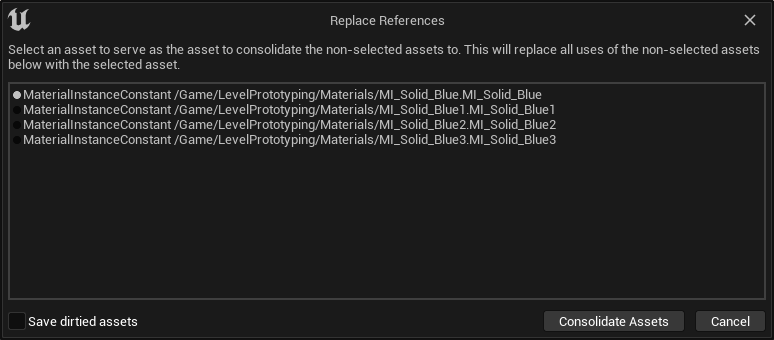
This opens the Replace References dialog window, which contains all the Assets you selected. If you want to add more Assets to this window, drag them from the Content Browser into the Asset list.
Consolidation is generally restricted to selected objects of the same type, with some exceptions allowed for Textures and Materials. If you don't see the Replace References option in the context menu, or if you can't drag and drop Assets from the Content Browser, make sure that you only selected Assets of the same type. If you accidentally added an Asset, you can remove it from the dialog by selecting it and pressing the Delete key on your keyboard.
-
Select an Asset from the list to serve as the Asset to consolidate to. To do this, click the Asset in the list.
-
(Optional) Enable the Save dirtied assets option. This ensures that all of the Assets affected by consolidation are saved.
If you enable this option, you will see an additional confirmation dialog asking you if you want to save these Assets after you click Consolidate Assets. If the consolidation fails, the Assets will not be saved and the Editor will display a warning.
-
Click Consolidate Assets.
The Consolidate Assets button is grayed out (and unavailable) until at least two assets are in the dialog and at least one is selected.
-
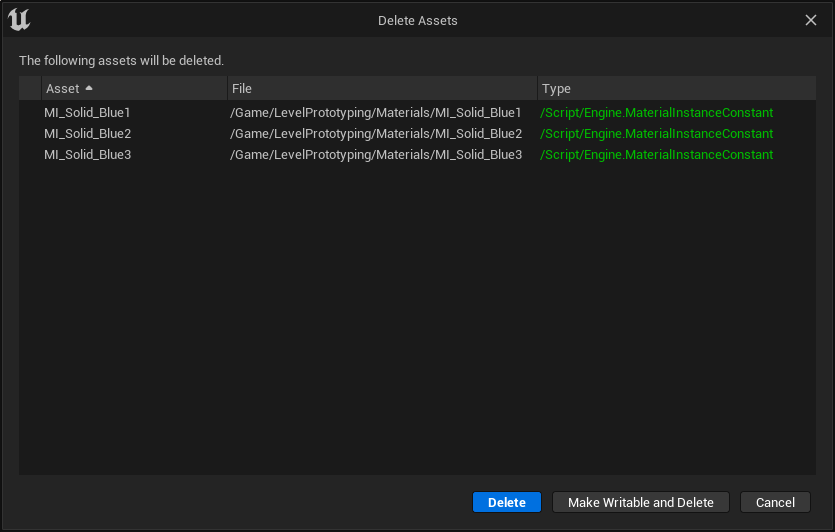
In the confirmation dialog that appears, review the list of Assets that will be deleted after the consolidation, then click Delete.
After Using the Replace References Tool
The Replace References tool makes heavy use of object redirectors. You should use the Fixup Redirects commandlet after running the Replace References tool. For more information, see Redirectors.
After consolidating Assets, you should save the consolidated Assets before attempting to load into memory any unloaded Assets that also reference one of the consolidated objects.