Sequencer contains various Property Tracks you can use to animate Actors' common property types. Using these tracks, you can animate properties such as Transform, Color, or Booleans. This guide provides an overview of the various Property Track types that exist in Sequencer.
Prerequisites
Transform Track
One of the most commonly-used tracks in Sequencer is the Transform track. You can use this track to animate the movement of objects, cameras, and characters in your scene.
Creation
By default, whenever a Static Mesh, Skeletal Mesh, or Camera is added to Sequencer, a Transform track will automatically be added under them.
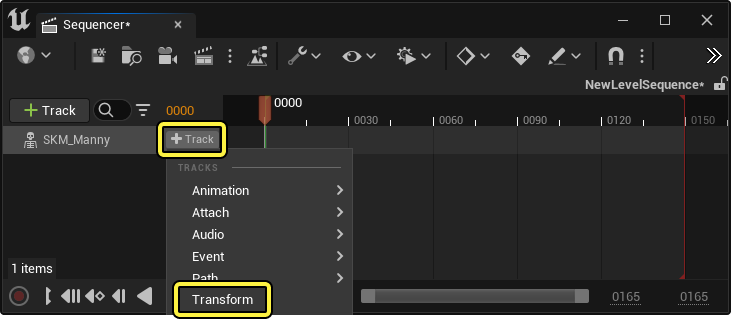
To manually add a Transform track, click Add Track (+) on your Actor Track, and select Transform.
The automatic adding of the Transform track under certain tracks is enabled from the Project Settings, and can be customized to occur for other Actor class types under the Track Setting Project Setting.
Usage
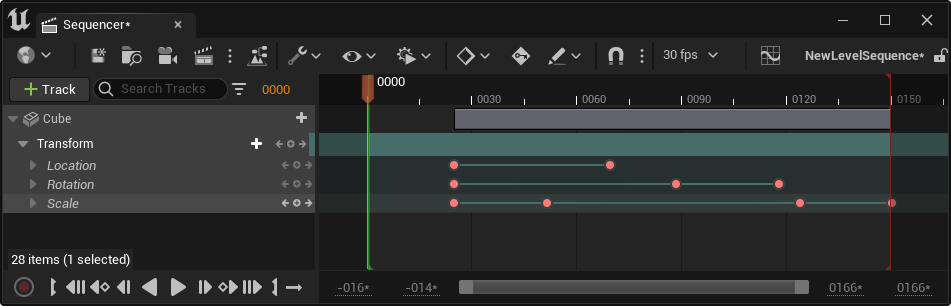
Transform tracks can be expanded to view individual channels or axes. Selecting these channel or axis tracks and pressing Enter will allow you to place keyframes on those specific tracks.
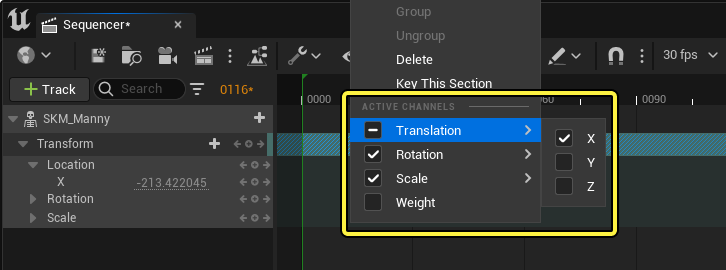
Channels and axes can also be disabled and removed from view if you don't need them. To do this, right-click the transform section and enable or disable channels under the Active Channels category. Removing any channel or axis will cause those tracks to not be evaluated by Sequencer and to not respond to Auto Keying.
Properties
The Transform track section contains properties to assist with improving control on your Transforms. Right-click a Transform track section and select Properties to view them.
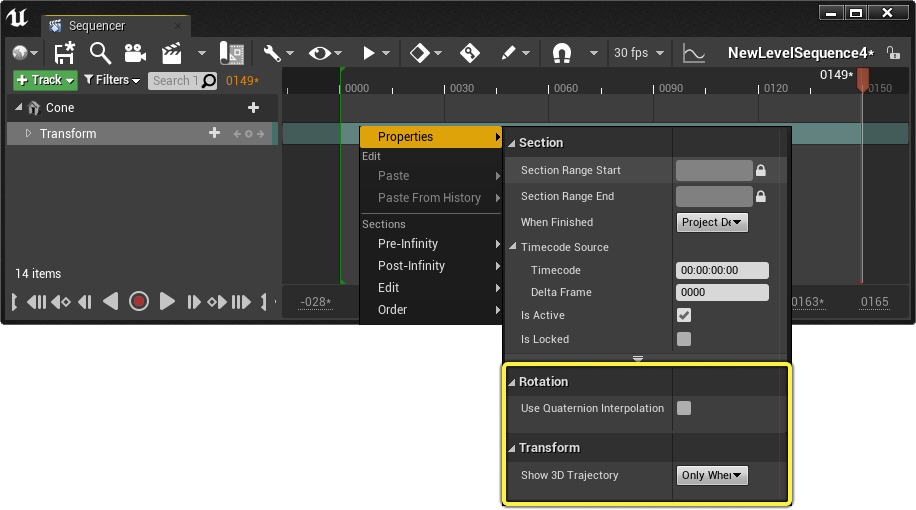
The Use Quaternion Interpolation option enables quaternion linear interpolation between transform keyframes. Quaternion interpolation helps reduce Gimbal lock and other Euler-based problems with rotations.
 |
 |
| Use Quaternion Interpolation Disabled | Use Quaternion Interpolation Enabled |
Show 3D Trajectory contains options for drawing trajectory paths for the Transform track.
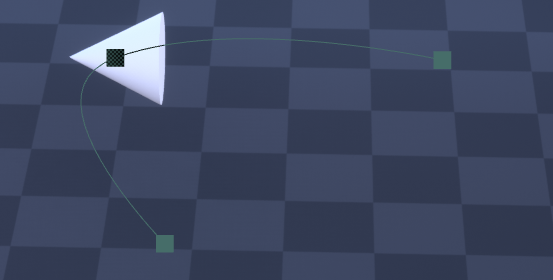
These options include:
- Only When Selected, which will only draw the trajectory when the object or track is selected.
- Always, which will always draw the trajectory regardless of selection.
- Never, which will never draw the trajectory.
Regardless of the chosen trajectory setting, the trajectory will always hide when Game View is enabled.
Property Tracks
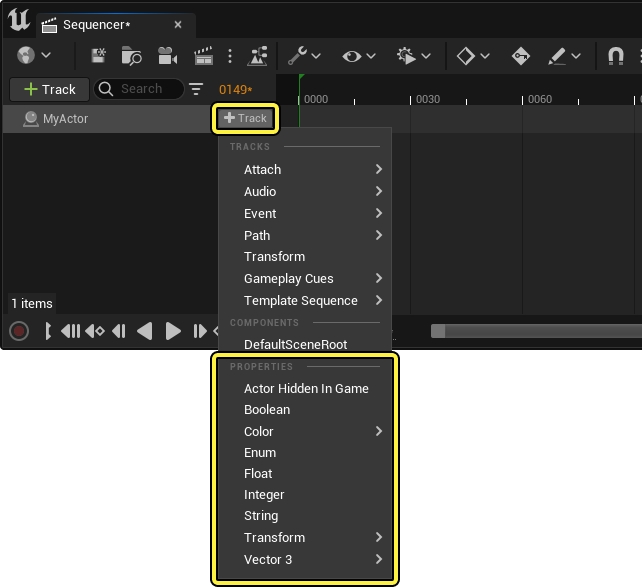
Sequencer supports the animating of various properties. Properties can be added to your Actor Track in Sequencer by clicking Add Track (+) on your Actor and choosing one from the Properties category.
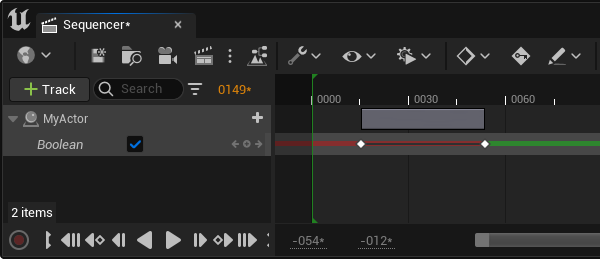
Boolean
Boolean tracks are used to animate boolean properties. Boolean tracks can only be set to enabled or disabled, and do not interpolate. The timeline will be colored red when set to disabled, and green when enabled.
Booleans are also represented in the curve editor by values of 0 (disabled) and 1 (enabled).
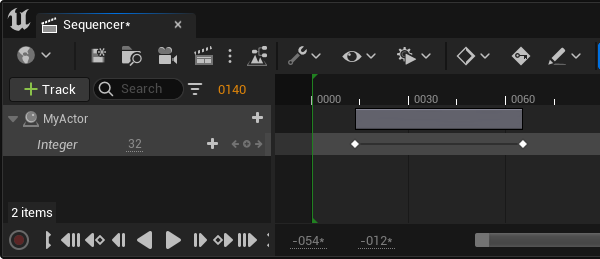
Integer
Integer tracks are used to animate integer properties and do not interpolate.
Float
Float tracks are used to animate scalar float properties. Float keyframes interpolate and can use custom tangents and curves.

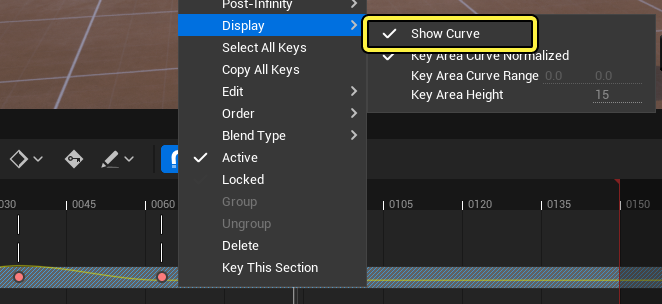
To assist with visualizing float value changes, you can enable float curves to be displayed in-line within a float track section.
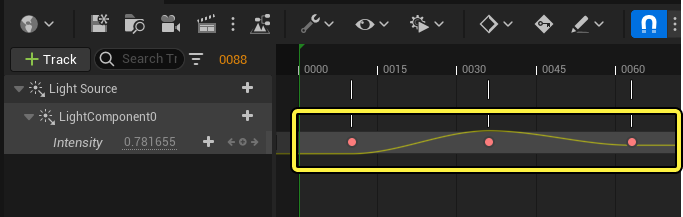
To enable the float track curve display, right-click on a float track section and select Display > Show Curve.
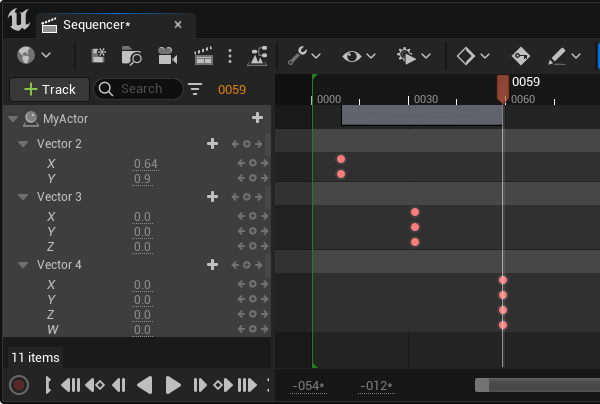
Vectors
Sequencer supports animating Vector 2, 3, and 4 properties using their respective tracks. All Vector tracks interpolate and can have custom tangents and curves.
Color
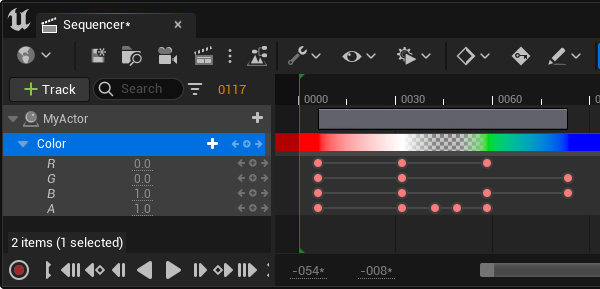
The Color track is used to animate color-specific properties in Sequencer, such as on lights or materials. The Color track supports interpolation and will also display the color set at each keyframe along the timeline so you can preview your colors at a glance.
To help with color selection, you can double-click a Color track keyframe to bring up the Color Picker. Once a color is selected, click the OK button and the keyframe will now be set to that color.
The Color track supports animating both Color and Linear Color spaces.
String
The String track is used to animate different String values. String values do not interpolate between keyframes.

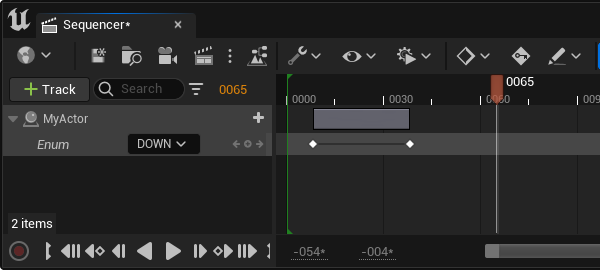
Enum
The Enum Track is used to animate different enumerated values. Enum values do not interpolate between keyframes.
Object
The Object Track is used to animate different Object and Asset values. Object values do not interpolate between keyframes.

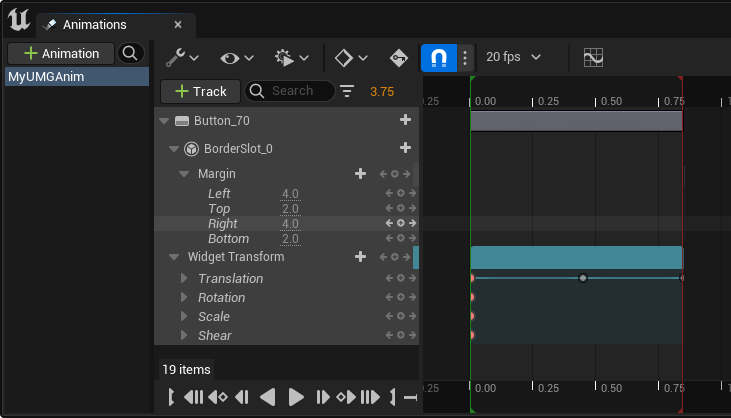
UMG Properties
Sequencer supports animating properties from UI Elements in the Creating User Interfaces. The two main tracks used for UMG are the Margin and Widget Transform Tracks.
Overridable Channels
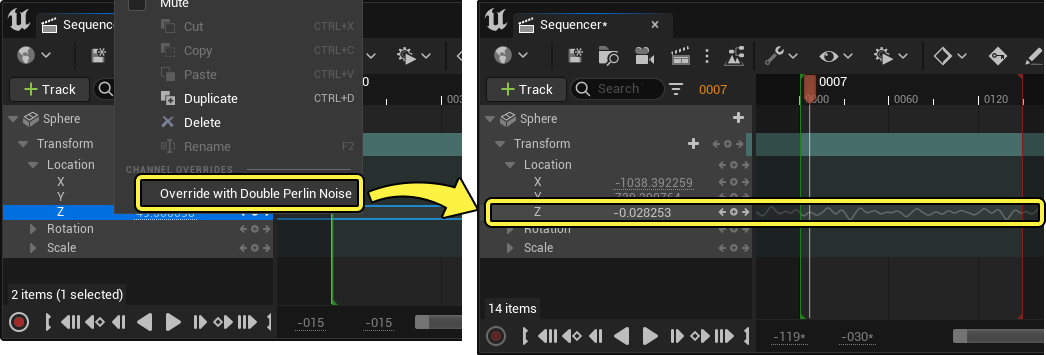
Some properties can be overridden to output animation data other than normal keyframes or curves. For example, you can override float channels or individual X/Y/Z channels on transform axes to output random perlin noise. This can be useful to create procedural noise-based animation, rather than manually animating noise.

Currently only float/double and transform tracks support overridable channels.
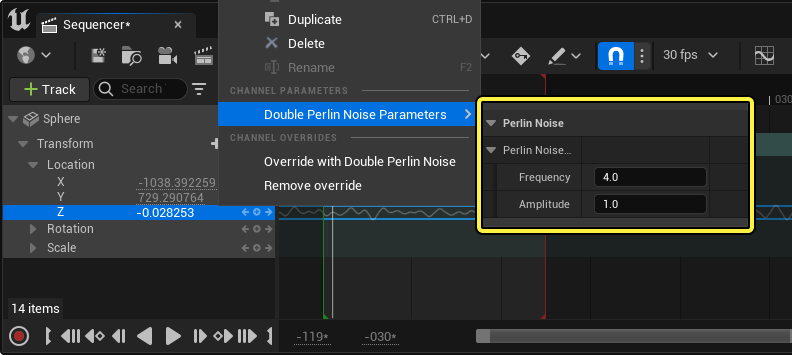
To override a channel navigate either to a Float Track or an individual axis channel of a Transform Track, right-click the track and select Override with Double Perlin Noise.
You can modify noise parameters by right-clicking the track and navigating to Double Perlin Noise Parameters, where both the Frequency and Amplitude can be edited.
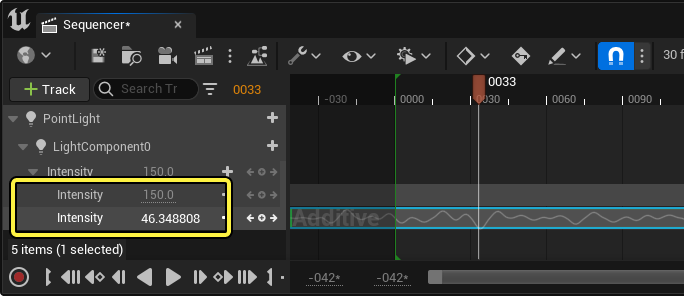
Noise channels animate relative to a value of 0. If you want your noise to animate between certain value ranges, such as between 100 - 200, then you can create extra additive Sections, and convert those channels to noise. This way, you can have the base section at a specific value, and then noise will apply additively to that base.
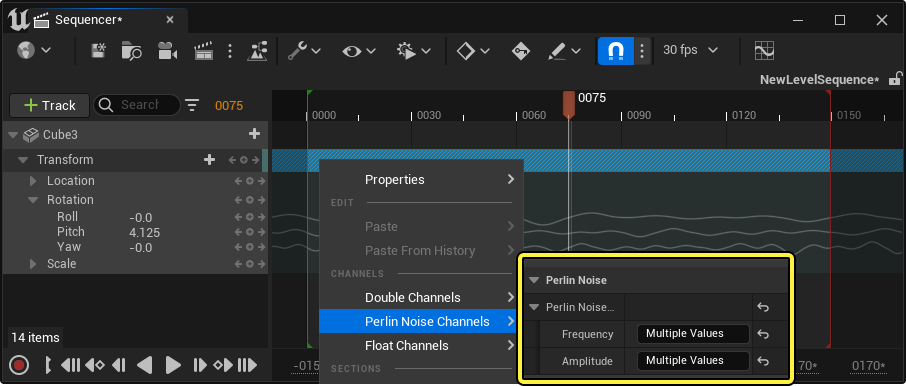
If you have overridden multiple channels within a section, you can right-click on the section and edit all noise parameters at the same time under the Perlin Noise Channels menu.