
As you create complex animation logic, it may be necessary to have more refined control over the way your animation blends, instead of just blending all bones at once. Blend Masks can be used to exclude bones from a blend, and Blend Profiles provide control over the rate at which different bones blend. These additional blending controls can improve the fidelity and compatibility of your gameplay animation.
This page provides an overview of how to create and use Blend Masks and Blend Profiles.
Prerequisites
-
Your project contains a Skeletal Mesh Actor, along with Animation Sequences.
-
You have a basic knowledge of how to create and use Animation Blueprints.
Blend Masks
Blend Masks are definitions you can add to your skeleton where you can define weight influences, disabling animation from playing partially or fully on specific bones. You can then use this pre-set definition on the Layered Blend Per Bone to play animation on certain bones.
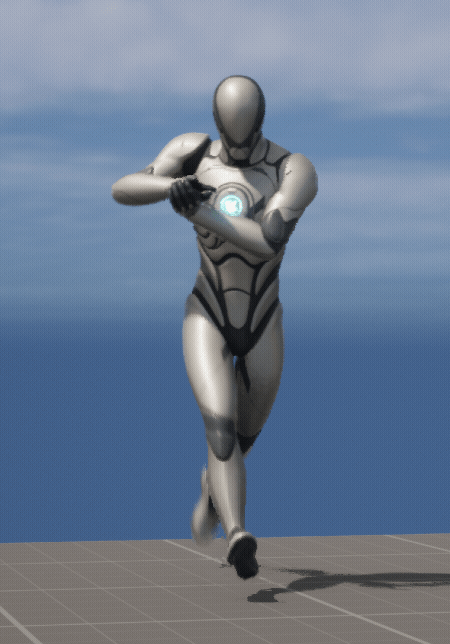
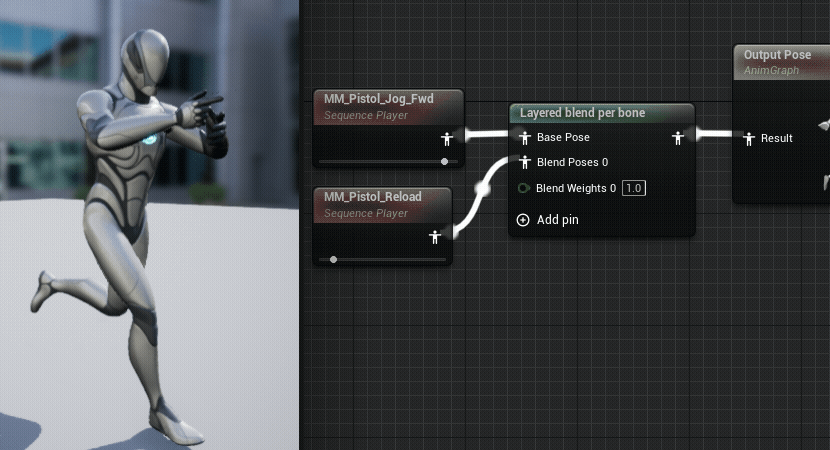
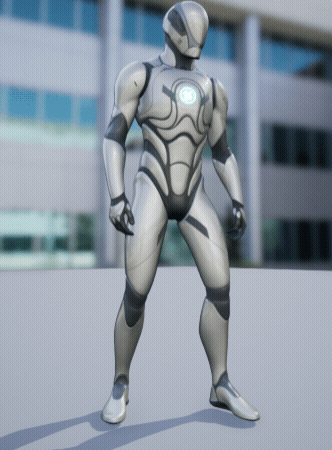
A common use-case for using Blend Masks is to exclude lower-body bones so that animation plays only on the upper-body, regardless of the full-body state. This is useful for weapon-based animations that require the upper-body bones to ignore the rest of the body, such as reloading, equipping, or shooting.
 |
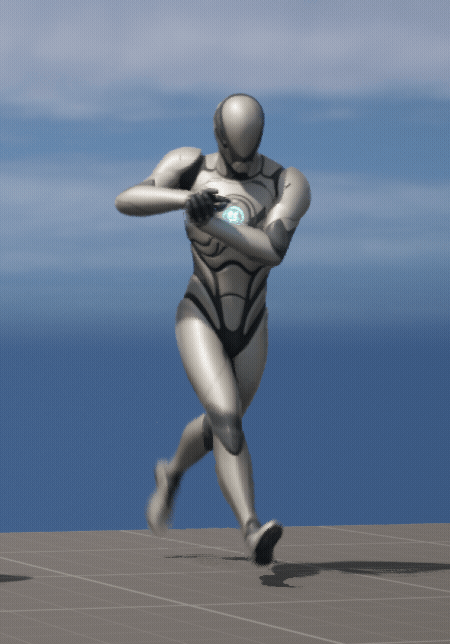 |
| Using Blend Masks | No Blend Masks |
Creating Blend Masks
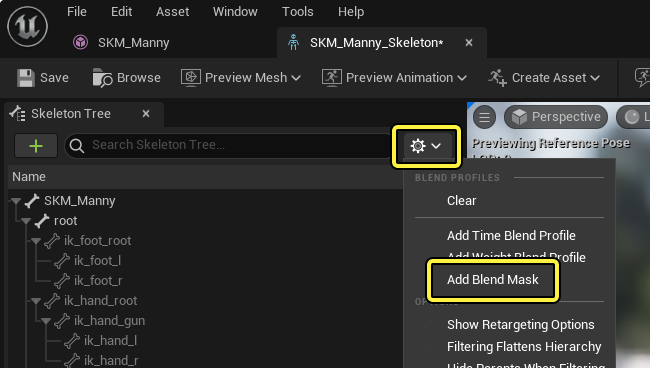
You create Blend Masks within the Skeleton Tree of your Skeletal Mesh. Click the Options dropdown menu in the Skeleton Tree and select Add Blend Mask. Give it a name and press Enter.
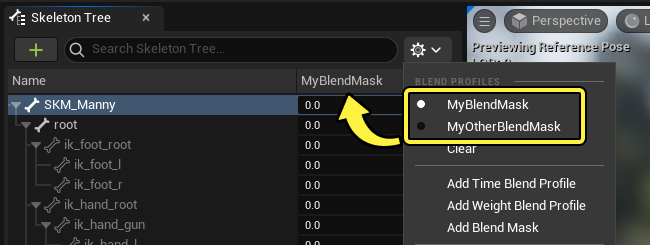
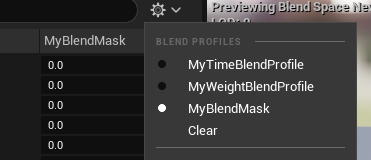
Once created, a Blend column appears within the Skeleton Tree listing your Blend Mask. If you have multiple Blend Masks, you can switch between them by clicking them in the Options menu.
To delete the currently-viewed Blend Mask, click the Options dropdown menu in the Skeleton Tree and select Remove.
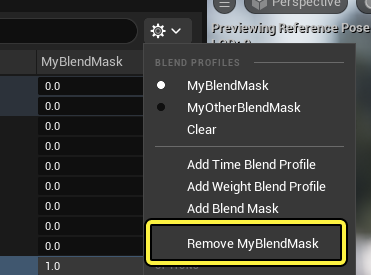
Both Blend Masks and Blend Profiles are stored in the Skeleton asset. Therefore, when creating or editing Blend Masks, you are editing the Skeleton asset.
Editing Blend Mask Values
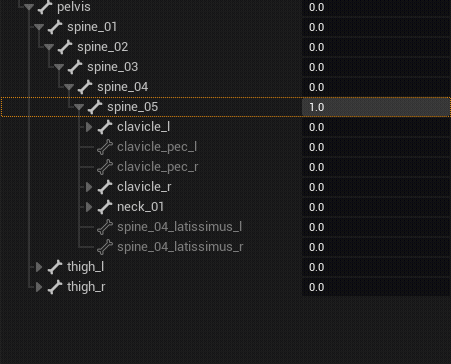
The Blend column shows the current values of each bone within your Blend Mask. Each bone can have an assigned value between 0 - 1. A value of 0 will cause no animation to play on that bone, and a value of 1 will cause animation to play at 100% value.
You can edit these values by either dragging on the value to enable the slider control, or by selecting and typing in a value directly.
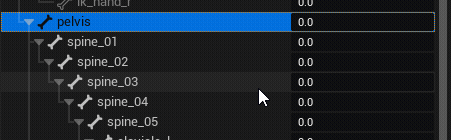
You can also set the same value to all children by right-clicking on a bone and selecting Recursively Set Blend Scales, which applies this blend value across several bones at once.
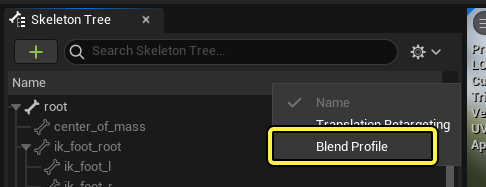
If you do not see the column for editing Blend Mask values, you may need to right-click on the property header and enable Blend Profile.
Using Blend Masks
Once you have created and set appropriate values for your Blend Mask, you can use it in your Animation Blueprint. This is done by setting your Blend Mask on the Layered Blend Per Bone node within the Anim Graph.
In your Animation Blueprint Anim Graph, right click and create a Layered blend per bone node, then set the following properties in the Details panel:
- Set Blend Mode to Blend Mask.
- Set Blend Masks to your Blend Mask.
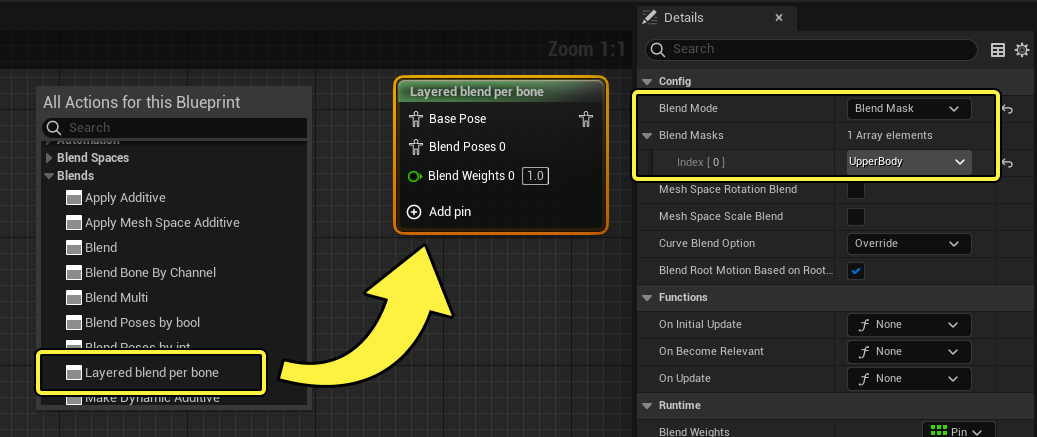
Connect your incoming source base and blend poses and you can now observe that the Blend Mask is working. In this example, we used an upper-body Blend Mask.
Although this behavior is possible by using the default Branch Filter Blend Mode on the Layered Blend per bone node, Blend Masks let you reuse these blend amounts on your bones more easily.
Blend Profiles
Blend Profiles are definitions you can add to your skeleton where you can define per-bone blend speeds, causing some bones to blend faster than others. Blend Profiles can be used when blending using the following methods:
- Blend Poses by bool.
- Blend Poses by int.
- Blend Poses by enum.
- State Machine Transitions.
- Animation Montages.
A use case for using Blend Profiles might be to blend the lower-body faster than the upper-body, which can be useful when transitioning between idle and locomotion states. This can make the feet appear to plant firmly on the ground when stopping, and start more naturally before the upper body when starting to move.
 |
 |
| Using Blend Profile (Legs are blending faster) | No Blend Profile |
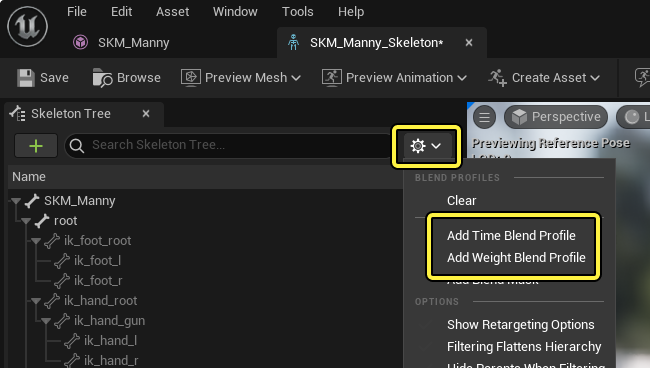
Similar to Blend Masks, Blend Profiles are created, managed, and edited in the Skeleton Tree. Click the Options dropdown menu in the Skeleton Tree and select either Add Time Blend Profile or Add Weight Blend Profile.
Because the list of Blend Masks and Blend Profiles occupy the same column and option menu region, you should ensure that they are clearly named to avoid confusion.
Time Blend Profile
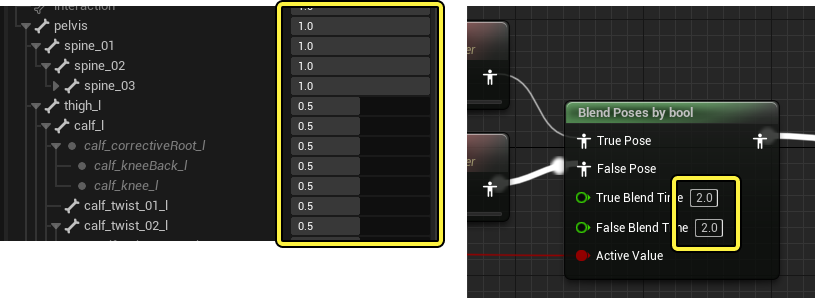
Time Blend Profiles are Blend Profiles that blend using a normalized (0 - 1) multiplier against the base blend value. A value of 1.0 blends at normal speed, and lower numbers blend faster. A value of 0.0 causes the blend to be instantaneous.
For example, if you set the following:
- Pelvis and all upper-body bones set to 1.0.
- Legs and all lower-body bones set to 0.5.
This causes the legs to blend twice as fast, according to the base blend time wherever you use this Blend Profile. If it is used on a Blend Poses by bool node, with the base blend time set to 2.0 seconds, then the legs blend over only 1.0 seconds. All other bones set to 1.0 still blend over the base 2.0 seconds.
Weight Blend Profile
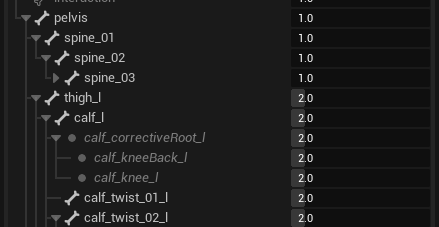
Weight Blend Profiles are Blend Profiles that blend using a weight factor against the base blend value. A value of 1.0 will blend at normal speed, and higher numbers will blend faster.
For example, if you set the following:
- Pelvis and all upper-body bones set to 1.0.
- Legs and all lower-body bones set to 2.0.
This causes the legs to blend twice as fast, according to the base blend time wherever you use this Blend Profile. A value of 2.0 means the blend will be 2x faster, 3.0 will mean 3x faster, and so on.
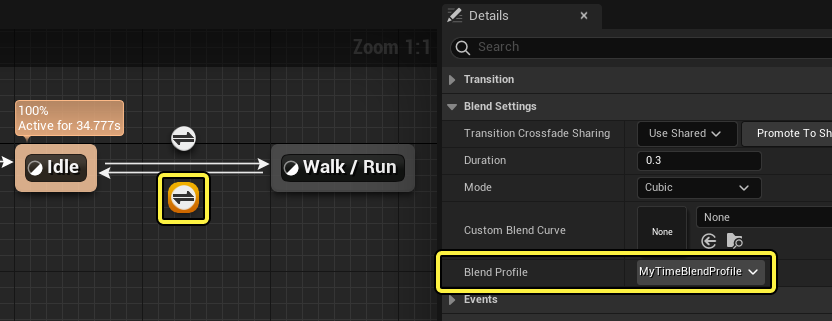
Using Blend Profiles
Once you have created and set appropriate values for your Blend Profile, you can apply it in the following ways:
-
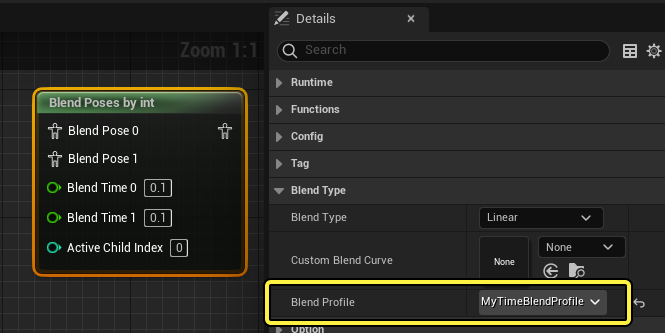
On Blend Pose nodes in the Animation Blueprint Anim Graph, select the node and locate the Blend Profile property in the Details panel.
-
On State Machine transition rules, select the transition rule and locate the Blend Profile property in the Details panel.
-
In the Animation Montages editor, you can set a different Blend Profile for blending in and out of the Montage using the Blend Profile In and Blend Profile Out properties in the Asset Details panel.
